Lab 5: SMS Configuration
Table of Contents
- Table of Contents
- Introduction
- Lab Section
Introduction
Lab Objective
In this Lab, we will go through the tasks that are required to complete the basic SMS integration. You will be able to initiate a SMS contact to the Contact Center and be able to accept/respond to the contact by logging in as an agent.
In this lab you will be configuring SMS number settings, SMS Assets, Entry Point and corresponding workflows. All these steps are required for integrating SMS with our application.
Pre-requisite
- You recived an admin credentials to configure in Managment Portal and Webex Connect.
- You recived the SMS number associated with your tenat.
- You have successfully completed the previous Lab Preconfiguration
Lab Section
Step 1. Verify SMS Number Assignment
-
Login to your respective Webex Connect UI using the provided URL https://cl1podX.imiconnect.io/ (where X is your POD number).
-
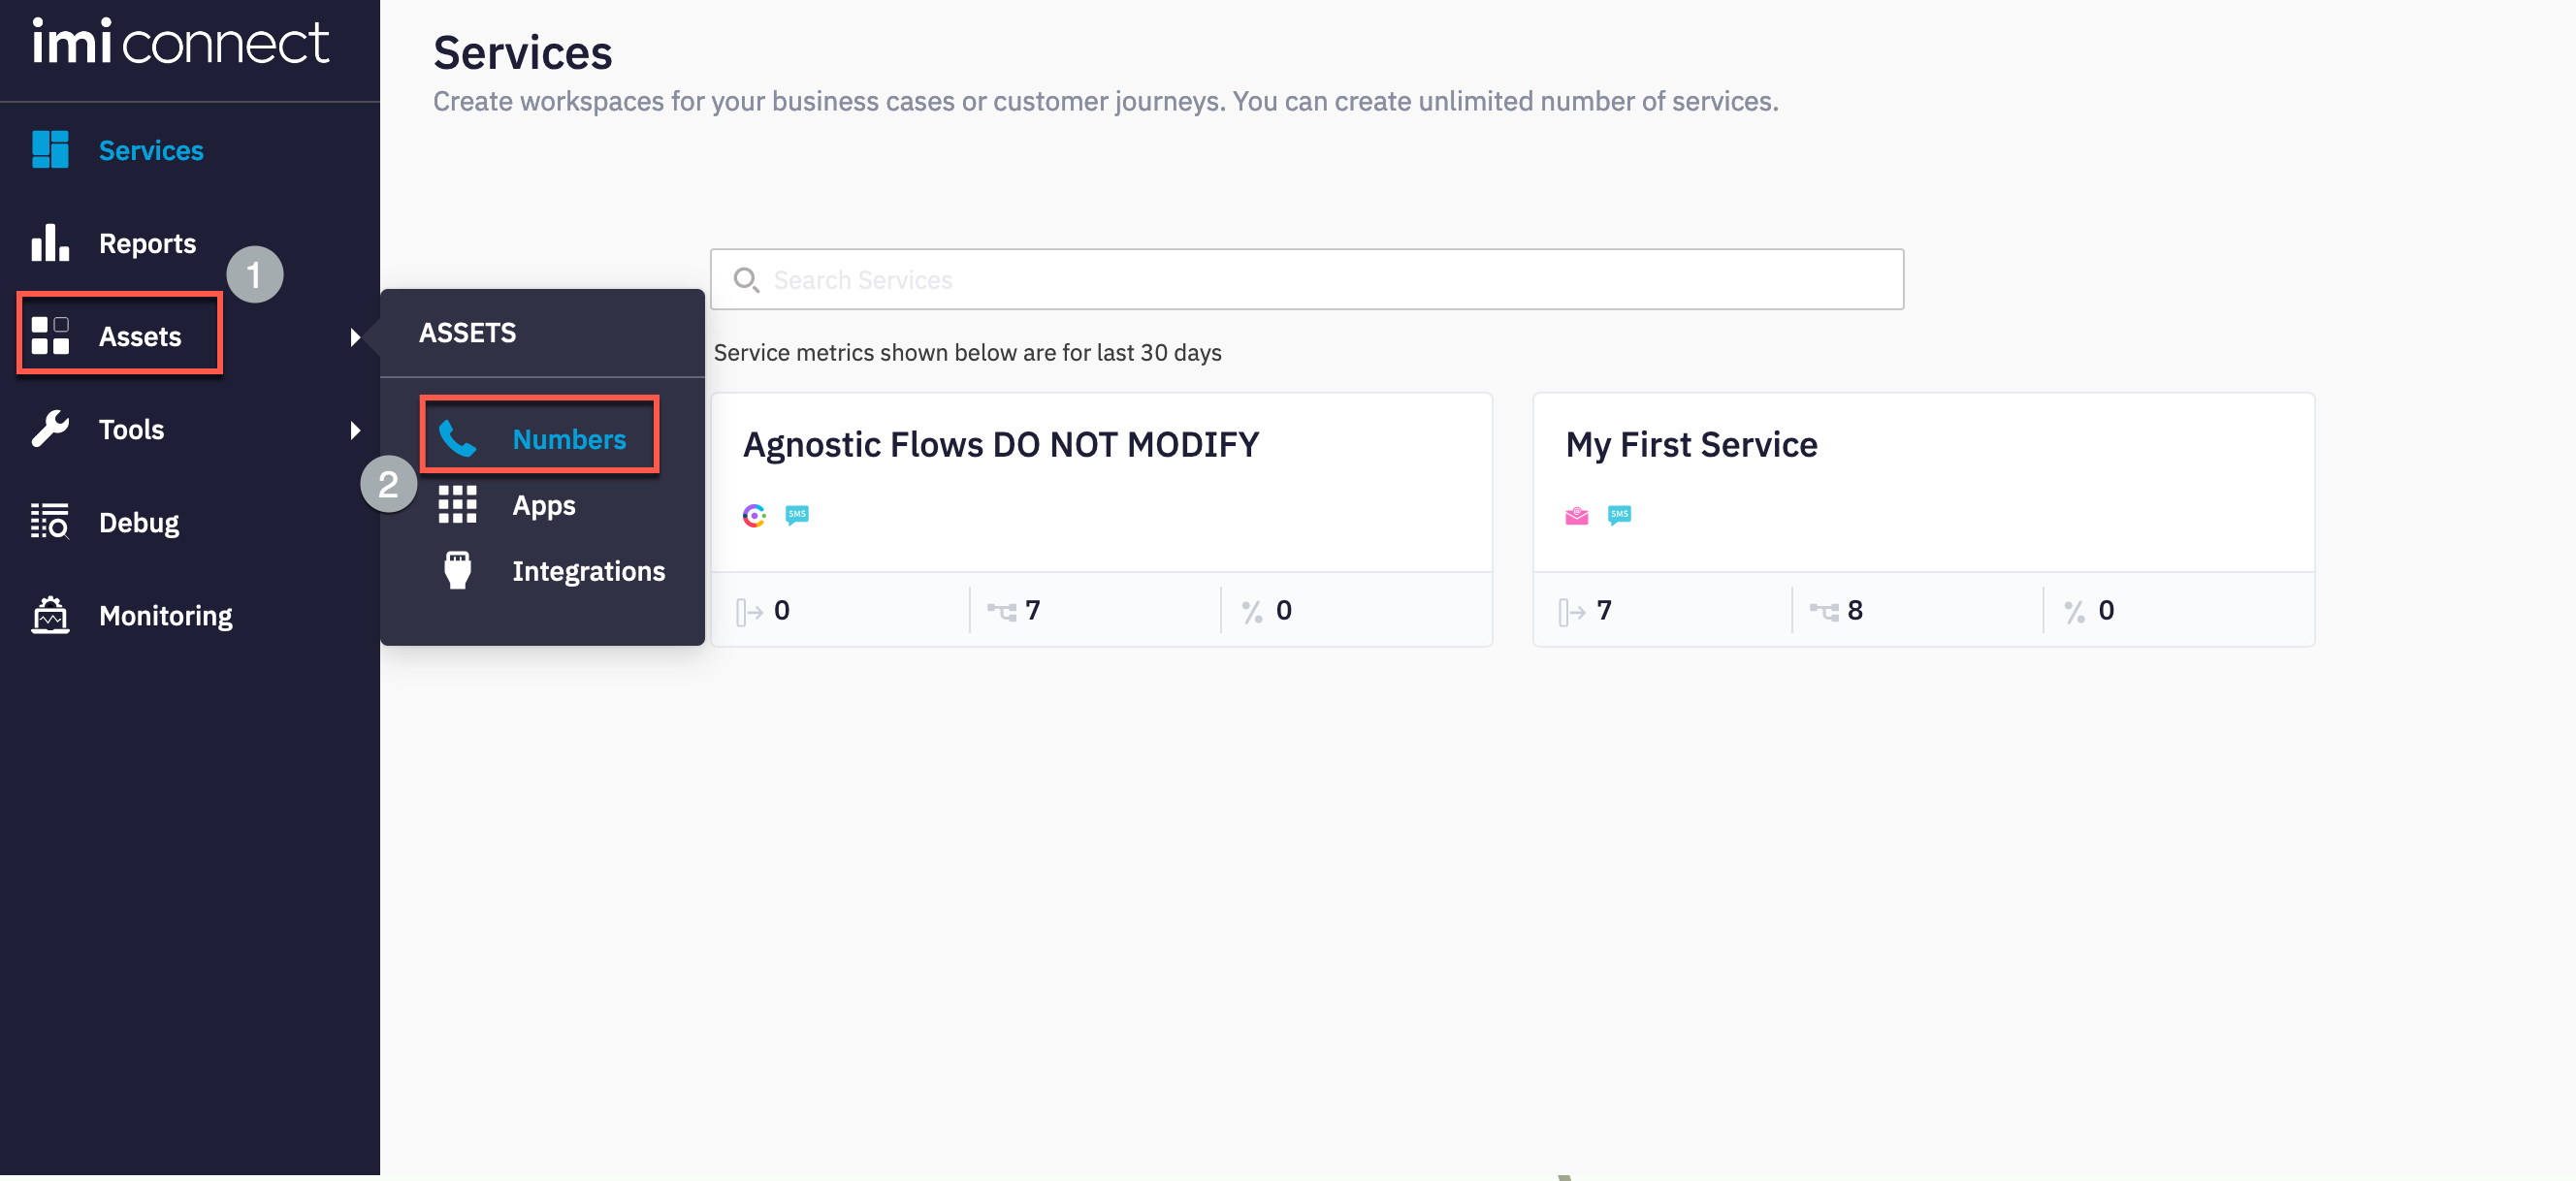
Navigate to Assets > Numbers and verify that the tenant you are using has a SMS number assigned
Note: SMS Numbers cannot be procured directly from the WxCC integrated IMI Connect tenant. For production use, please note that customers will have to work with Partners to go through a procurement process to enable SMS and get numbers assigned to the tenant.
Step 2. SMS Asset registration to WebexCC
1. Register SMS asset to WebexCC
-
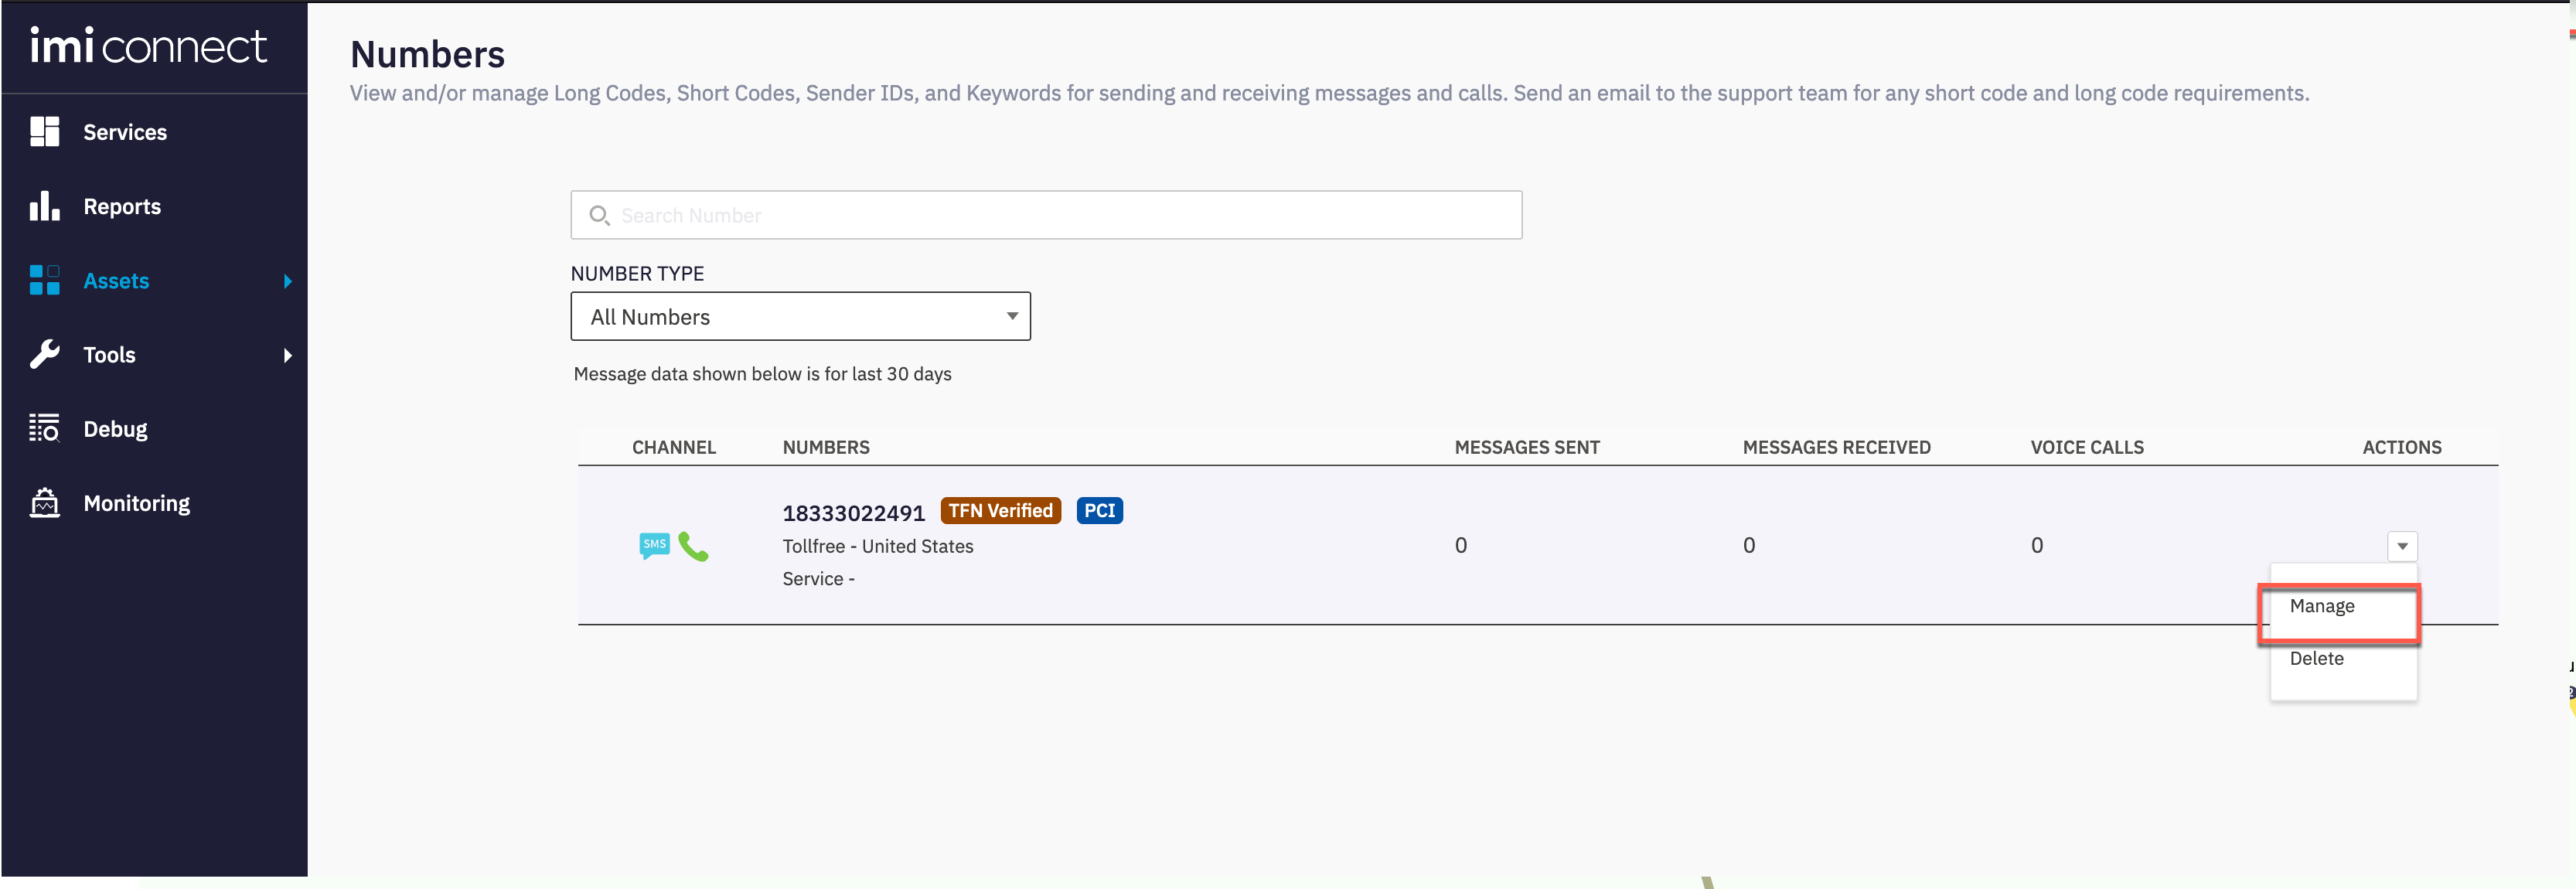
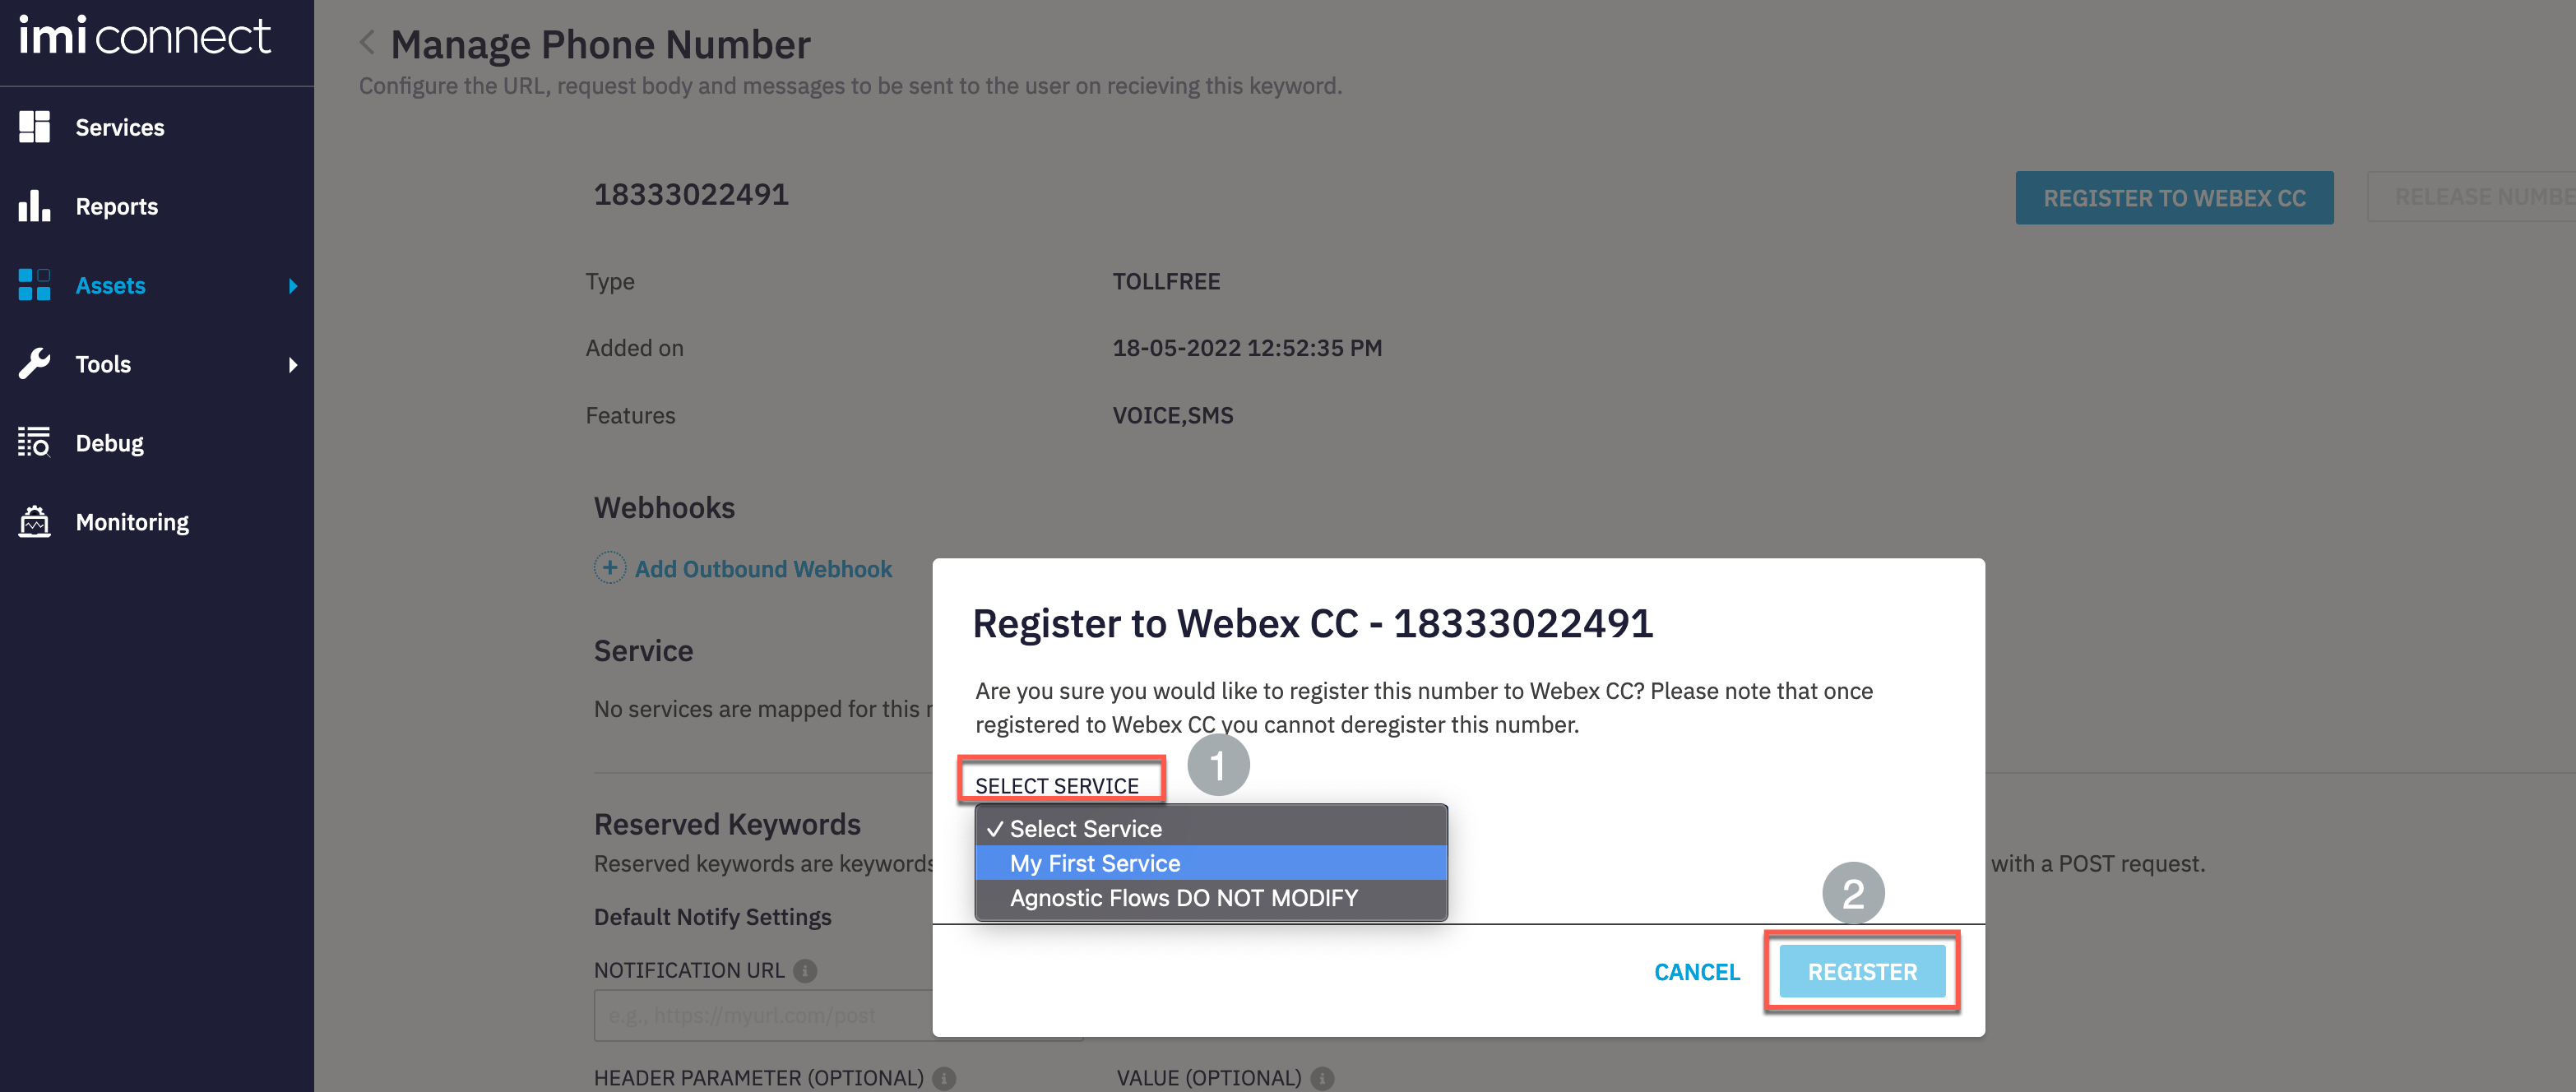
In the SMS number assigned, under actions select the ‘Manage’ option
-
Click ‘Register to WebexCC option’
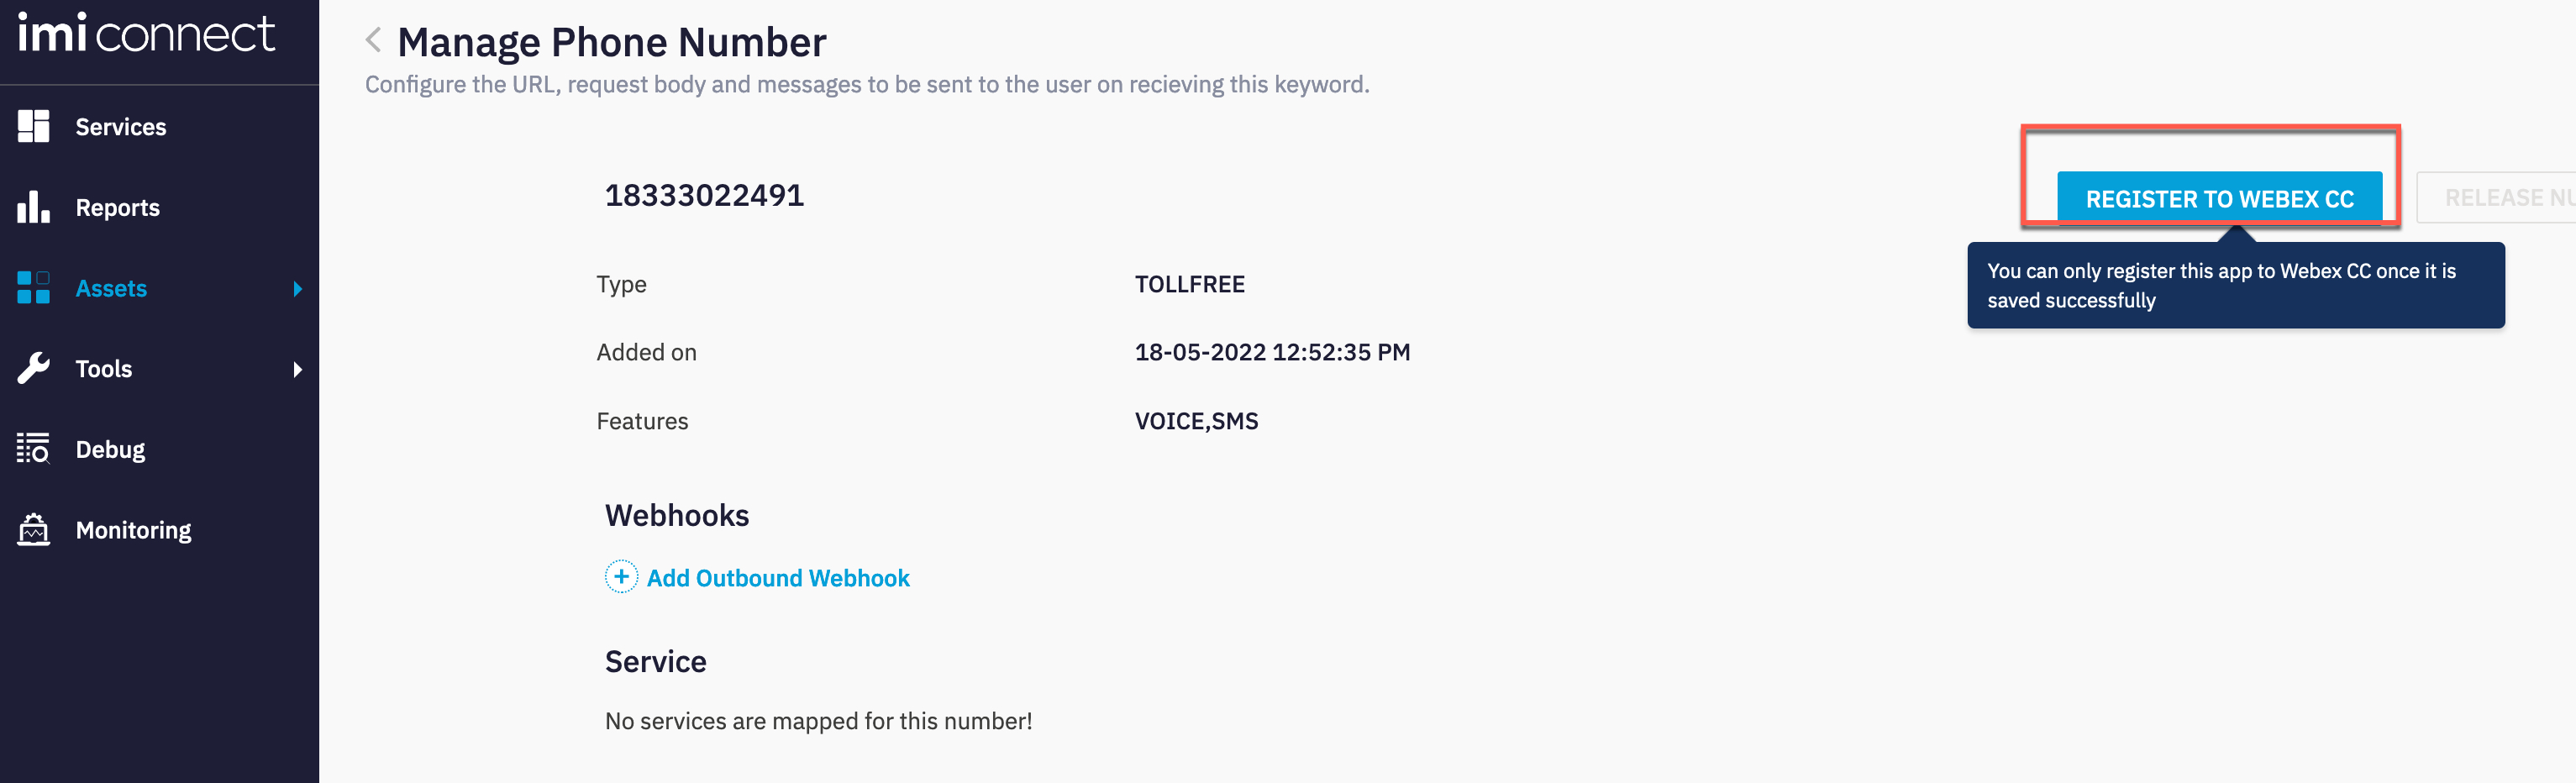
- In the resulting window, select a service under which this asset would be managed
-
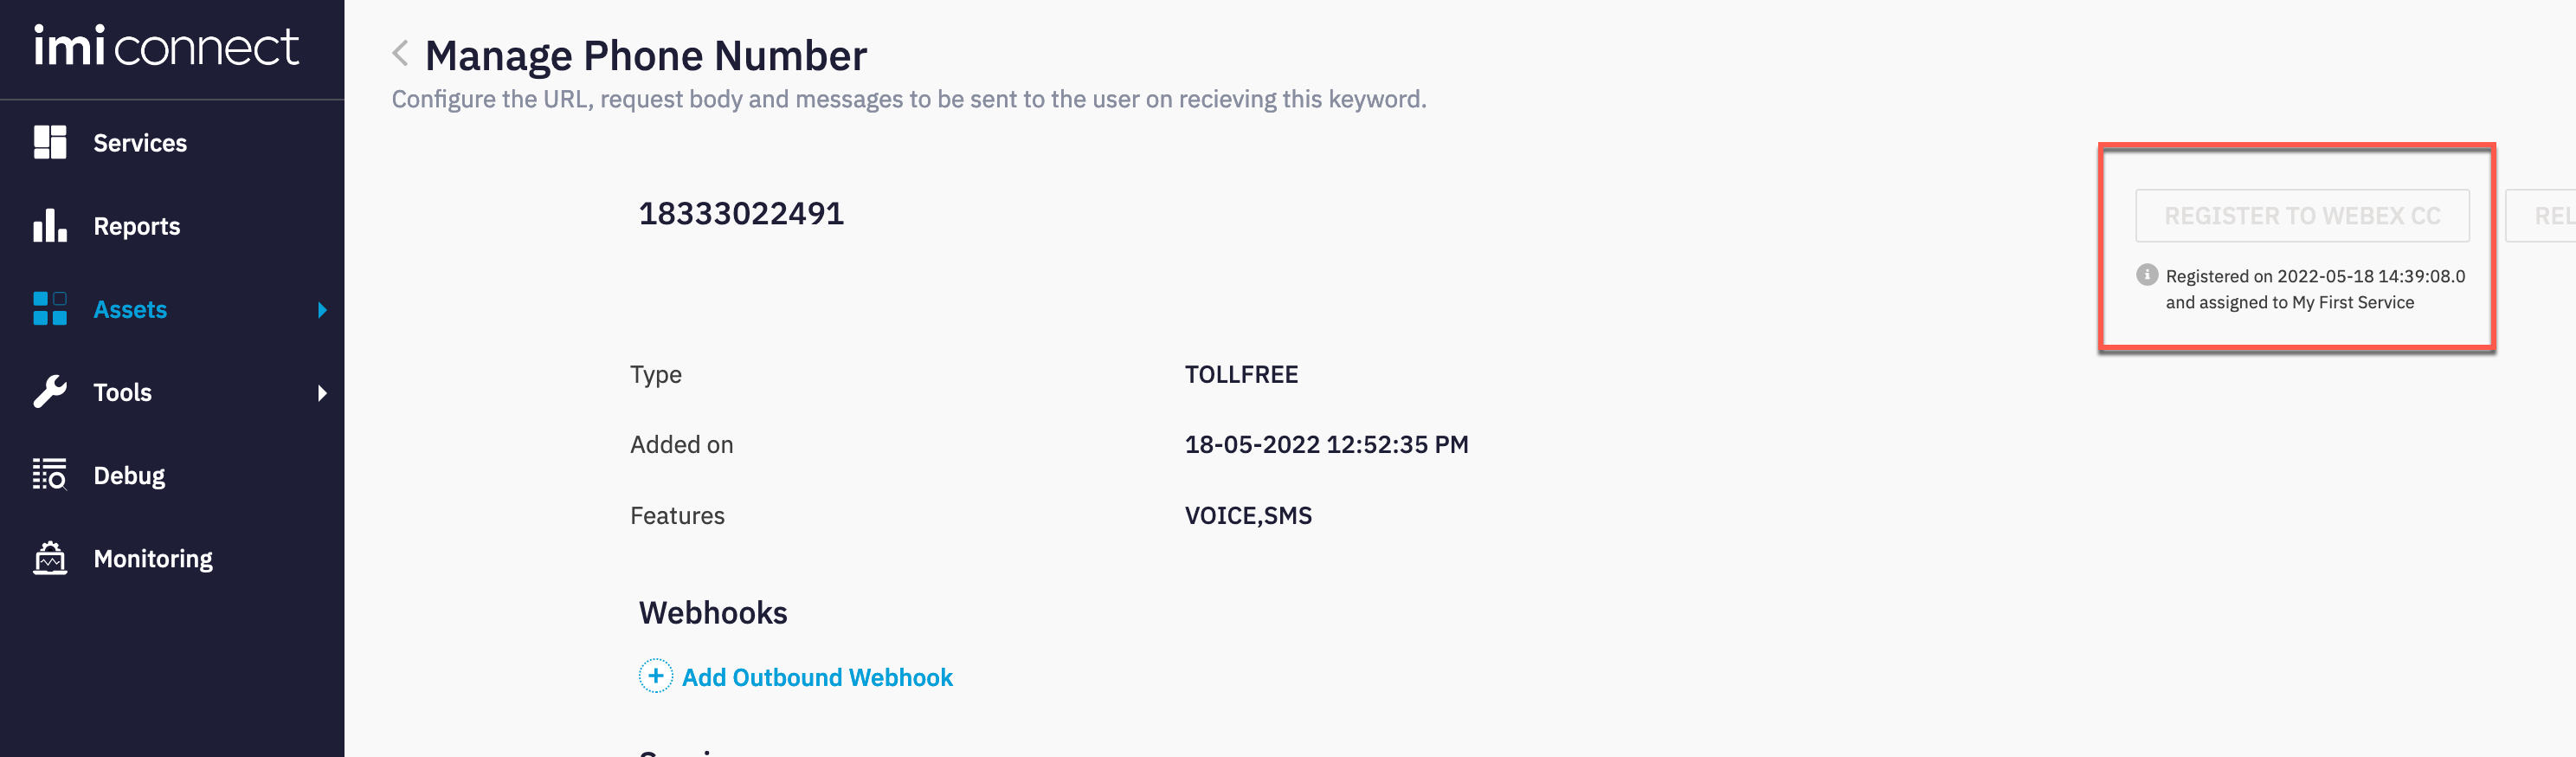
- Verify that the ‘Register to Webex CC’ option is now disabled and there is a message indicating the time when the asset was registered along with the service to which it is assigned.
Step 3. SMS Entry Point and Queue creation
1. Create Entry Point in Managment Portal
-
Login to Webex Contact Centre administration portal
-
Click on Provisioning and select Entry Points/Queues > Entry Point.
-
Click on
New Entry Point.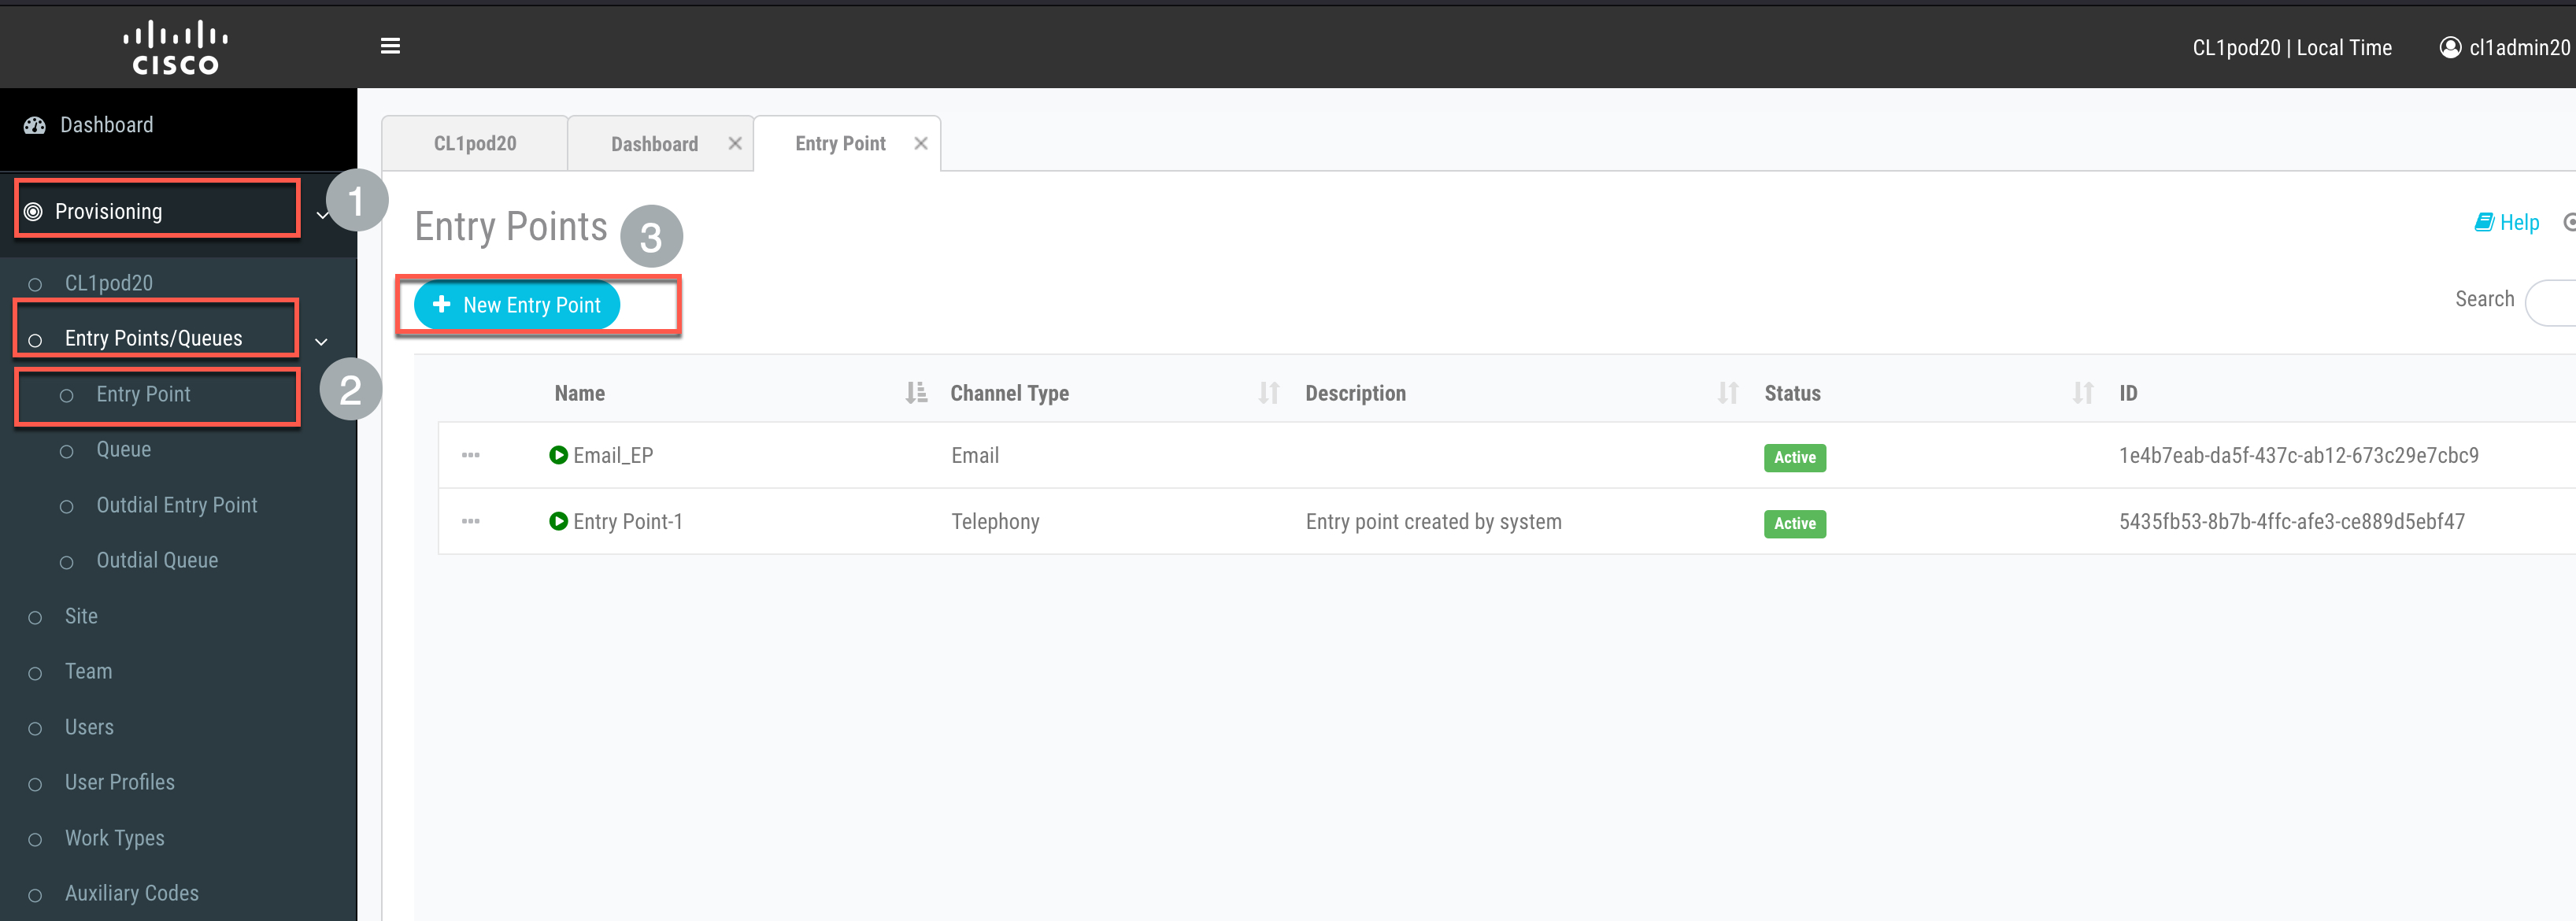
-
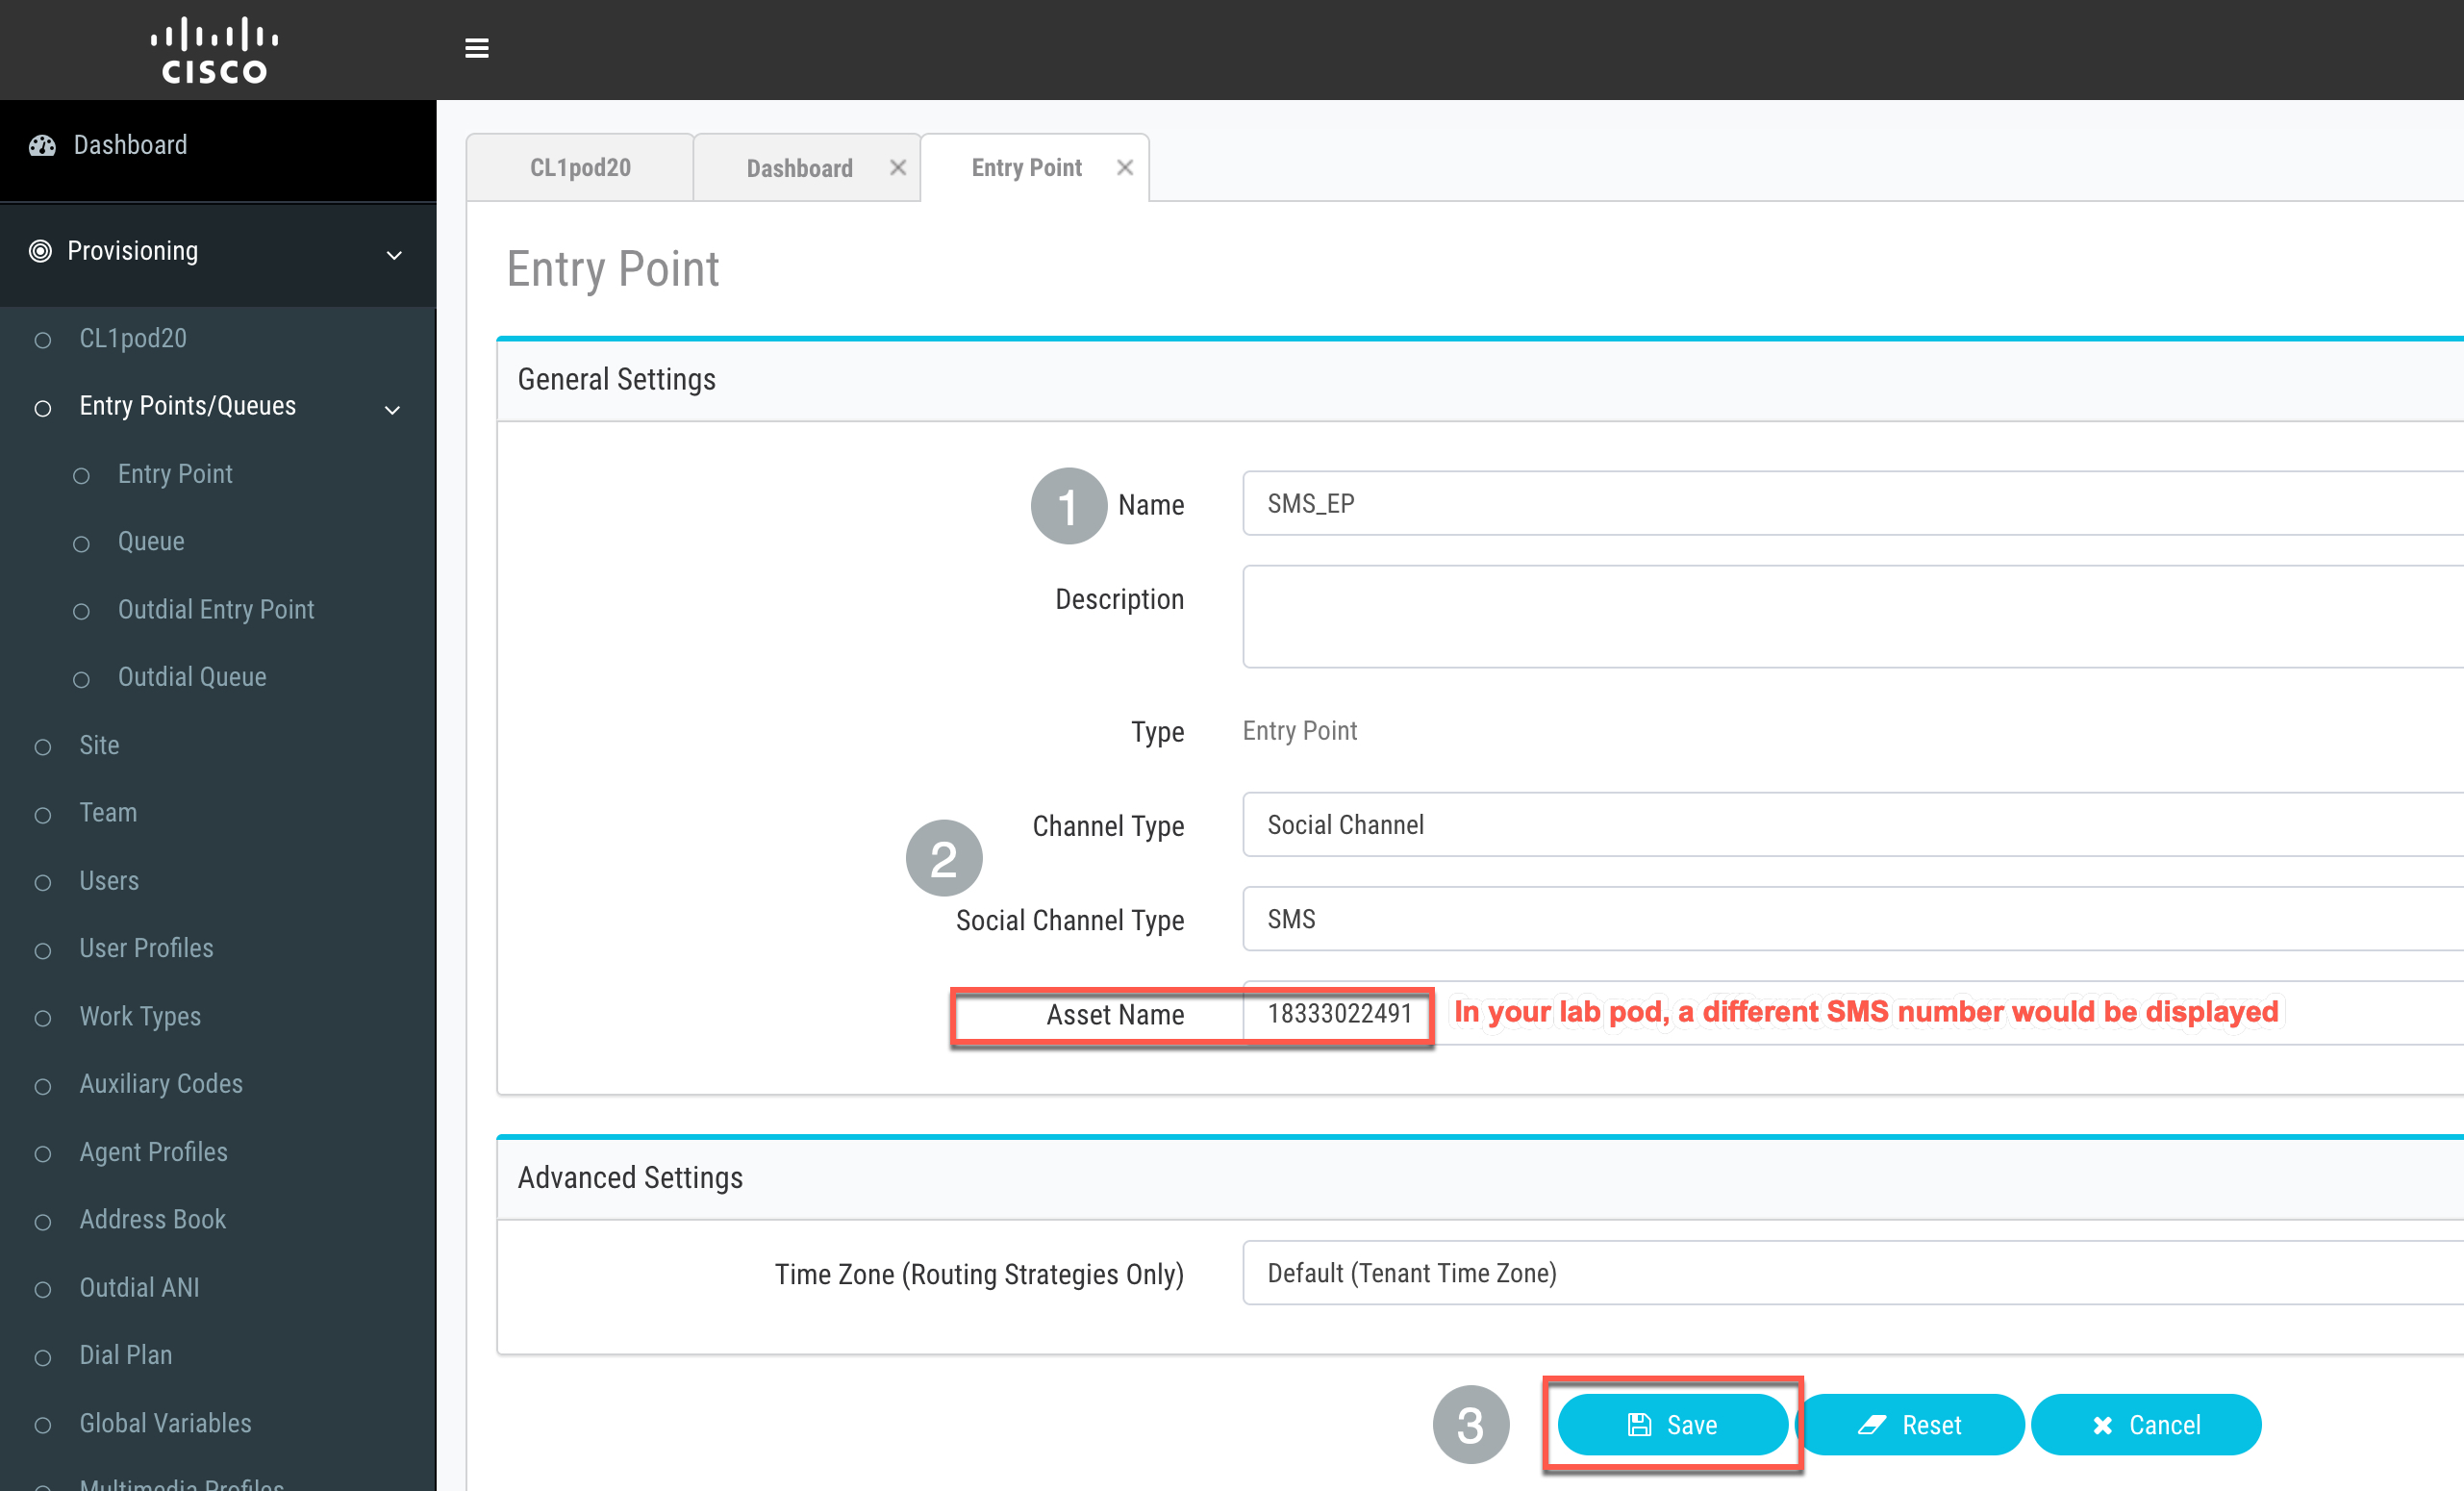
Input Name as
SMS_EP. -
Select
Social Channelin the Channel Type section. -
Select
SMSin the Social Channel Type section. -
Leave the Asset Name as appered value
SMS Number assigned in your Connect tenant. -
The Time Zone can stay as default value.
-
Click on Save after comparing your values with the screenshot below.
-
Click on Provisioning and select Entry Points/Queues > Queue.
-
Click on
New Queue.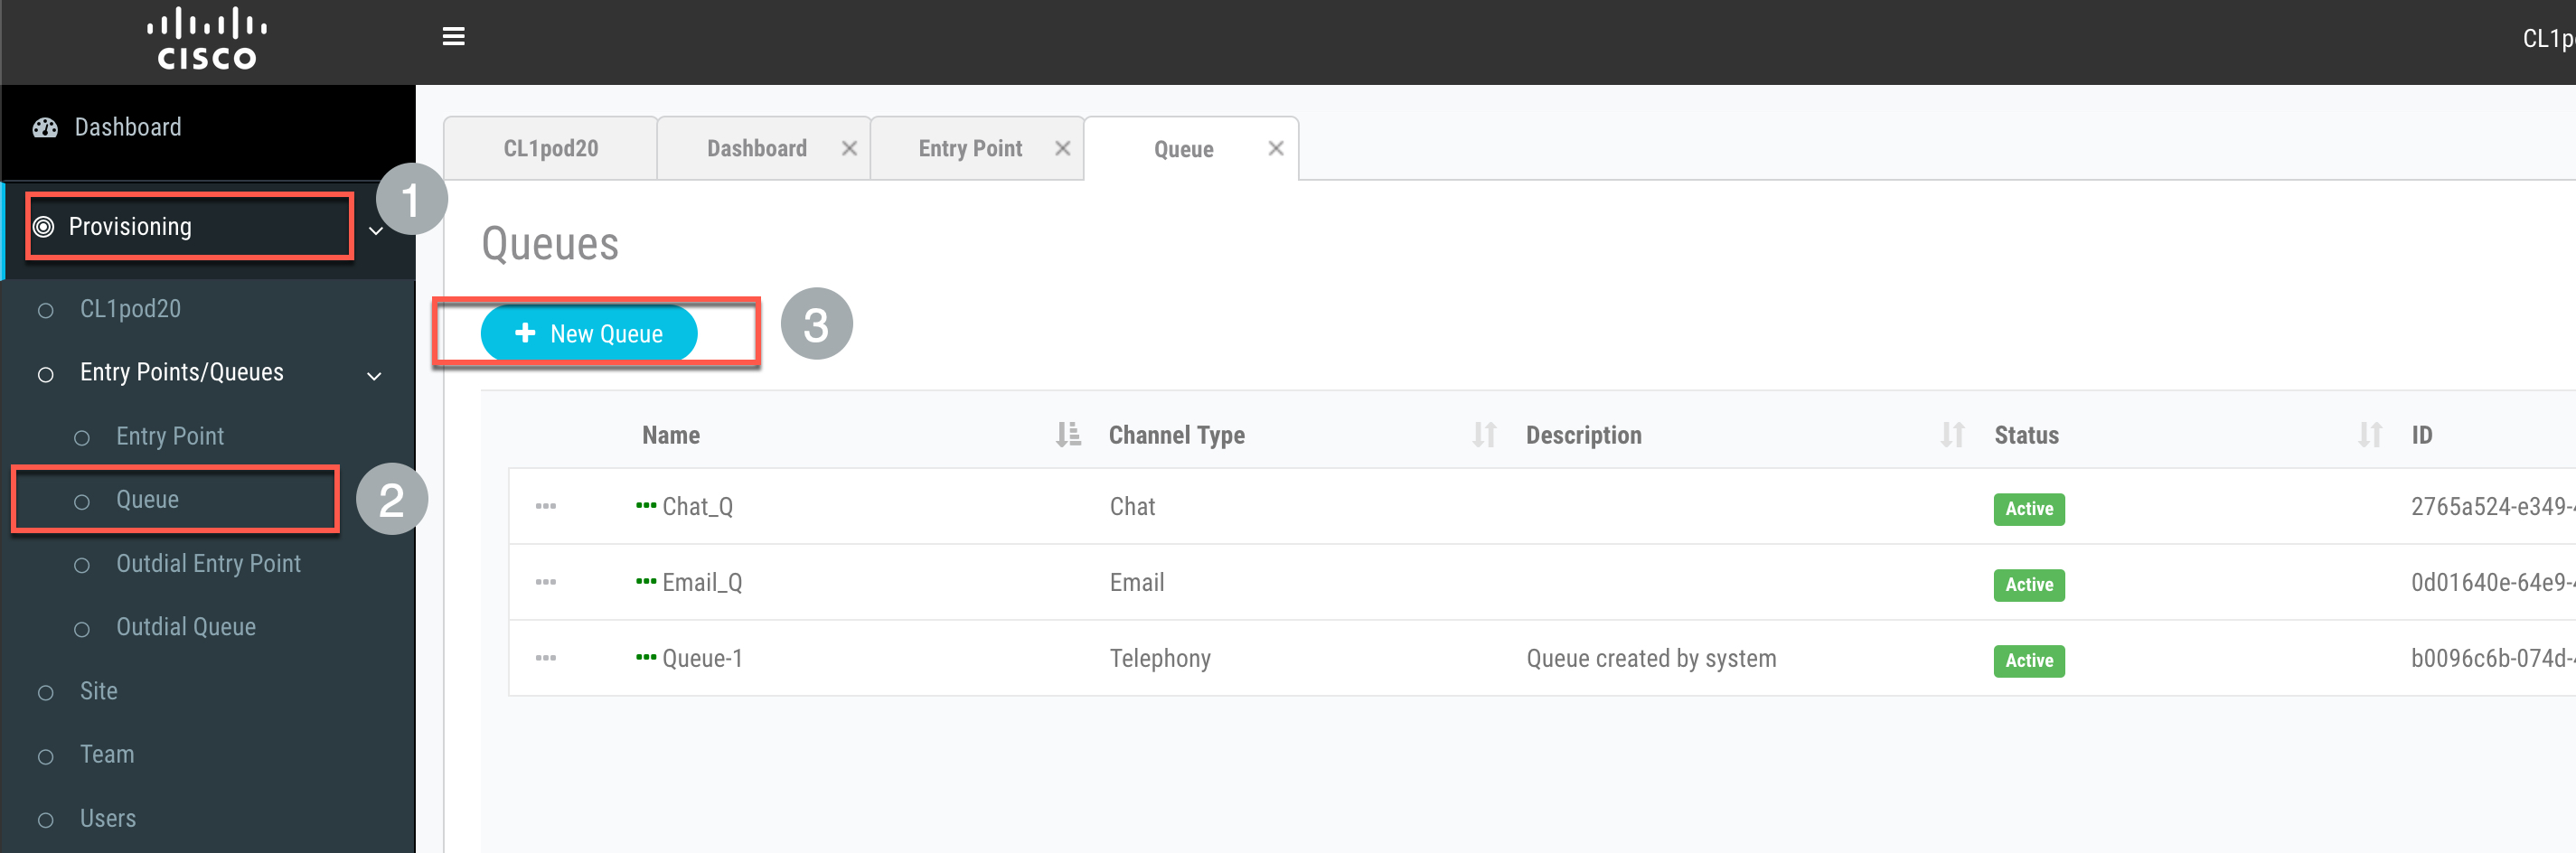
-
Input Name as
SMS_Queue. -
Select
Social Channelin the Channel Type section. -
Click
Add Groupin the Conversation distribution section.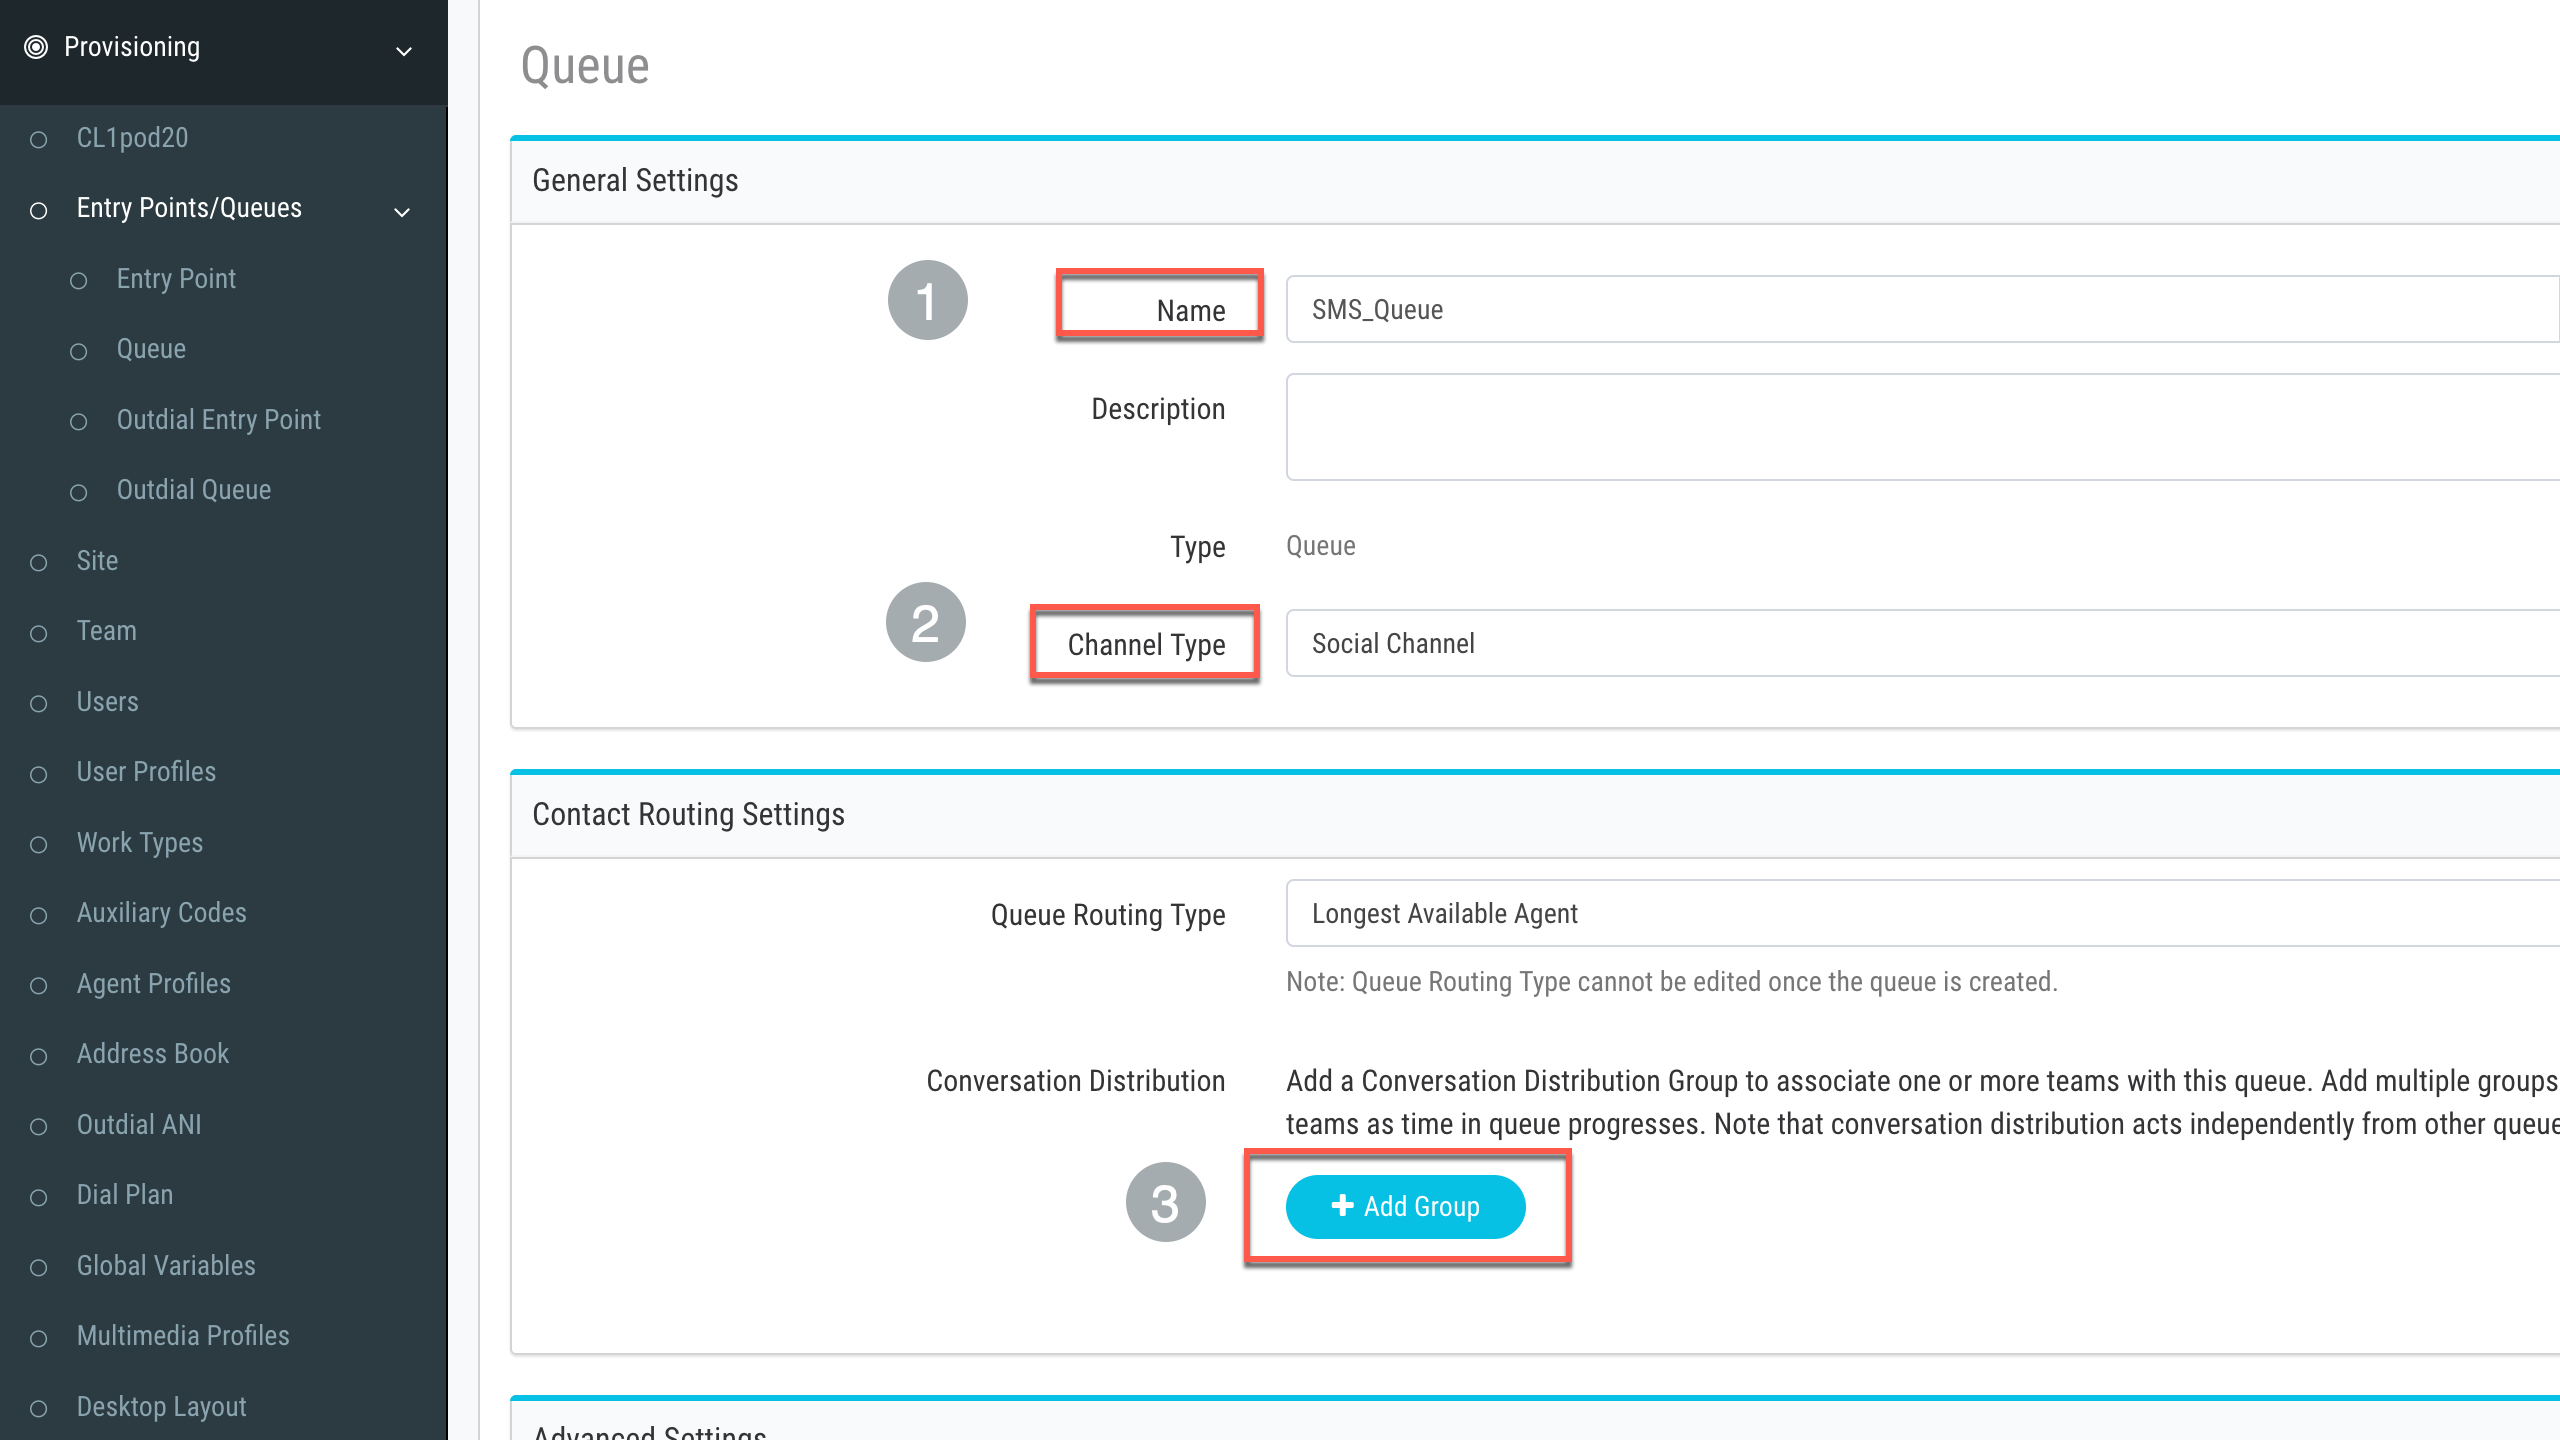
-
Select the Agent based teams created in the previous lab and click
Save. Once saved, clickCloseto exit this window.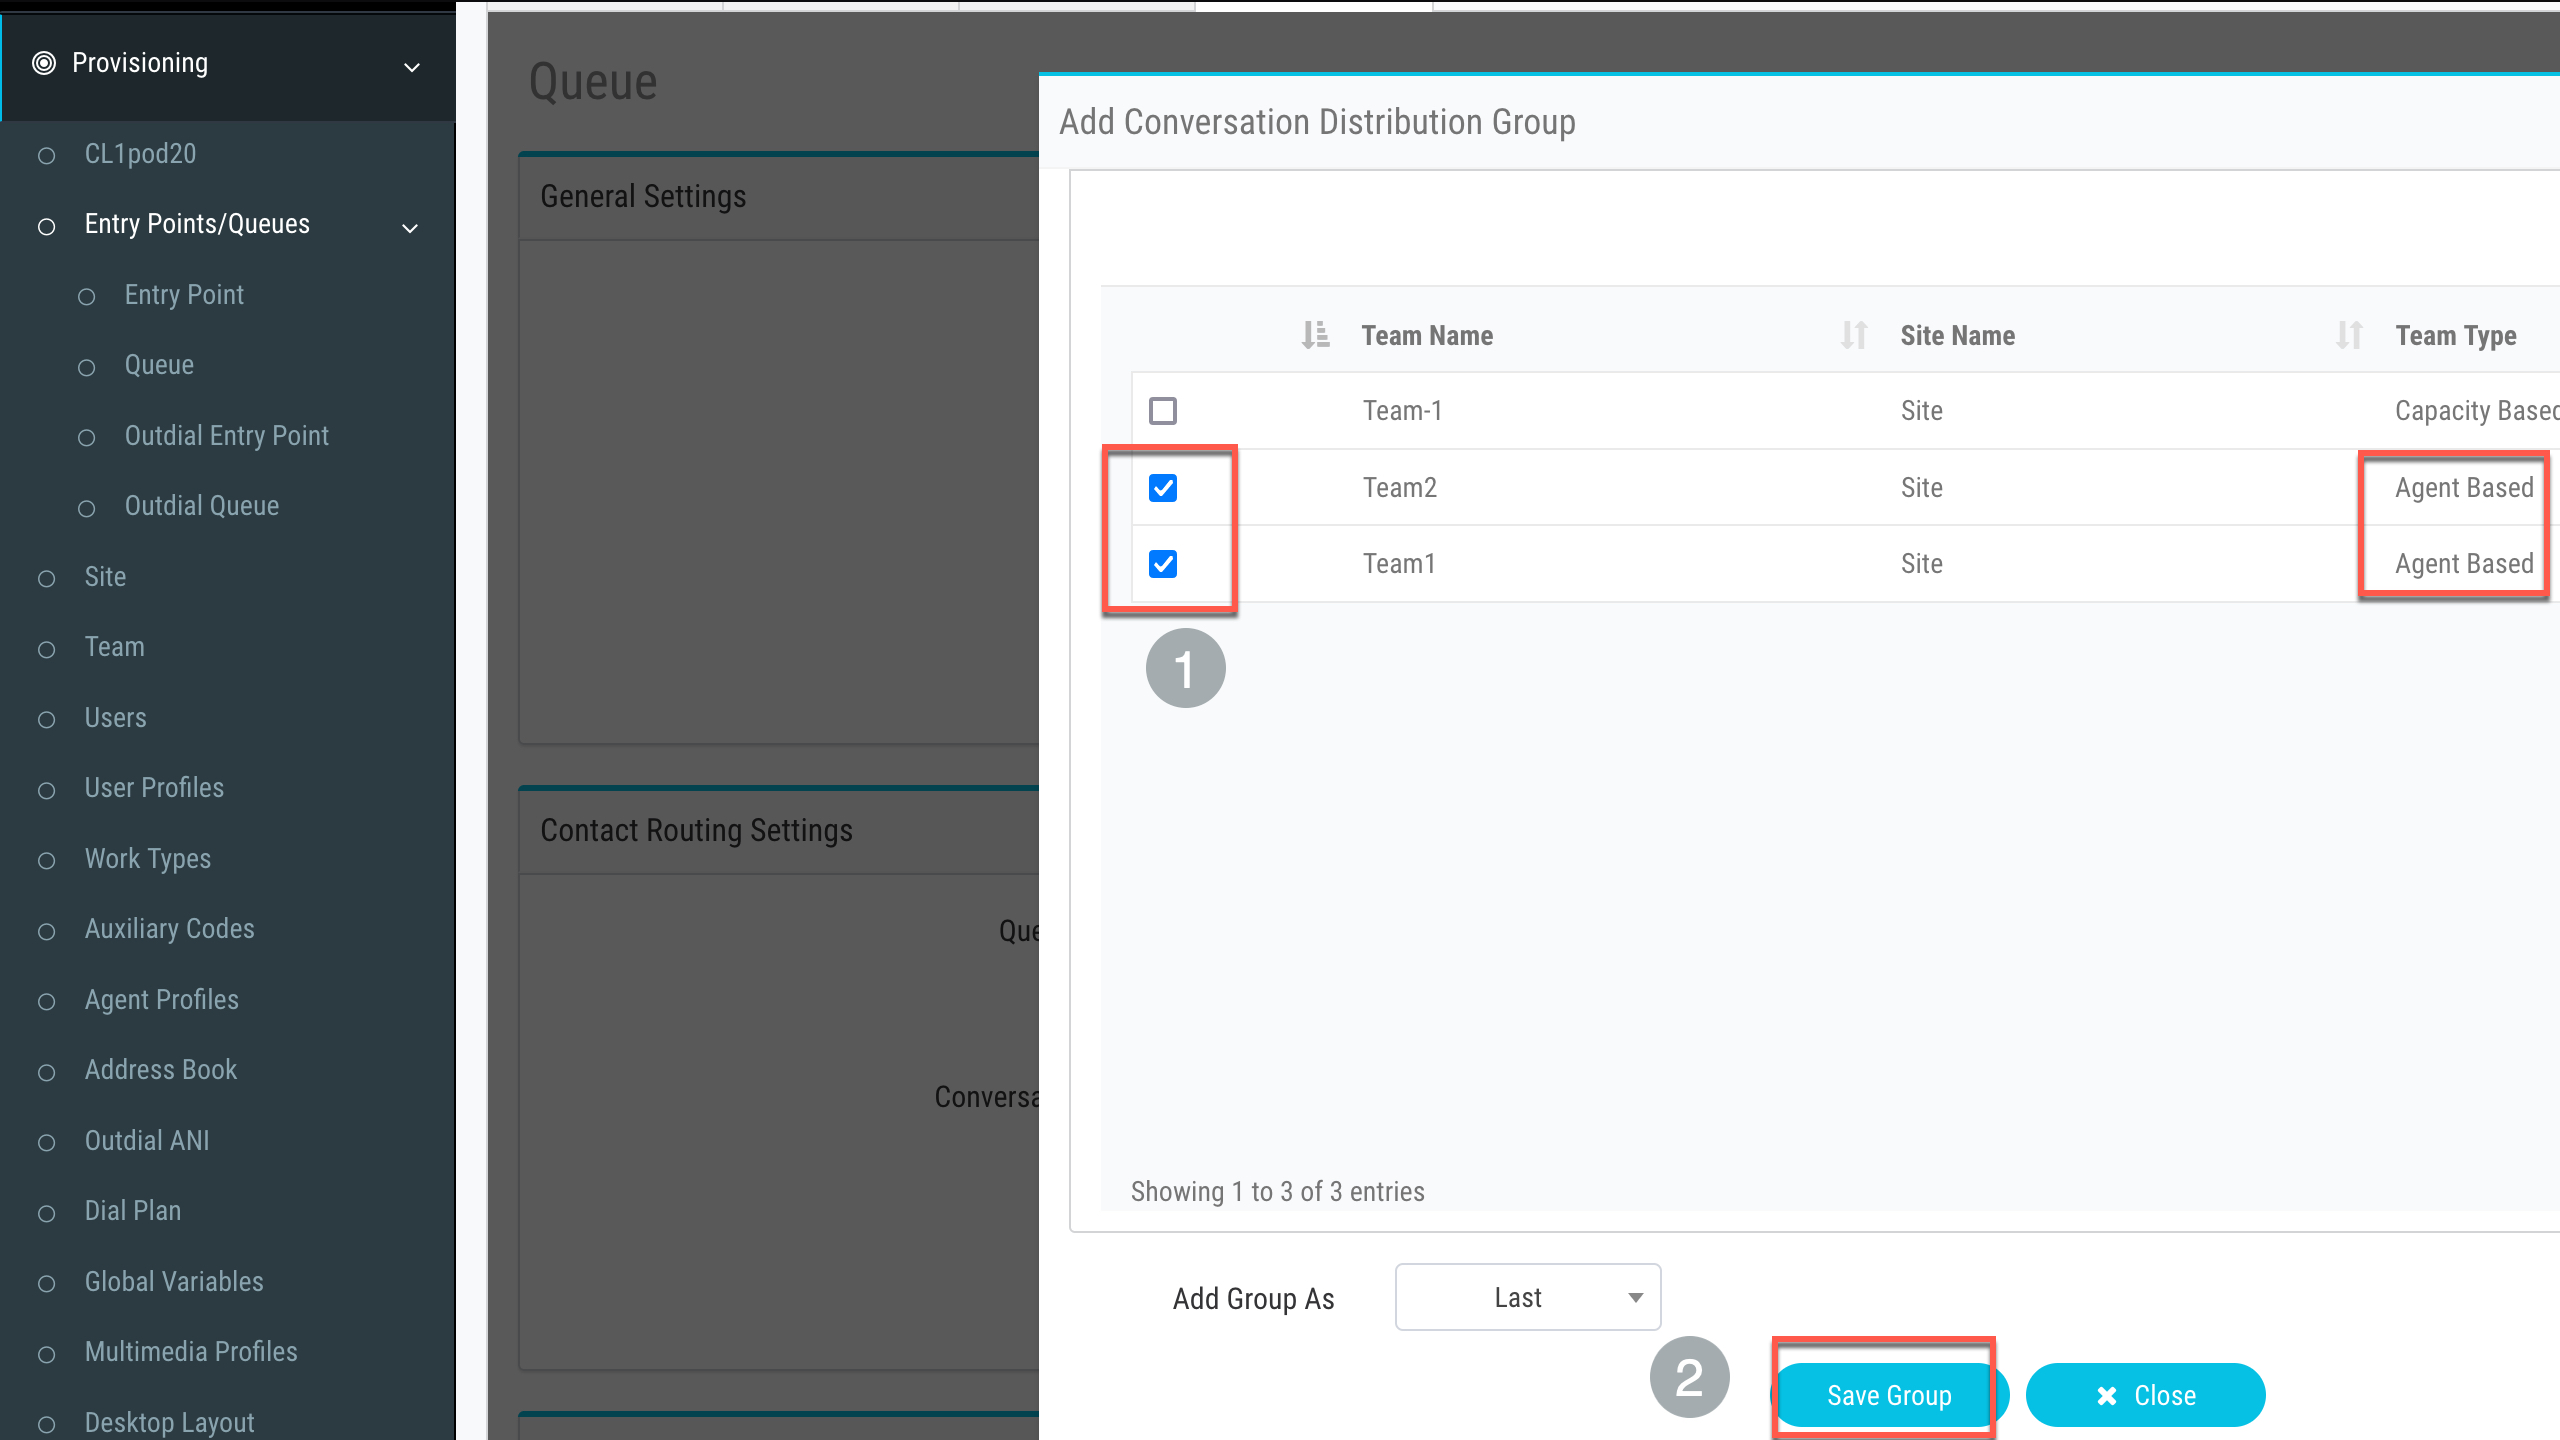
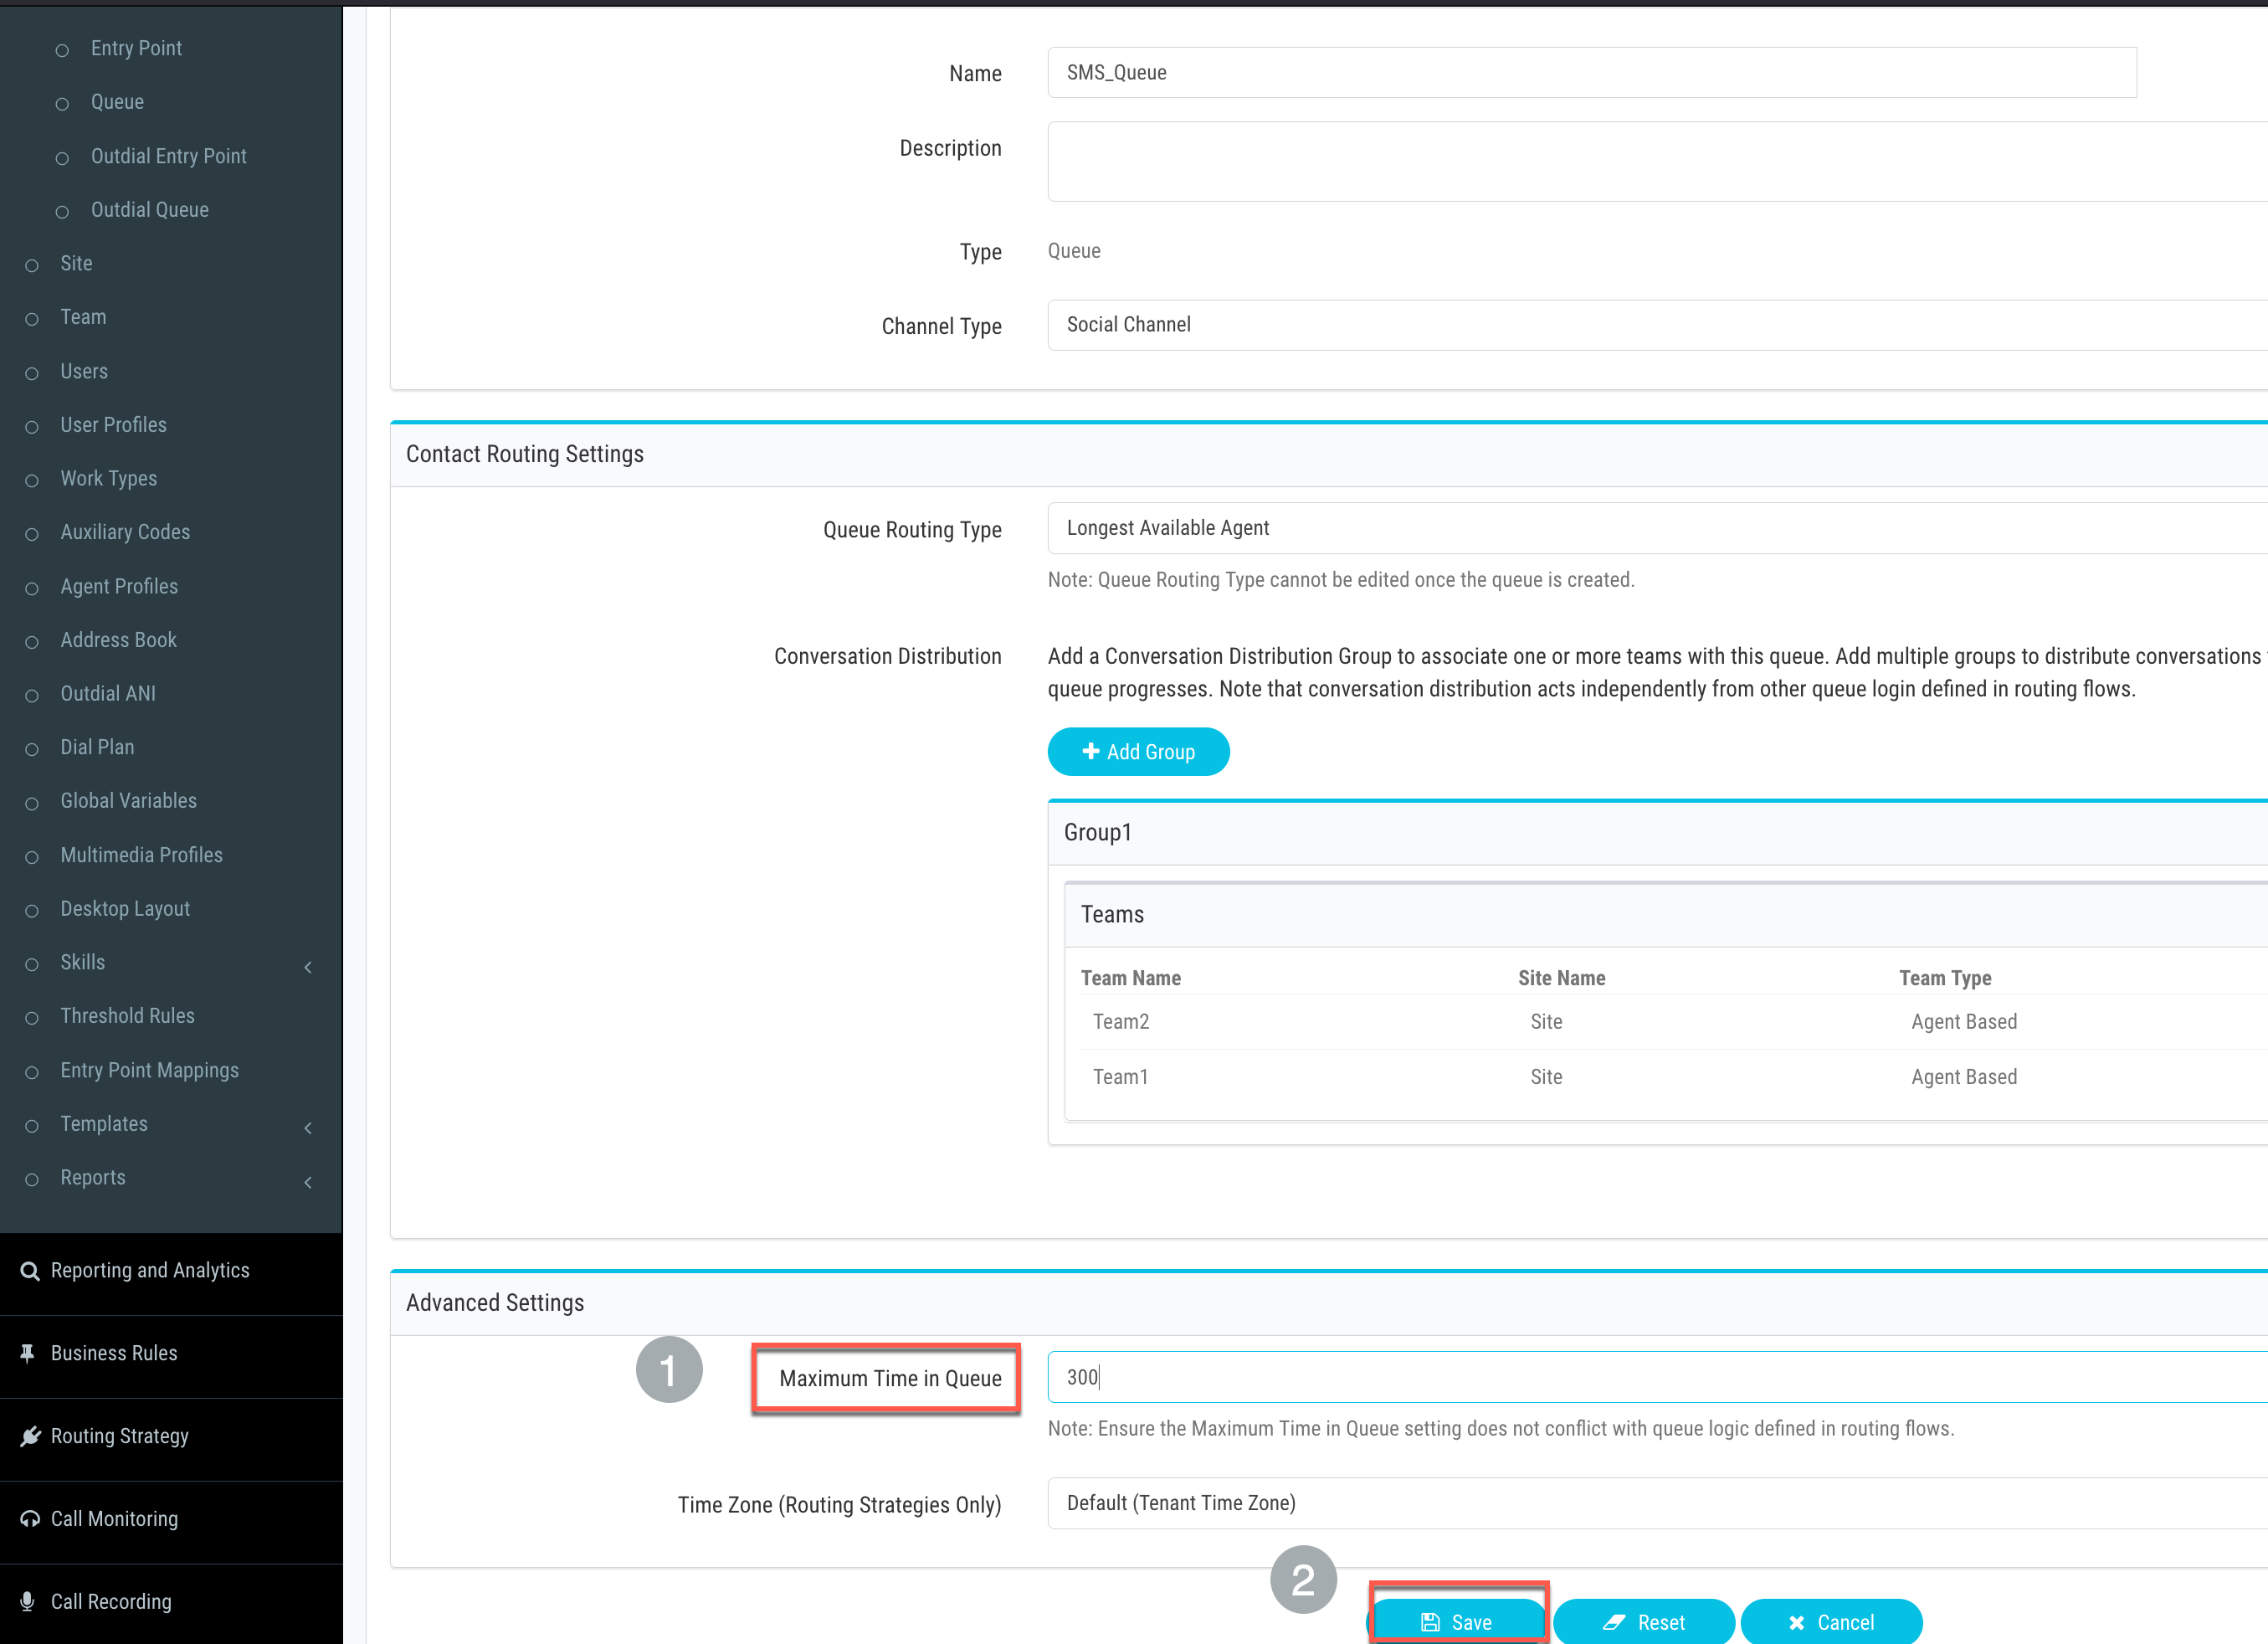
-
Input Maximum Time in Queue as
300. -
The Time Zone can stay as default value.
-
Click on Save after comparing your values with the screenshot below.
Step 4. Create/Upload SMS flow
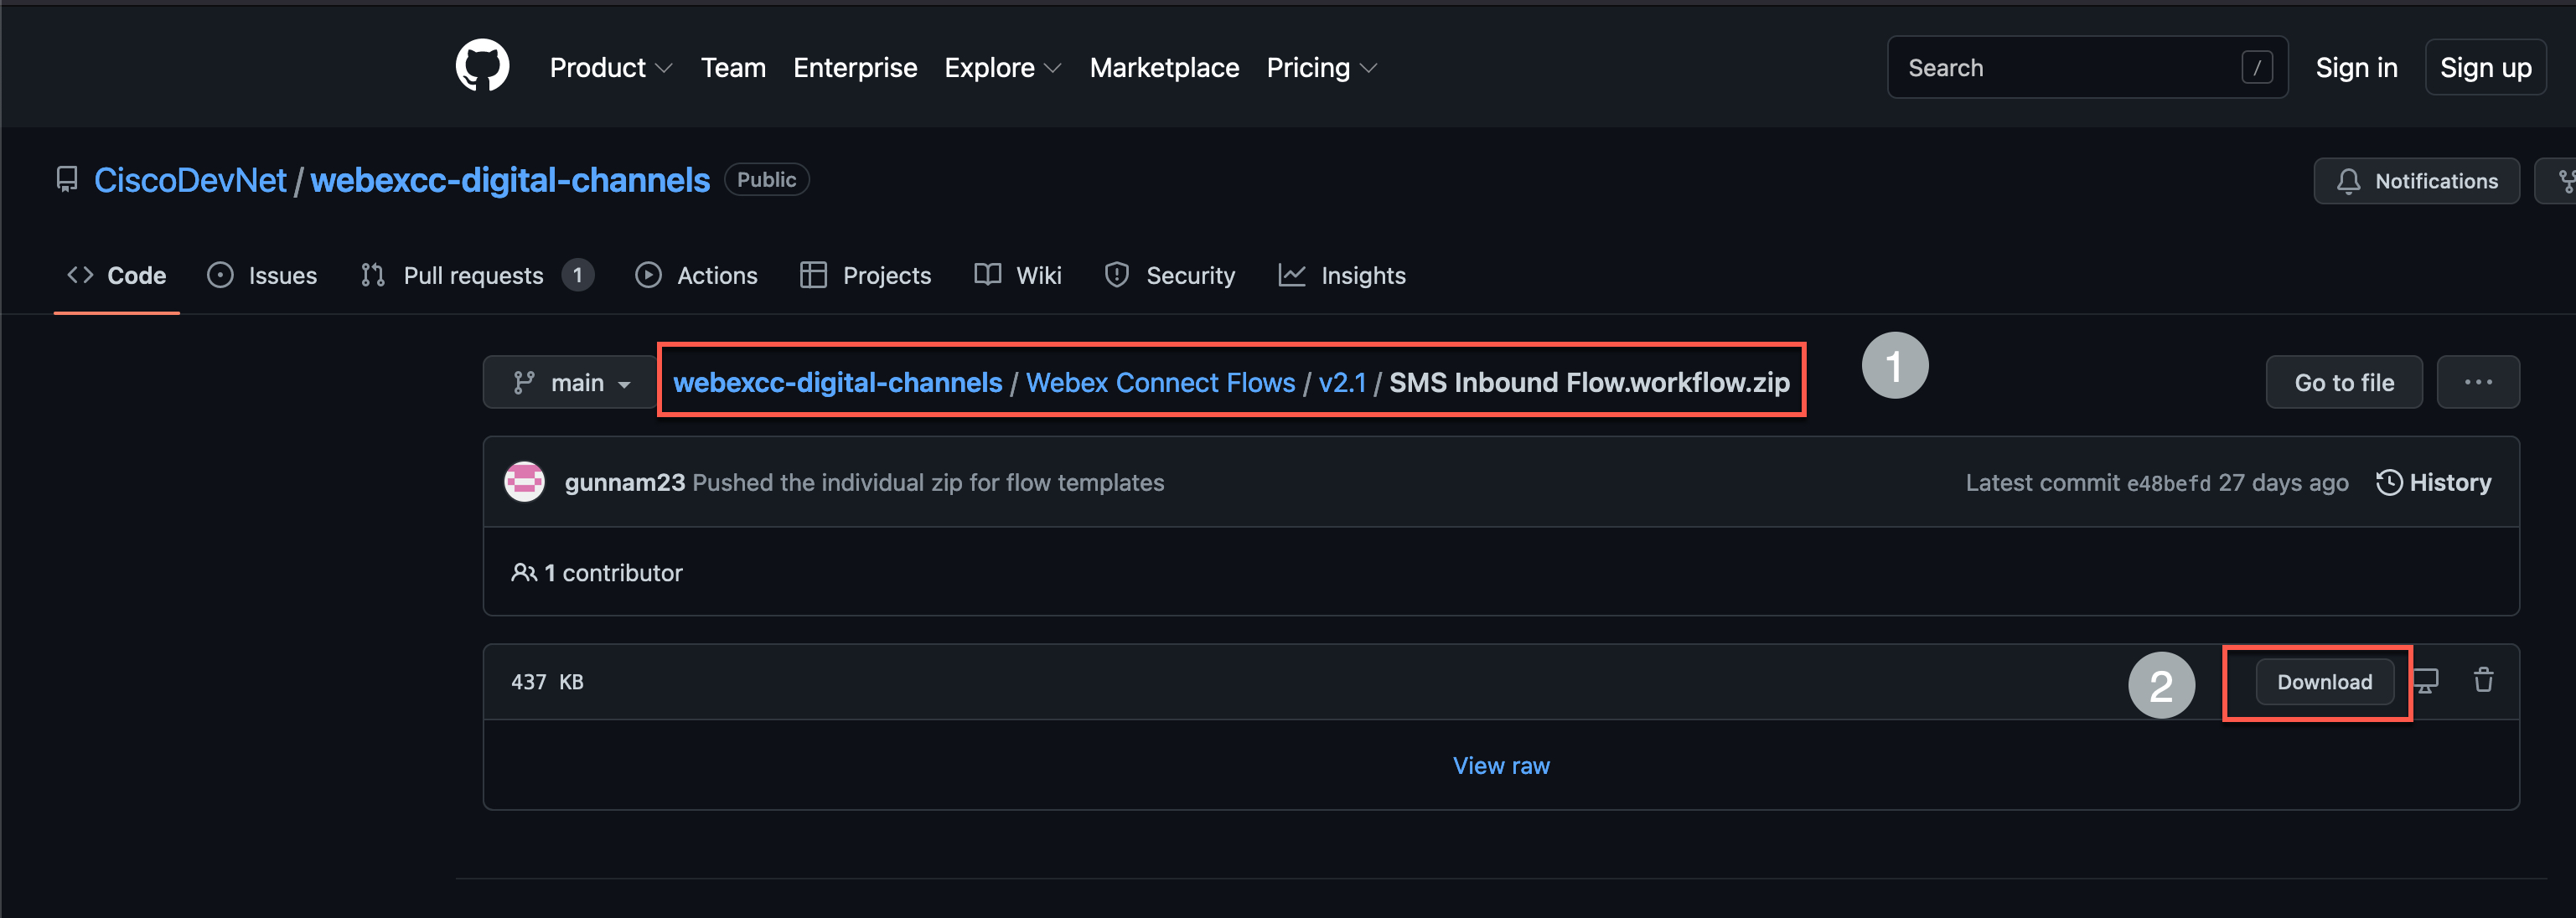
-
Download the SMS flow from the GitHub page.
-
Navigate to Webex Connect Flows -> v2.1 -> SMS Inbound Flow.workflow.zip, select the zip file and click download.
-
Unzip the downloaded file.
-
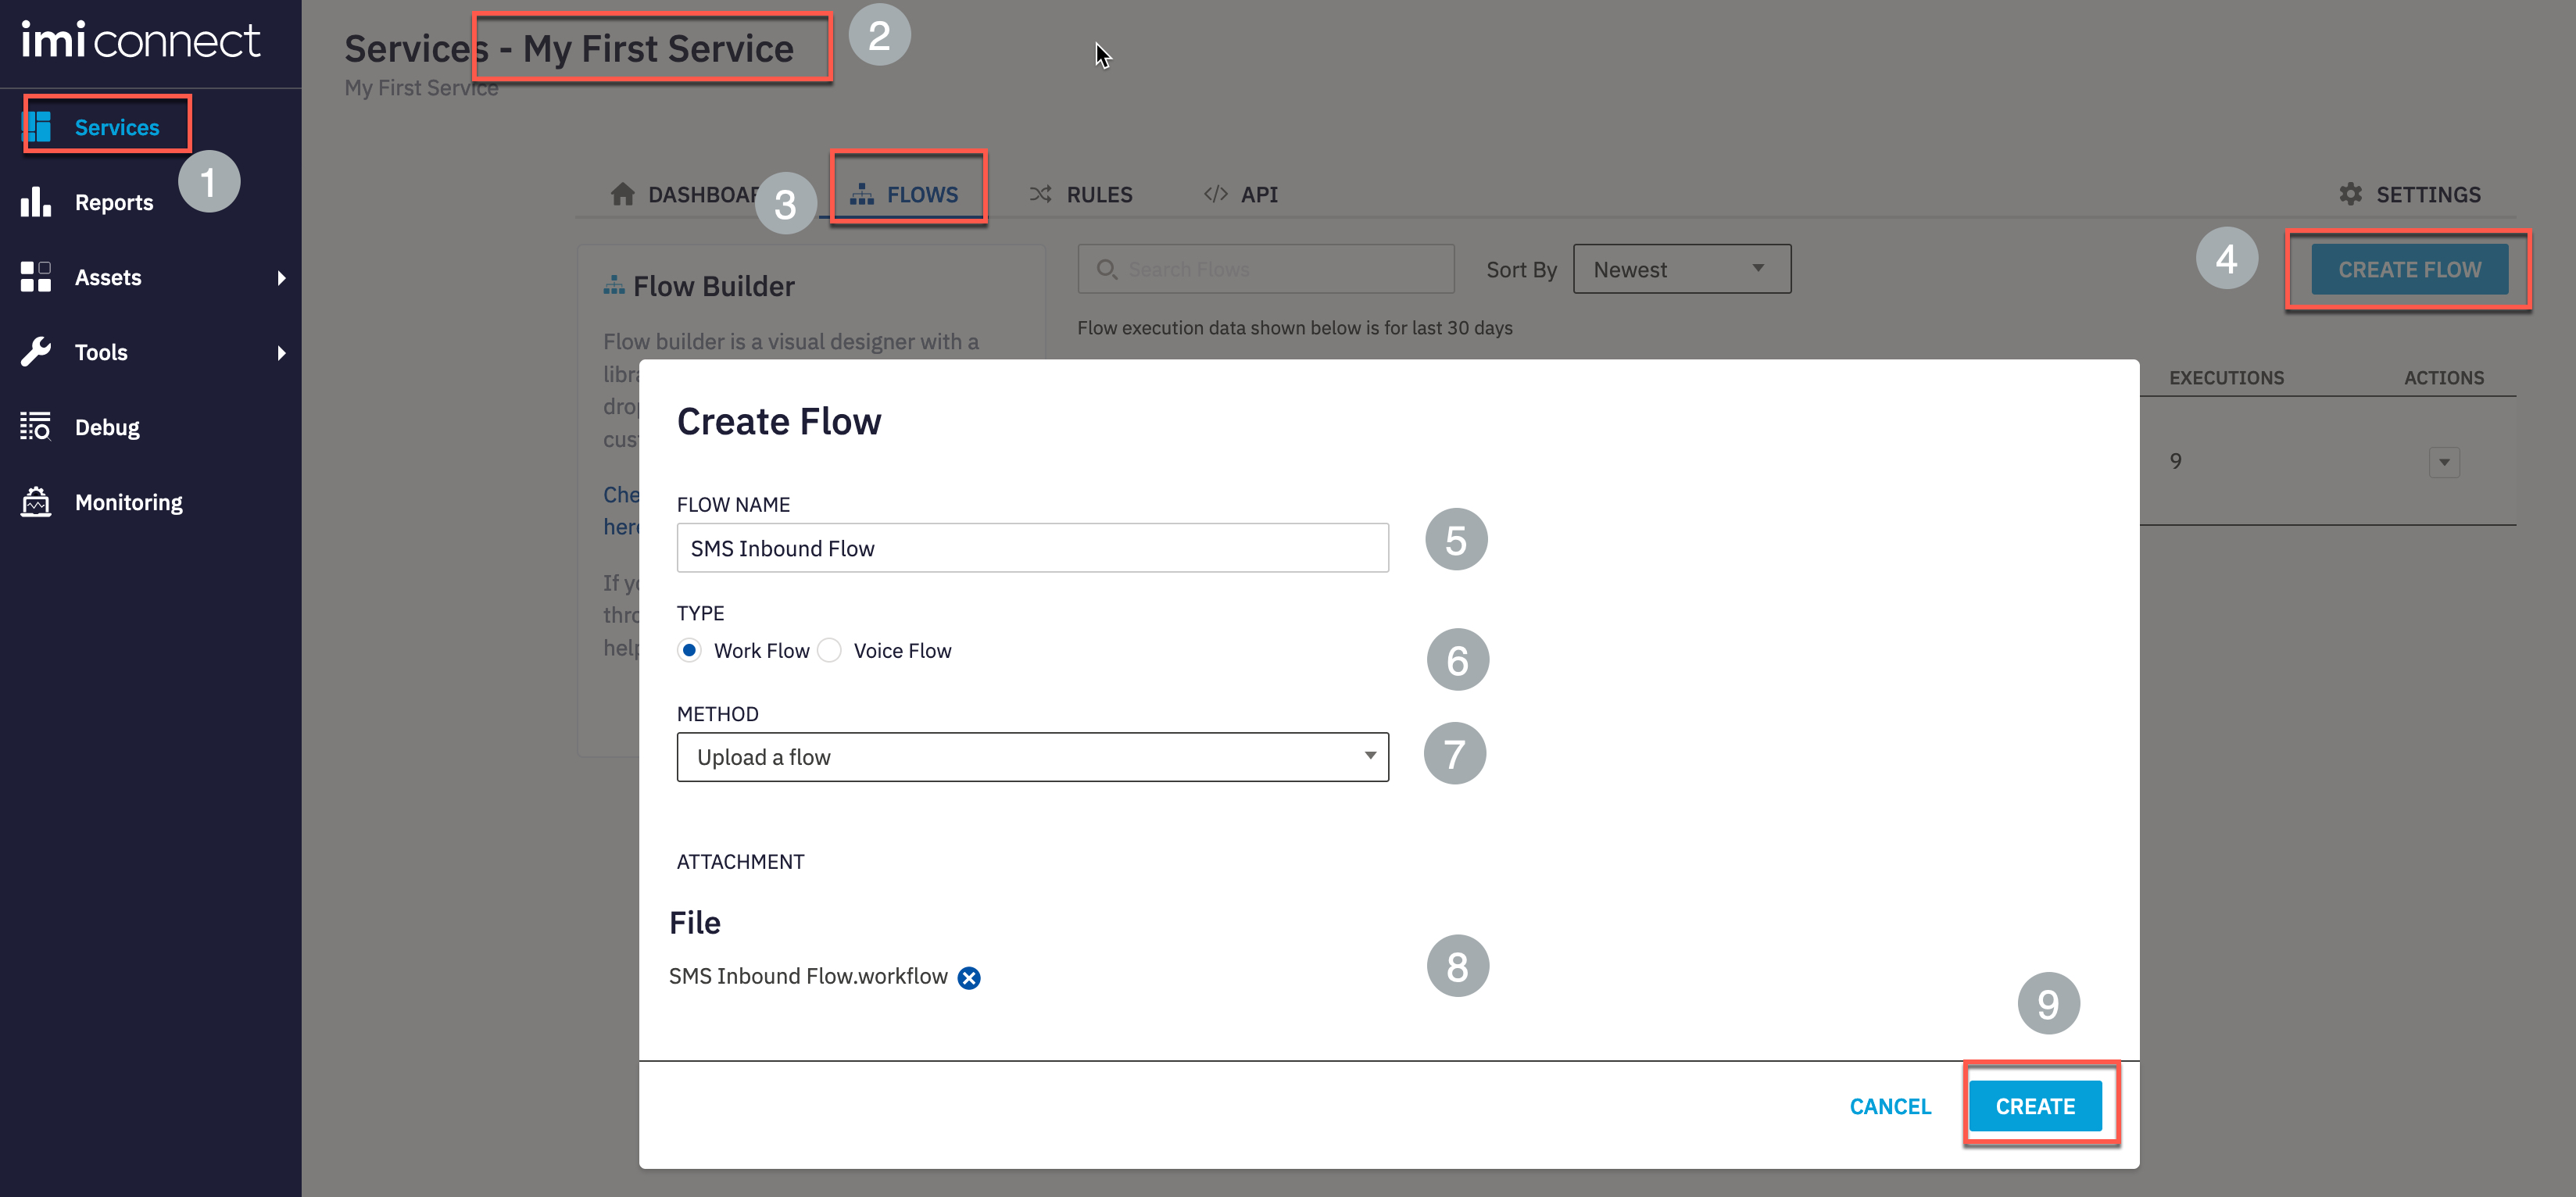
Go to Webex Connect, click on Services and select the service in which the Asset is created in step 2. It should be My First Service
-
In the service click on FLOWS -> CREATE FLOW
-
Enter the FLOW NAME as SMS Inbound Flow, select the TYPE as Work Flow and under METHOD select Upload a flow.
-
Drag and drop the Email Inbound Flow.workflow flow that is downloaded in zip file, click CREATE and then click SAVE.
-
Once the flow is saved, the ‘Configure SMS Event’ node will open. Select the SMS number assigned to your tenant in the INCOMING NUMBER section
-
Input * as
Keywordand click on Verify -
Once the Success message is displayed, click on Save
-
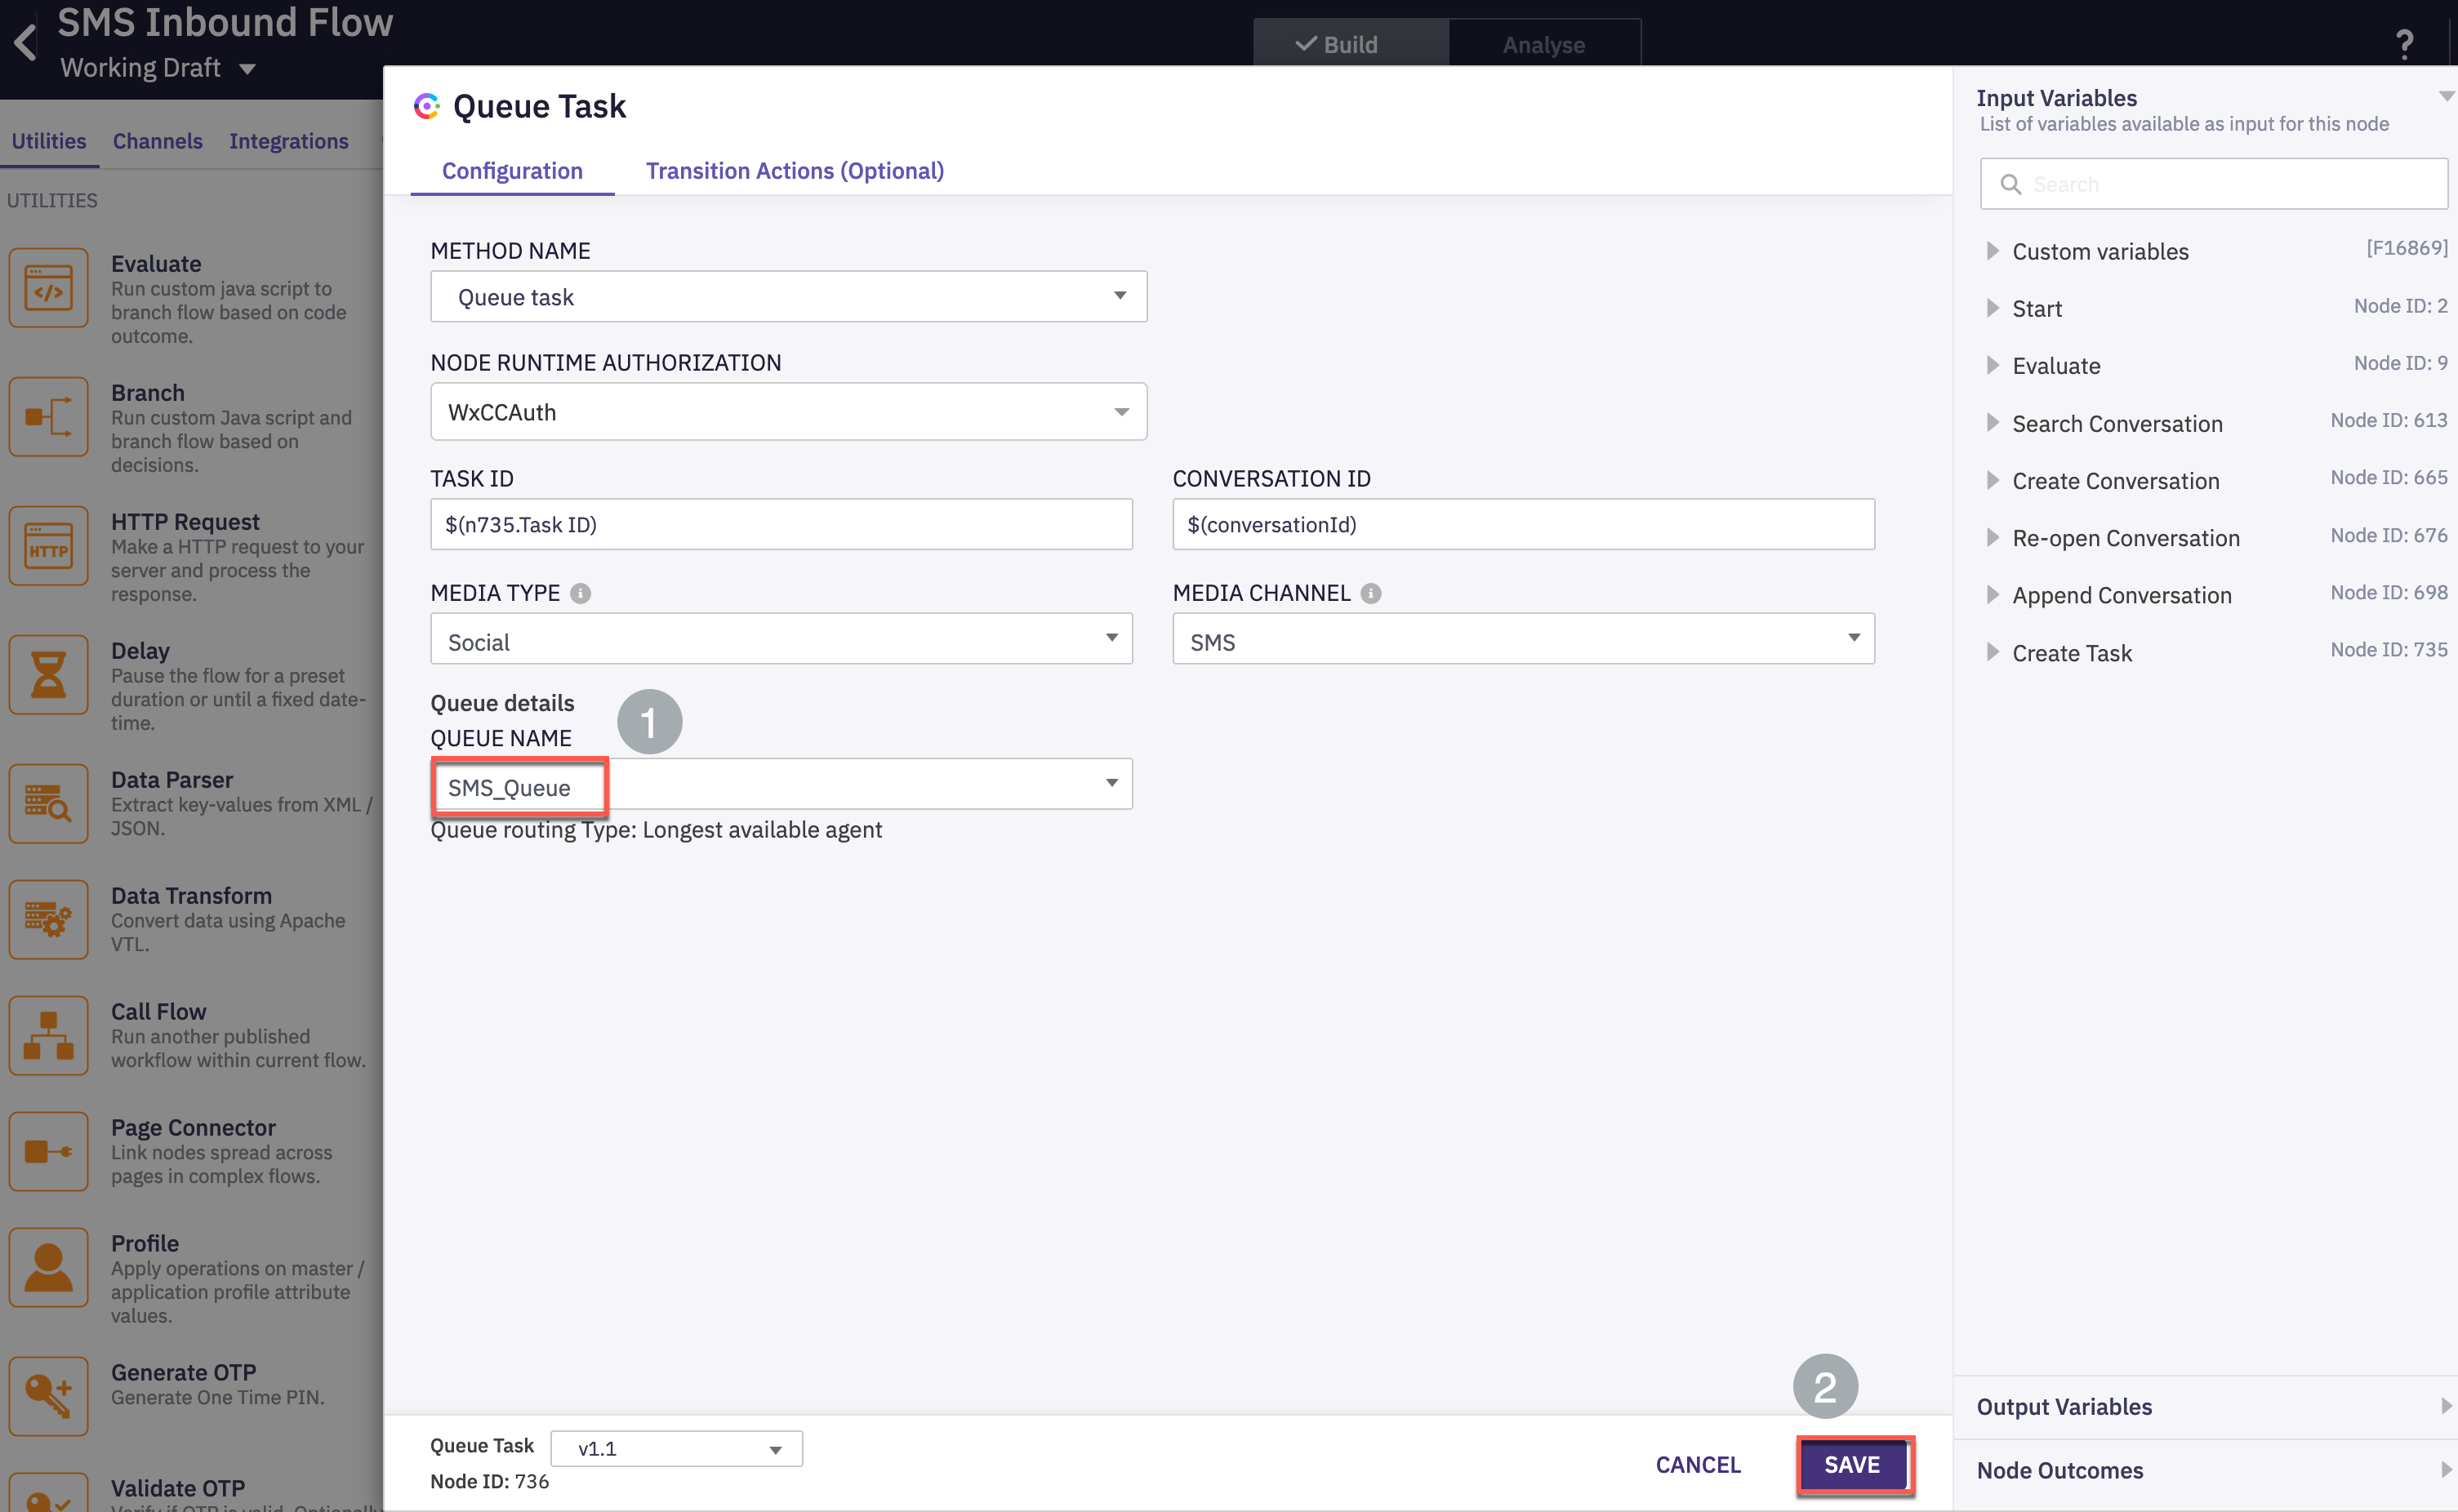
In the created workflow find the Queue Task, click twice, select the QUEUE NAME as Email_Q and click on SAVE.
-
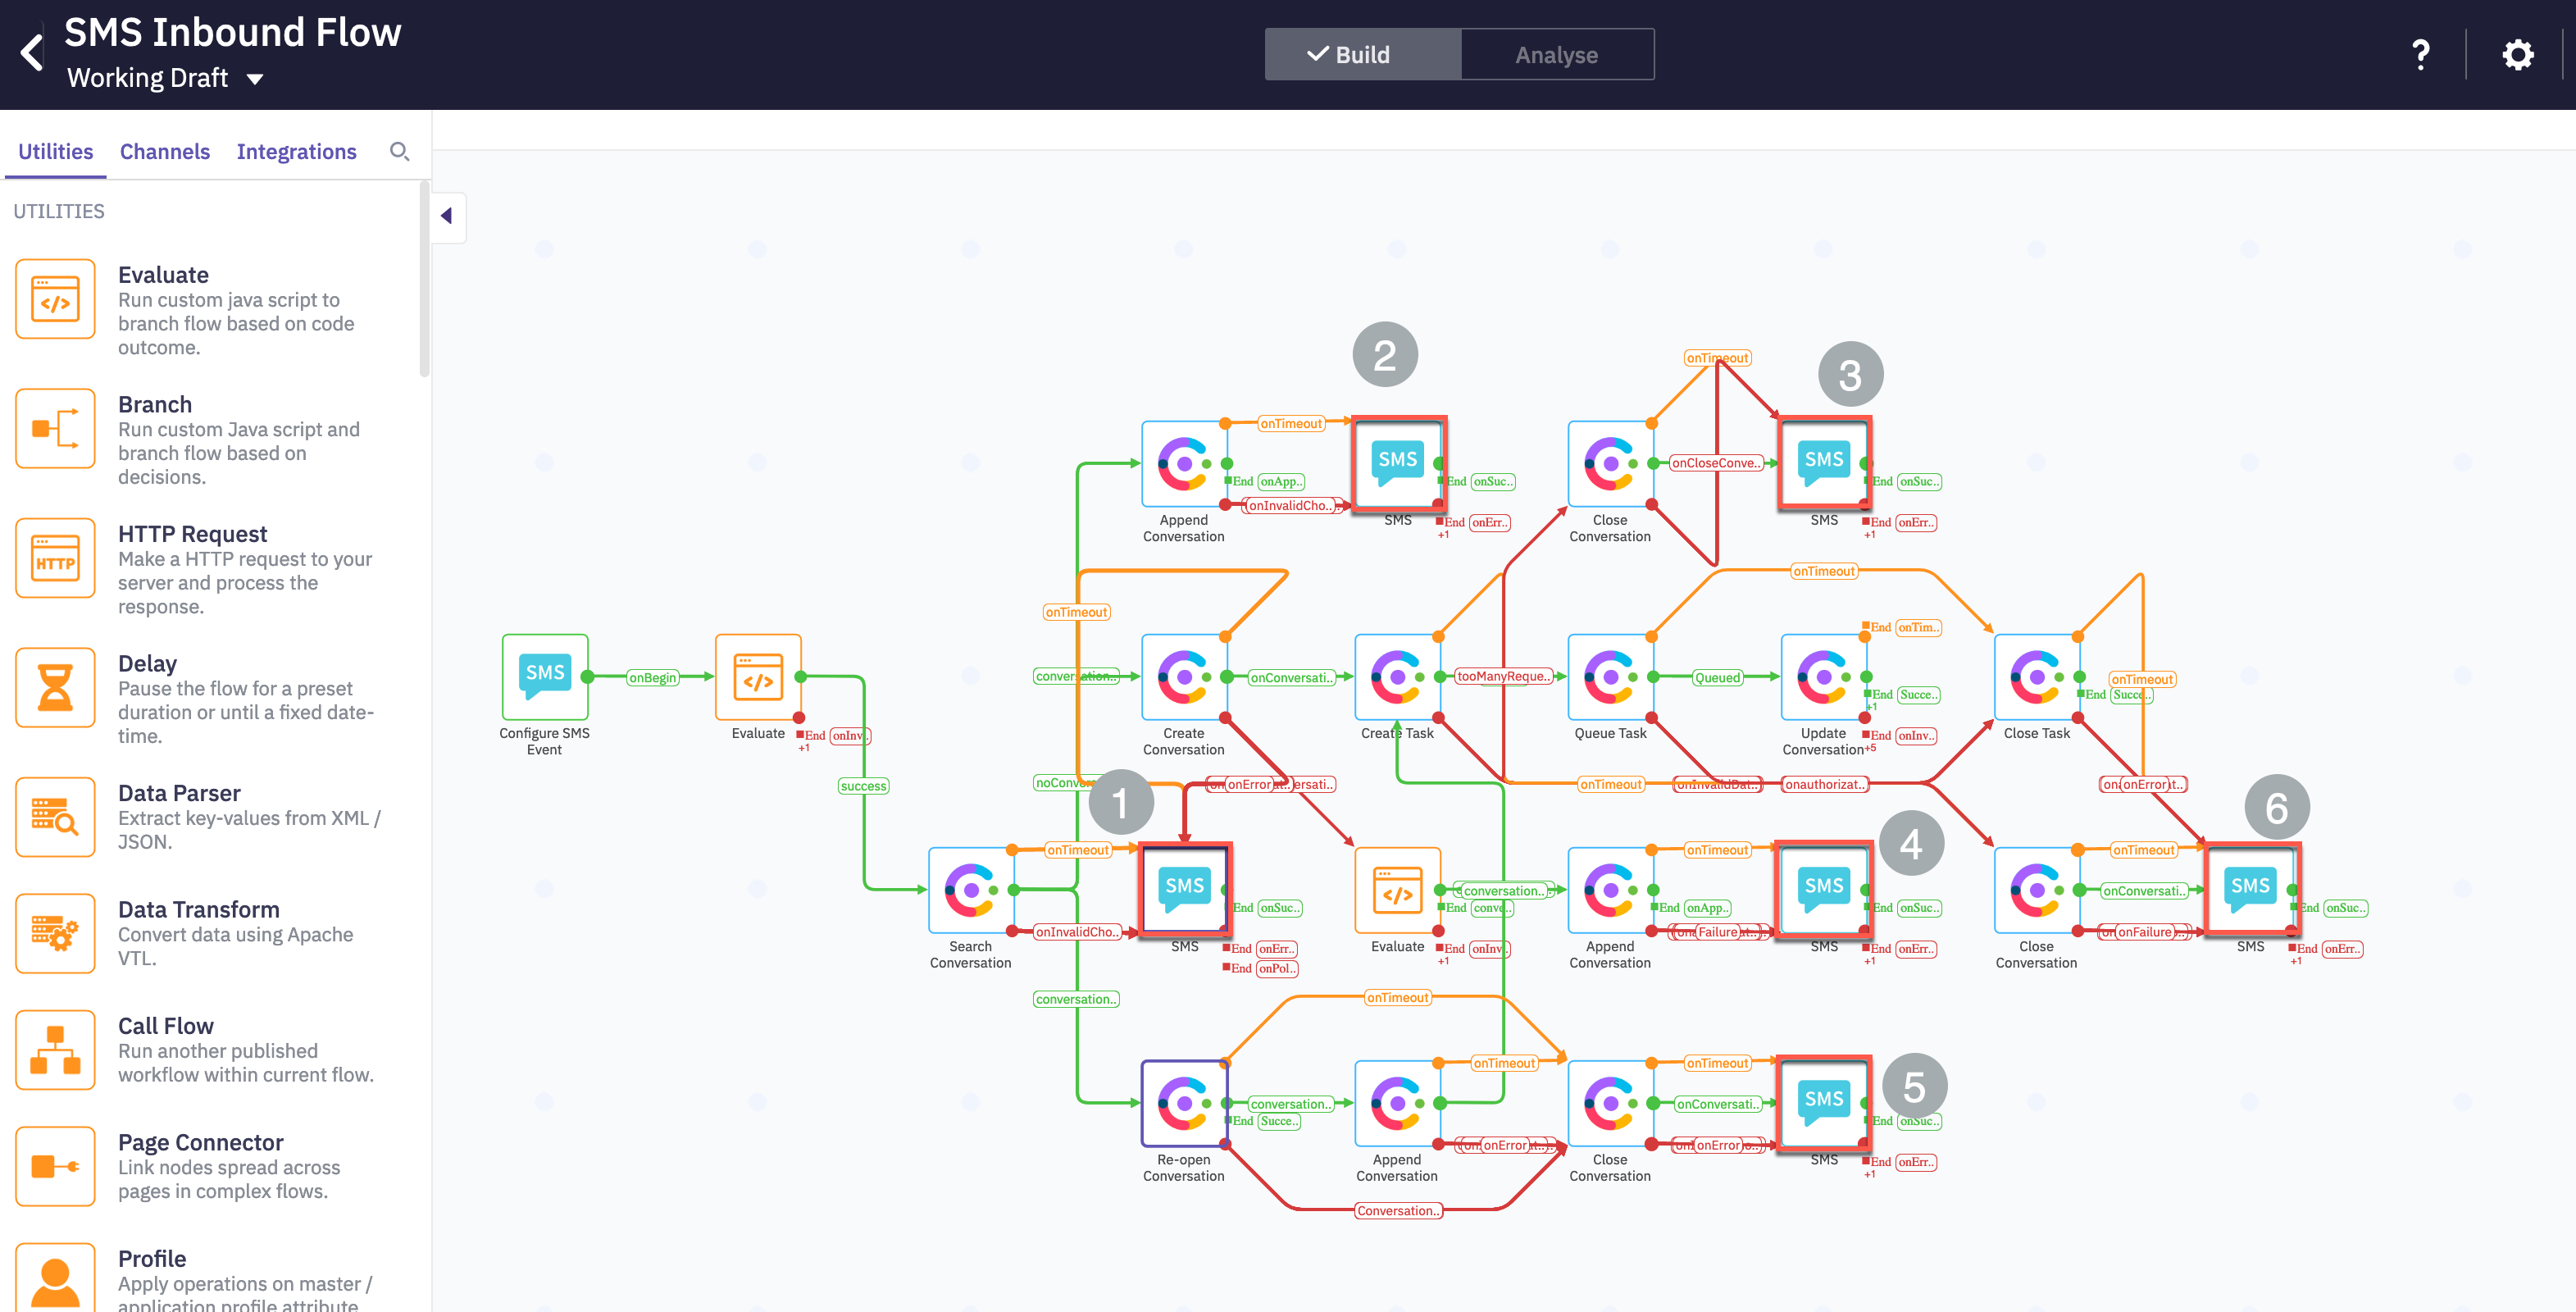
Find and open all the SMS nodes and select the SMS number assigned to your tenant in the FROM NUMBER section
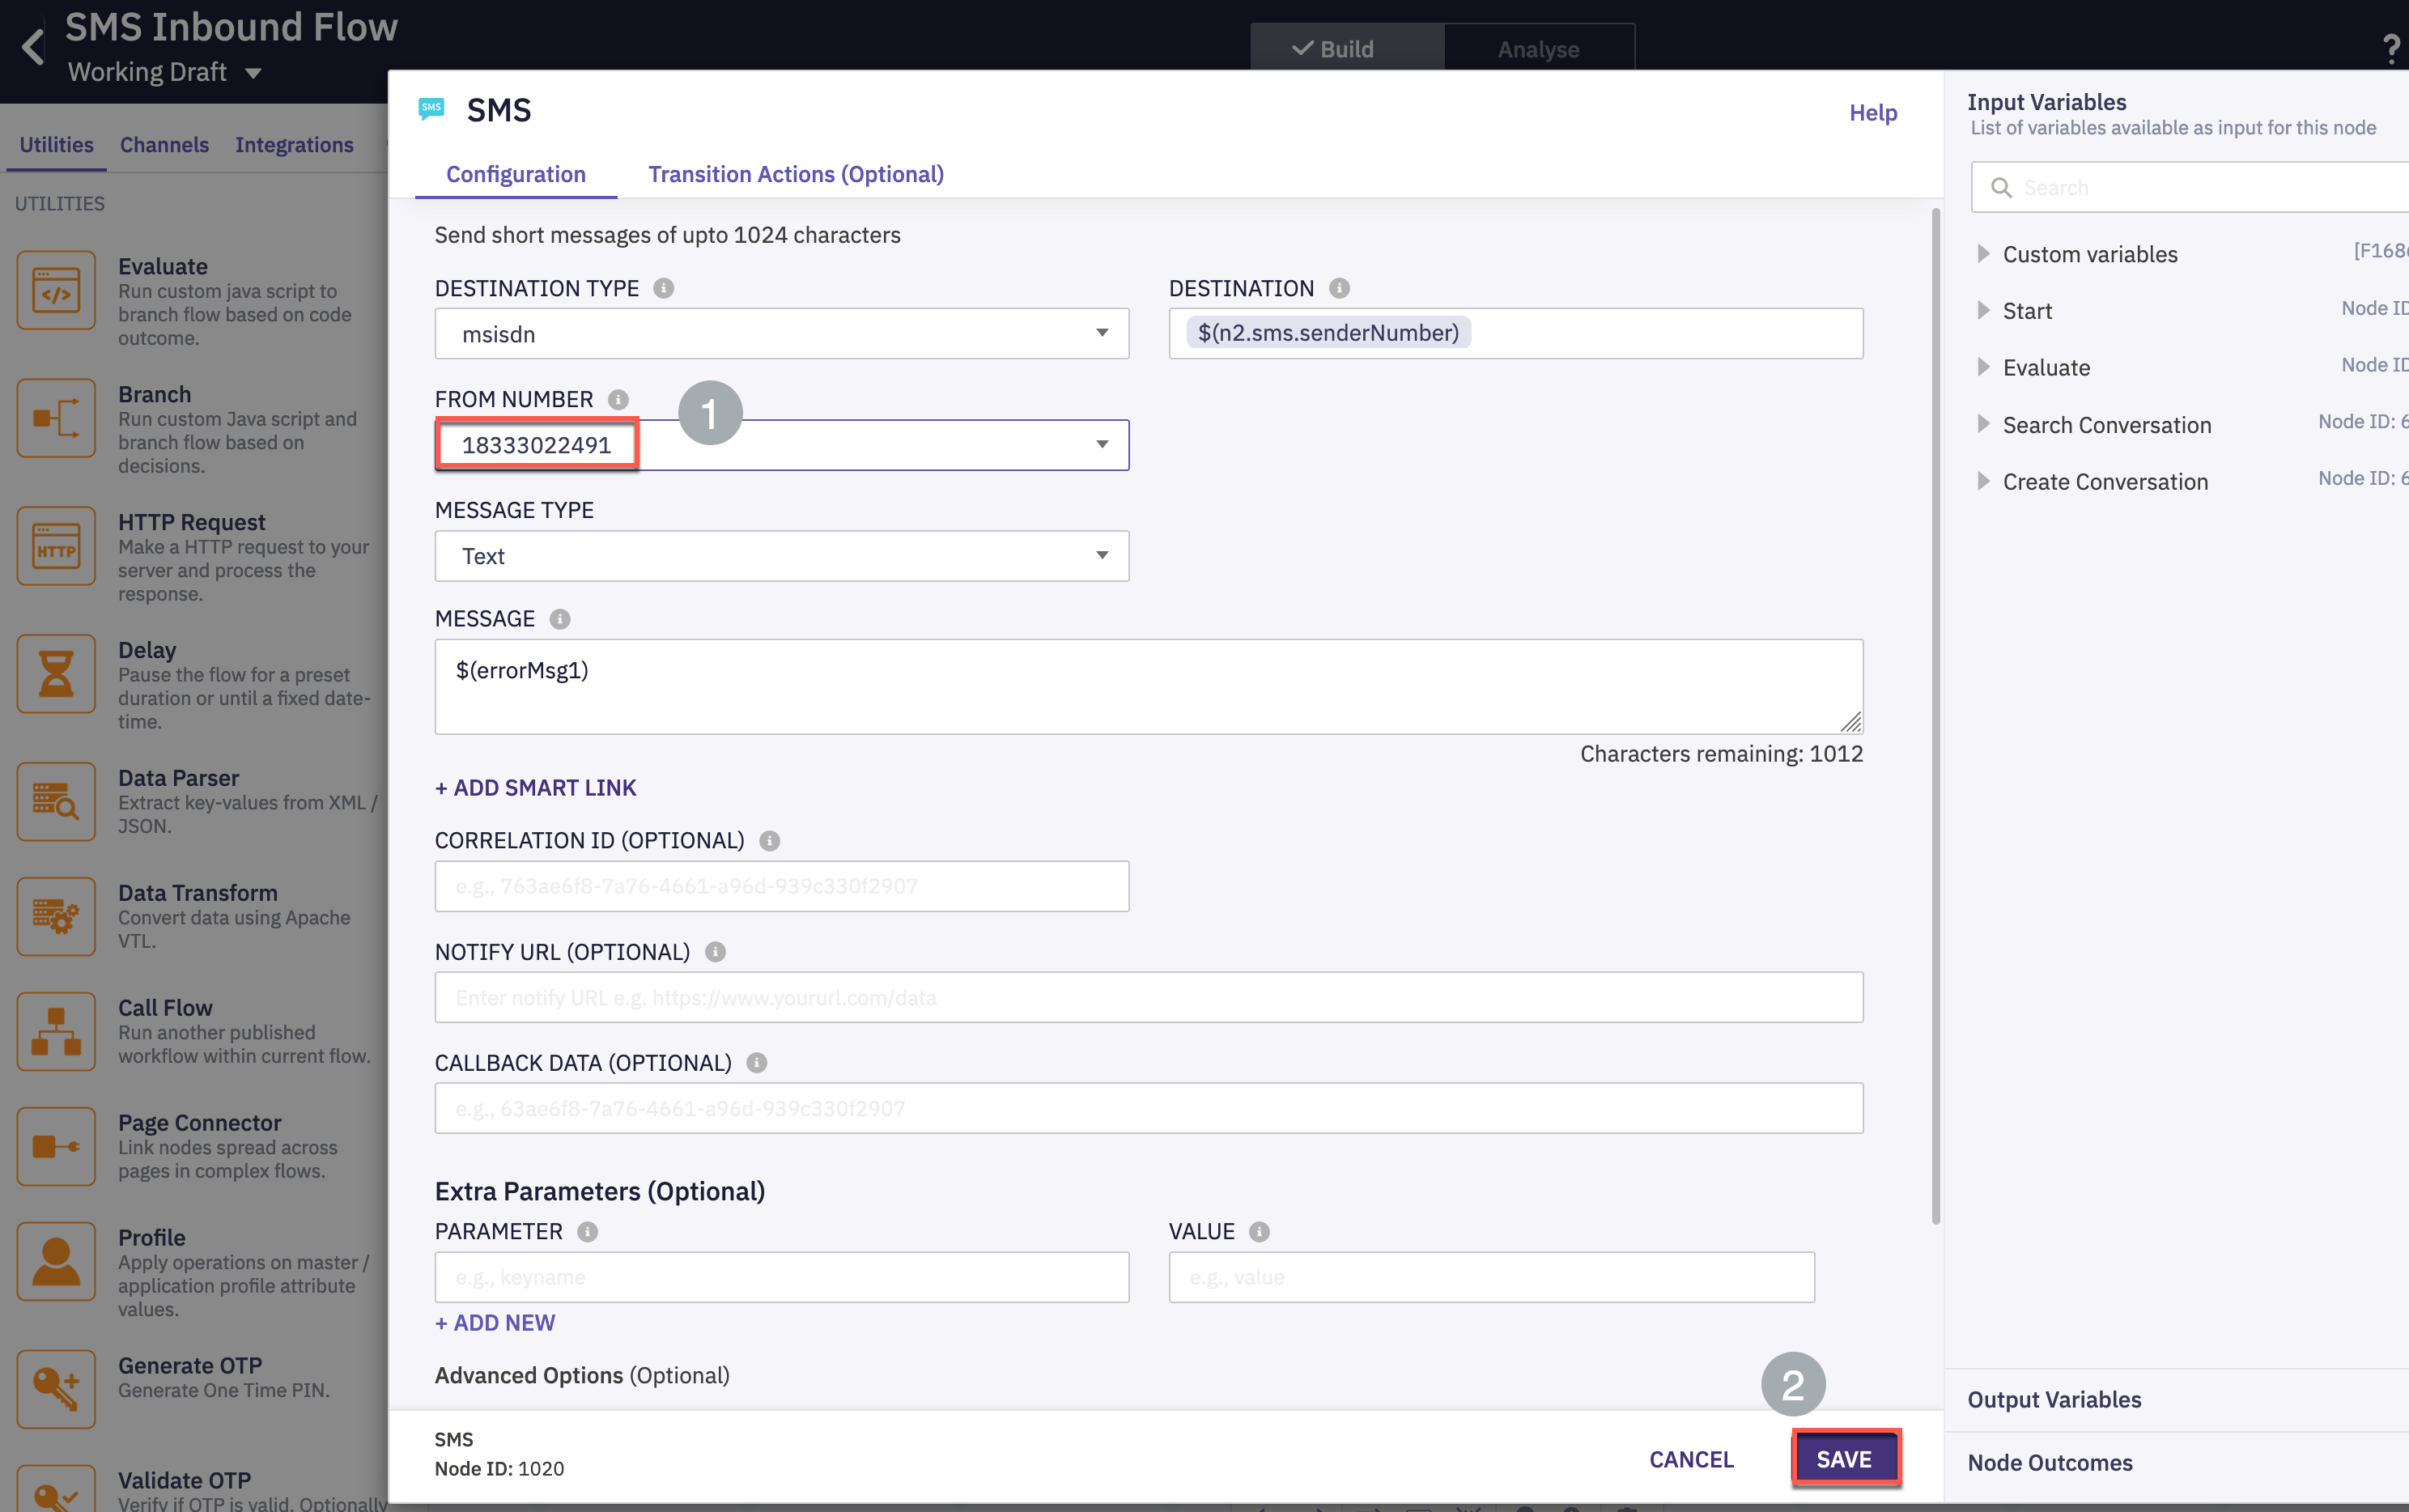
-
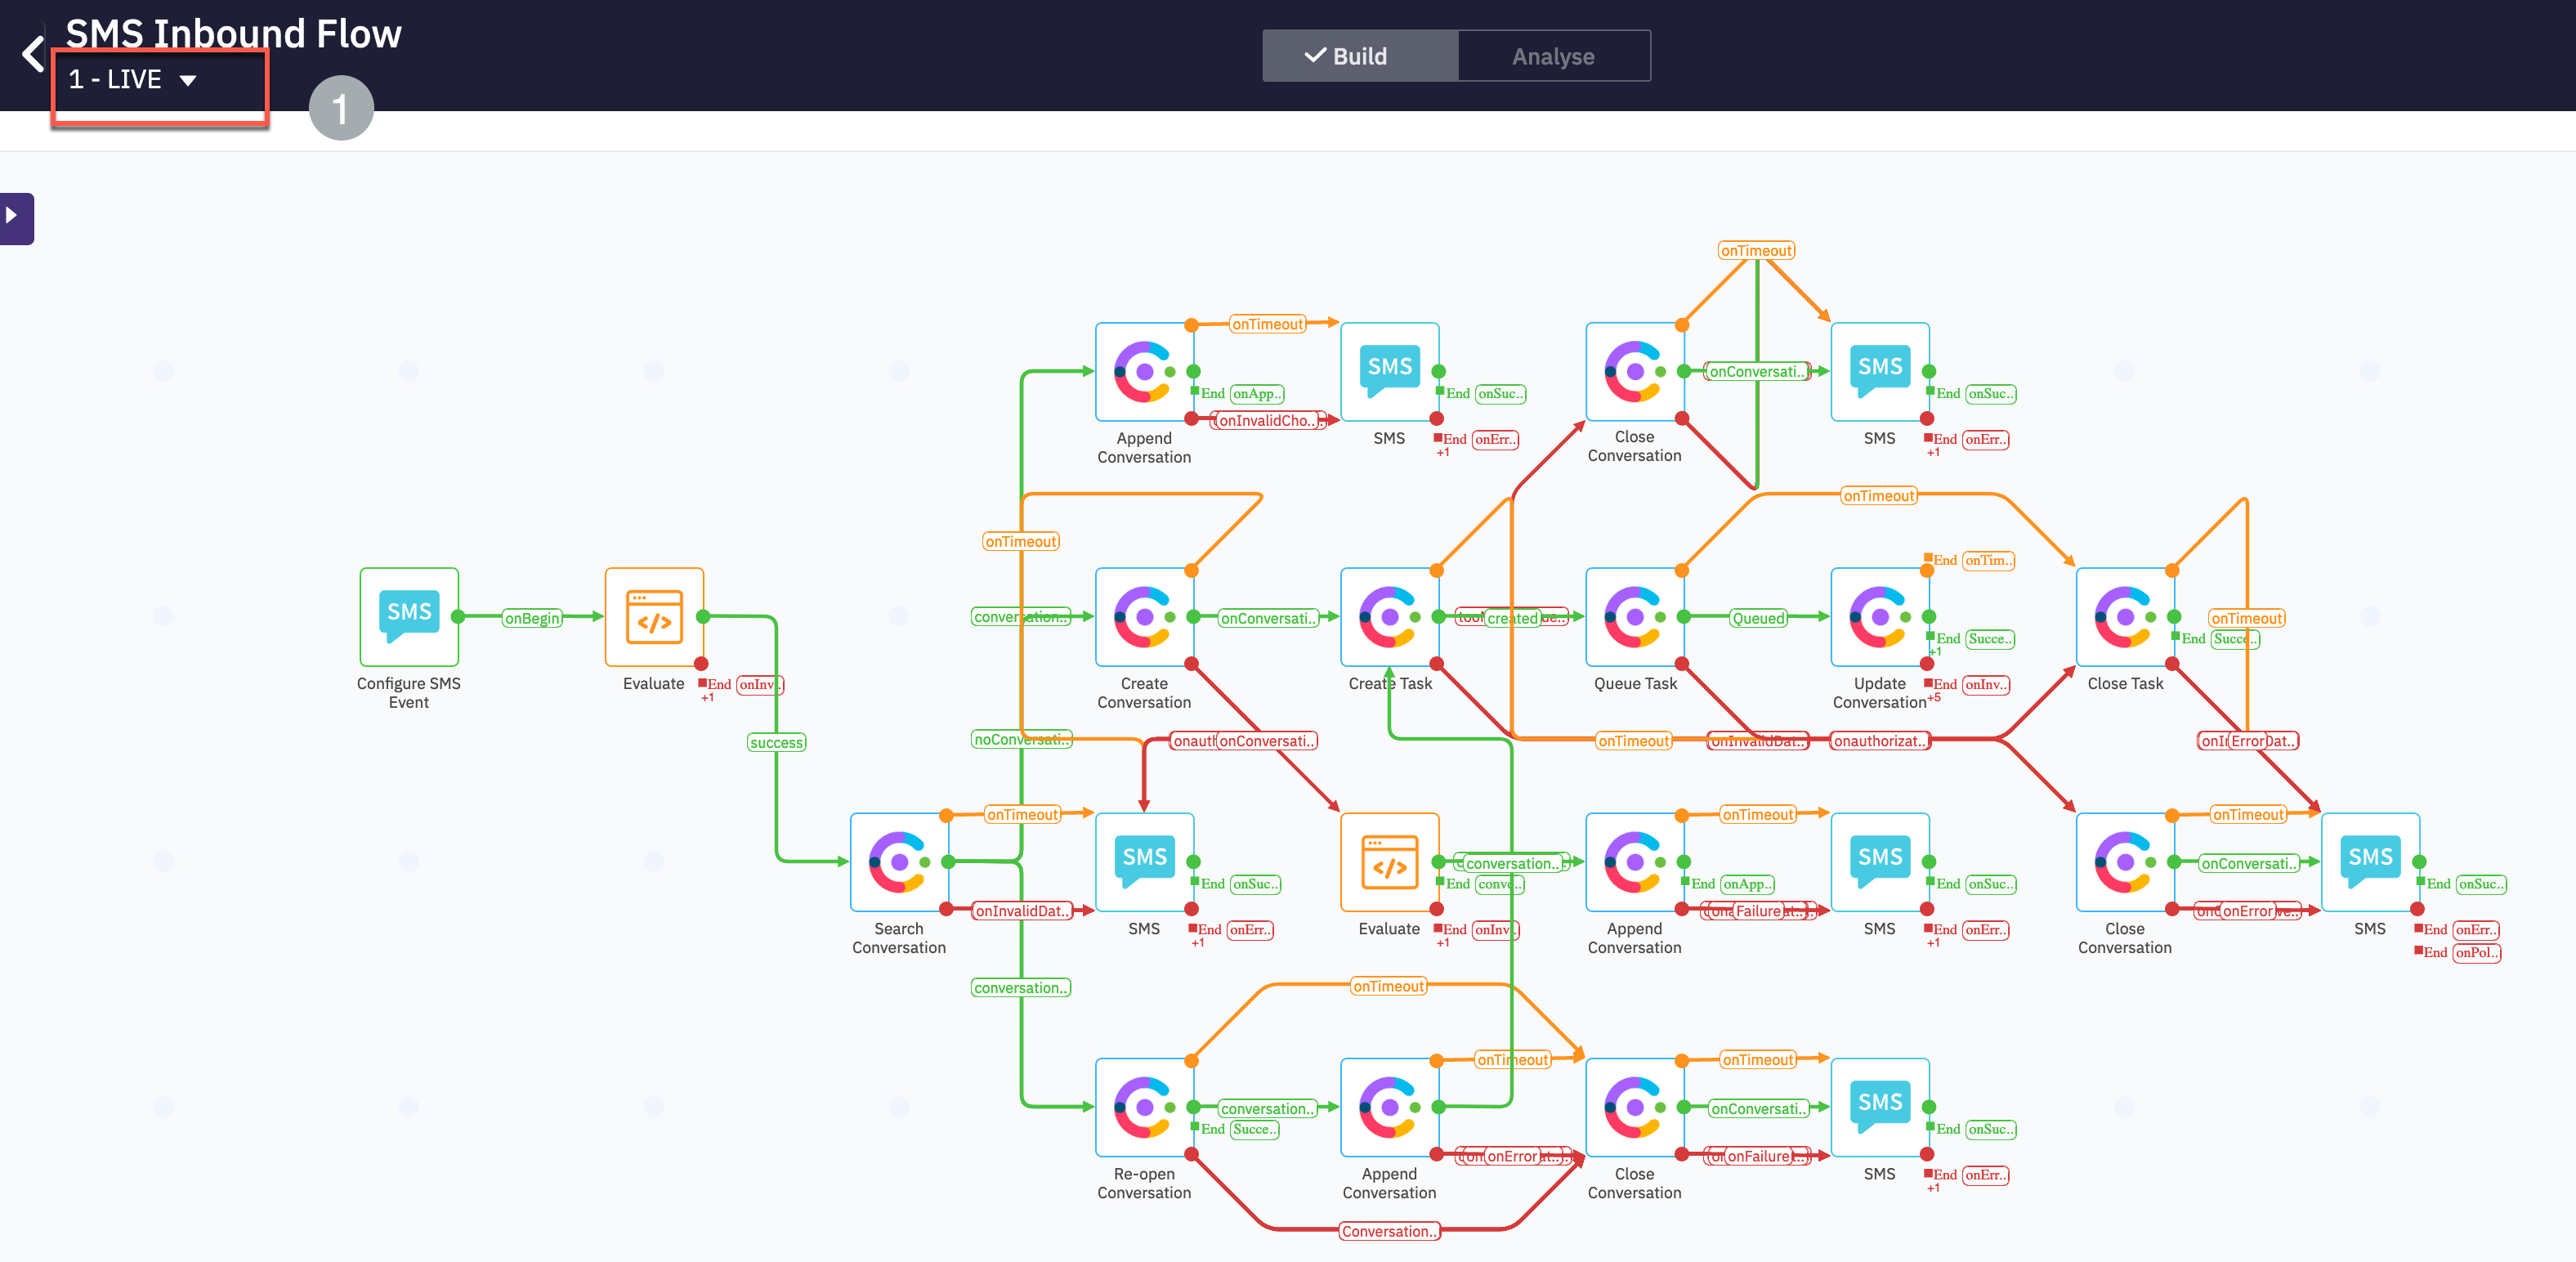
Finally click on Make Live on top right corner and click Make Live.
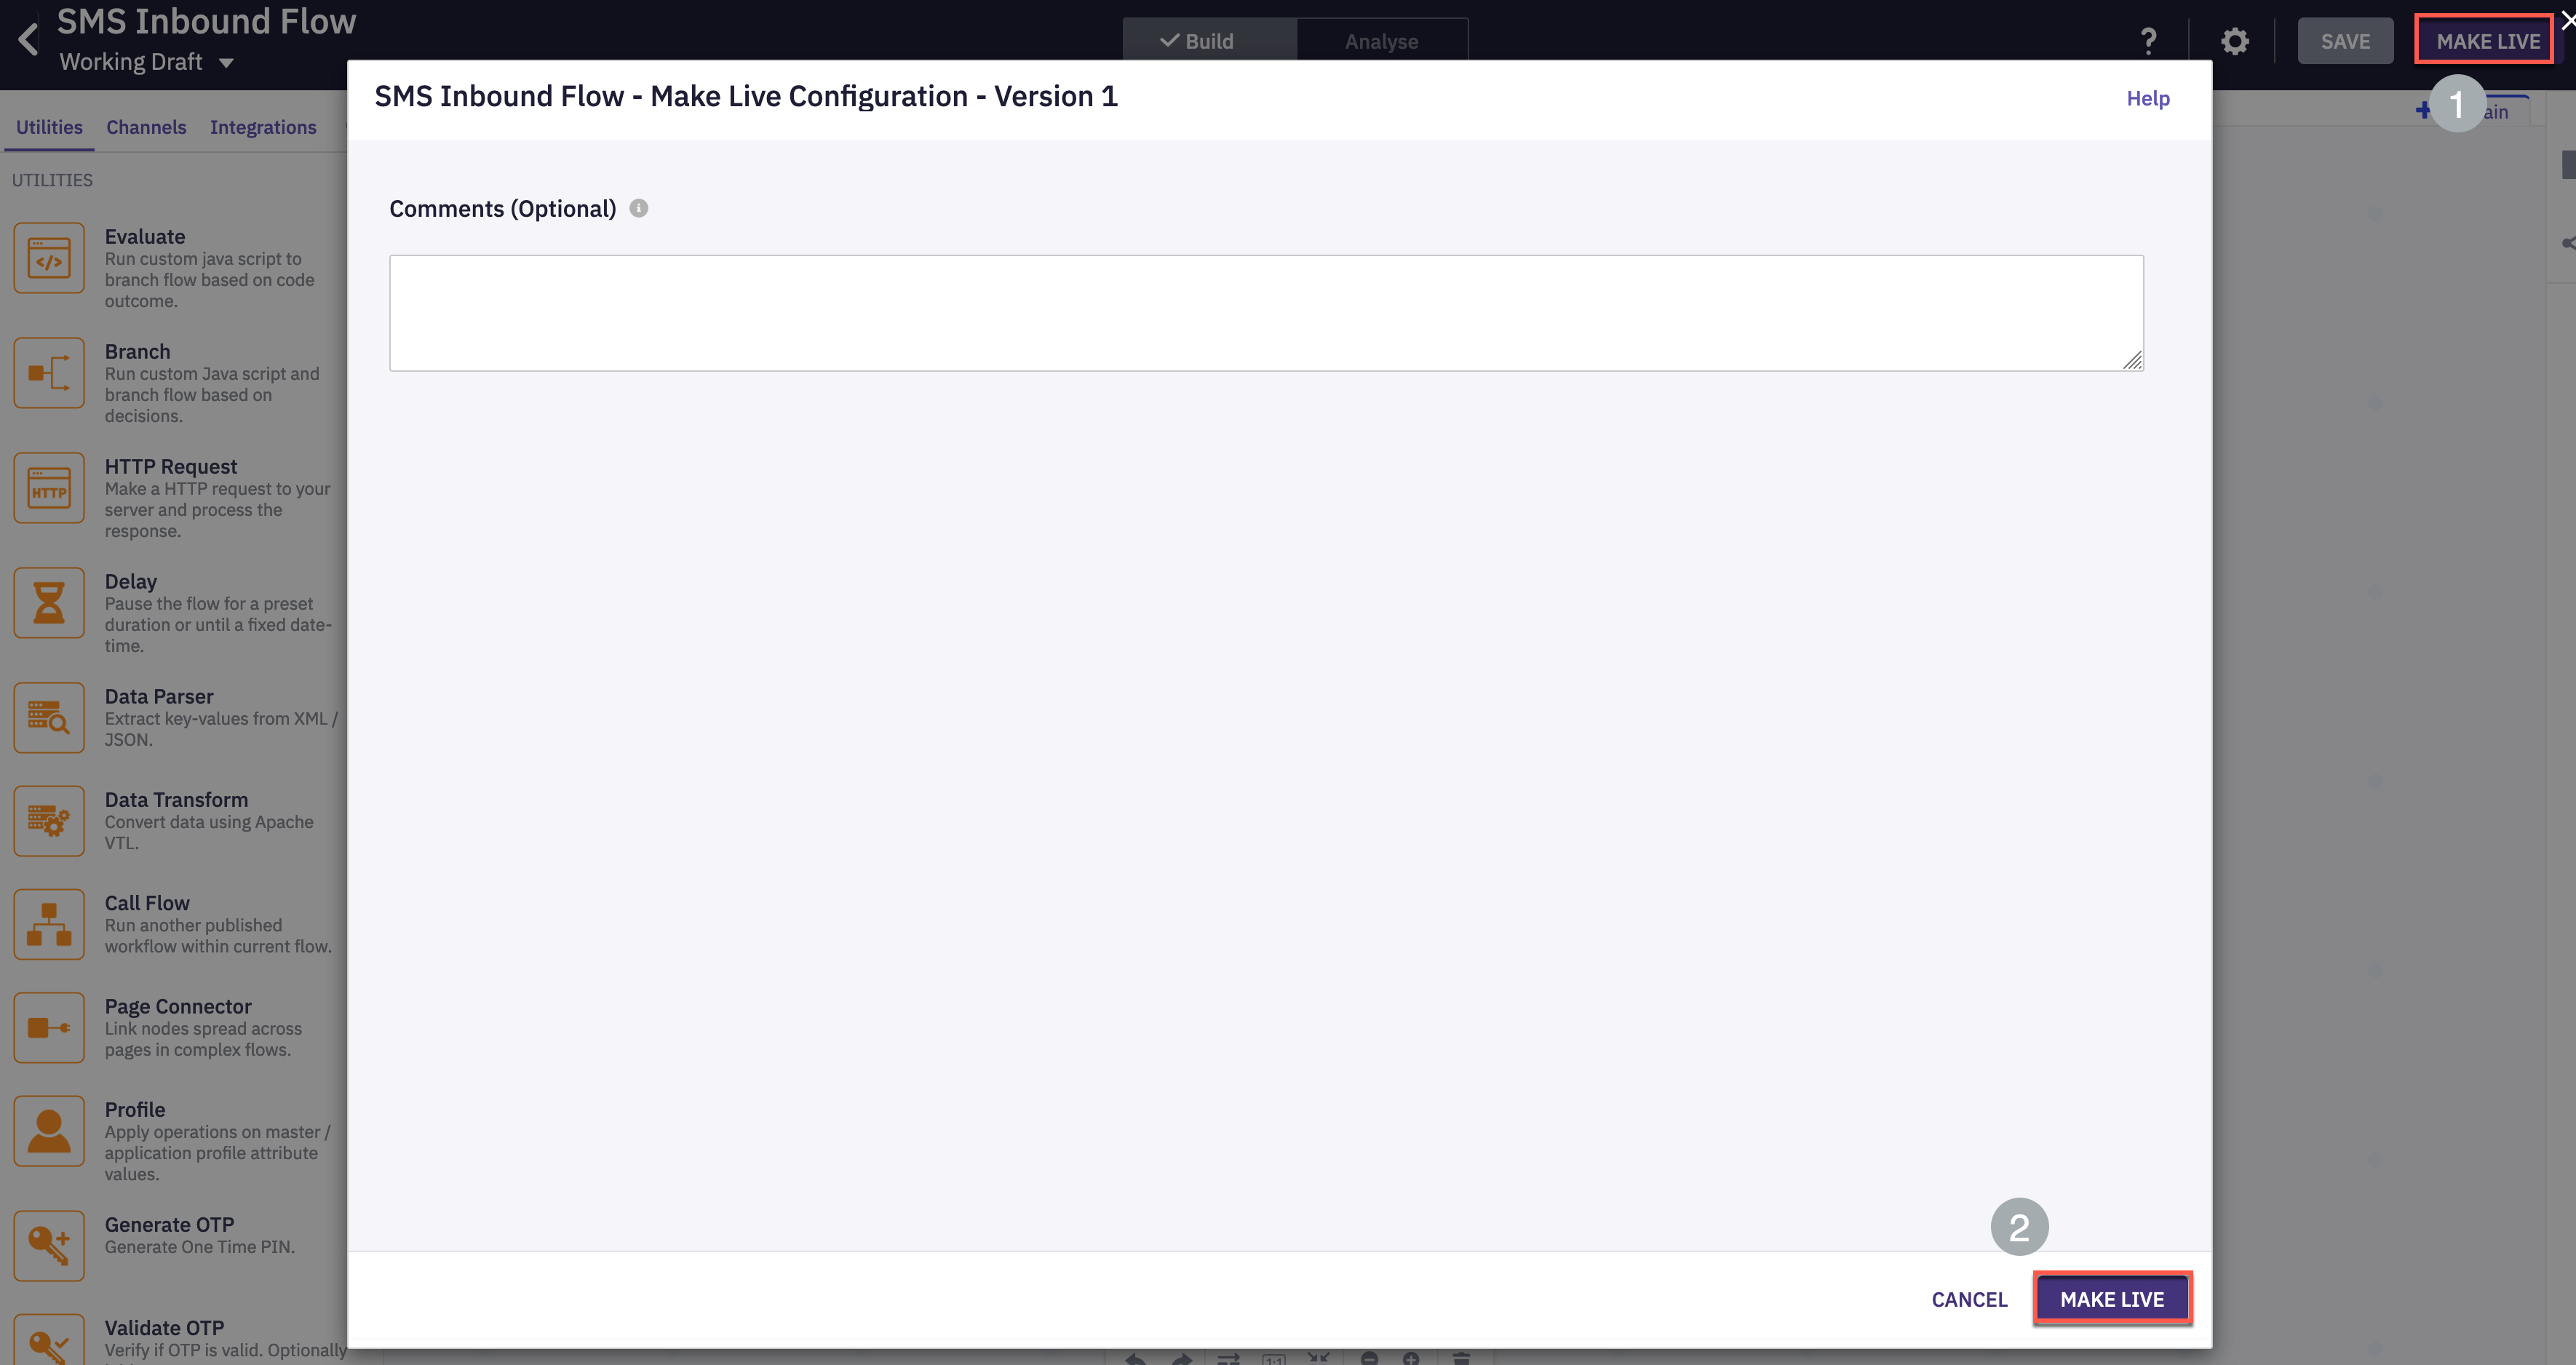
-
Wait for 2 minutes and verify that the flow is published successfully.
Verification - send SMS and accept the request
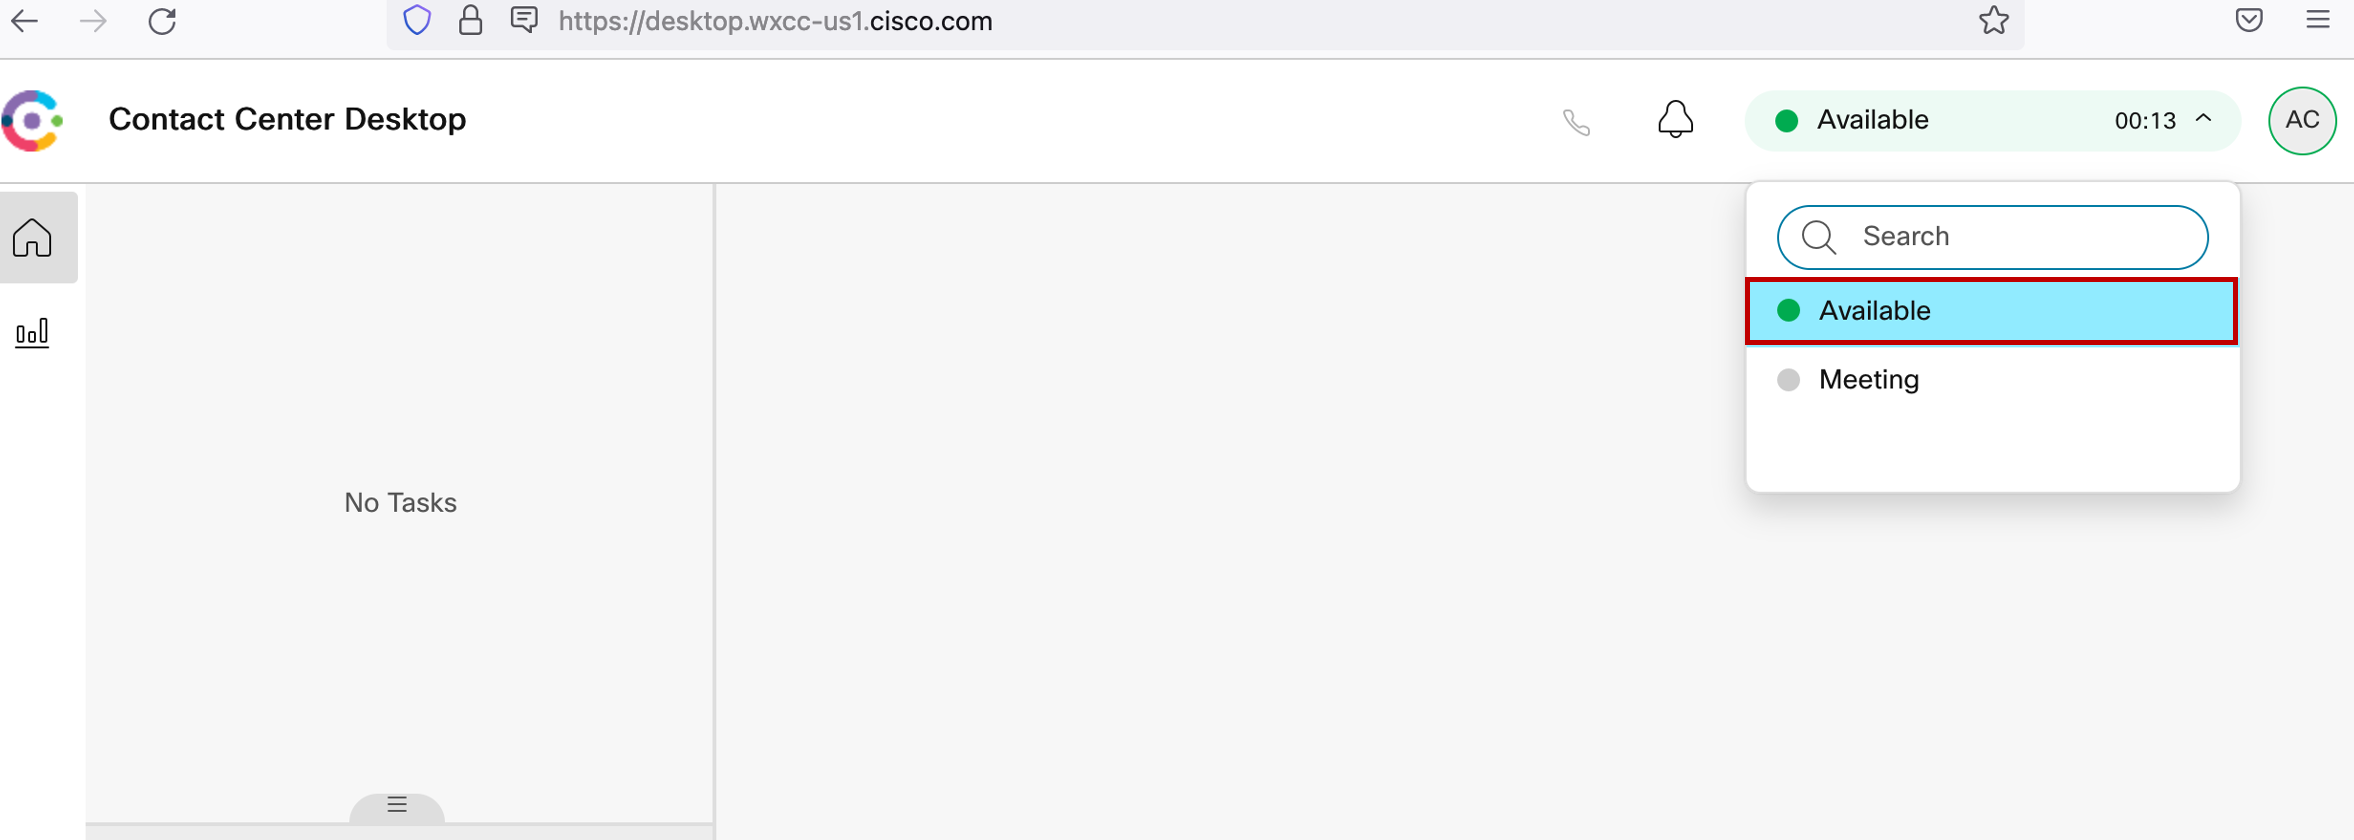
-
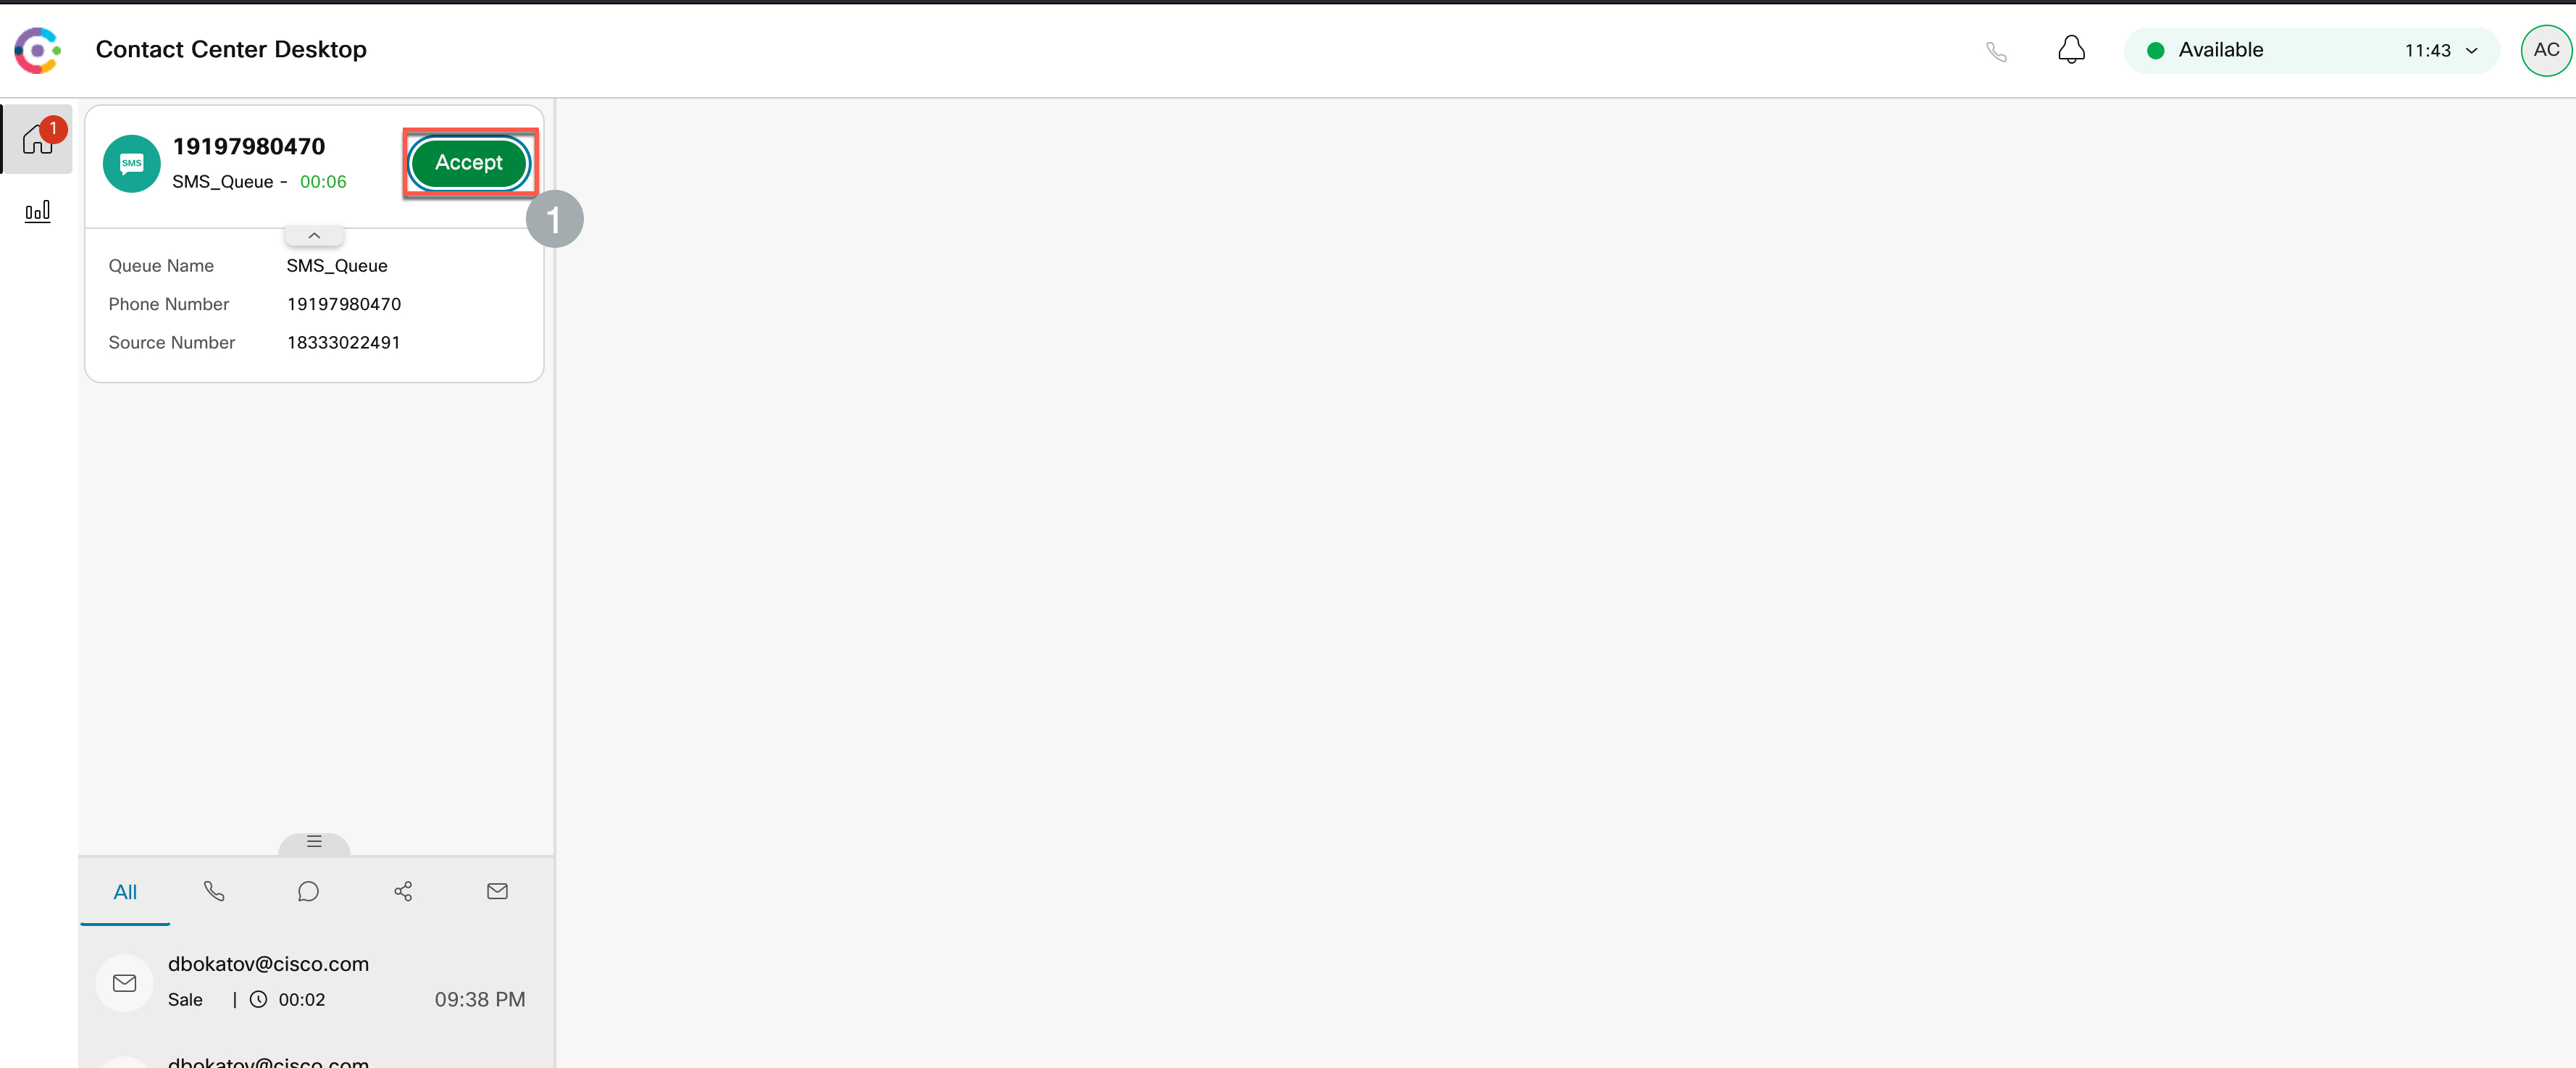
Login to the Agent Desktop and make the agent Available.
-
From your mobile number send a SMS to the number that is assigned to your Webex Connect tenant and the one used in the flow configuration earlier.
-
The SMS will be offered to the agent. Click “Accept” to handle the SMS.
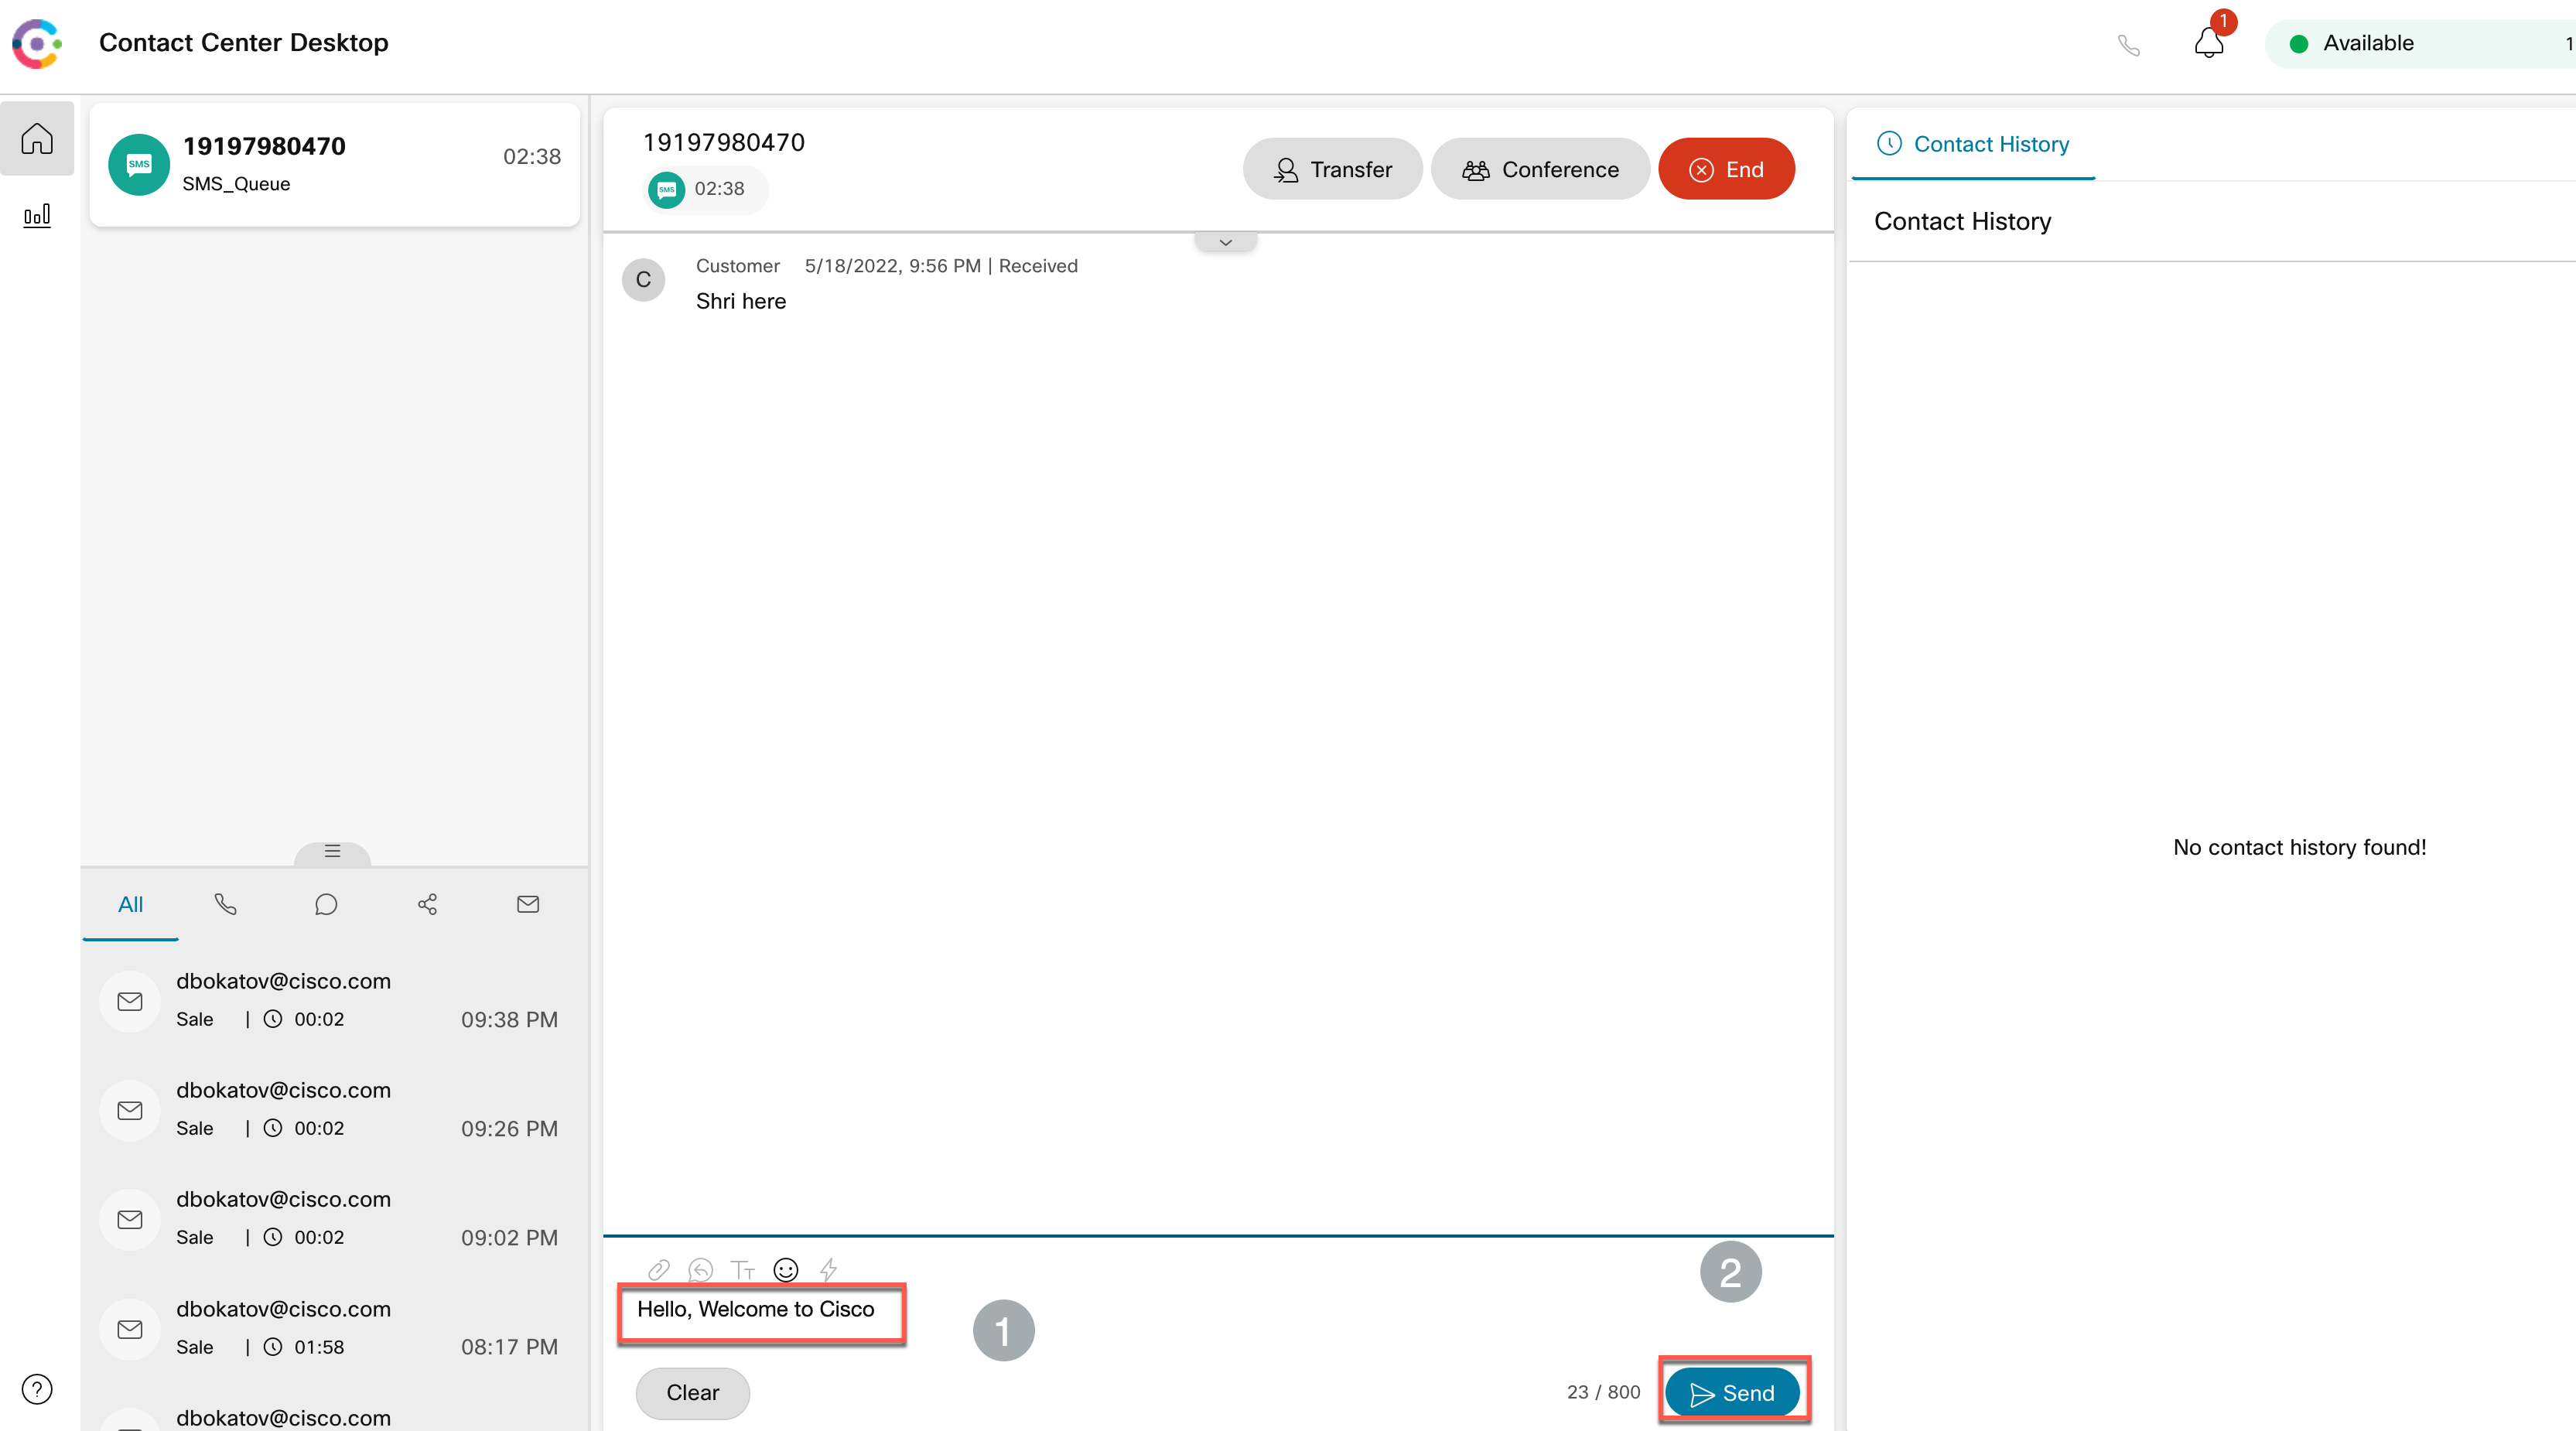
-
Type a response and hit send button.
-
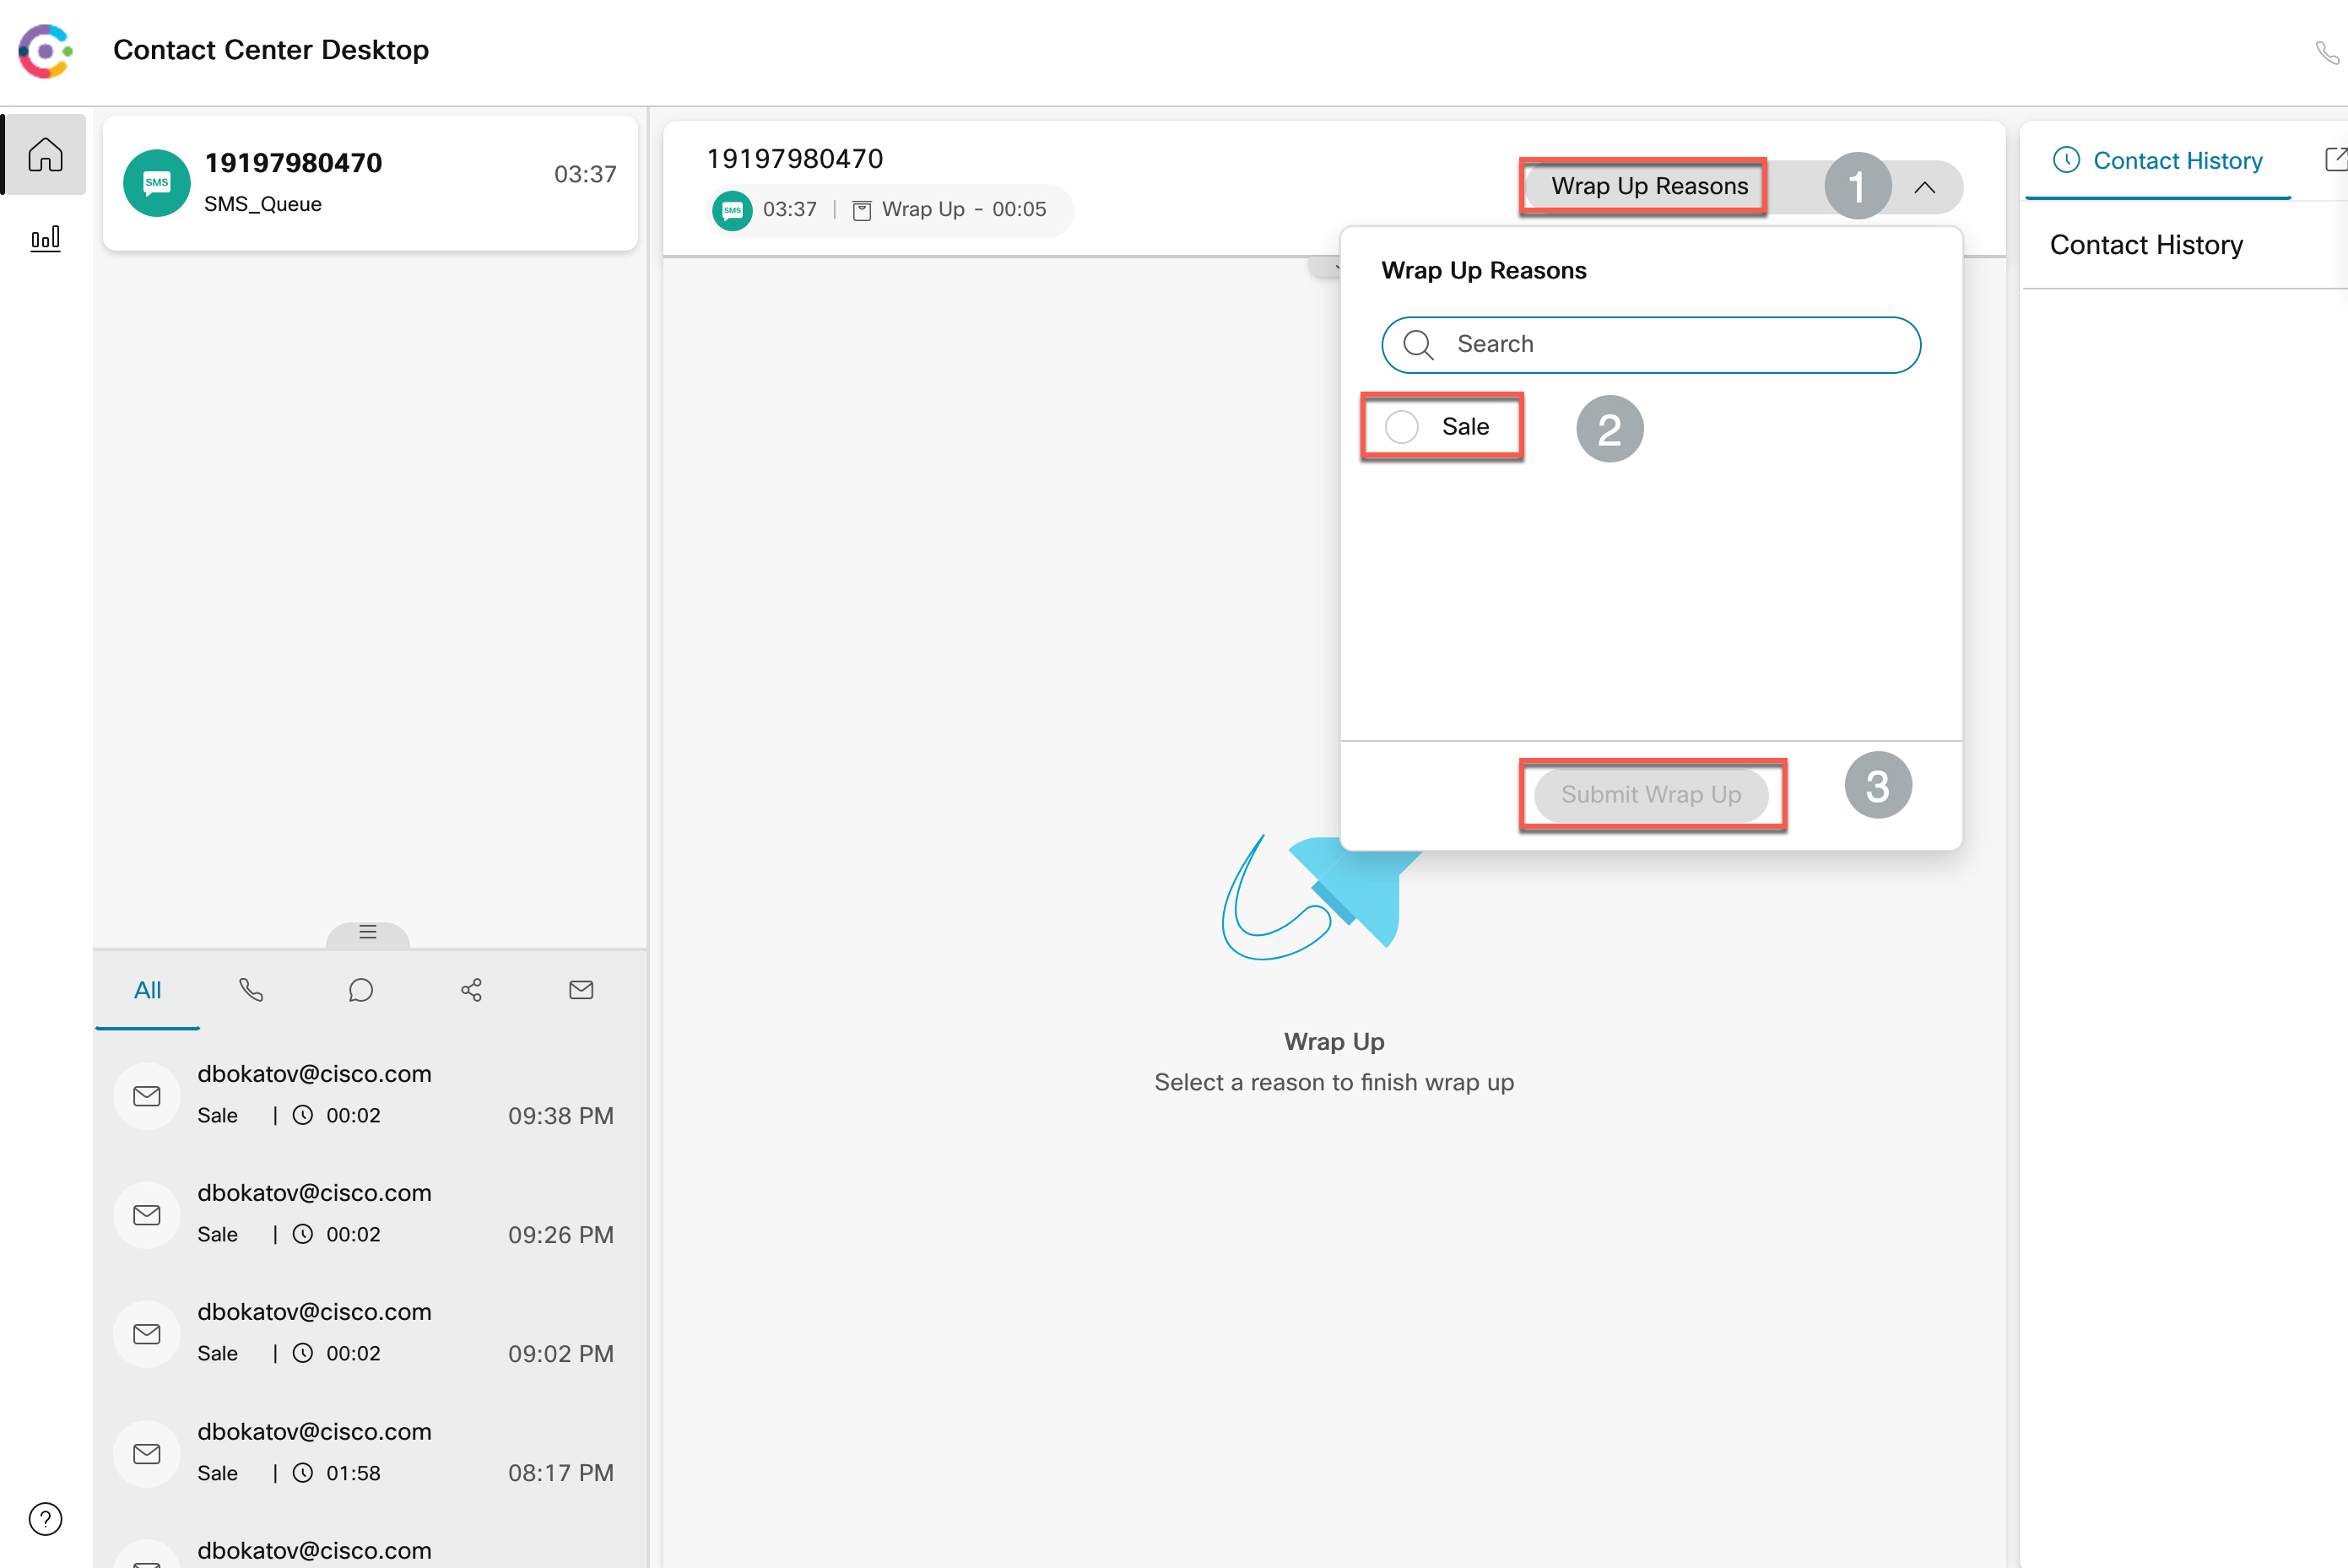
End the contact
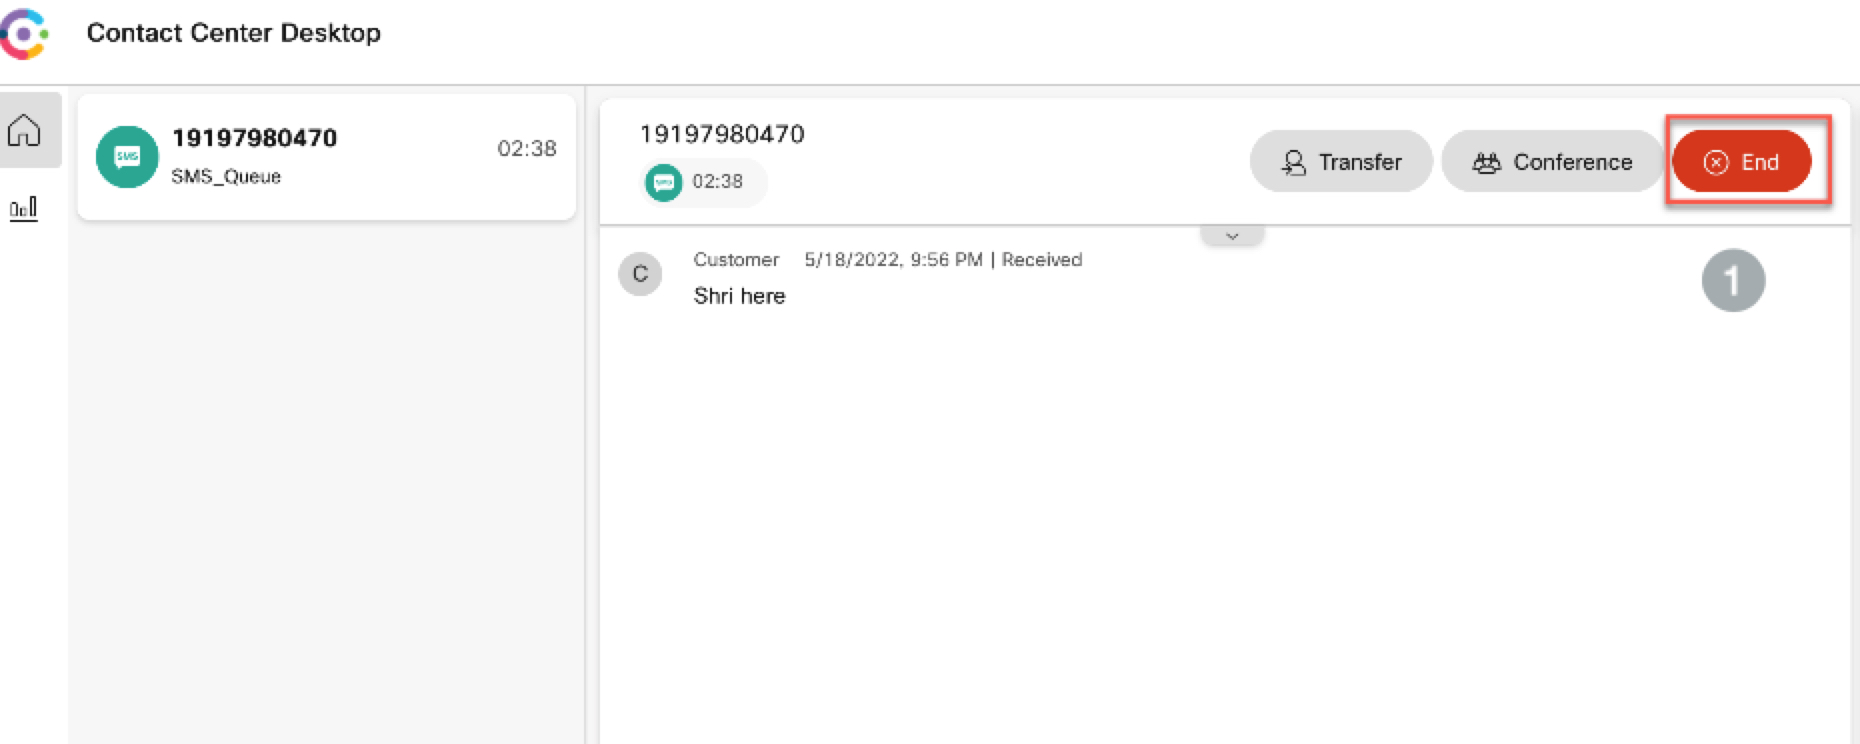
-
Add wrap up and close the task.