Lab 8: Agent Productivity
Table of Contents
Introduction
Lab Objective
In this Lab, we will go through the tasks that are required to configure a basic OTP (One Time Passcode) verification scenario in Webex Connect. The OTP generated will be sent to customers email and also to agents Webex teams, that is accessible in the agent desktop.
Pre-requisite
- You recived an admin credentials to configure in Managment Portal and Webex Connect.
- You have successfully completed the previous Lab Preconfiguration
Lab Section
Step 1. Create Inbound Webhook
-
Login to your respective Webex Connect UI using the provided URL https://cl1podX.imiconnect.io/ (where X is your POD number).
-
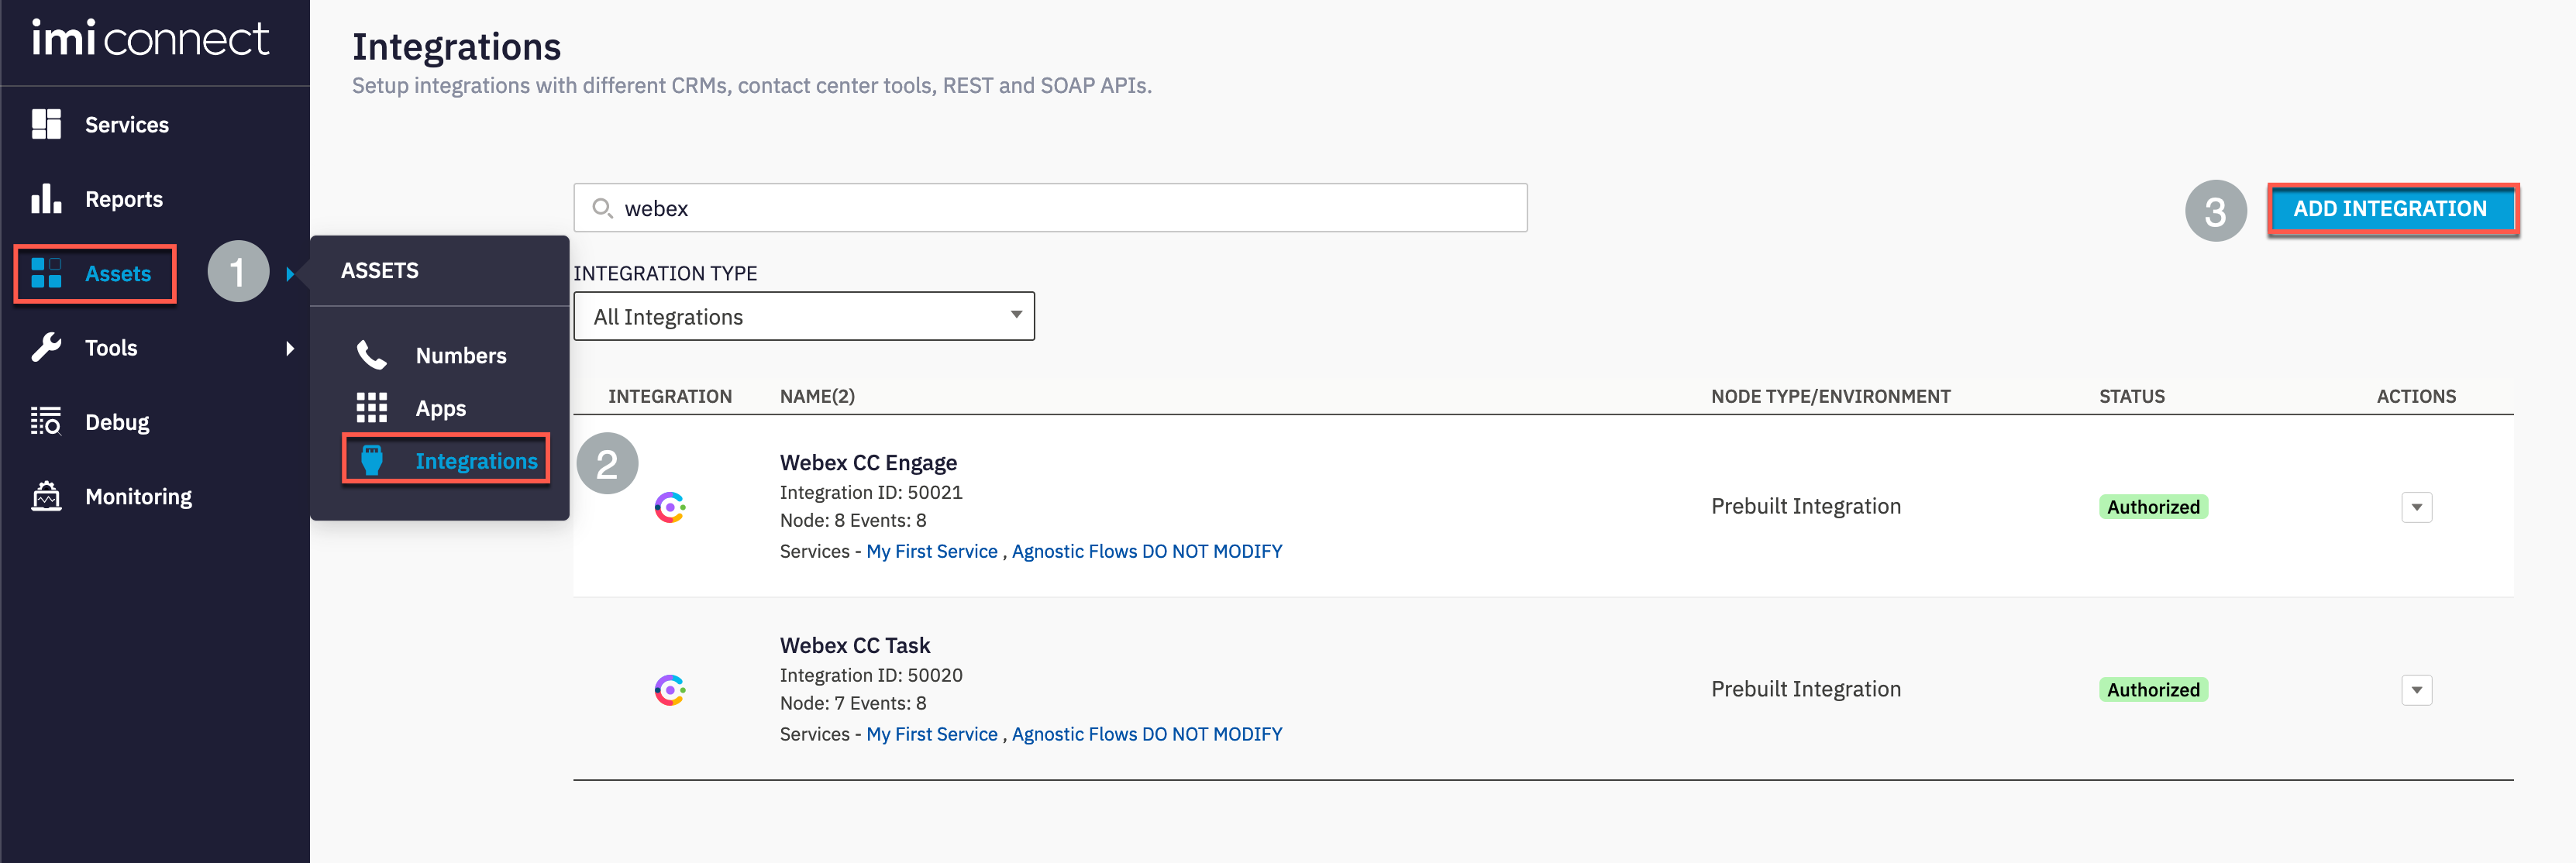
Navigate to Assets > Integrations > Add Integration
-
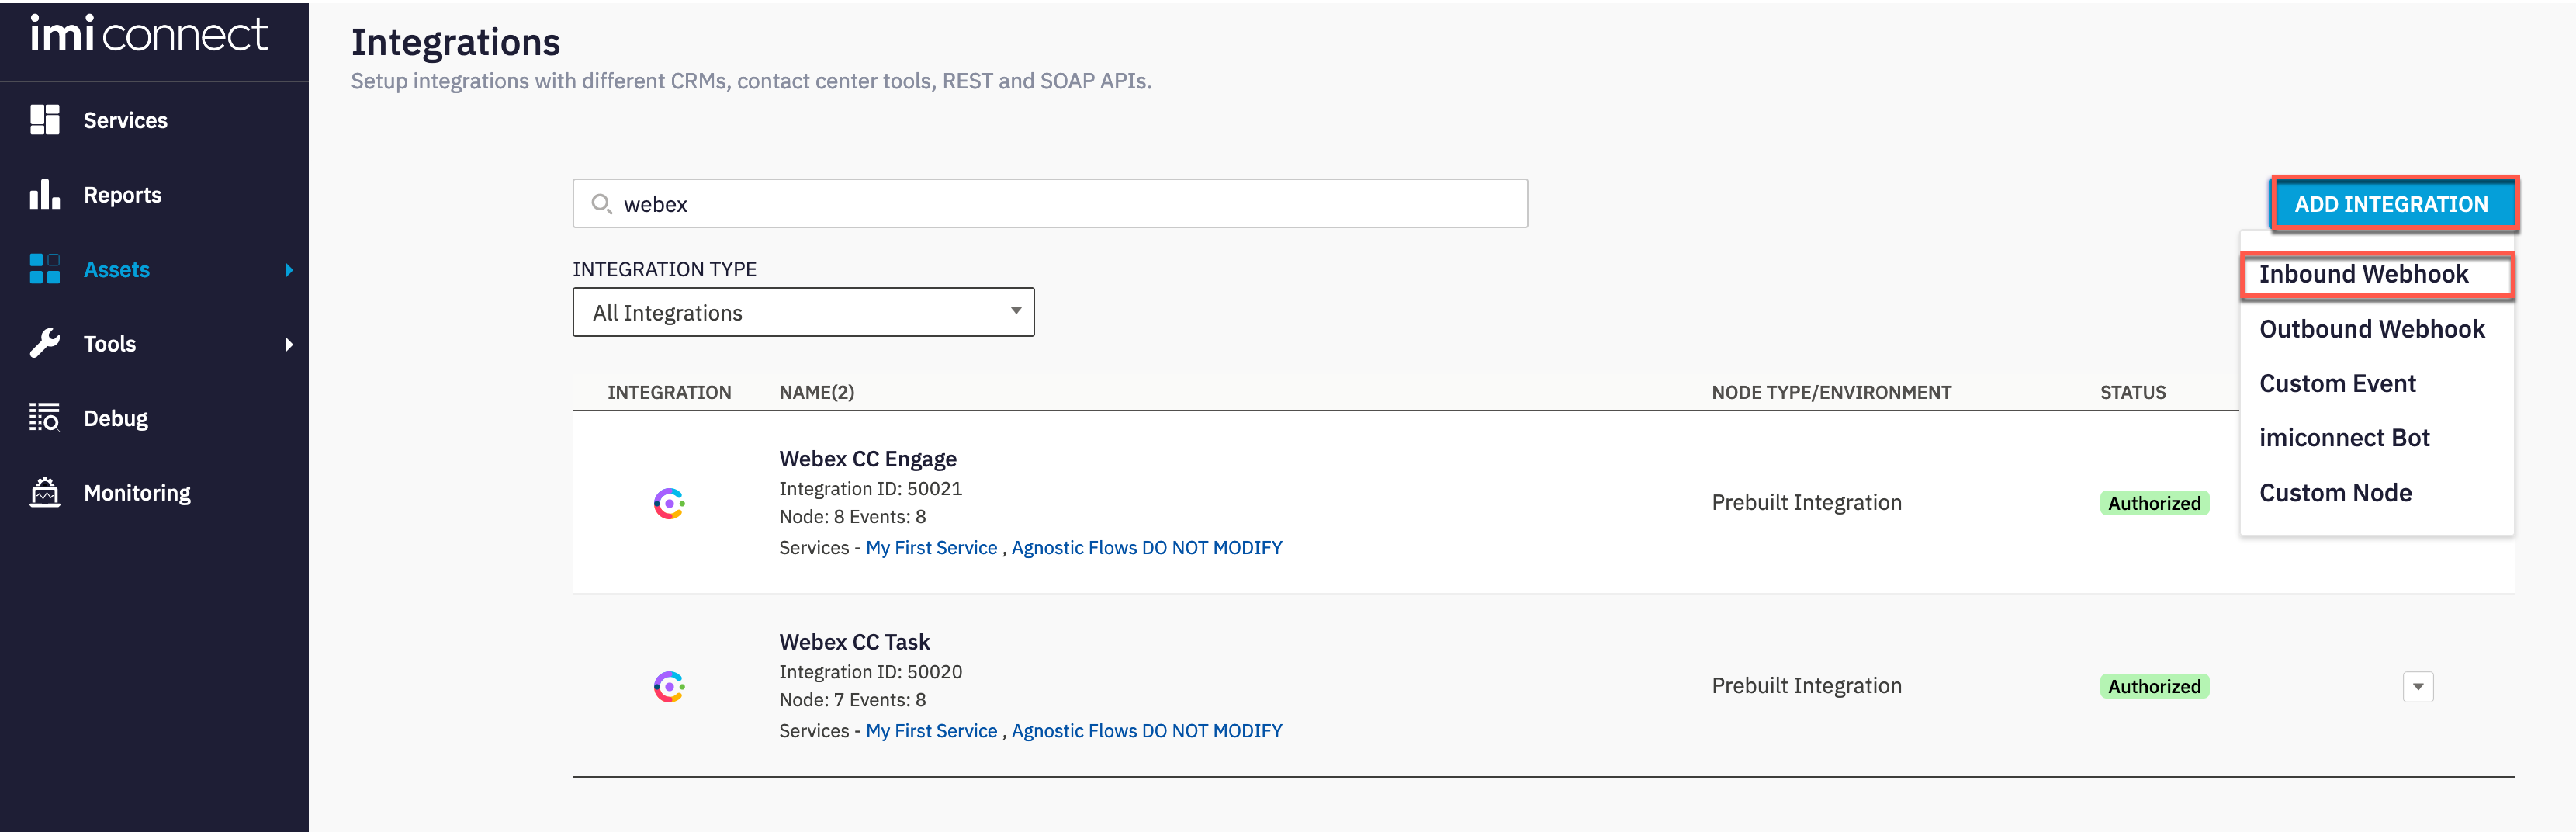
Click on Add Integration and select Inbound Webhook
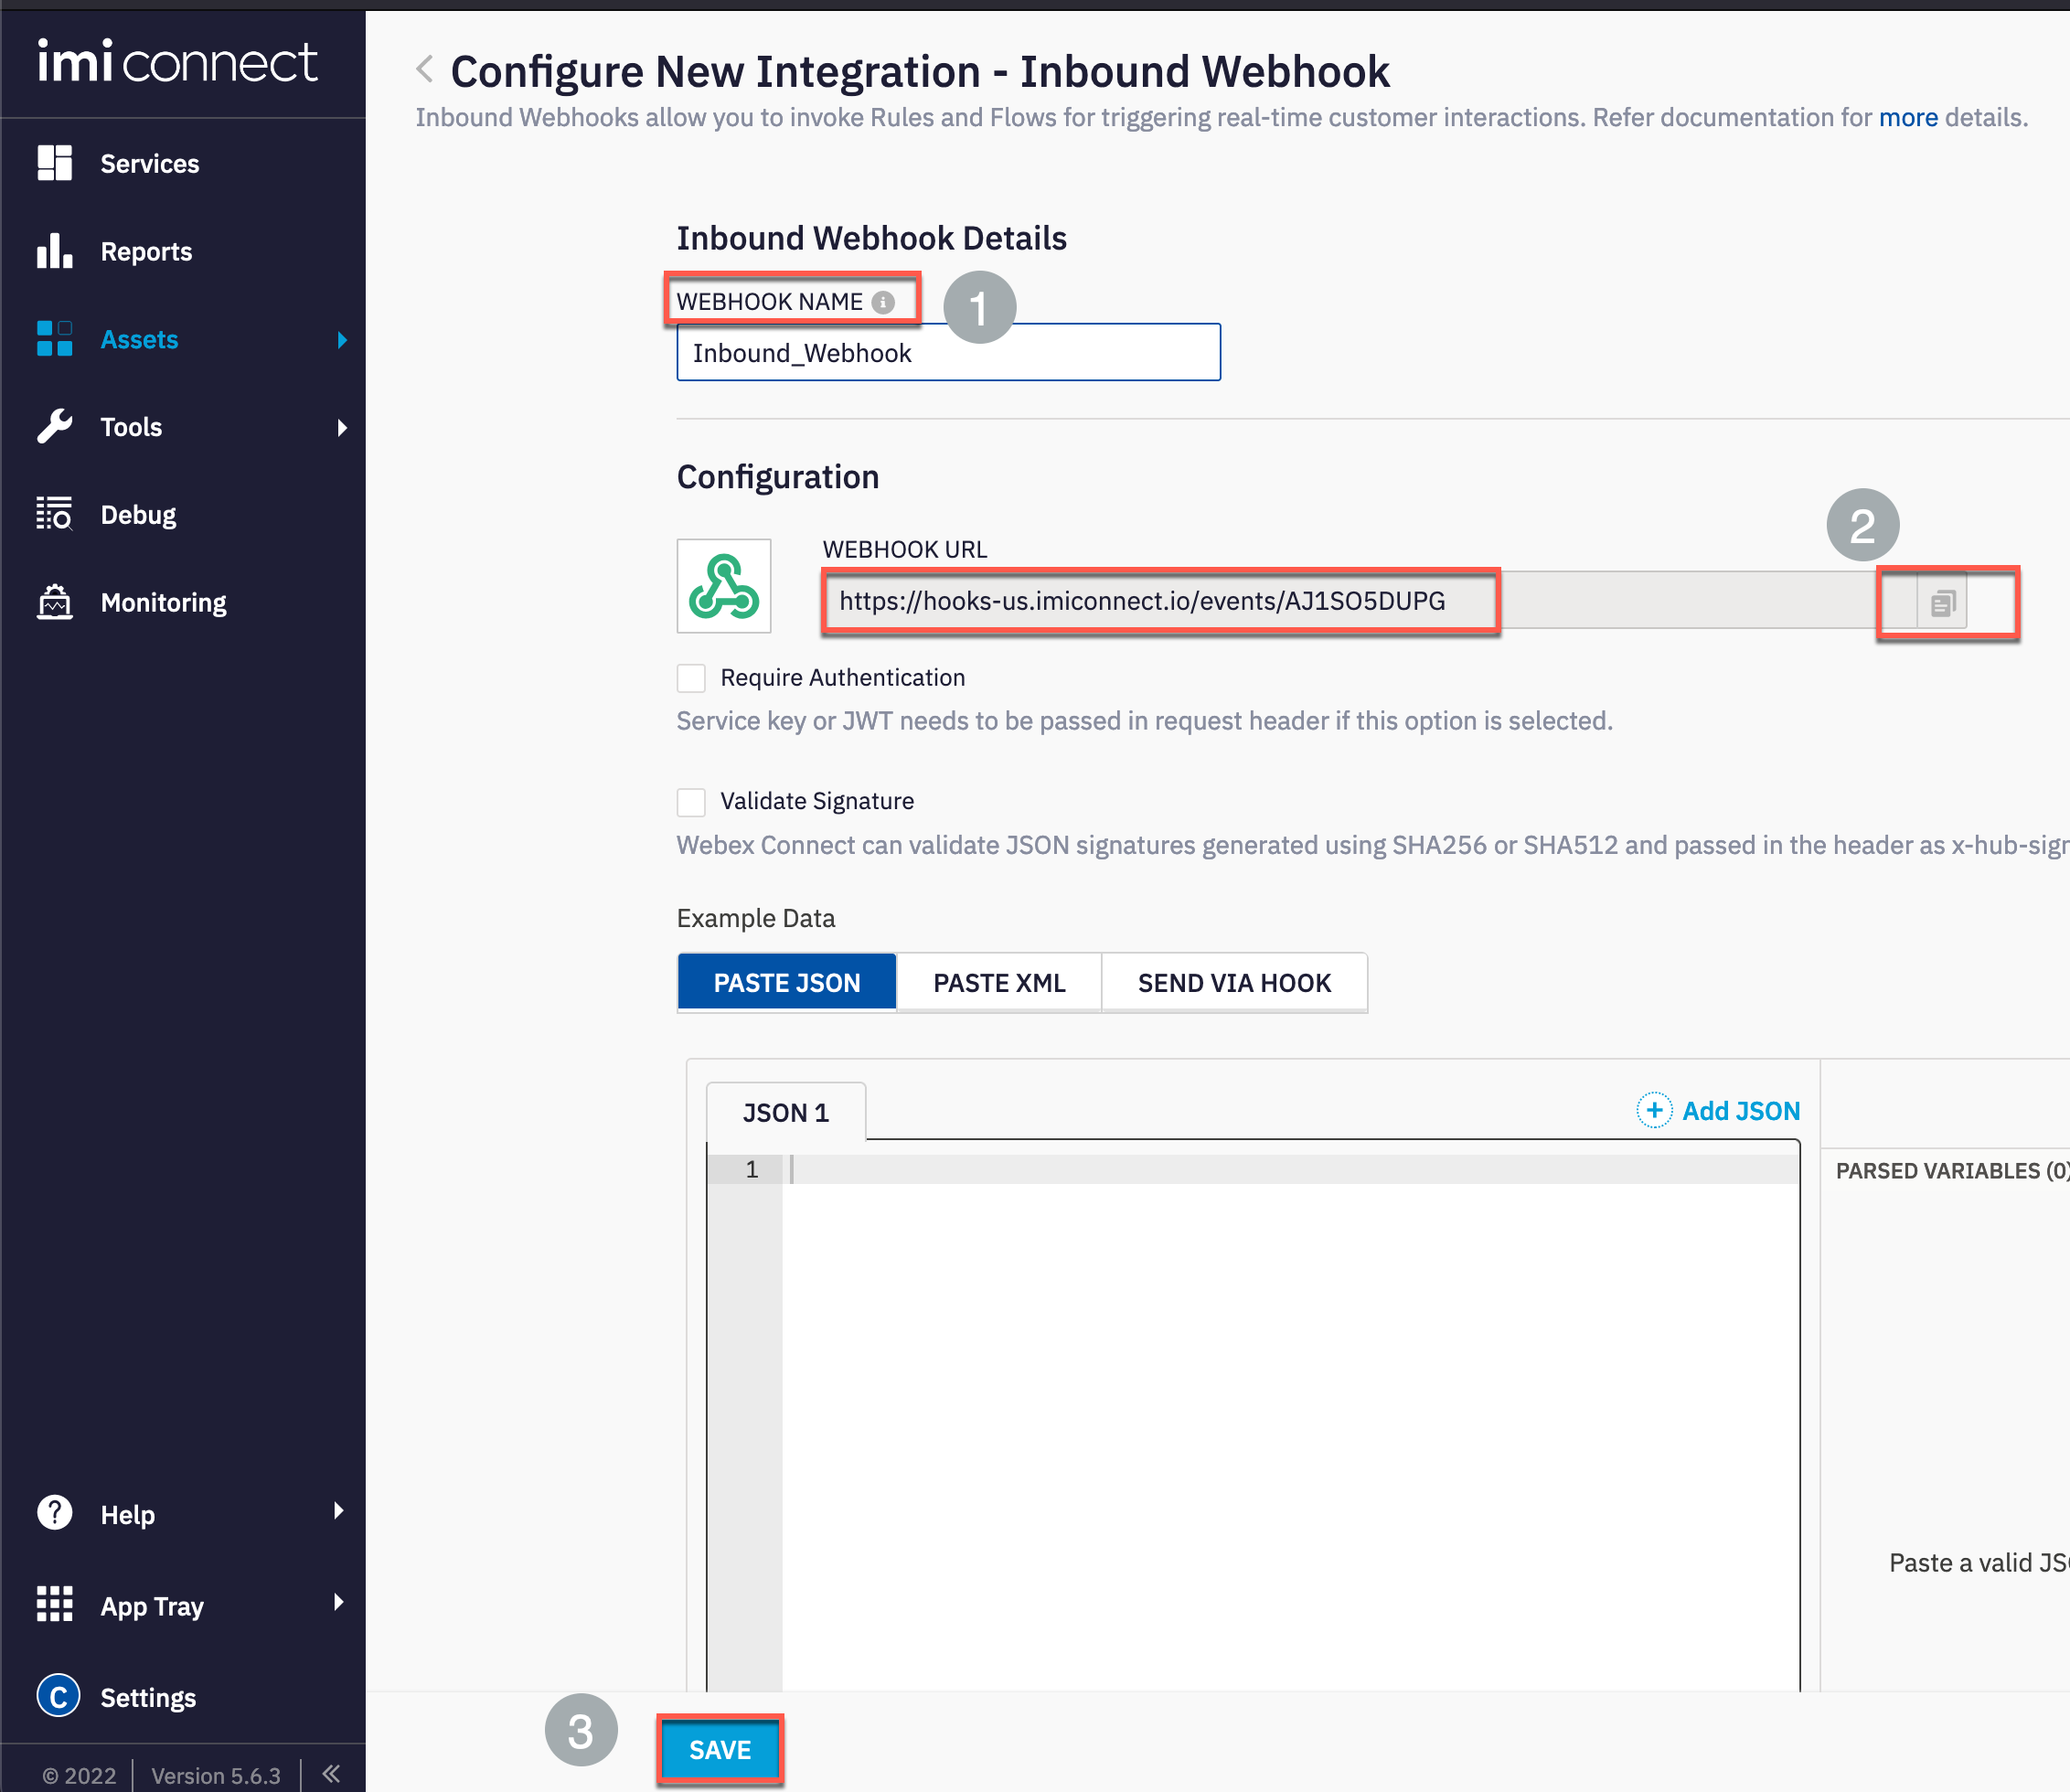
- Input a desired name in the Webhook Name field. Copy the Webhook URL for later use. Click Save
Step 2. Create an Event
-
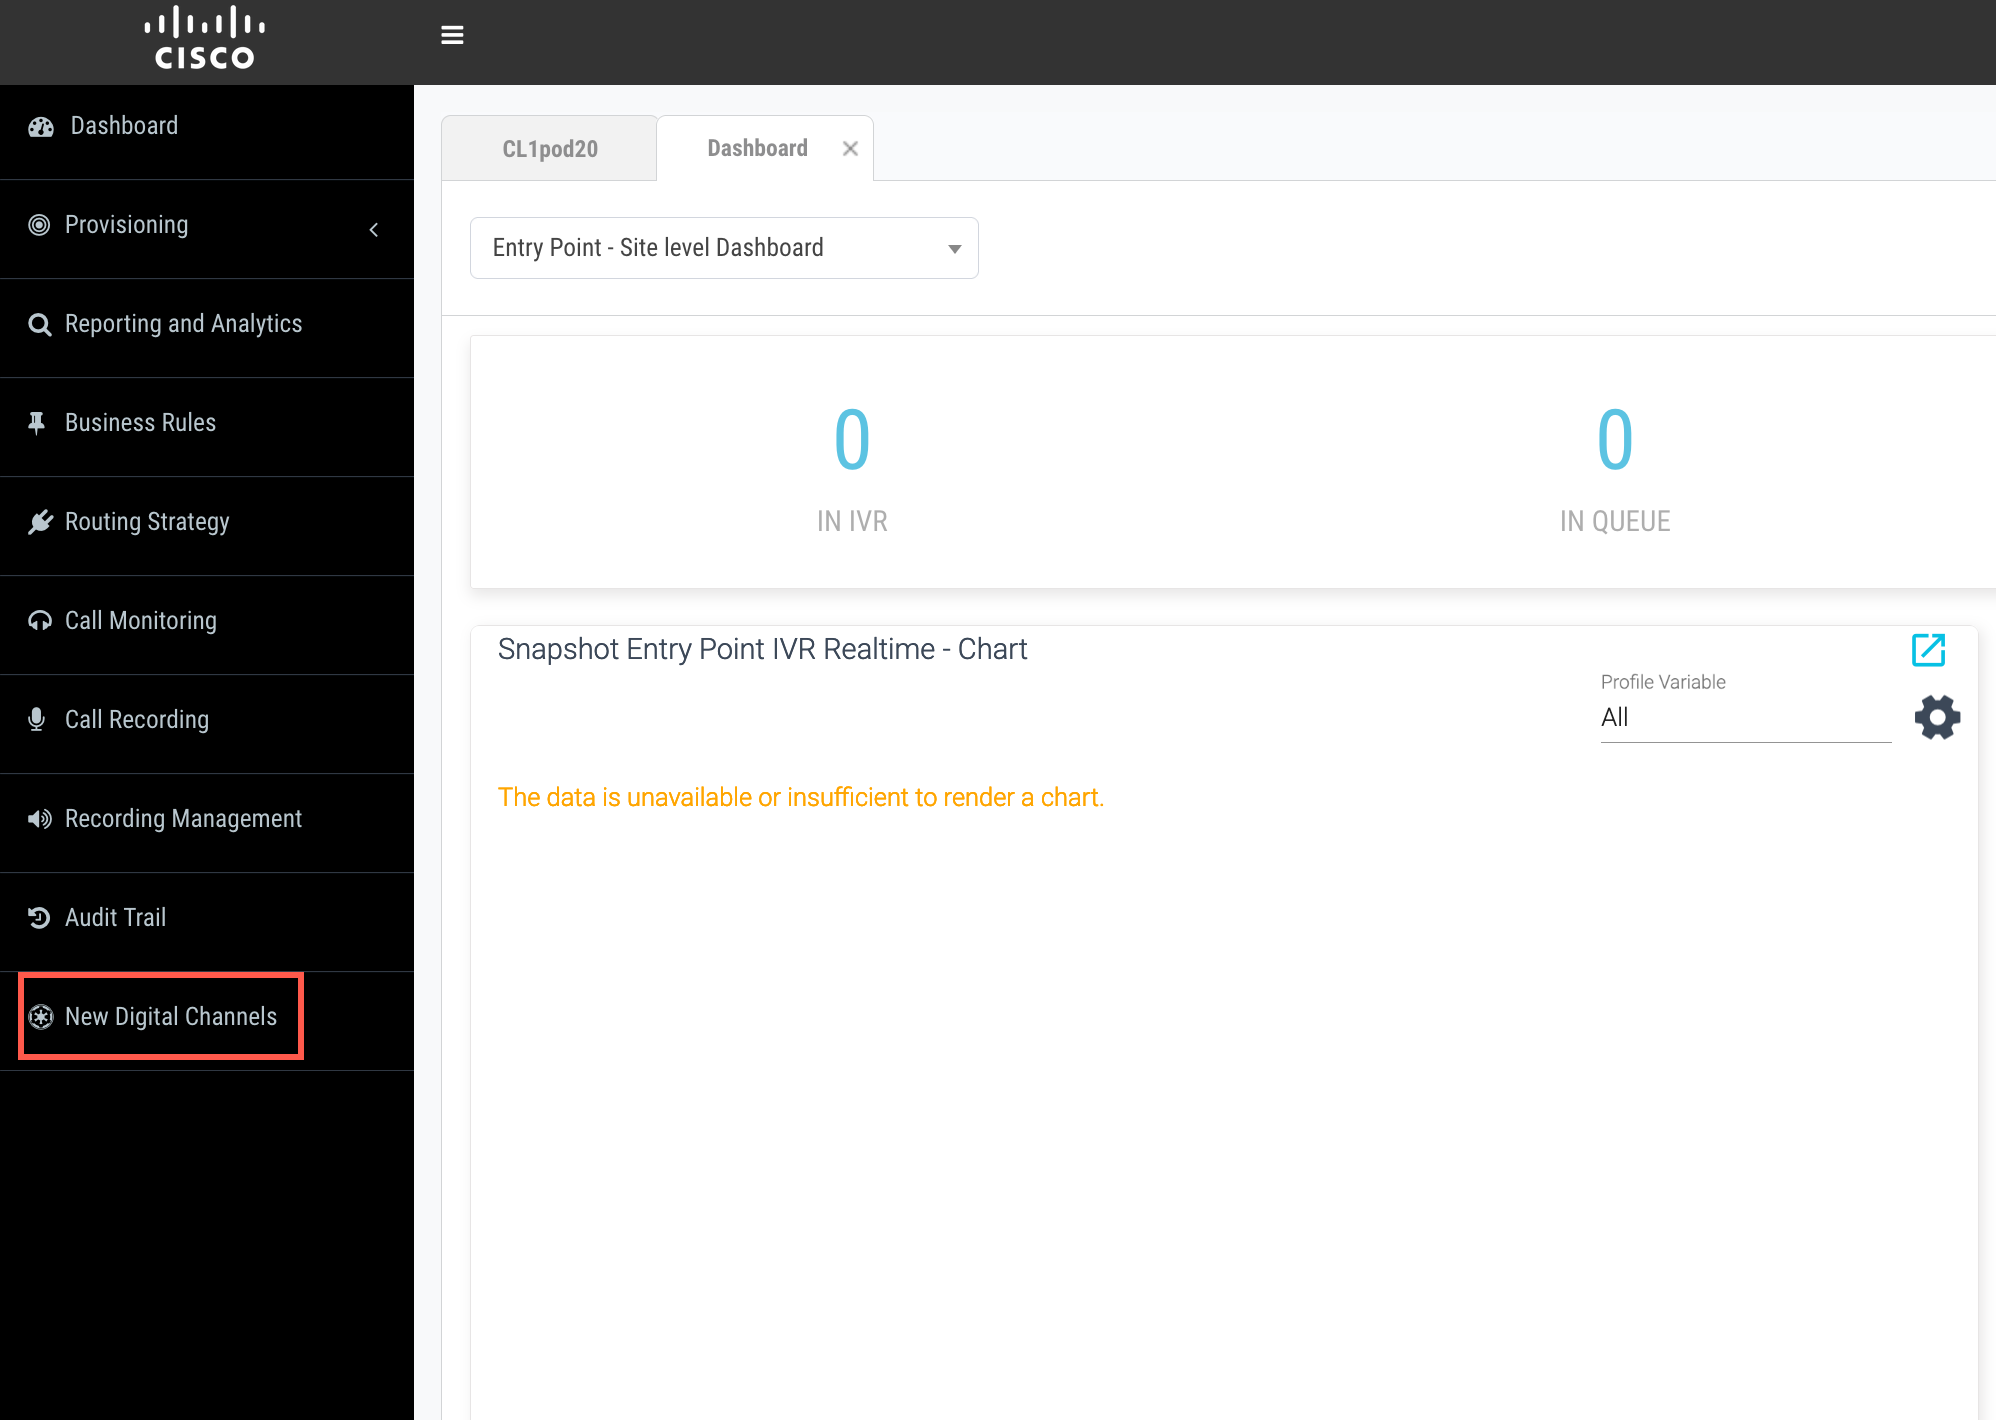
Login to your Webex contact centre portal with your administrator credentials: https://portal.wxcc-us1.cisco.com/portal and navigate to New Digital Channels
-
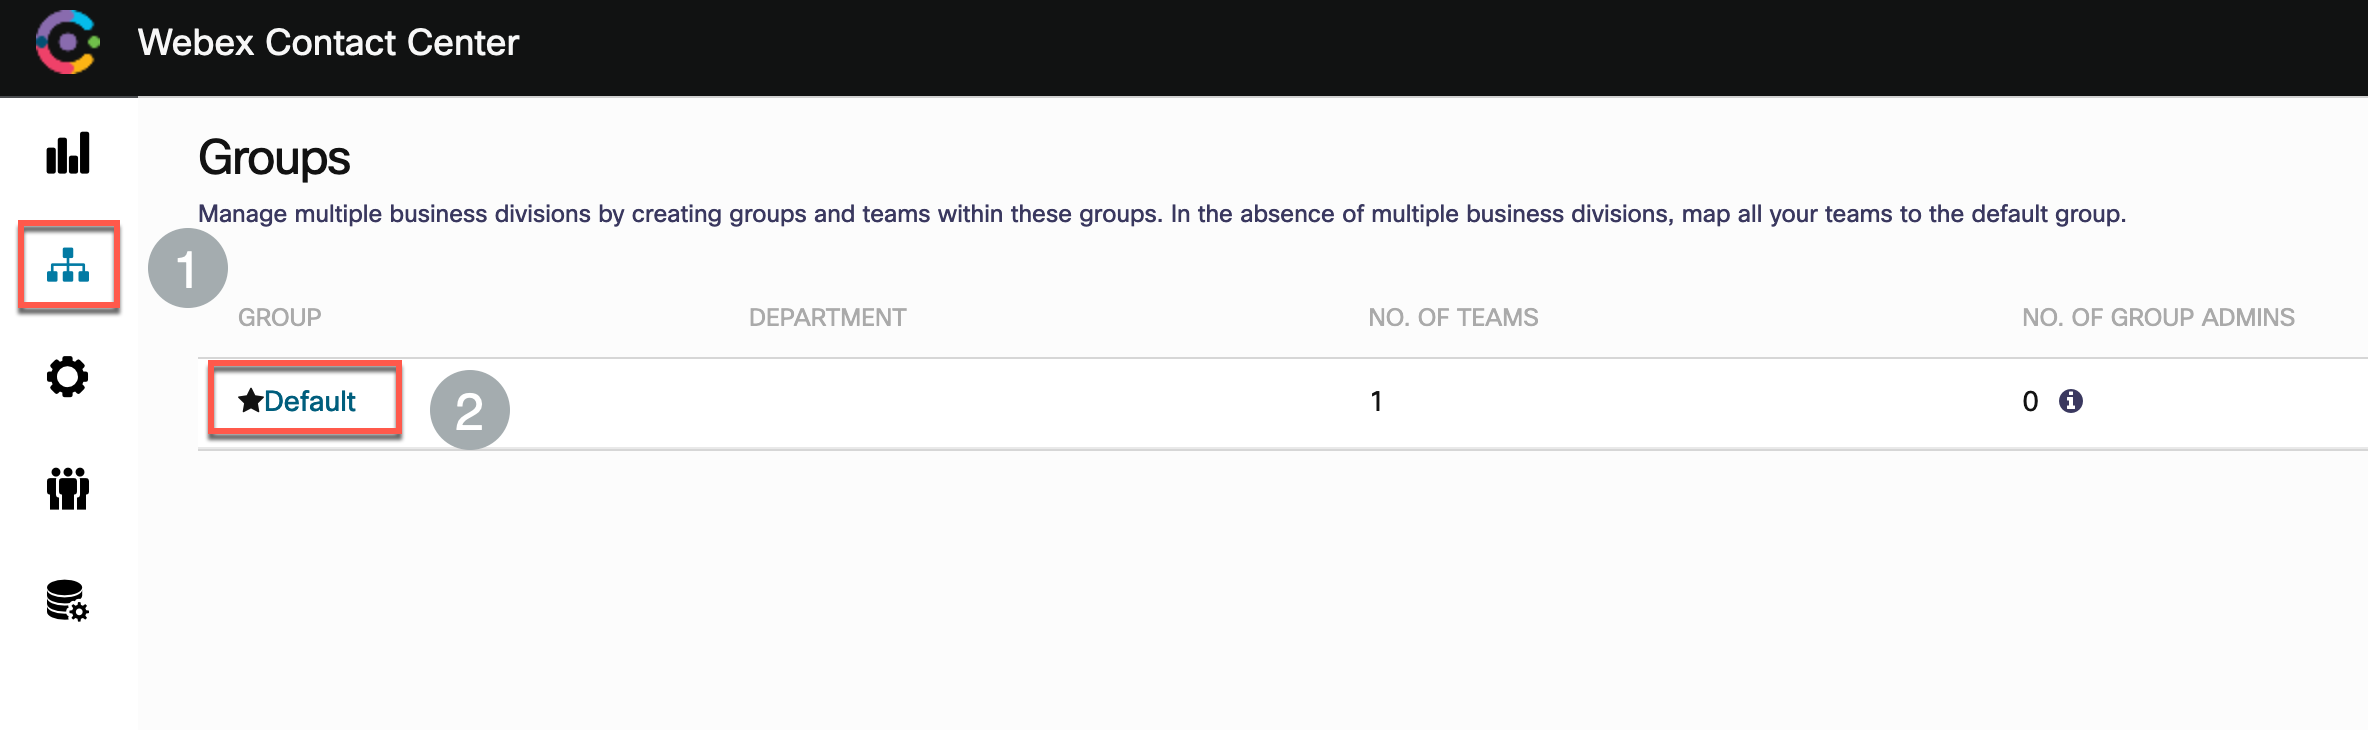
Navigate to Groups > Click ‘Default’
-
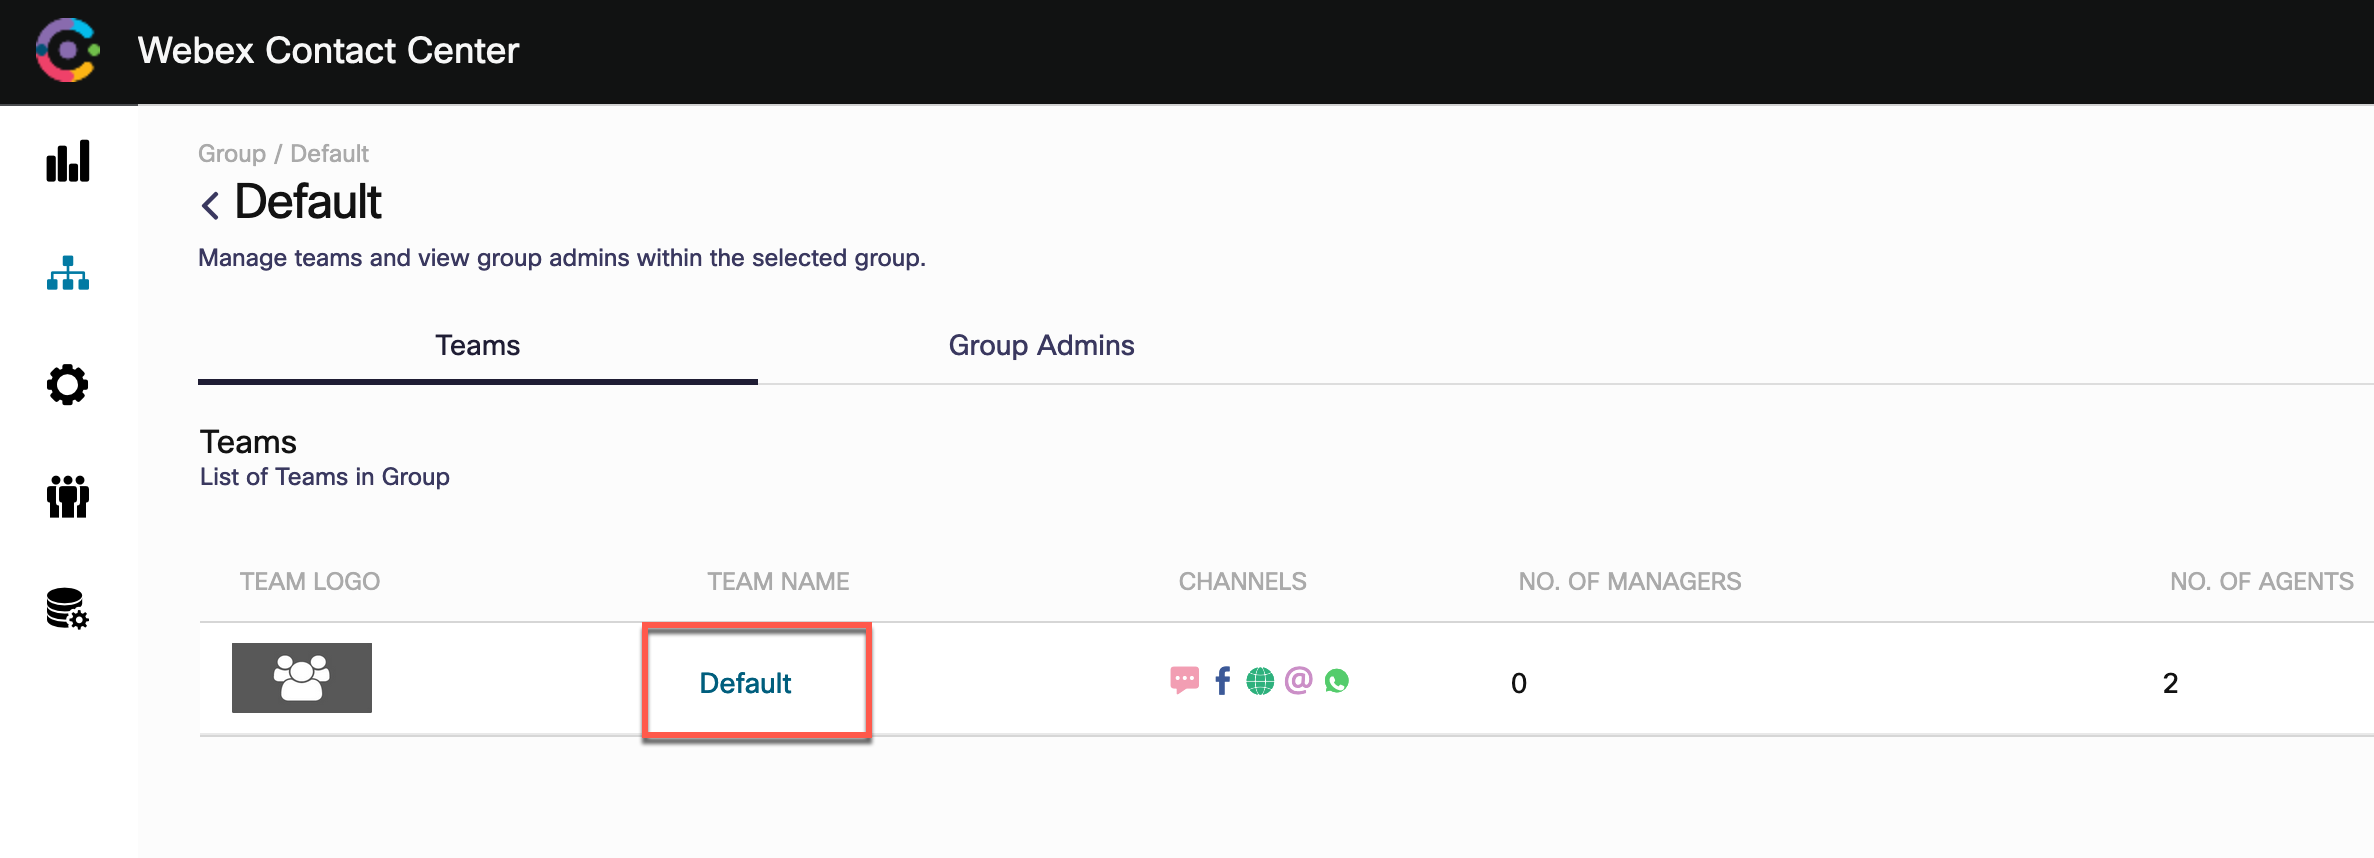
Click ‘Default’ Team
-
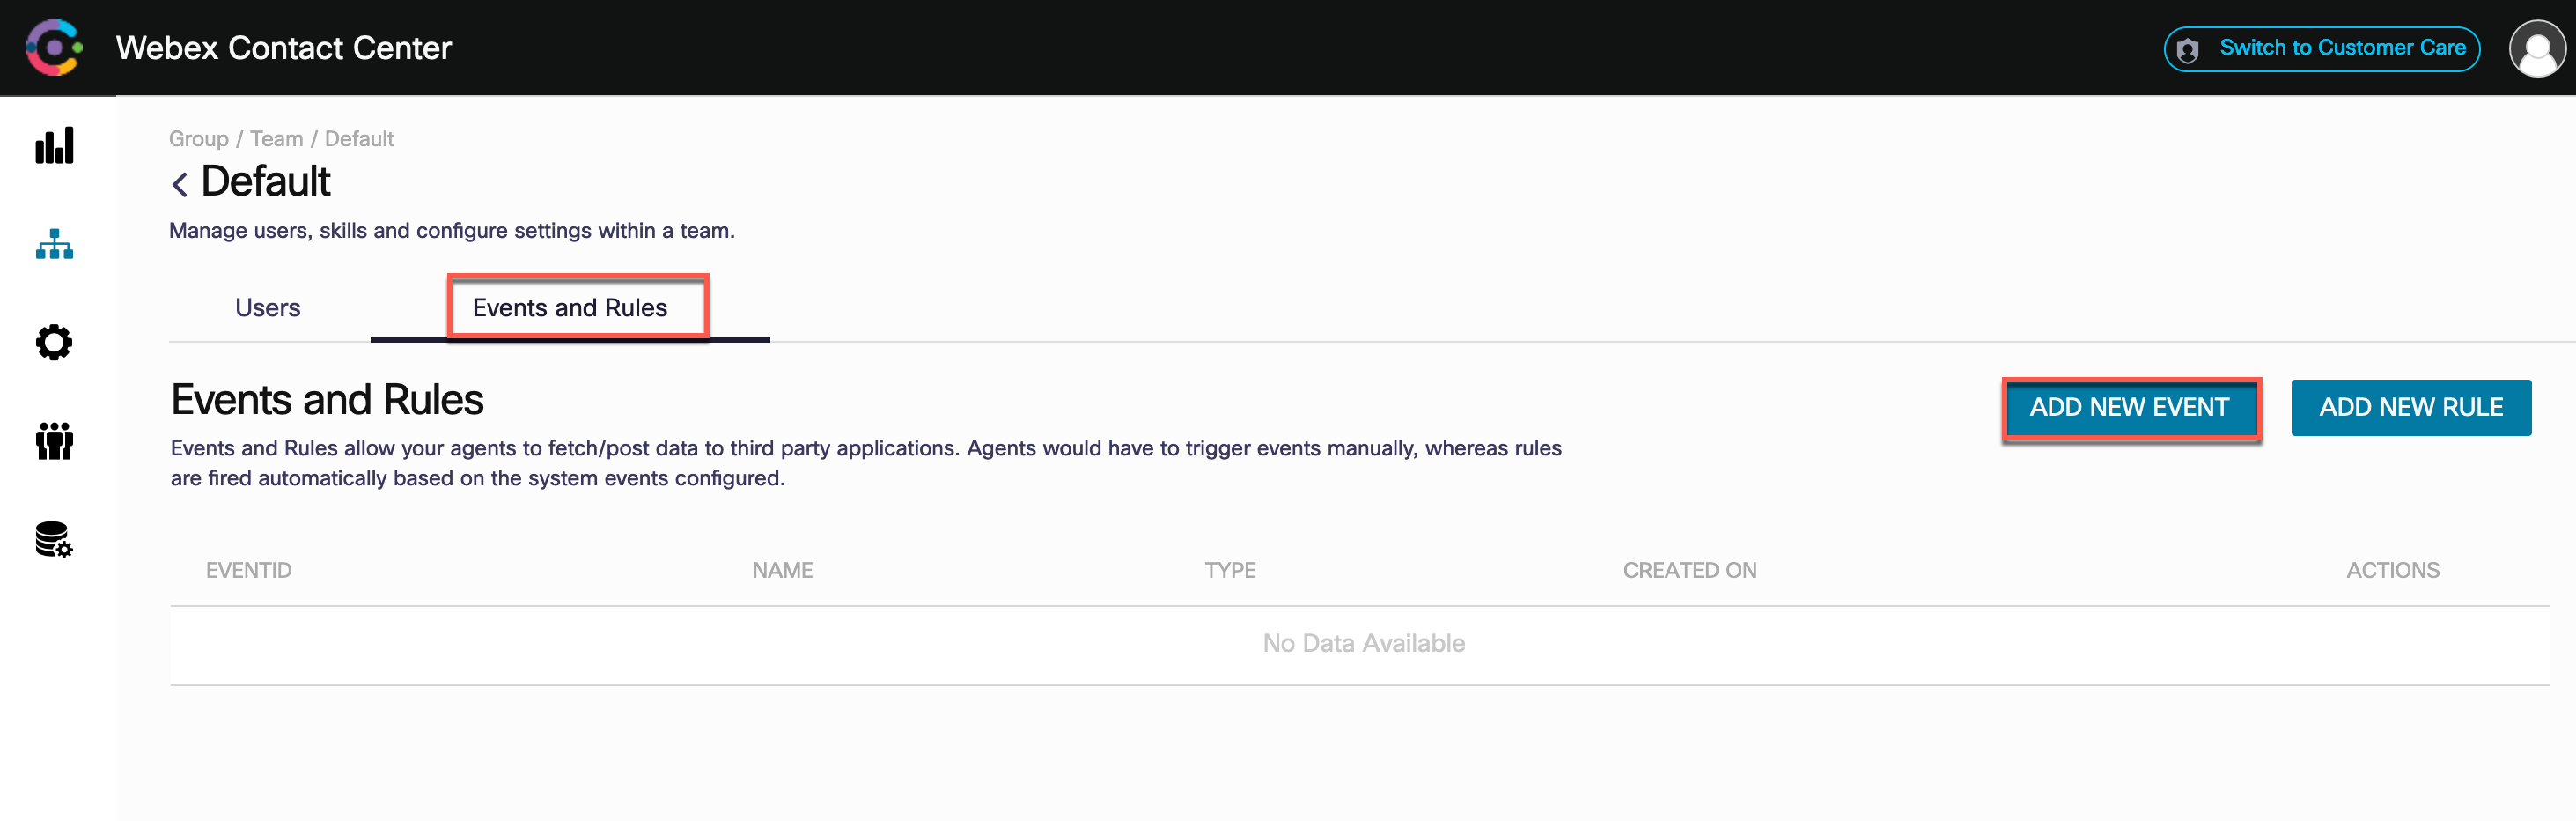
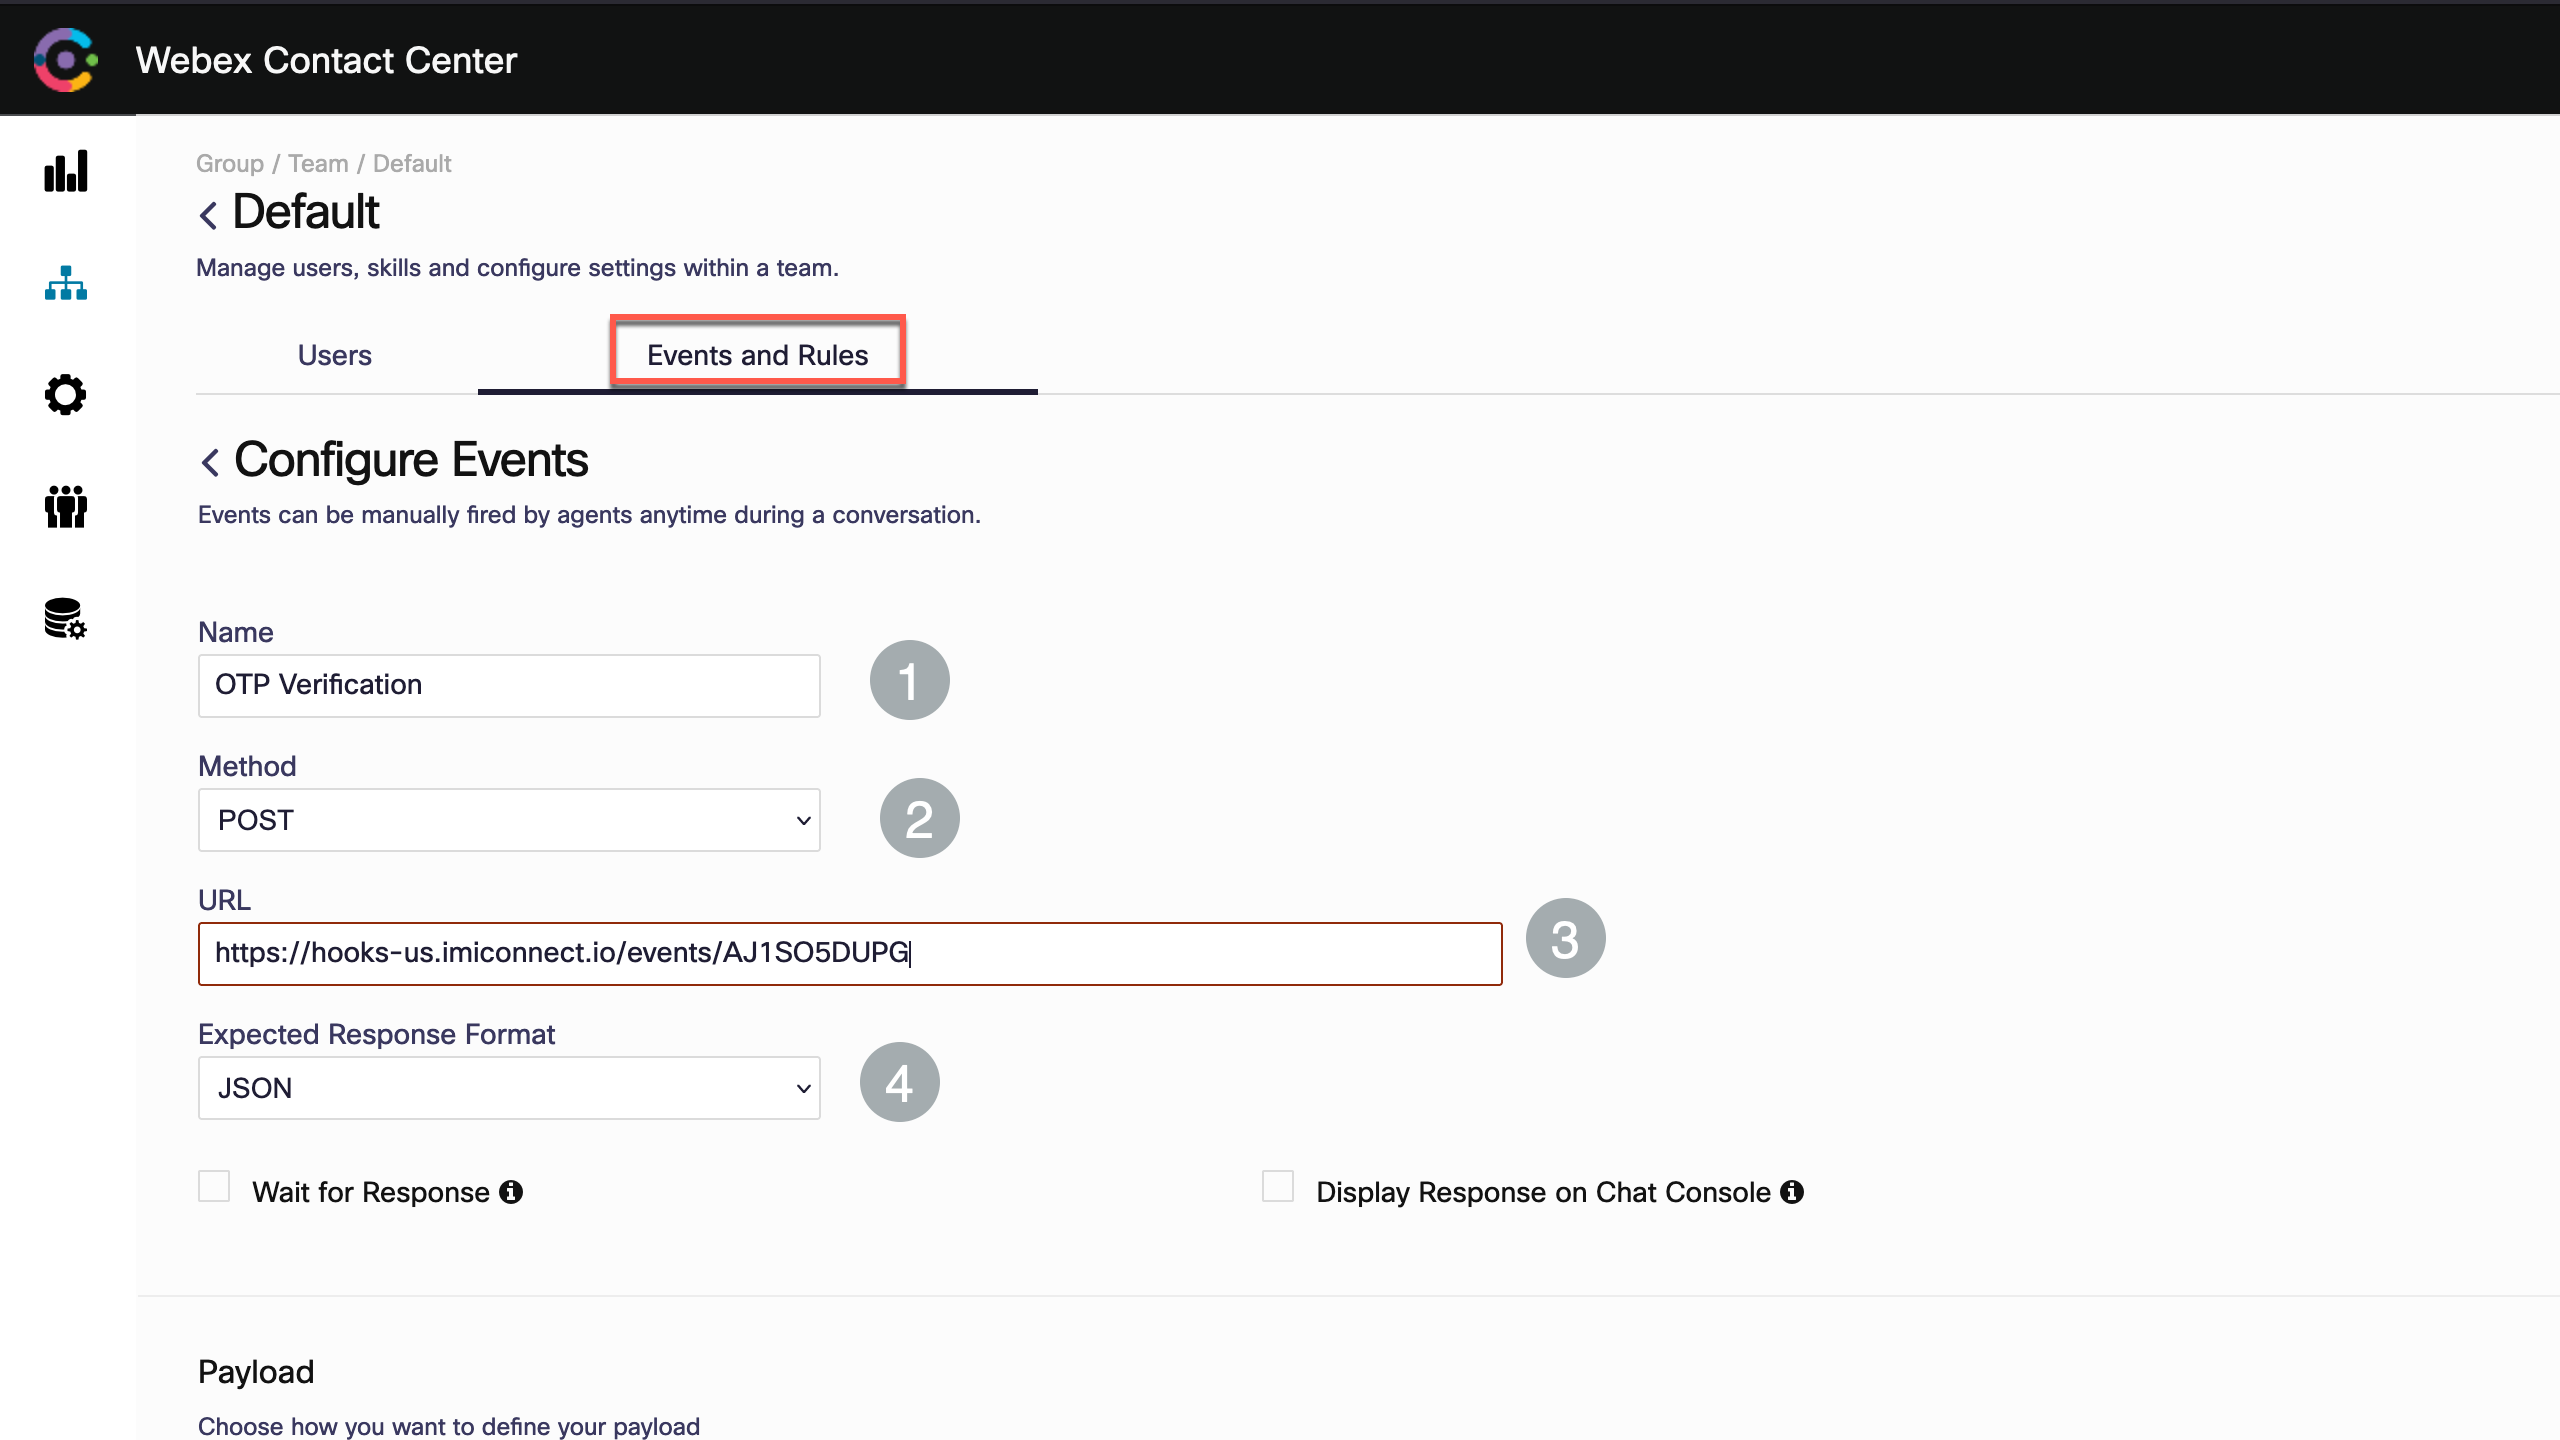
Navigate to ‘Events and Rules’ and click ‘Add New Event’
-
Input a desired name in the Name field
-
Select the Method as POST
-
Input the webhook URL (copied in Step-1) in the URL field
-
Select the Expected Response format as JSON
-
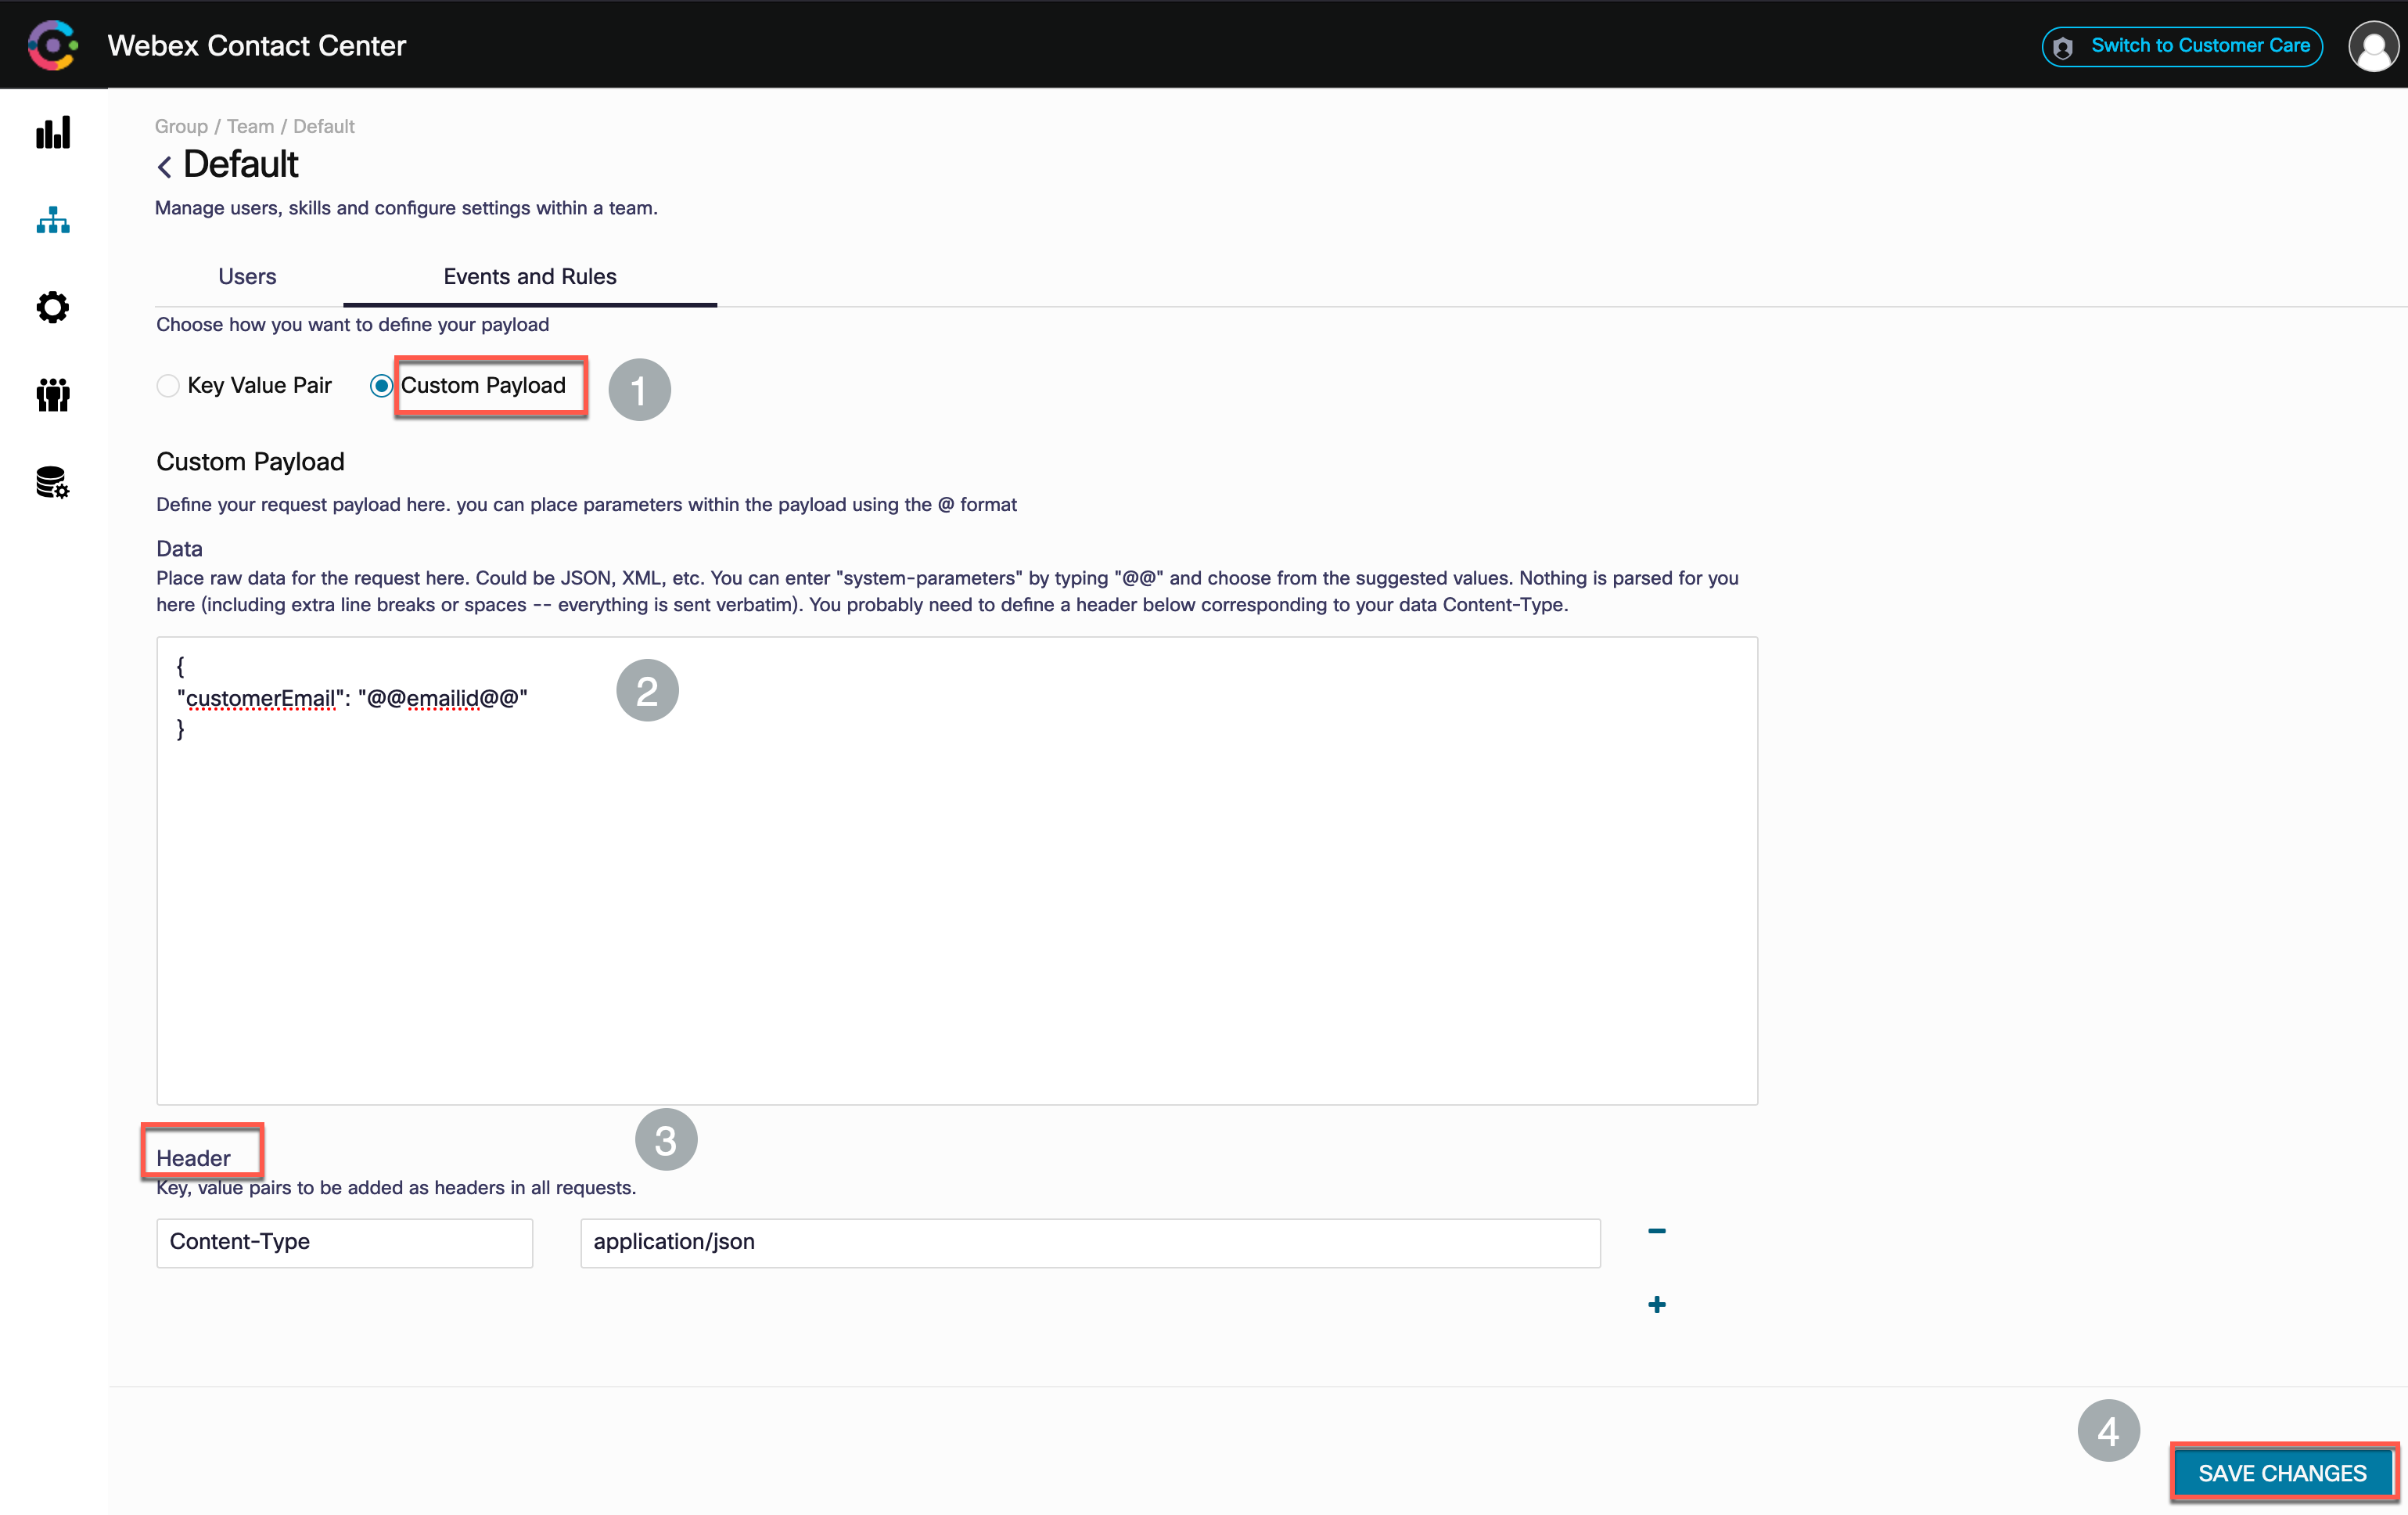
Select the Payload as Custom Payload
- In the Data field enter the below value
` { “customerEmail”: “@@emailid@@” } `
-
Under Header section, configure Content-Type as application/json
-
Click Save
Step 3. Create Webex room
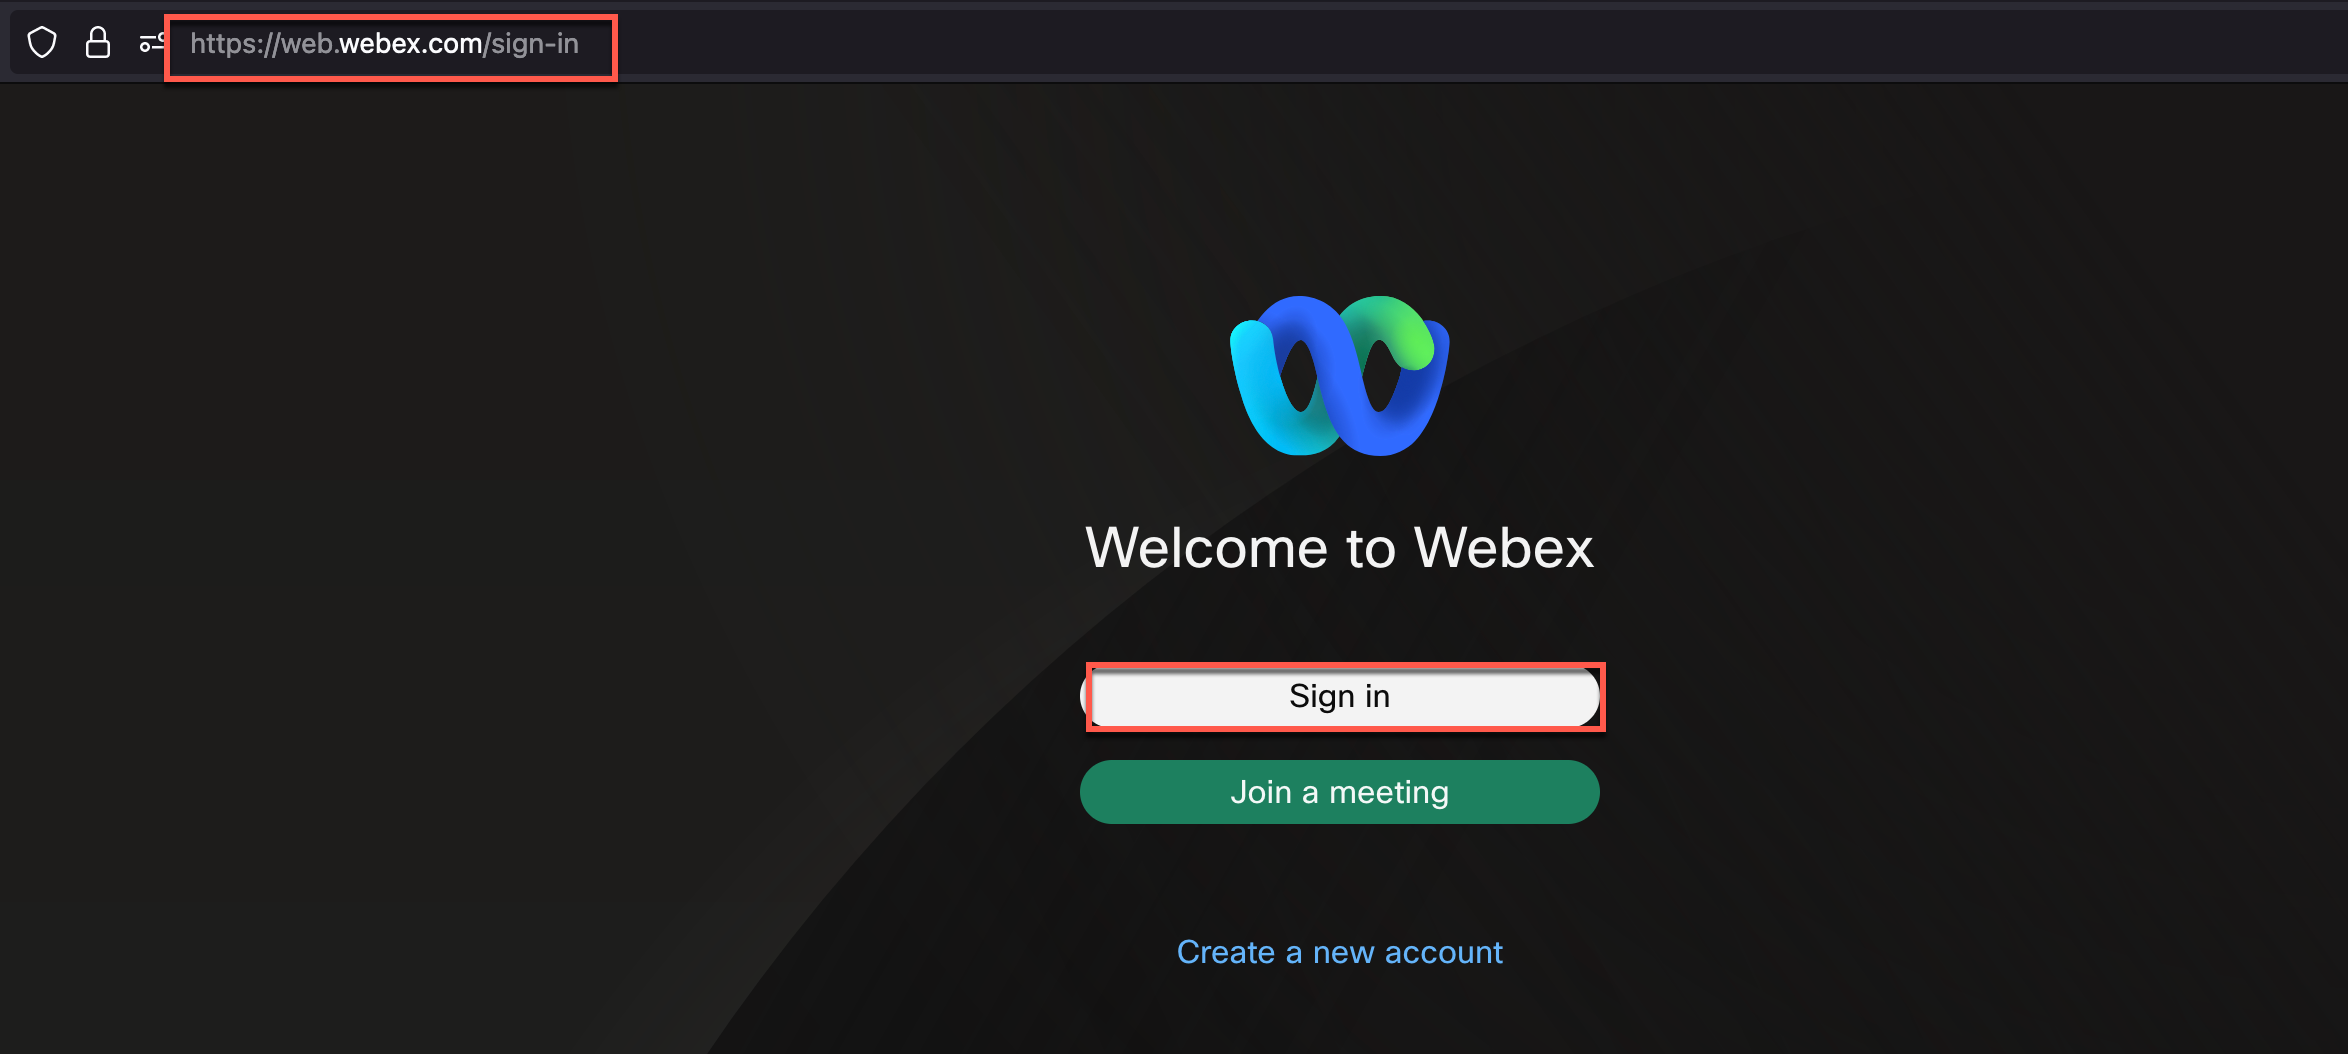
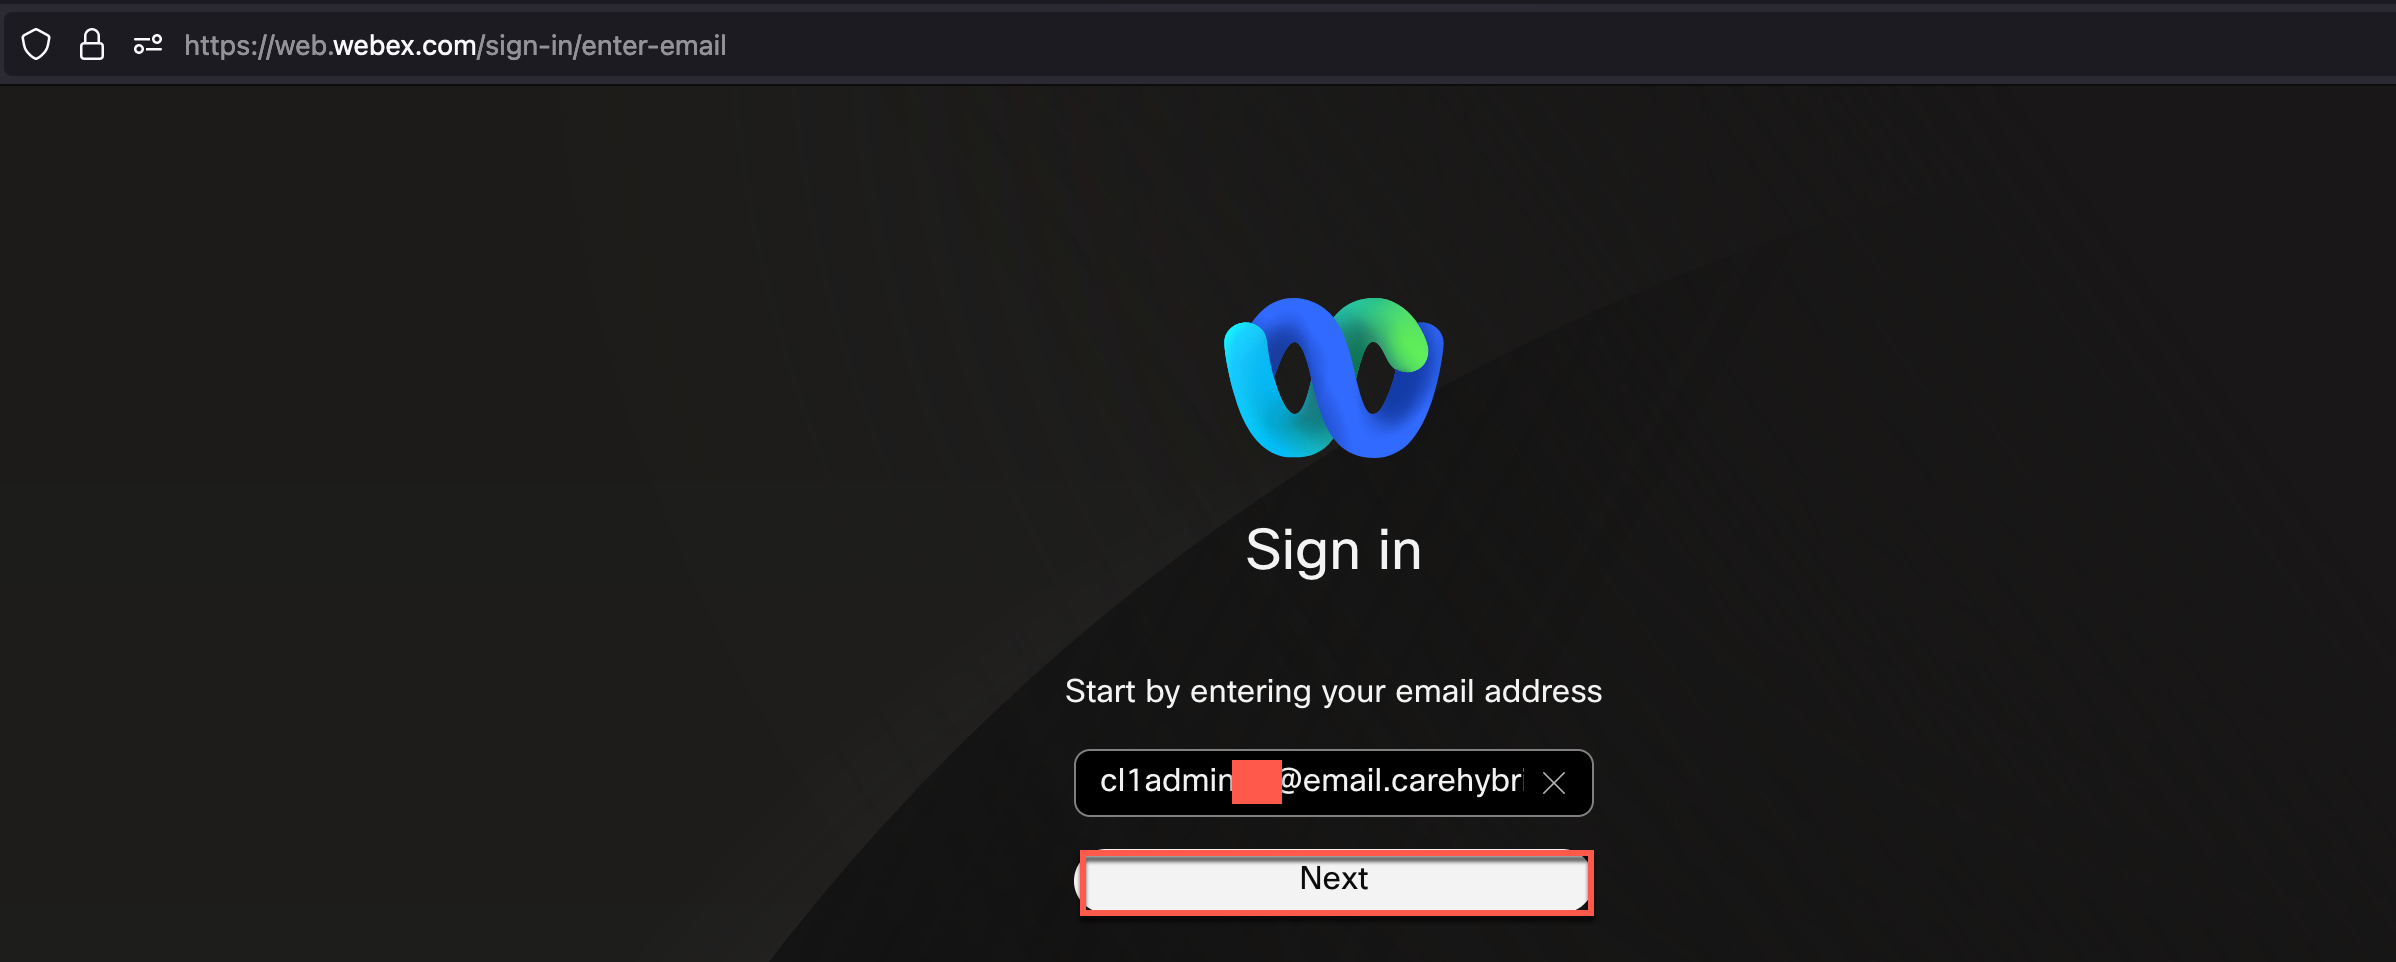
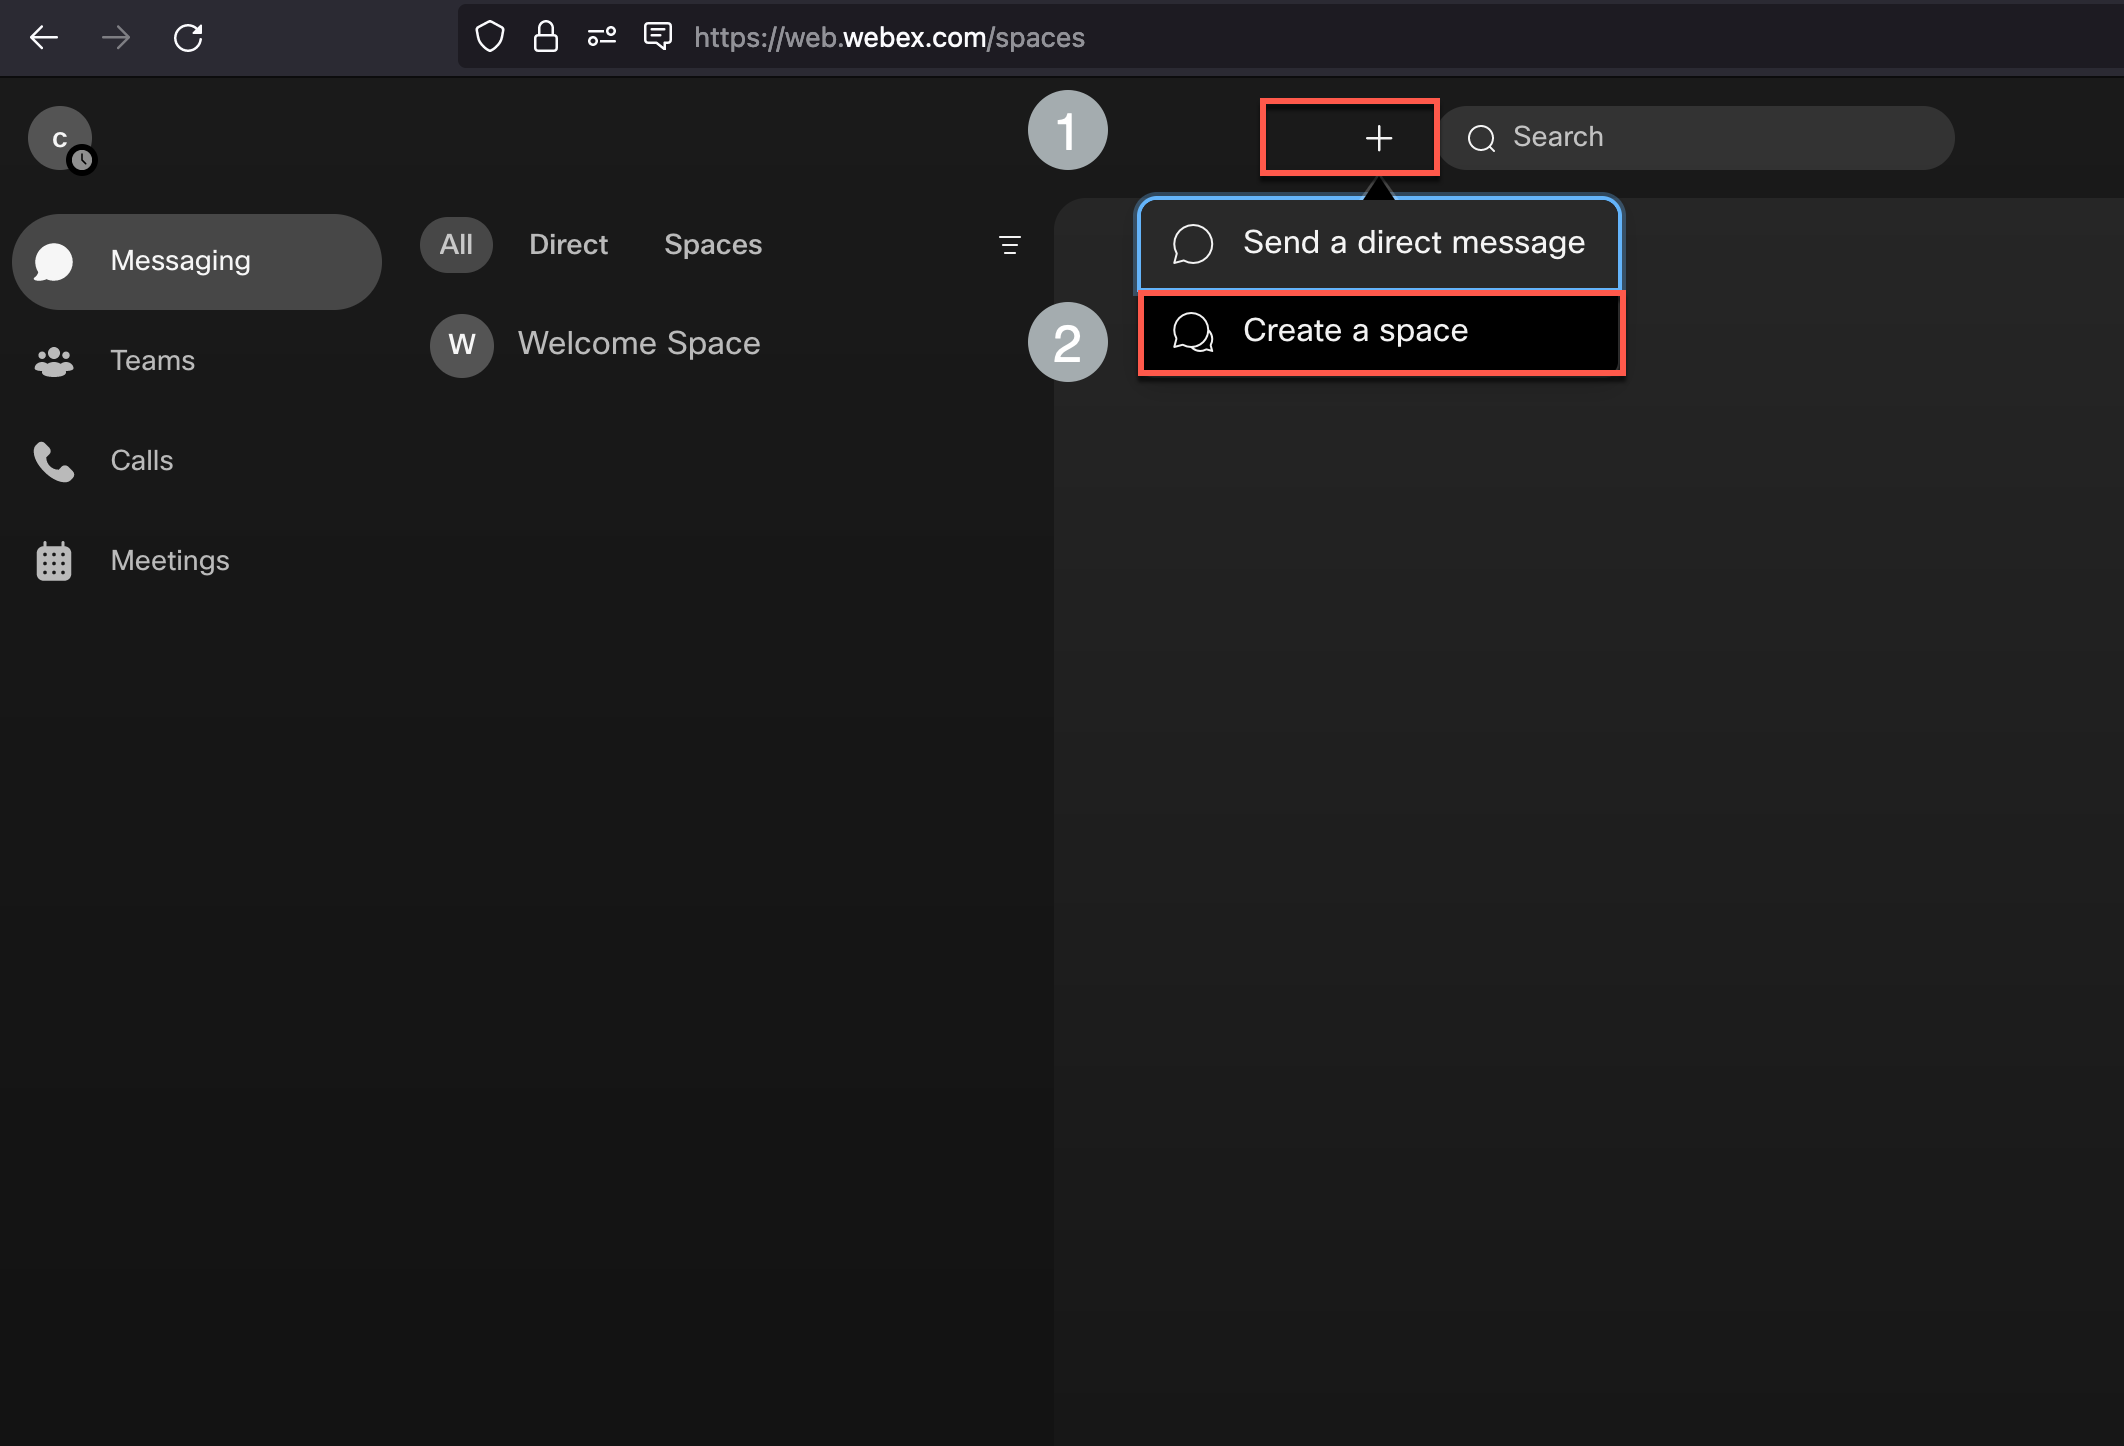
- Go to https://web.webex.com/sign-in and login with the administrator credential of your lab pod.
-
Click Create a Space option
-
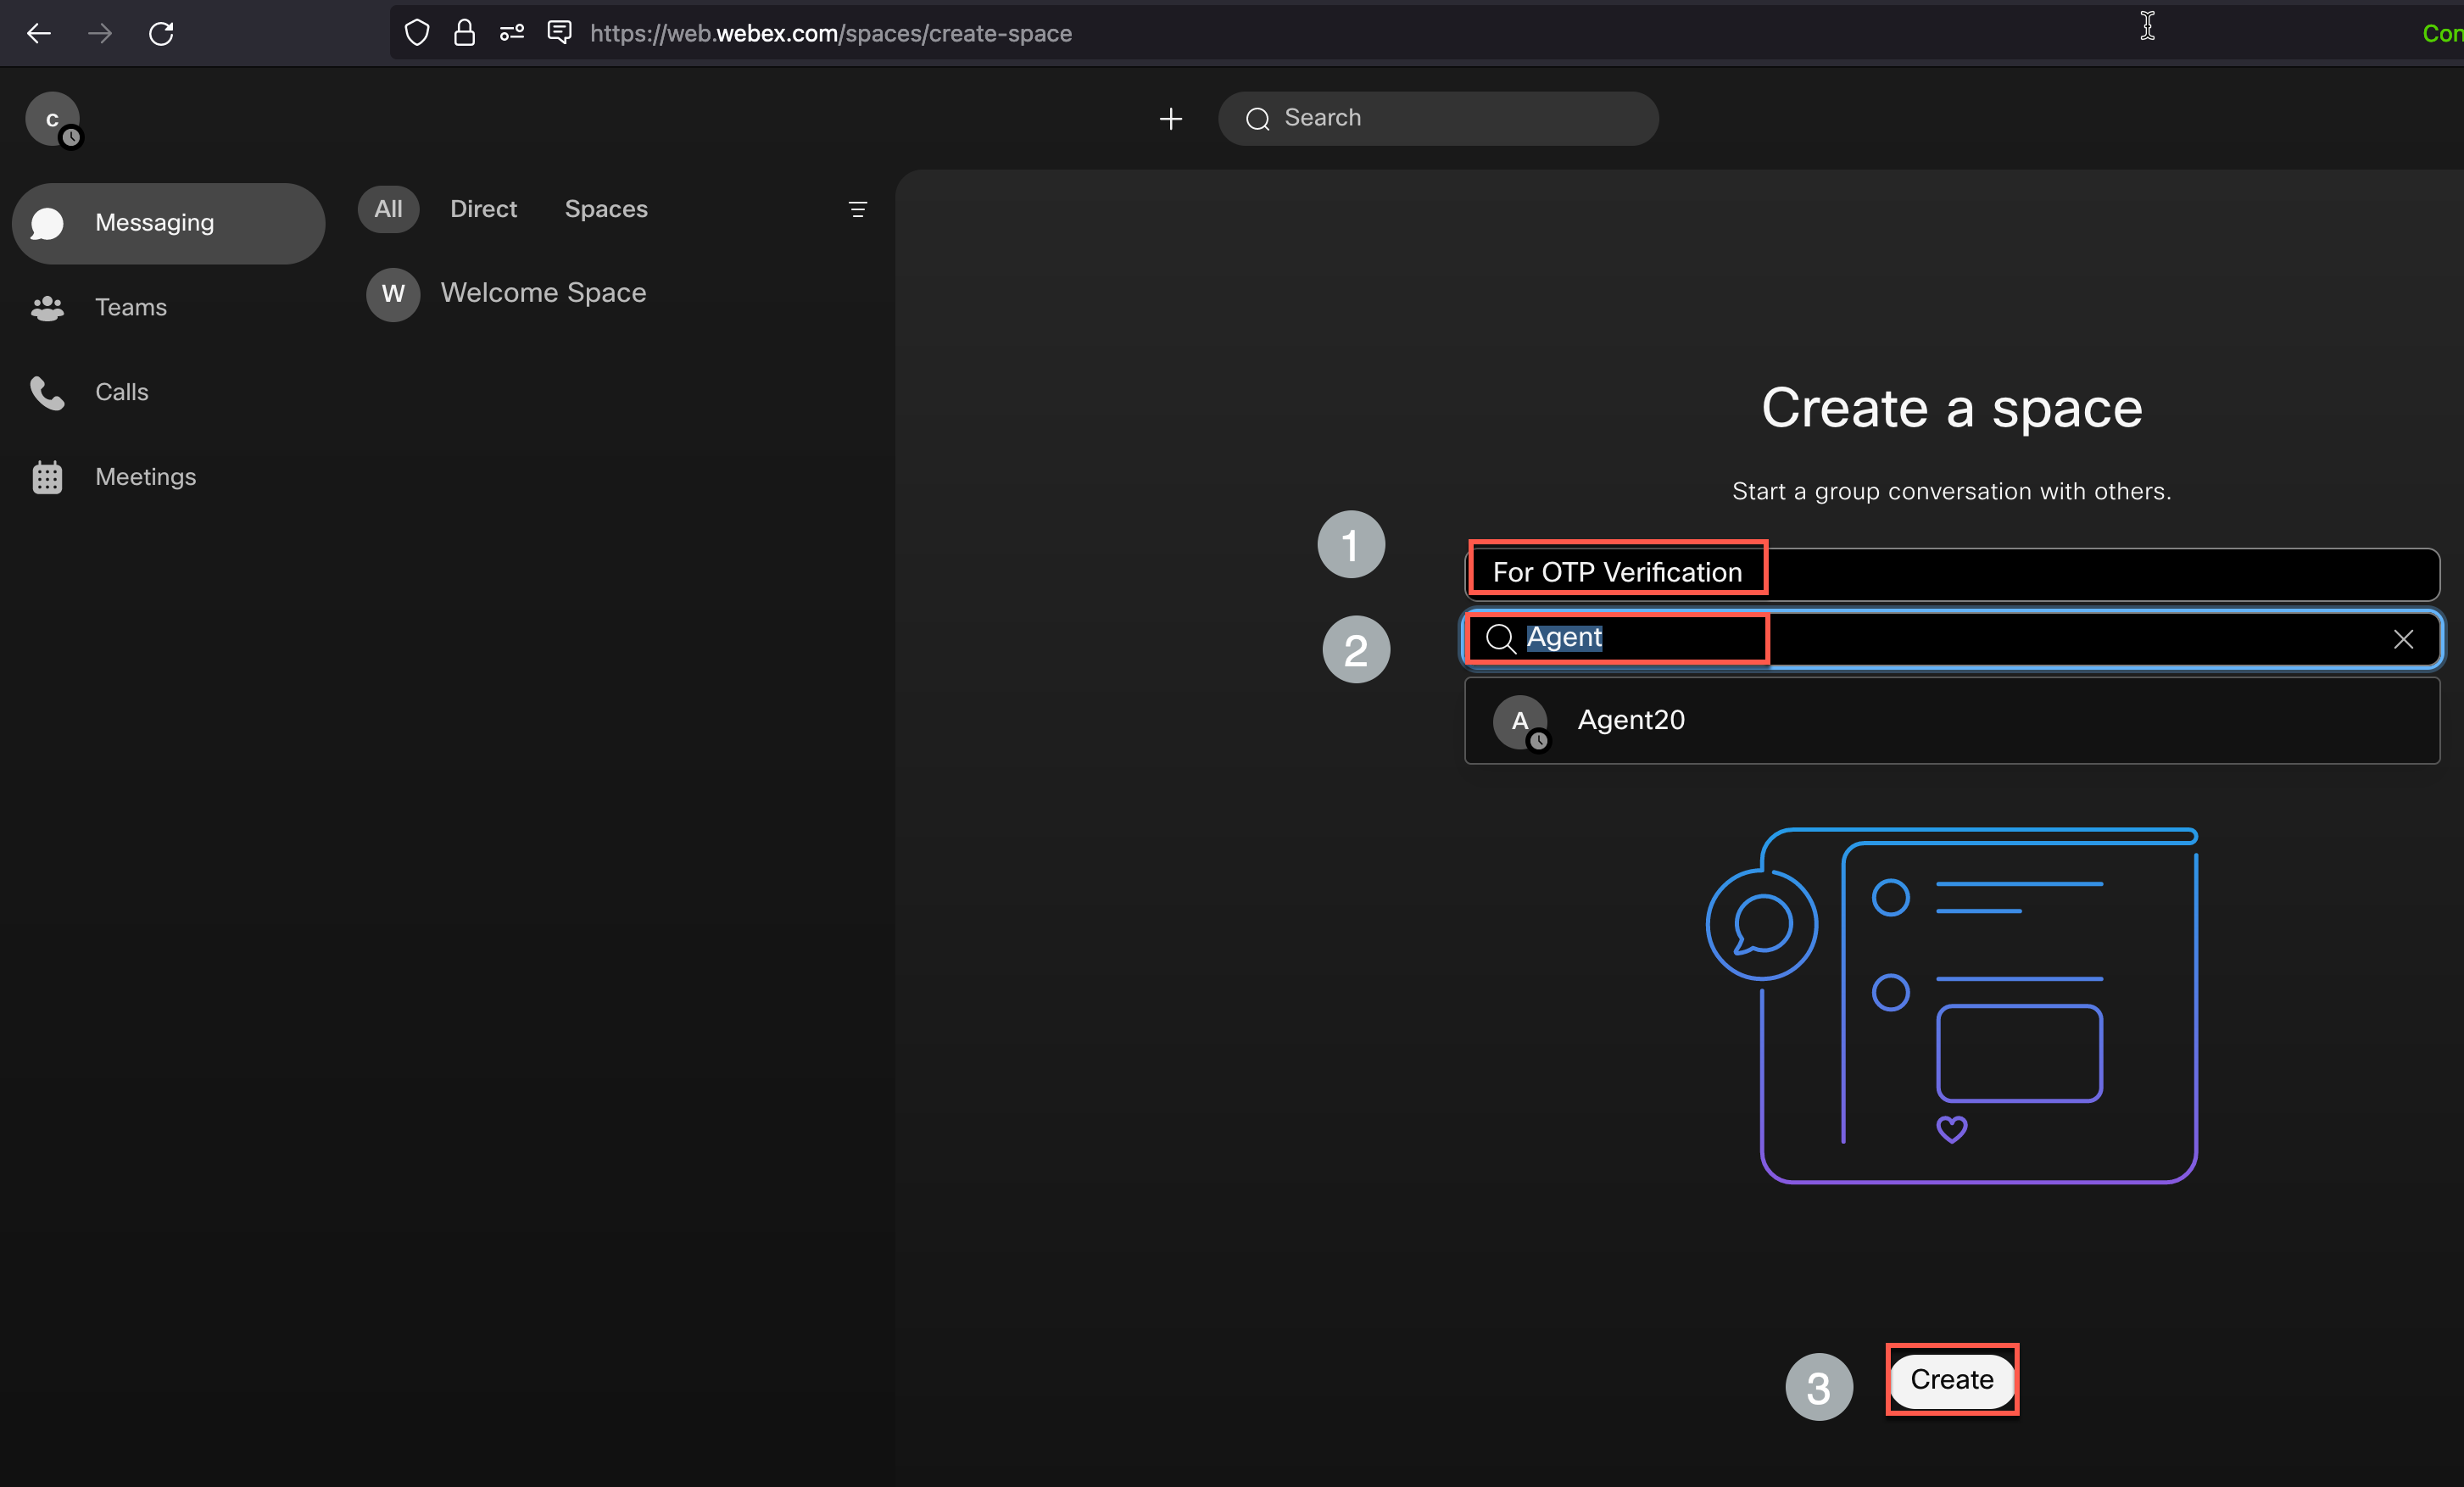
Enter a desired name for the room, search for Agent and add the Agent user to this room. Click Create
-
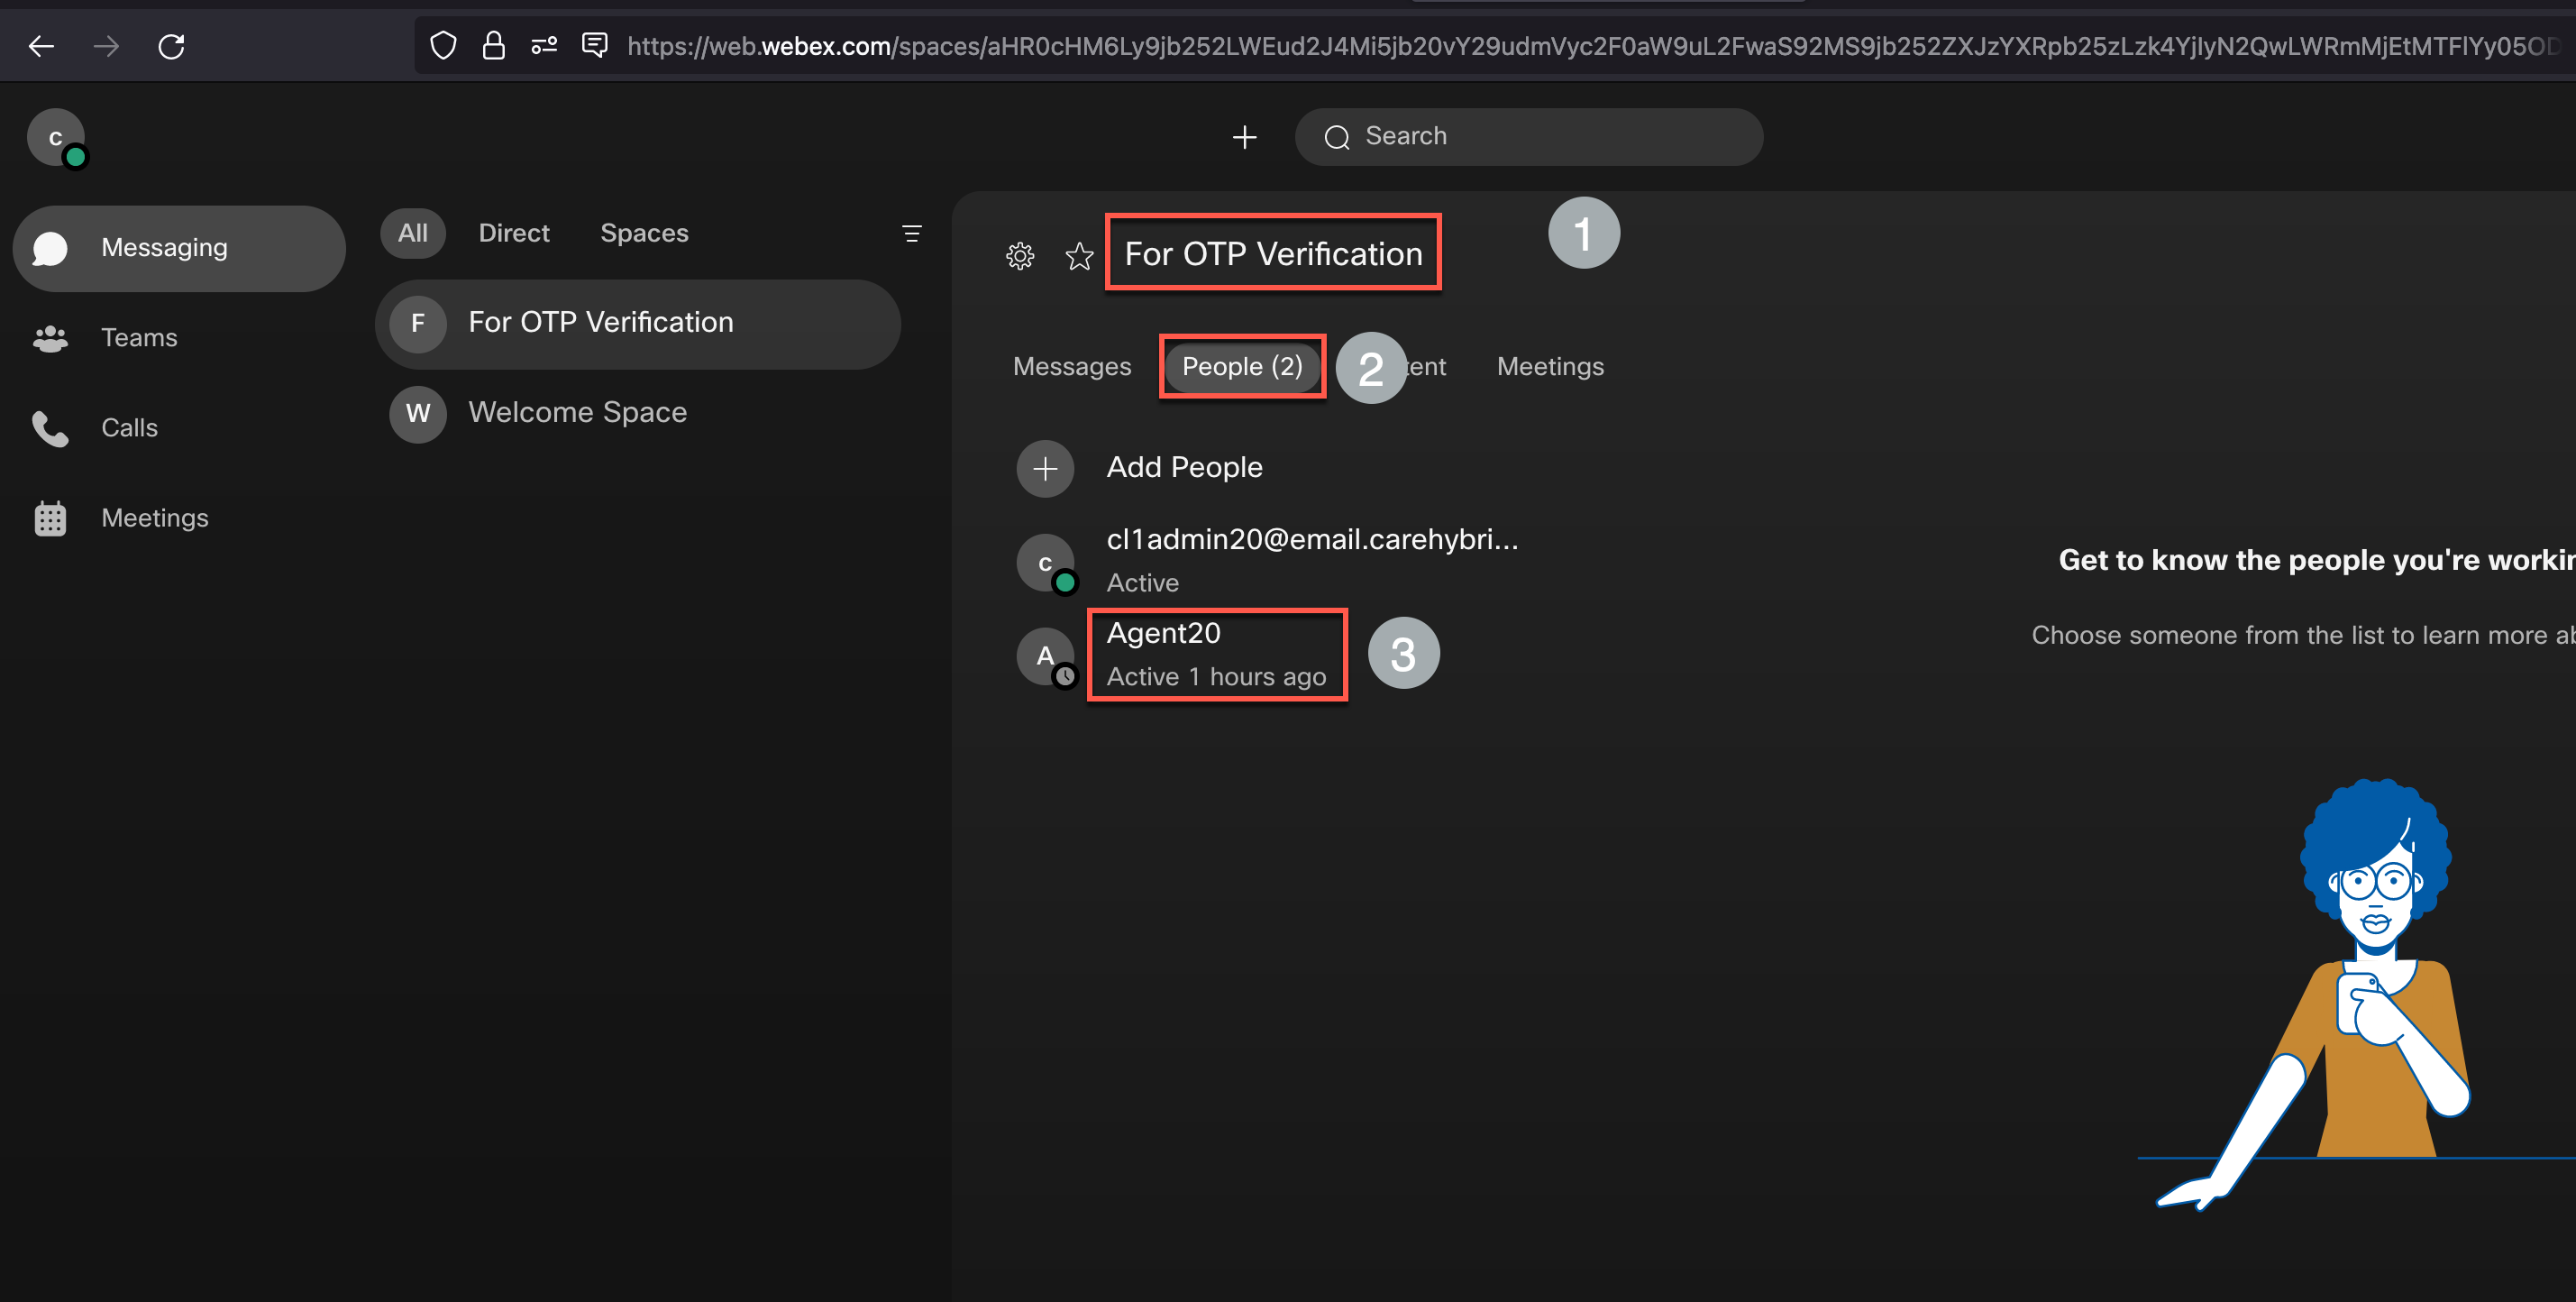
Verify that the room is created and the agent is part of the newly created room.
Step 4. Fetch Webex access token and RoomId
-
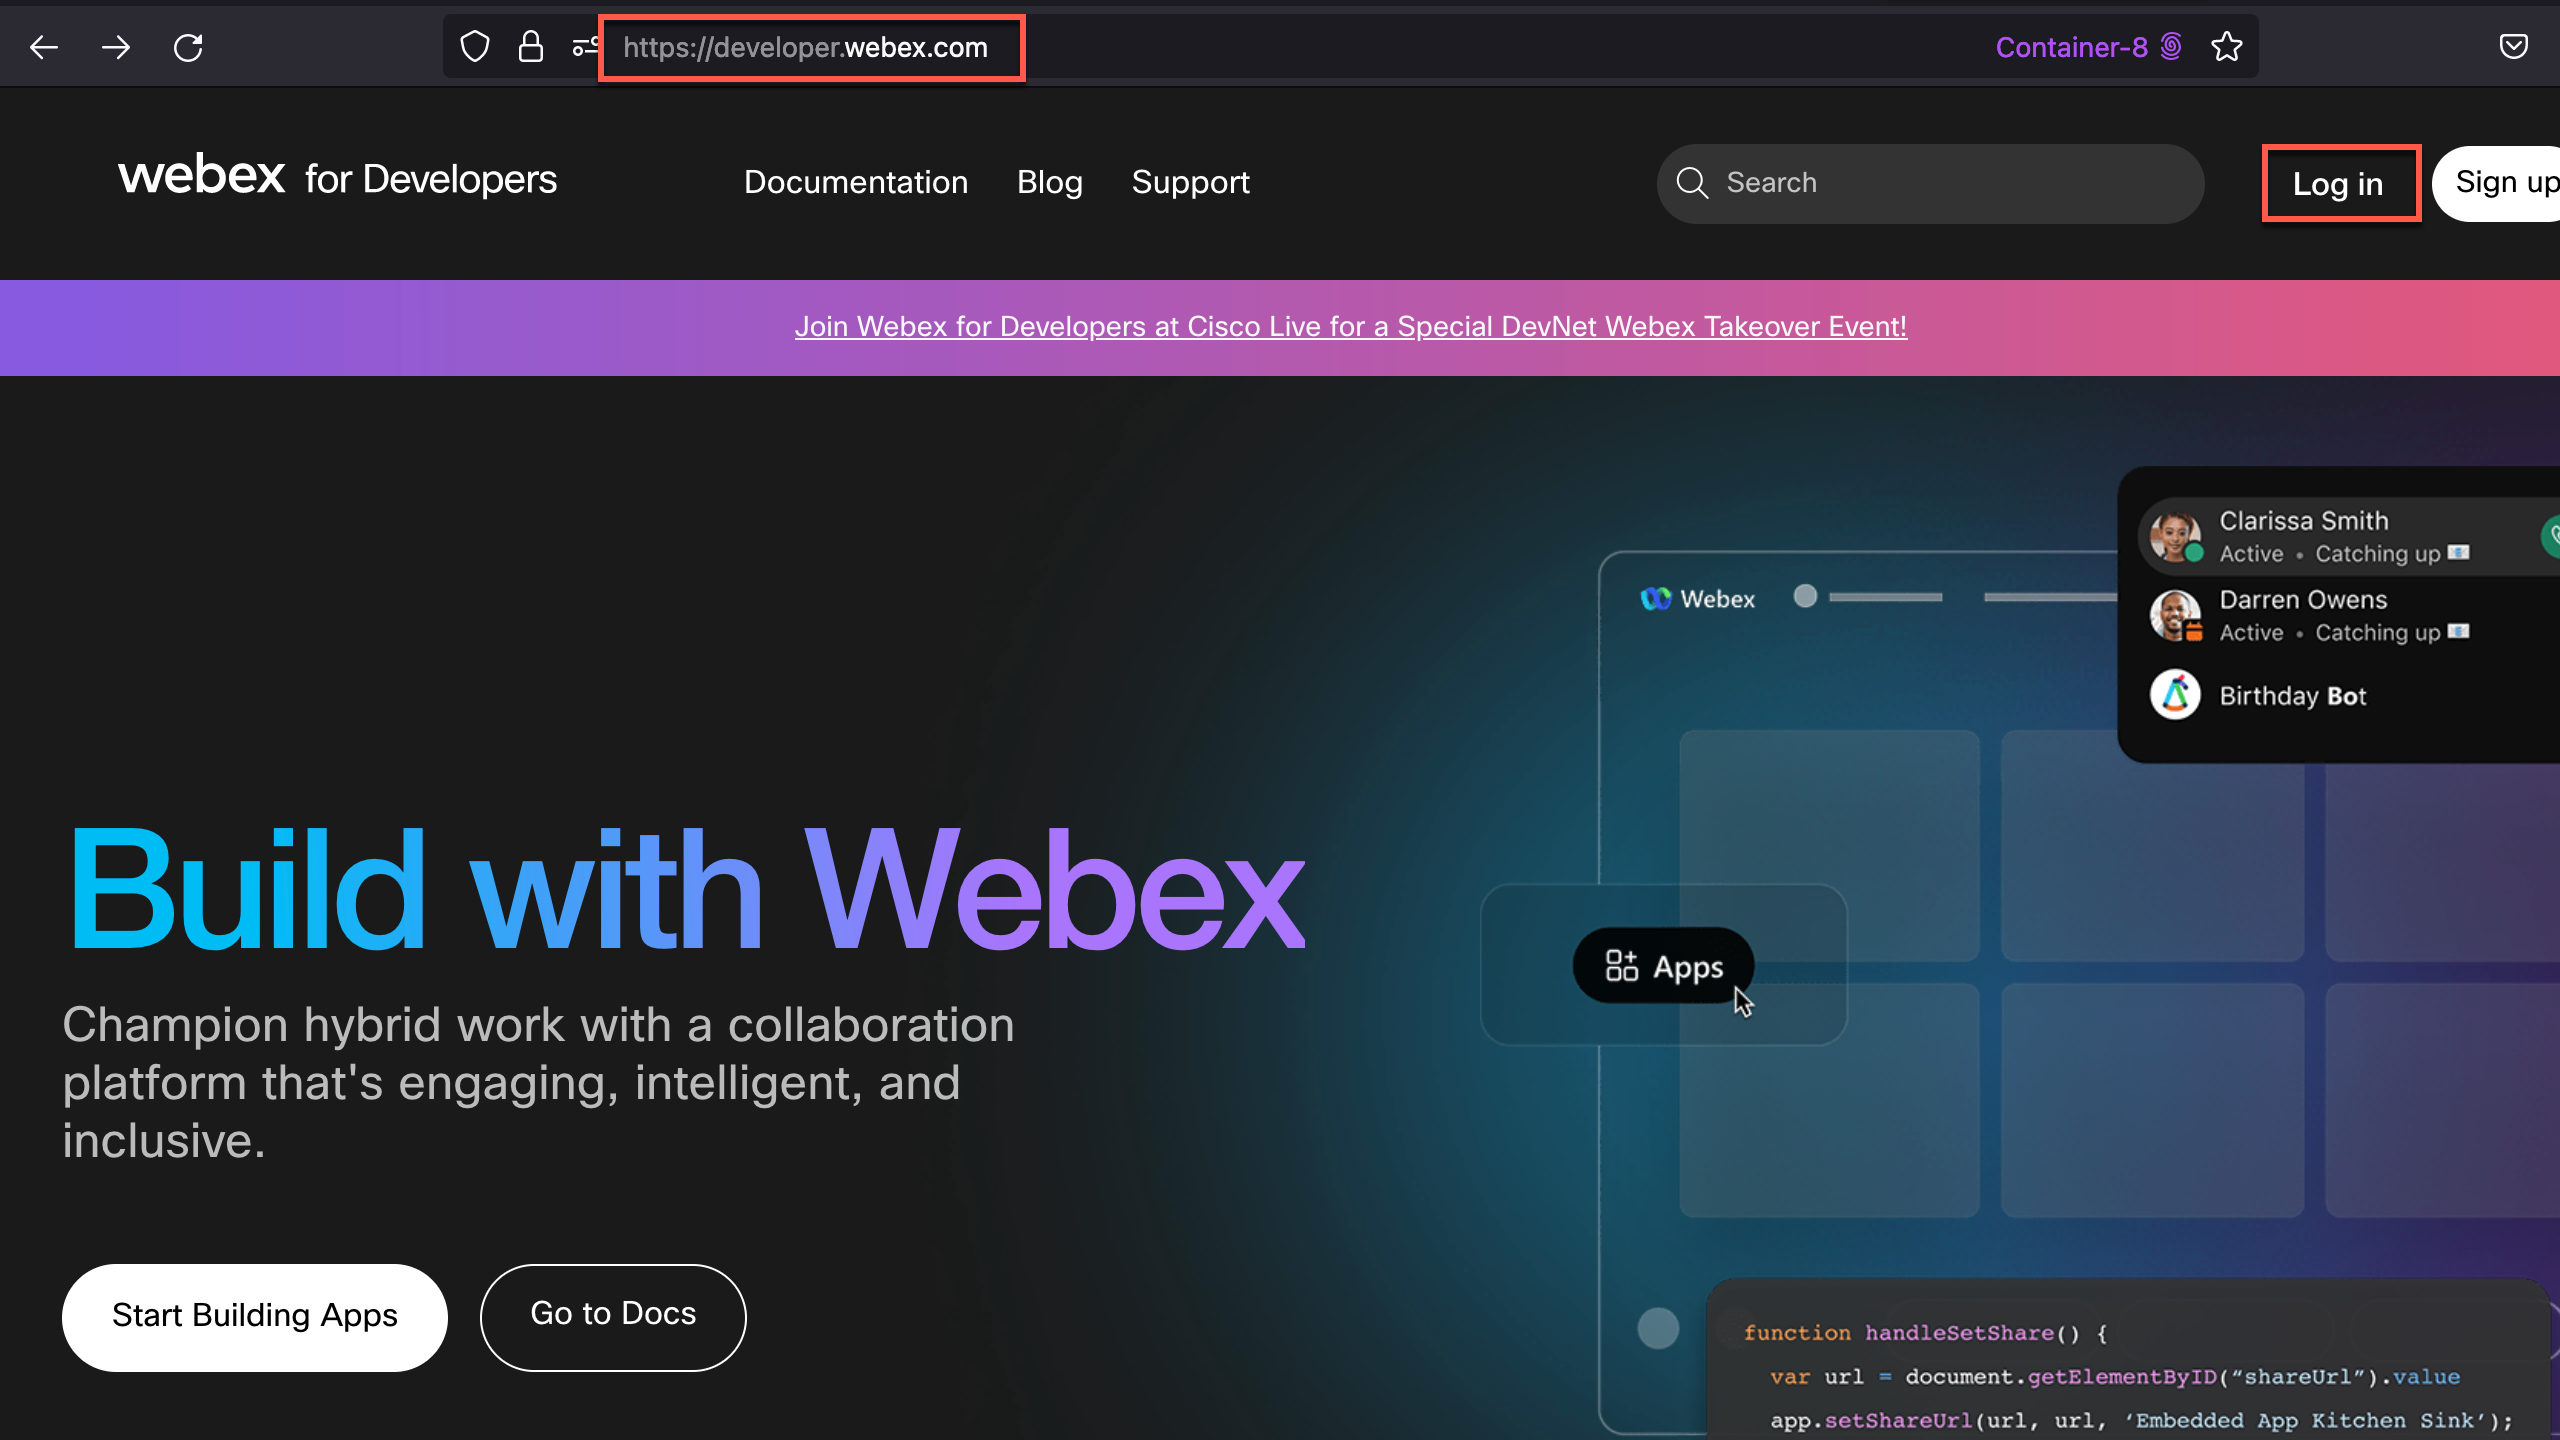
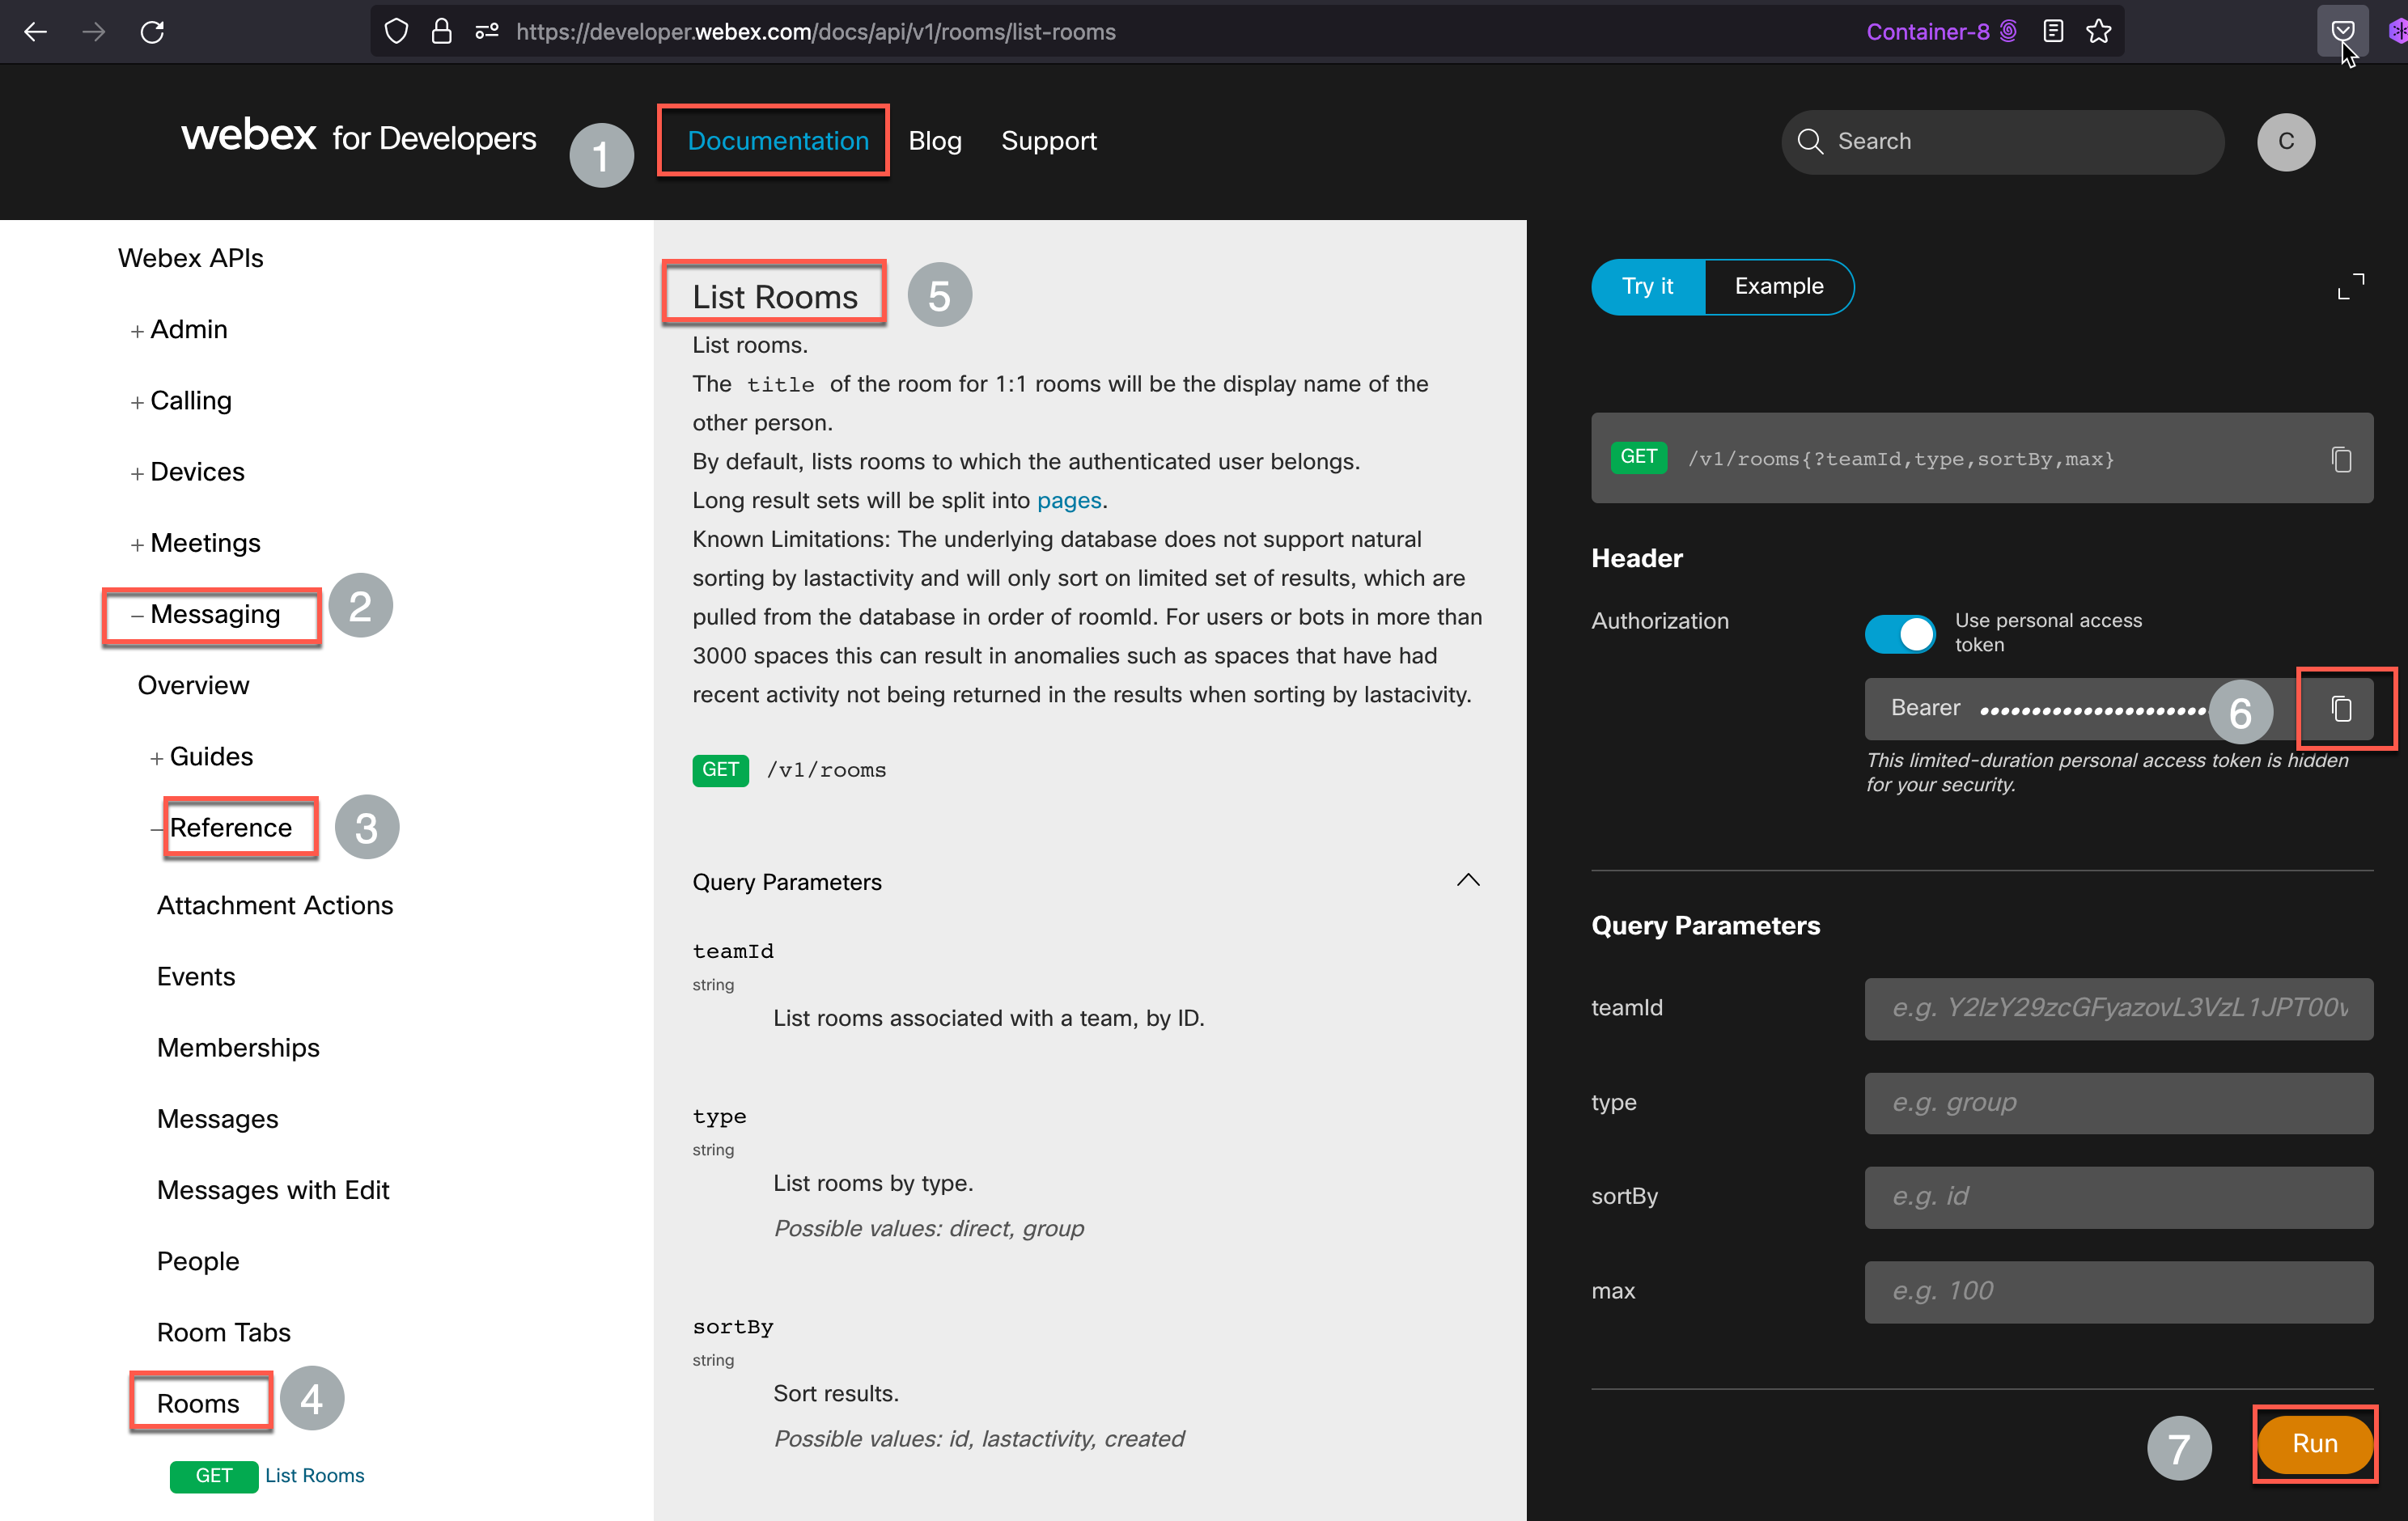
Go to https://developer.webex.com/ and login with the administrator credential of your lab pod.
-
Click Documentation . Navigate to Messaging > Reference > Rooms > Select List Rooms and copy the access token under Authorization
-
Click Run
-
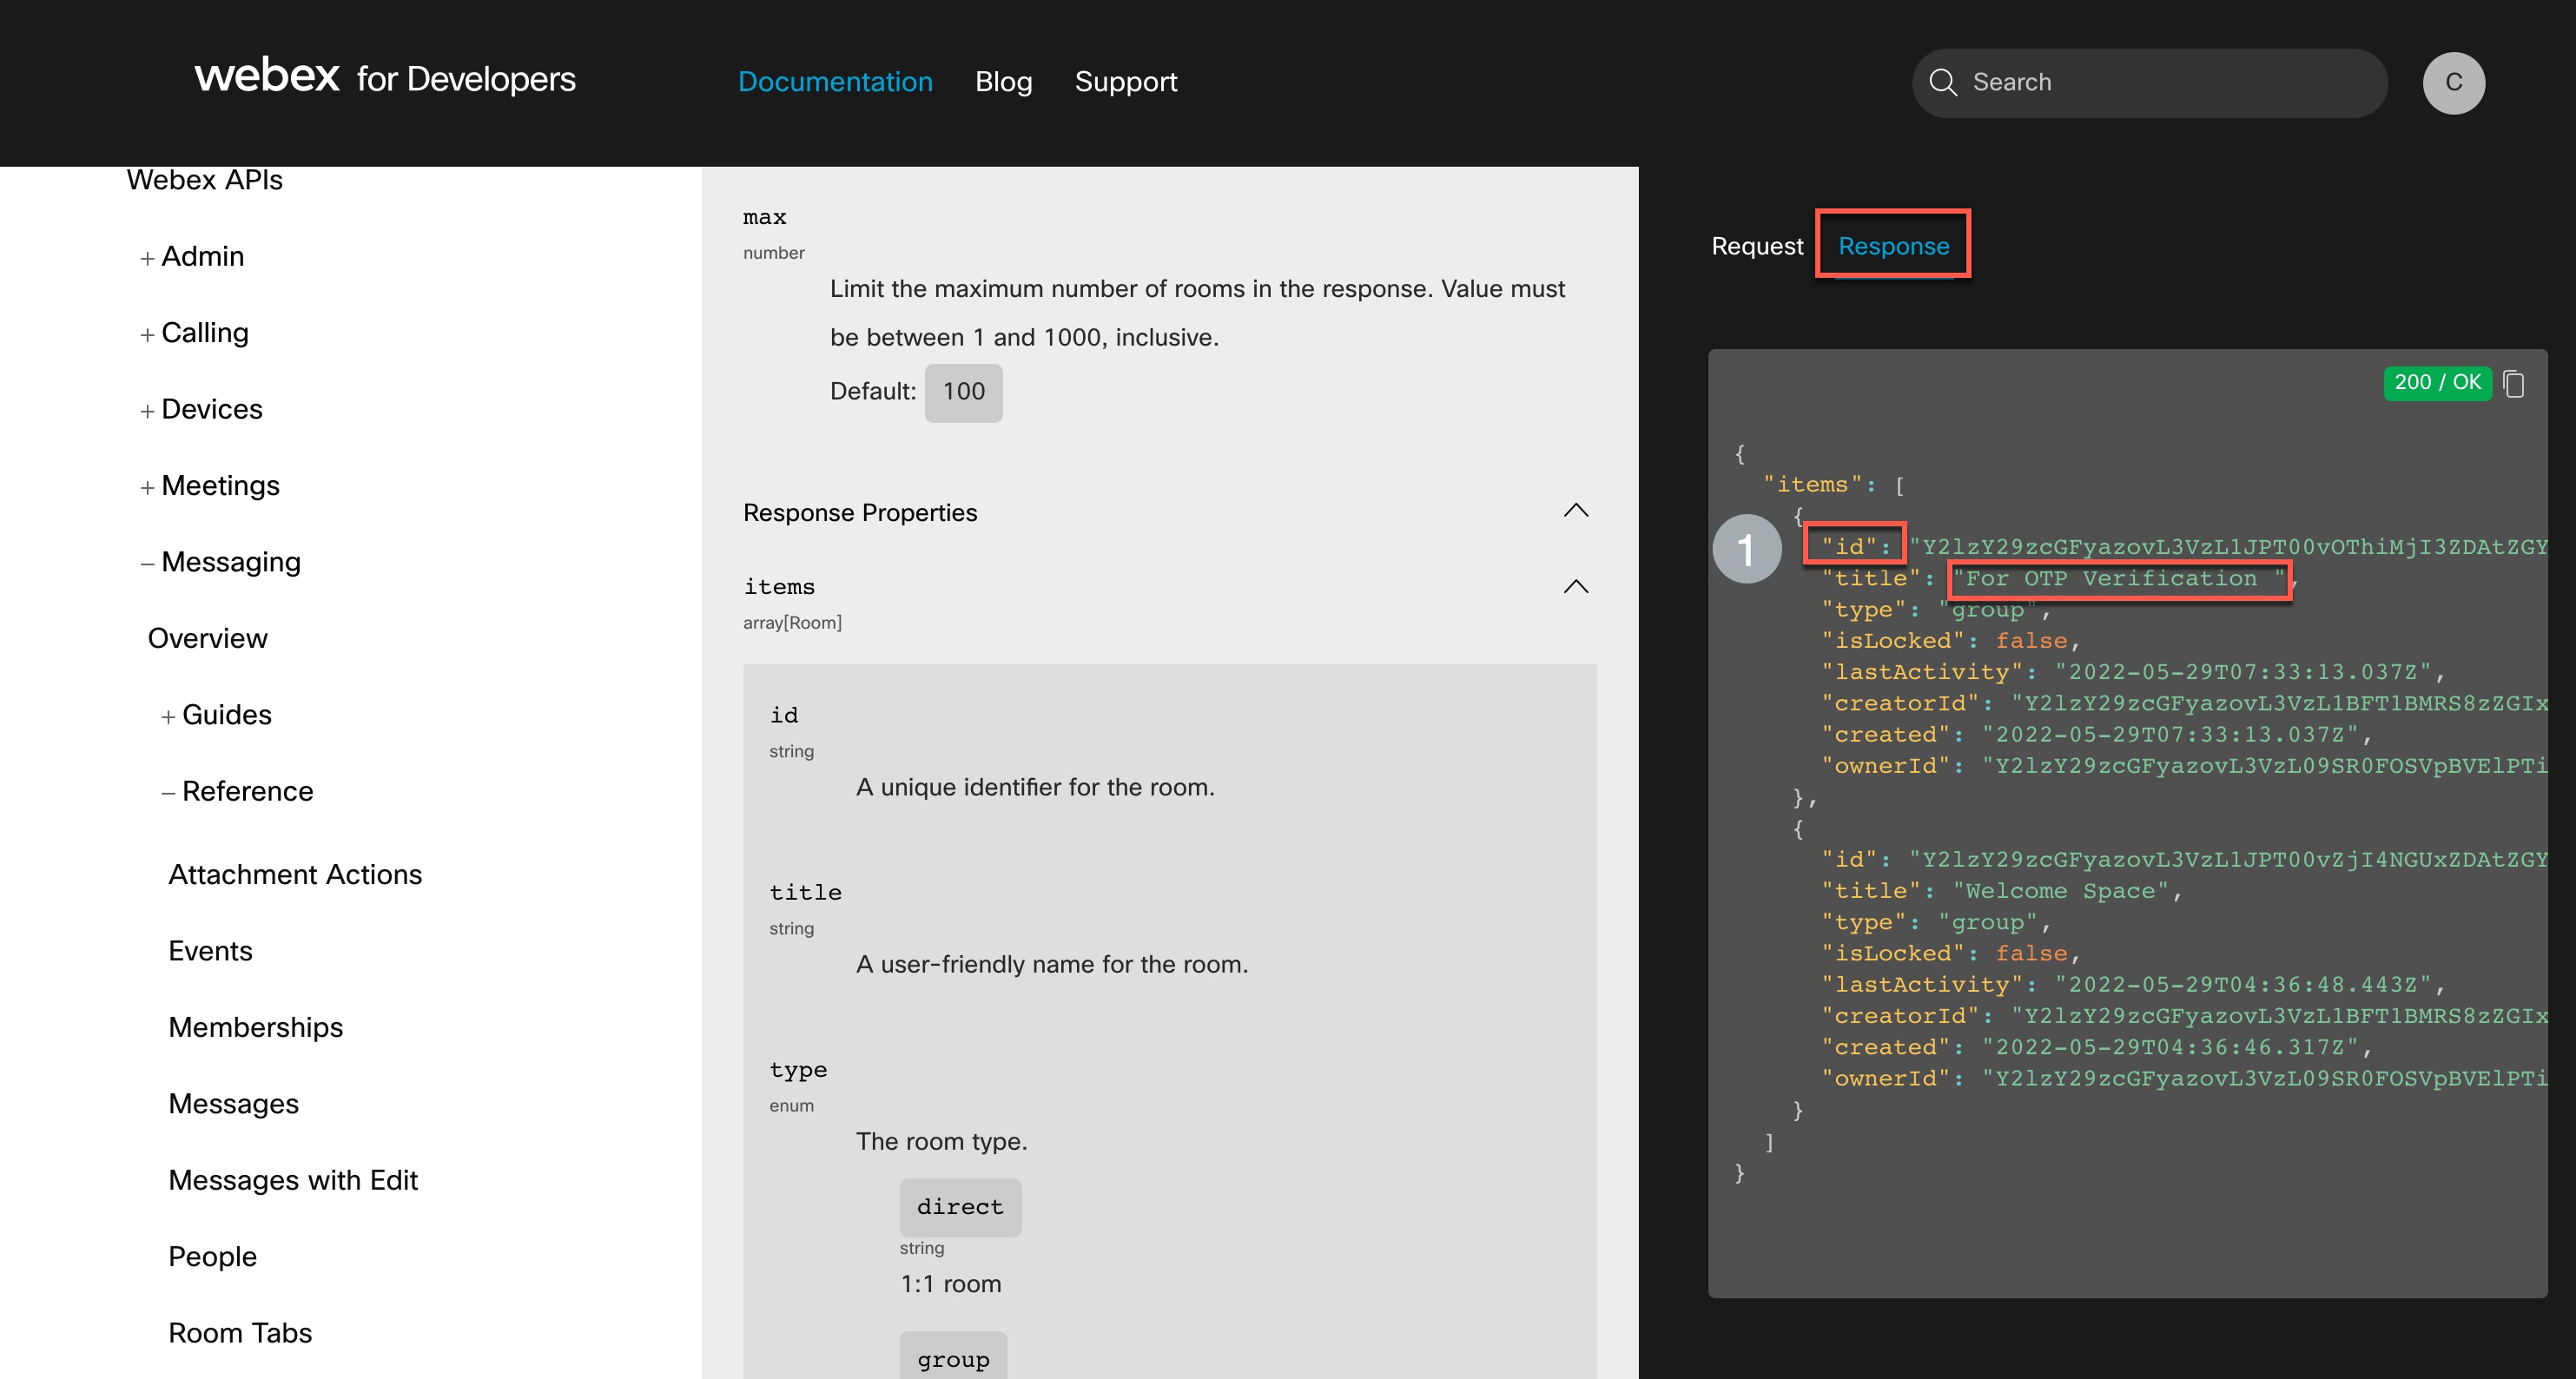
In the response window, identify the room created in the previous step and copy the value of id of that room (this is for later use).
Step 5. OTP Flow configuration
-
Login to your respective Webex Connect UI using the provided URL https://cl1podX.imiconnect.io/ (where X is your POD number).
-
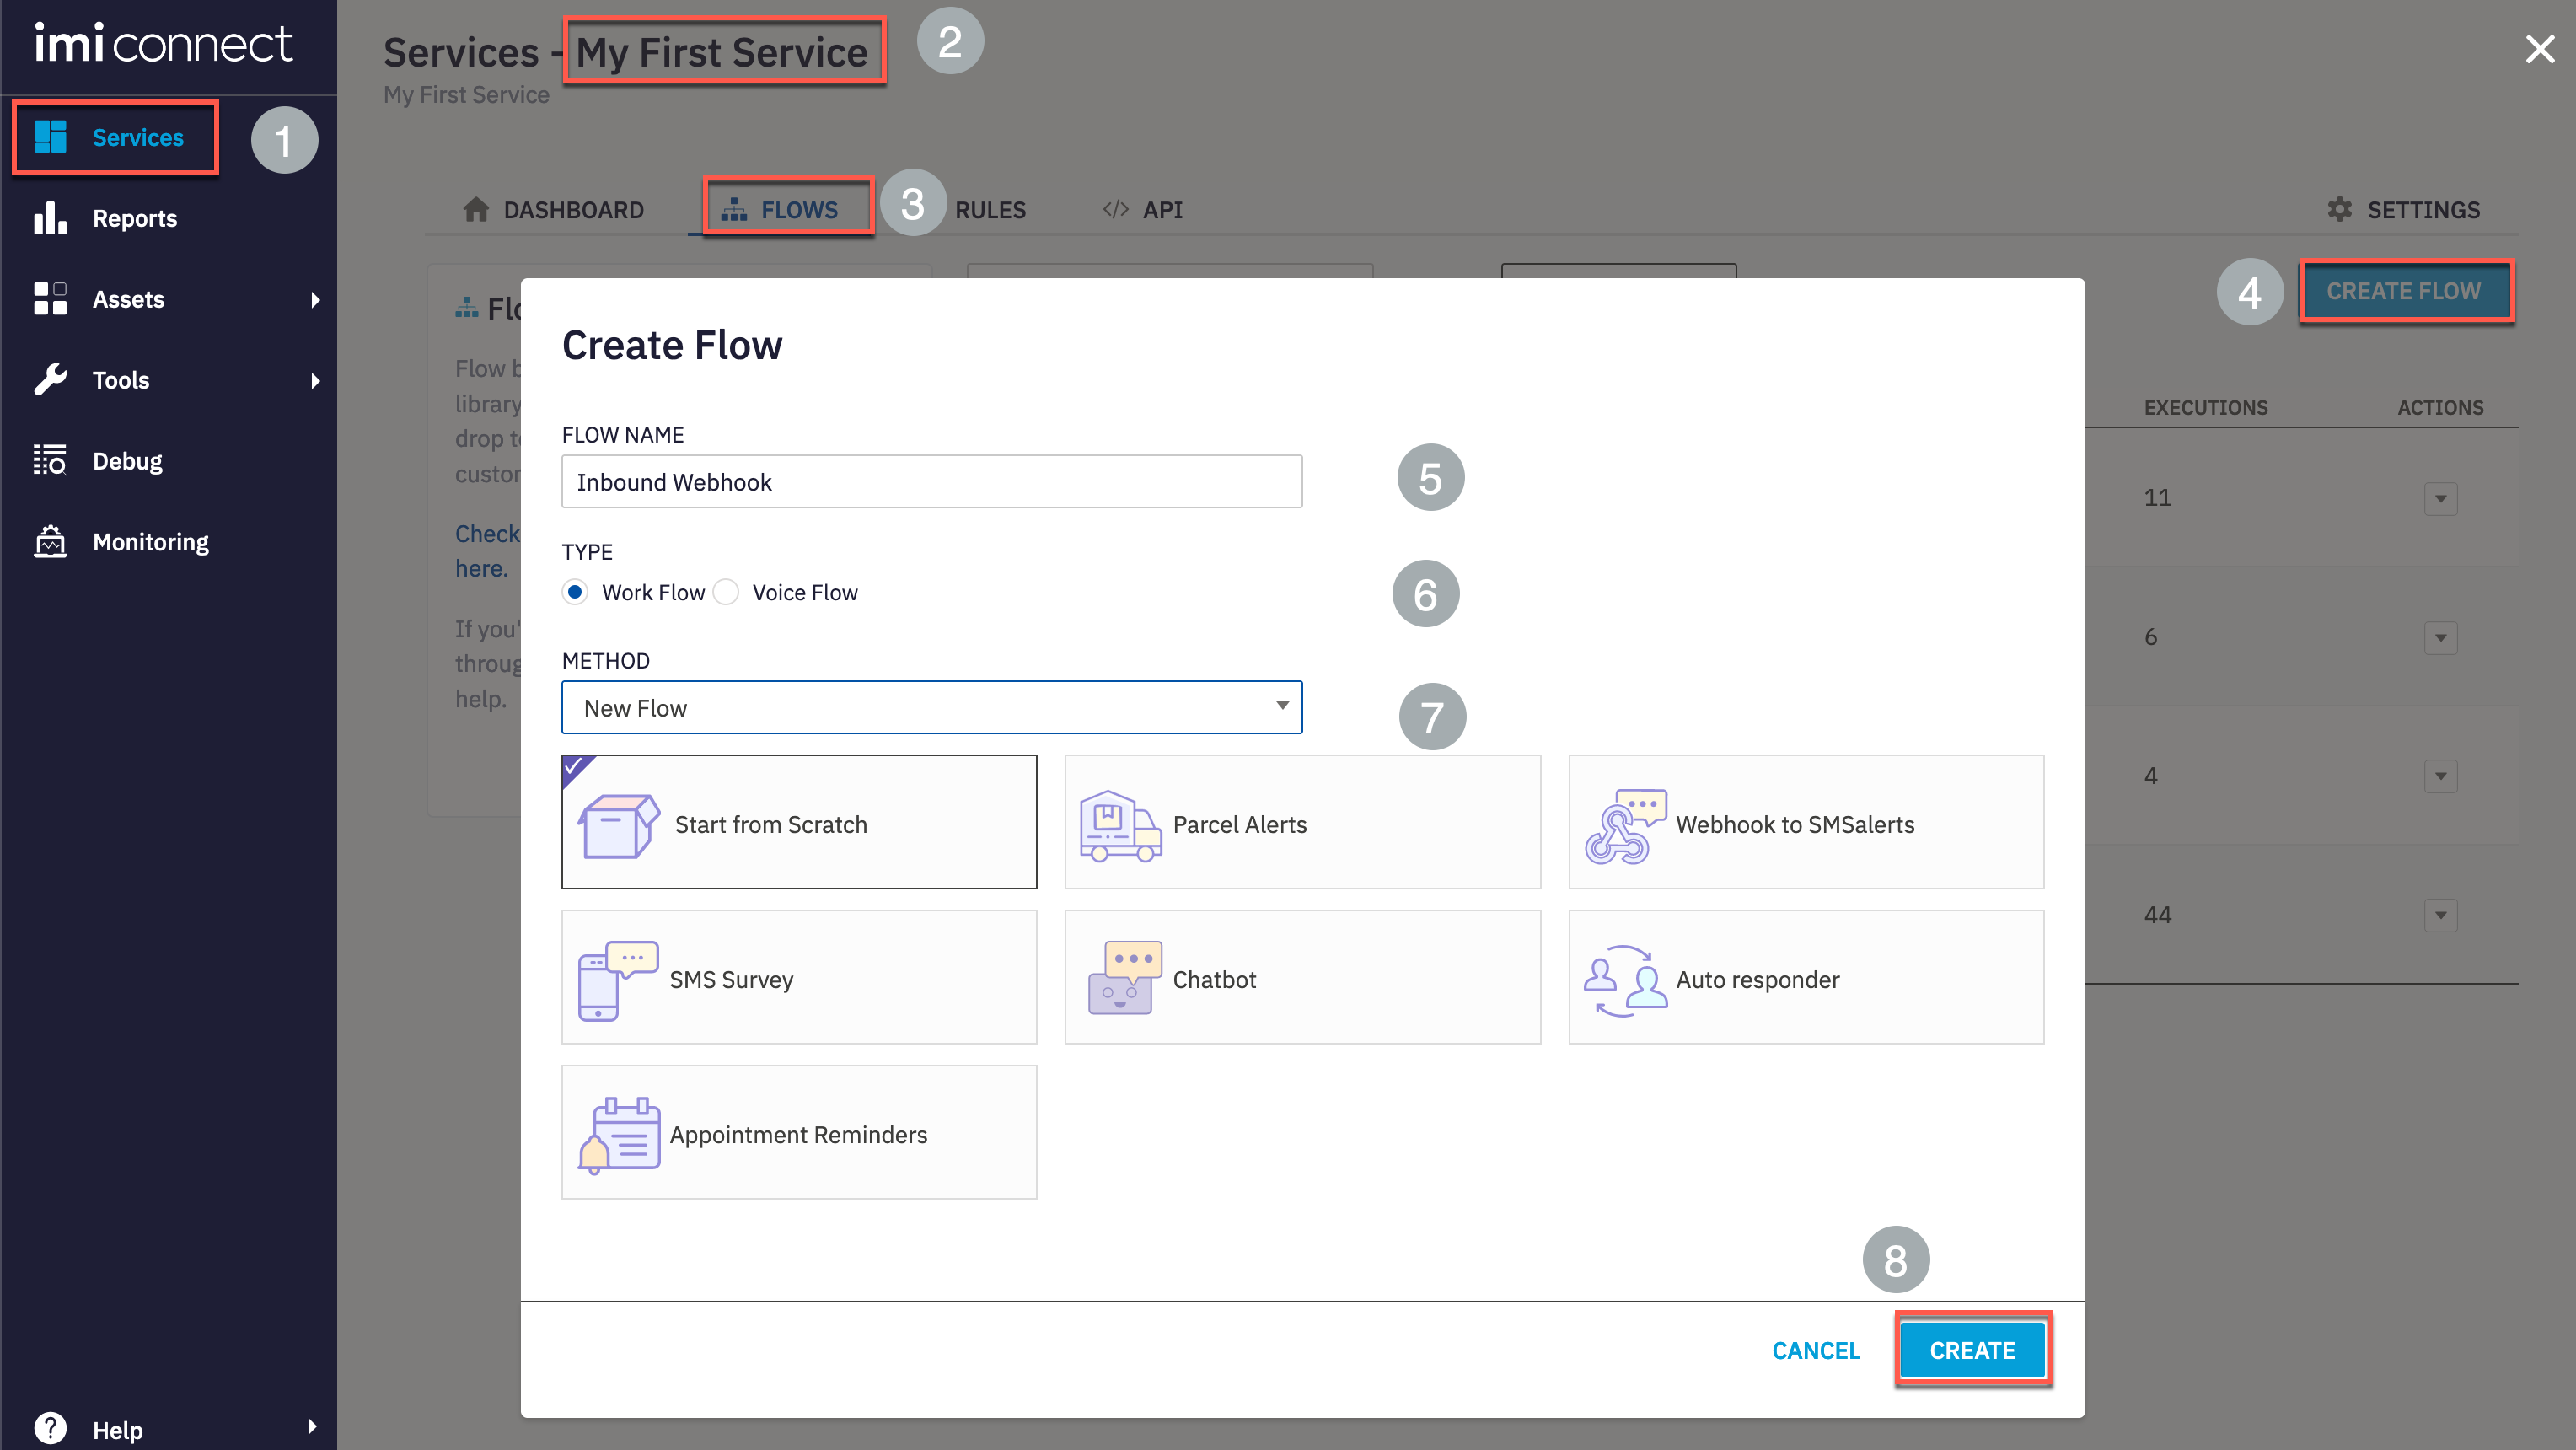
Click on Services and select the service in which the Email asset is created in previous labs. It should be My First Service
-
In the service click on FLOWS -> CREATE FLOW
-
Enter the FLOW NAME as Inbound Webhook, select the TYPE as Work Flow and under METHOD select New flow. Click Create
-
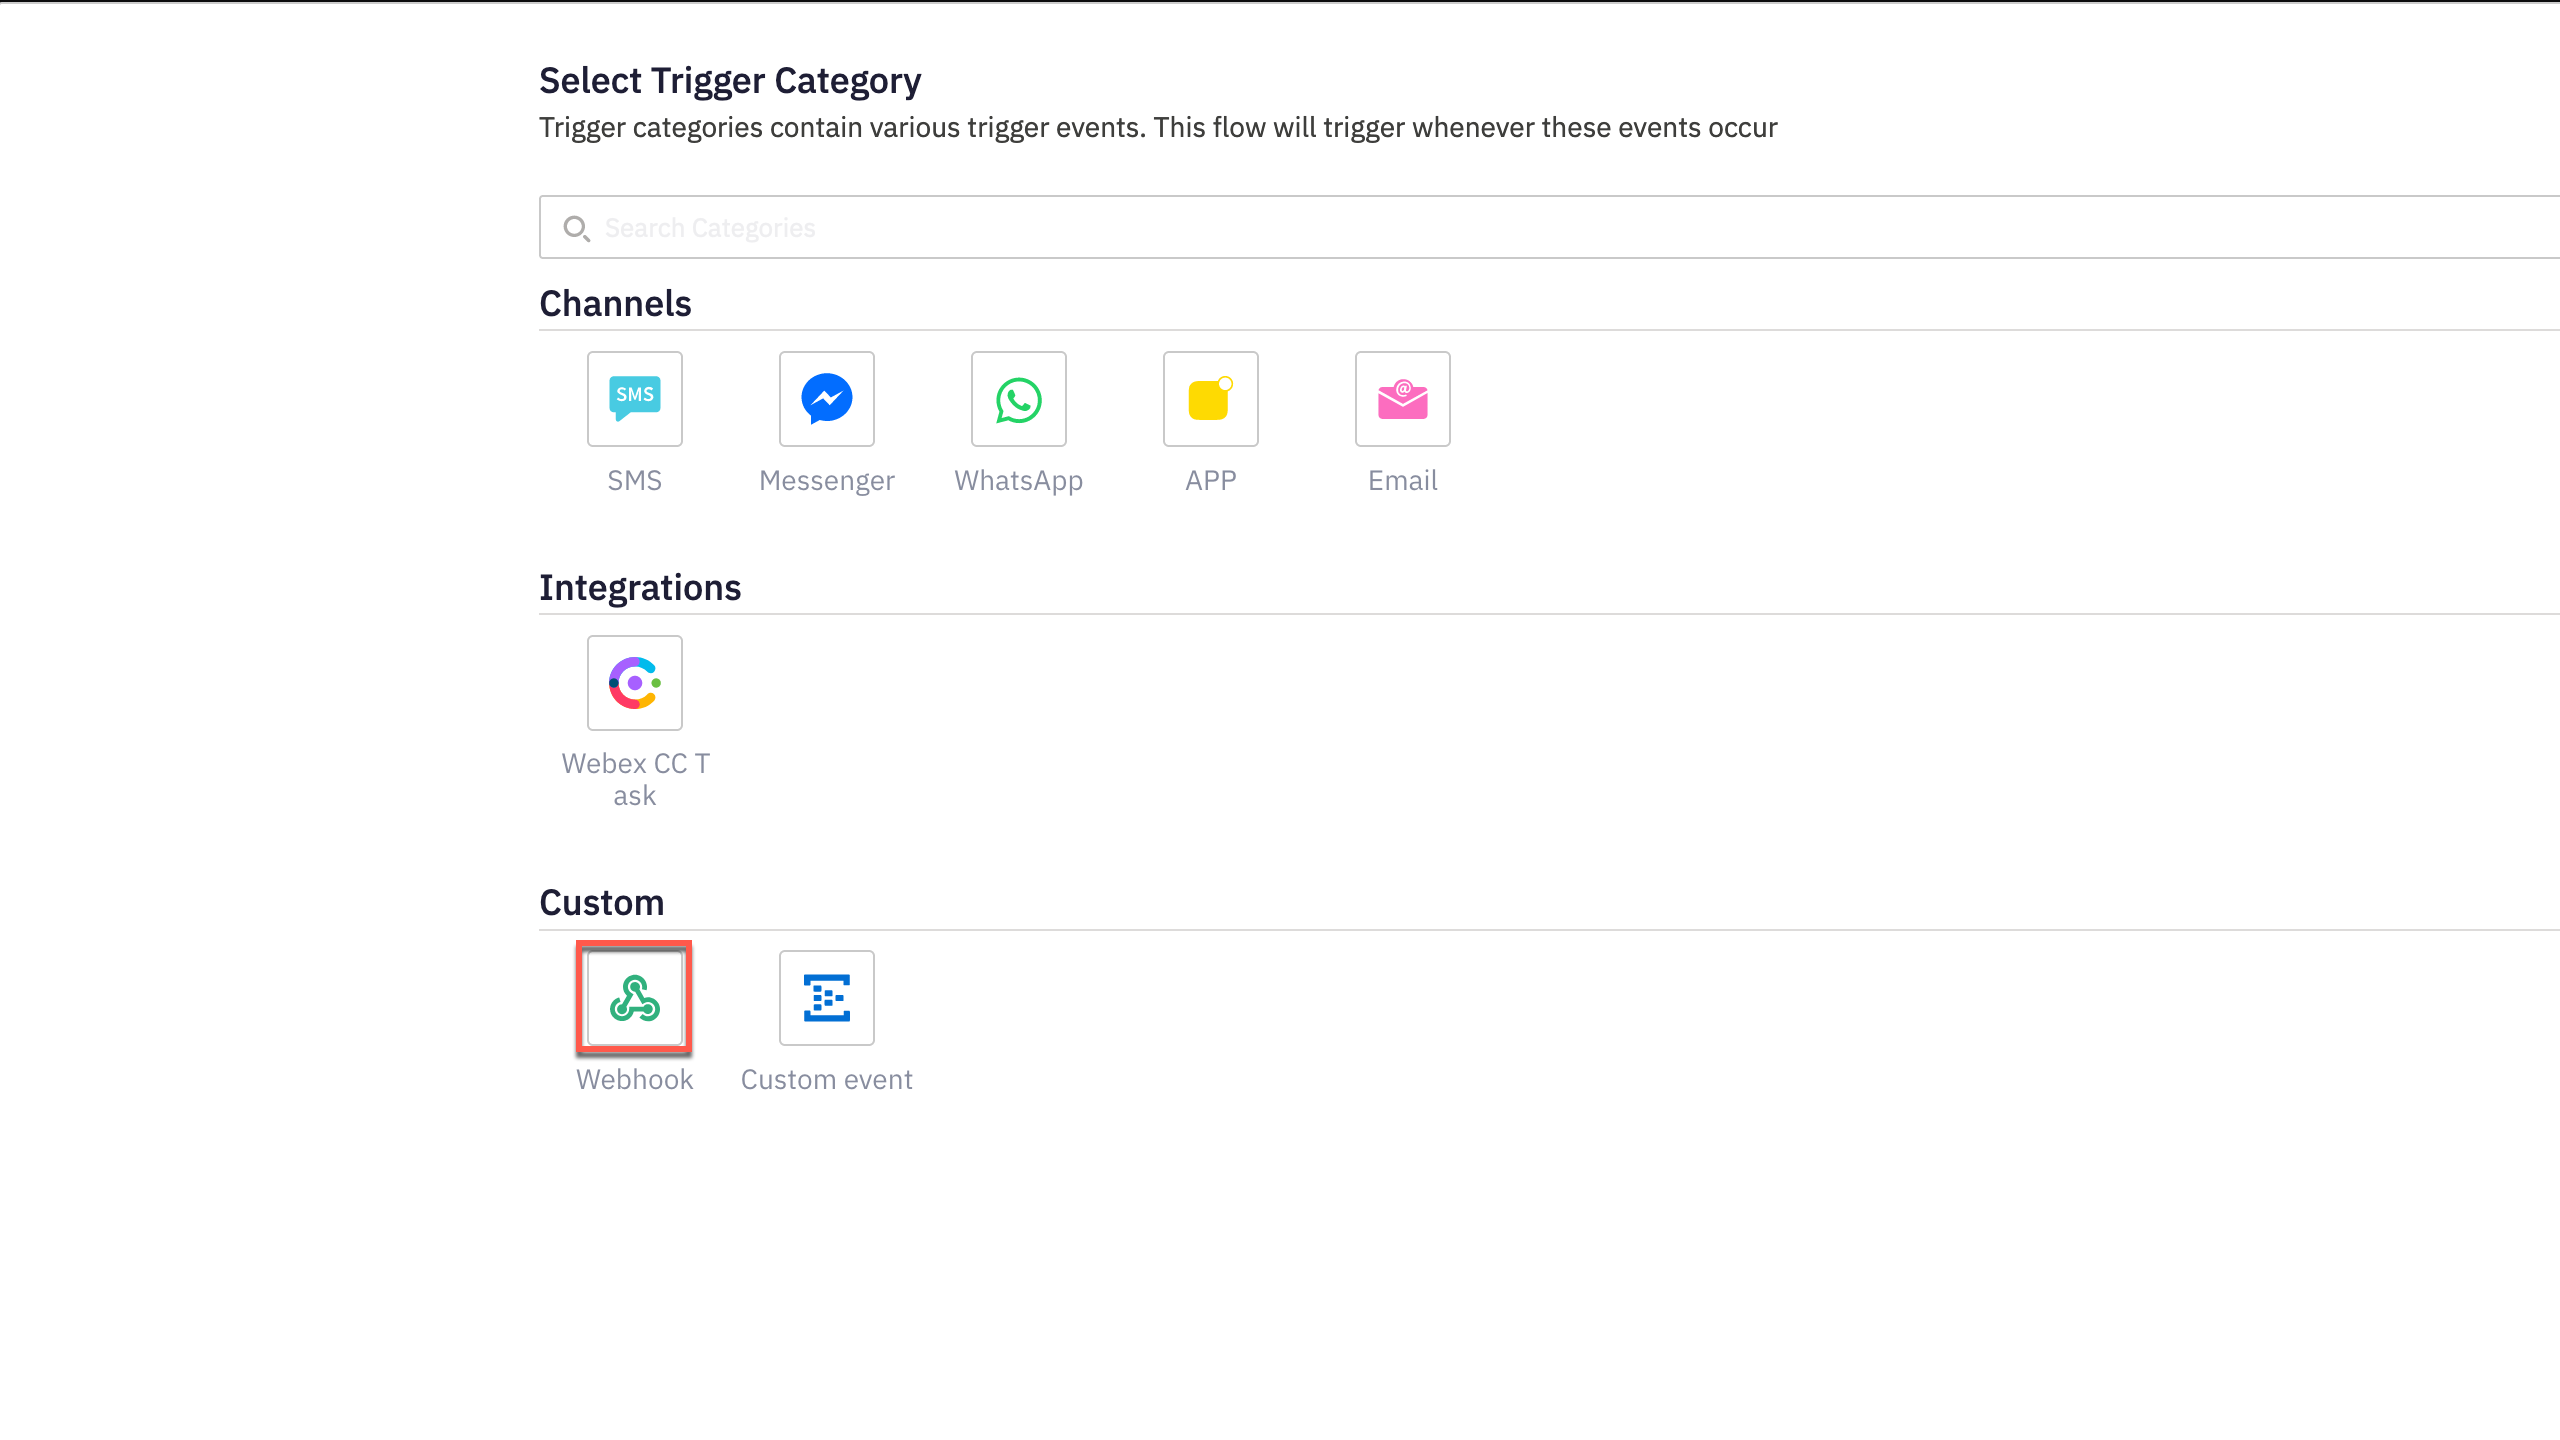
Select the trigger event of this flow as Webhook
-
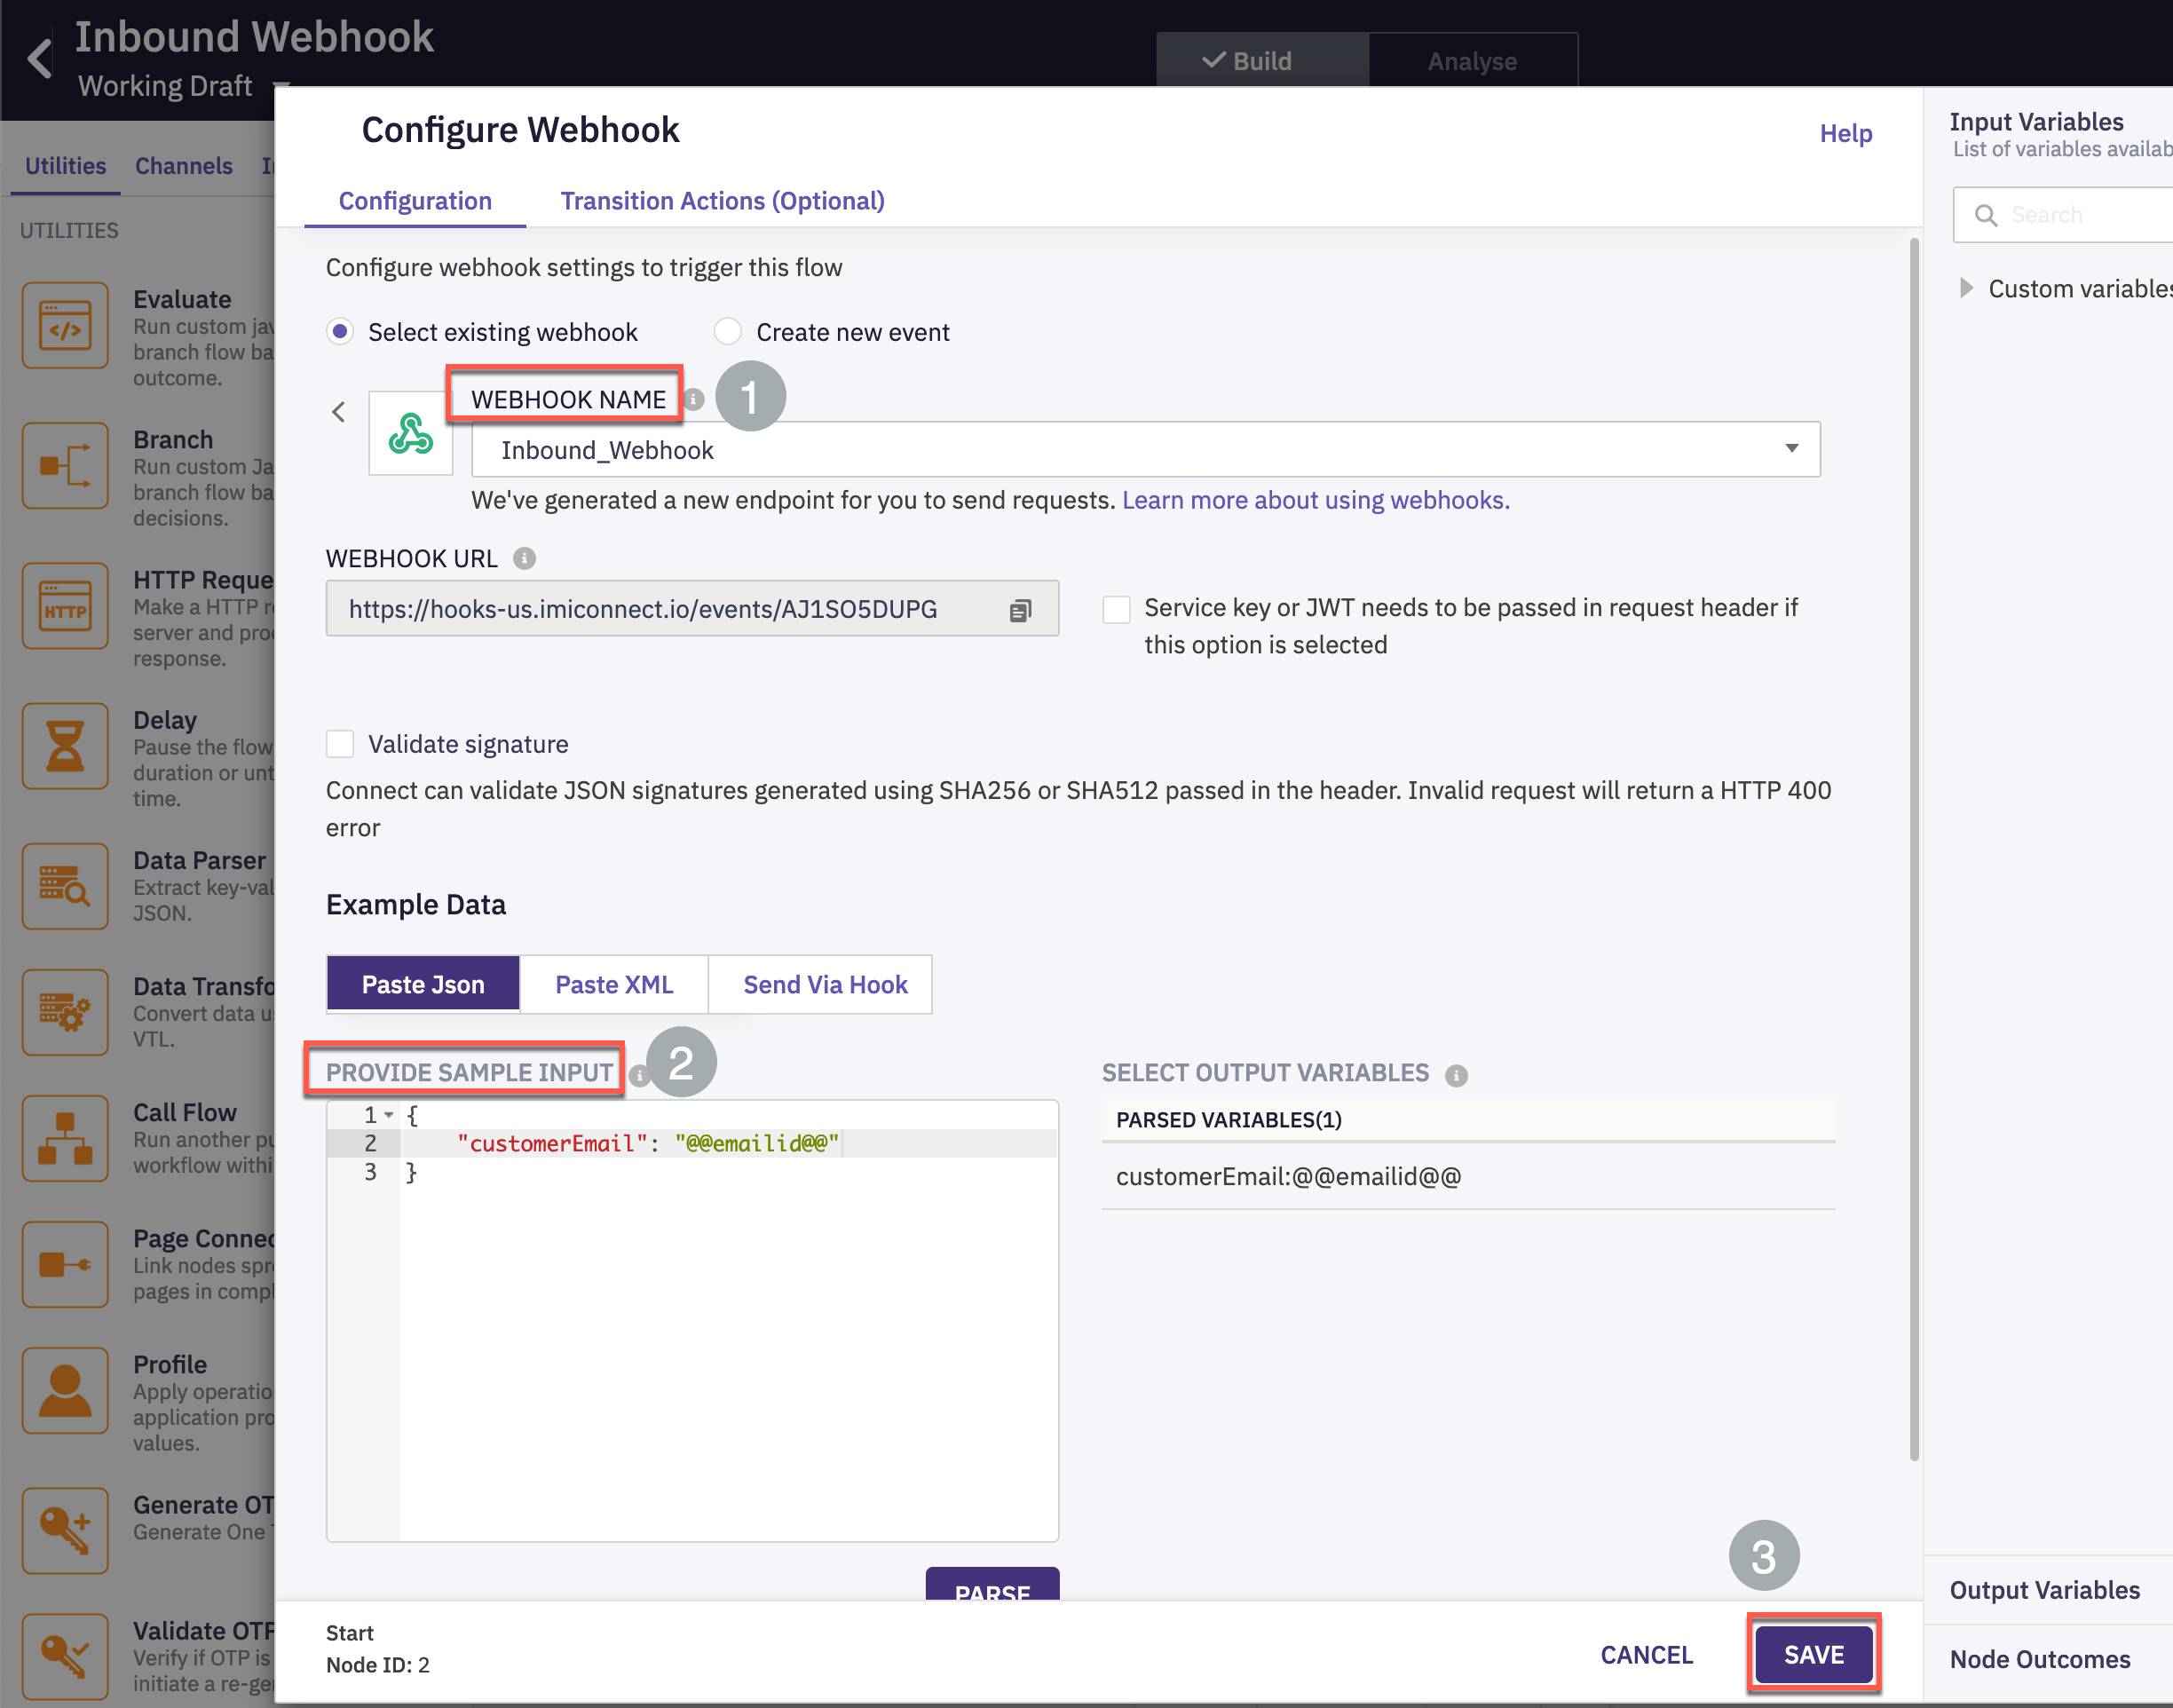
In configure webhook window, select the Webhook Name as the one created in Step-1
-
Input the sample input data as,
` { “customerEmail”: “@@emailid@@” } `
-
Click Save
-
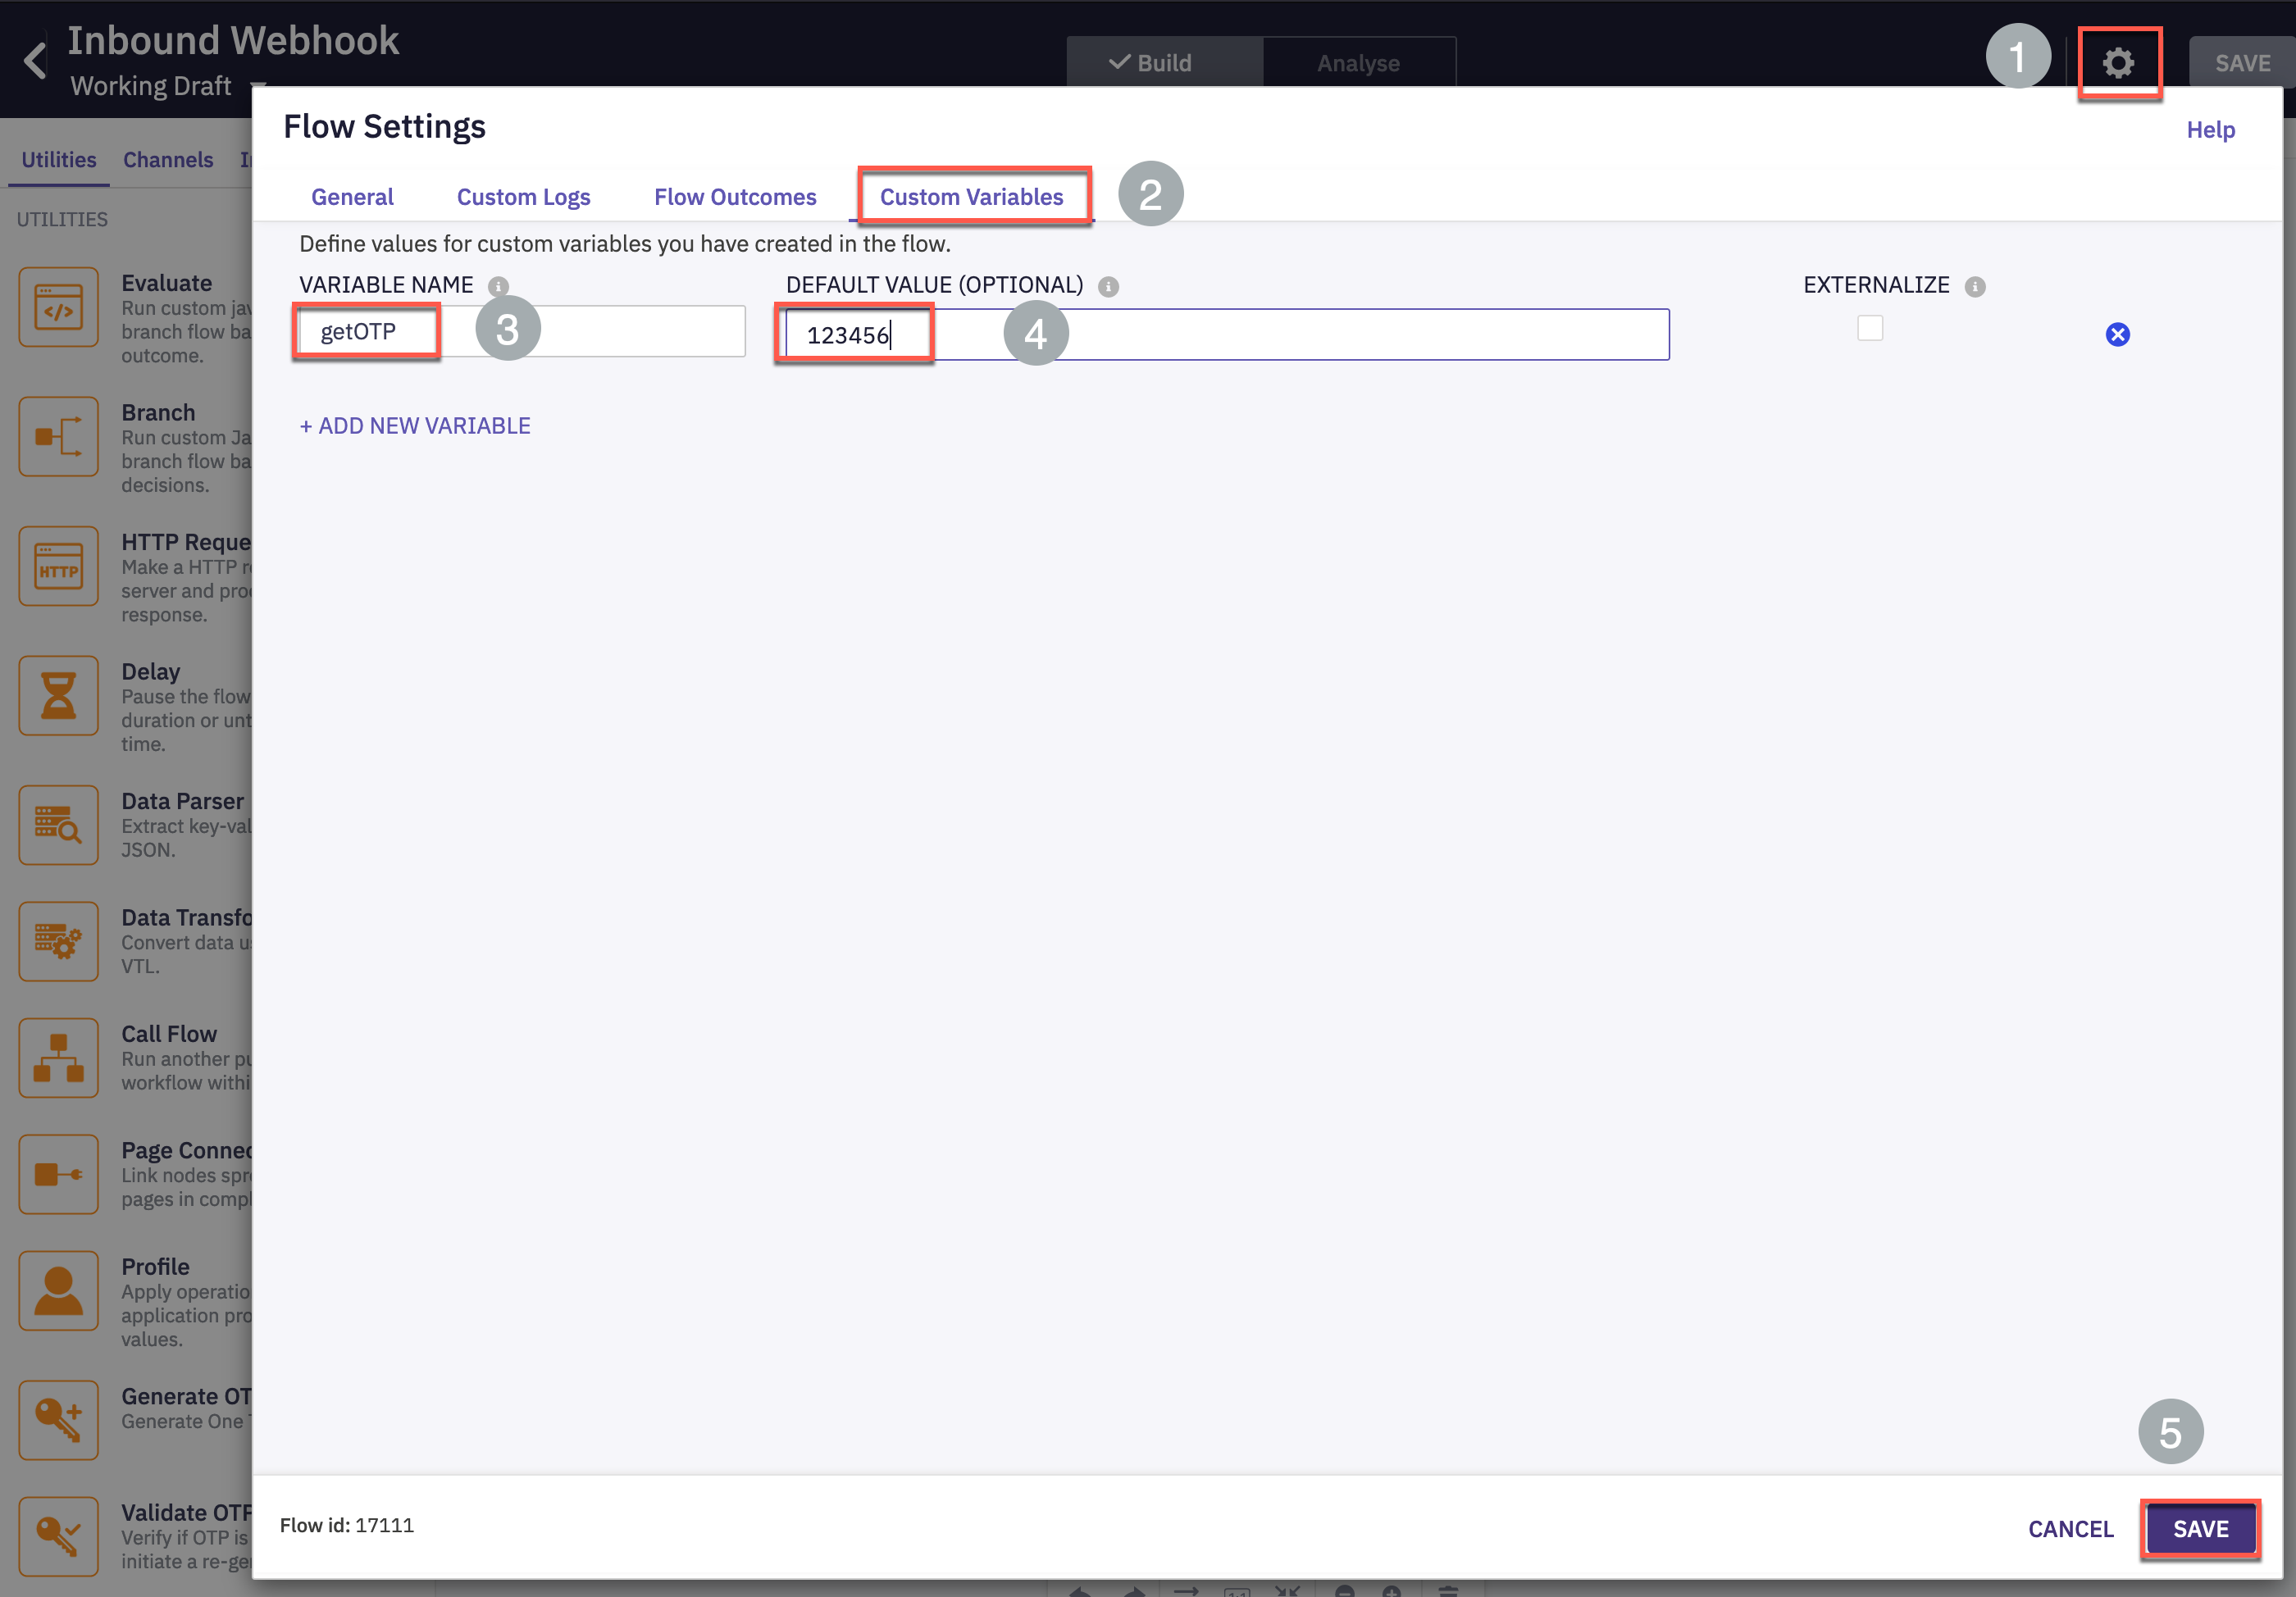
Navigate to settings on the top right corner of the flow builder UI > Custom Variables.
-
Create a new variable and provide a default value.
-
Enter the Variable Name as ‘getOTP’ and the Default Value as ‘123456’. Click Save
-
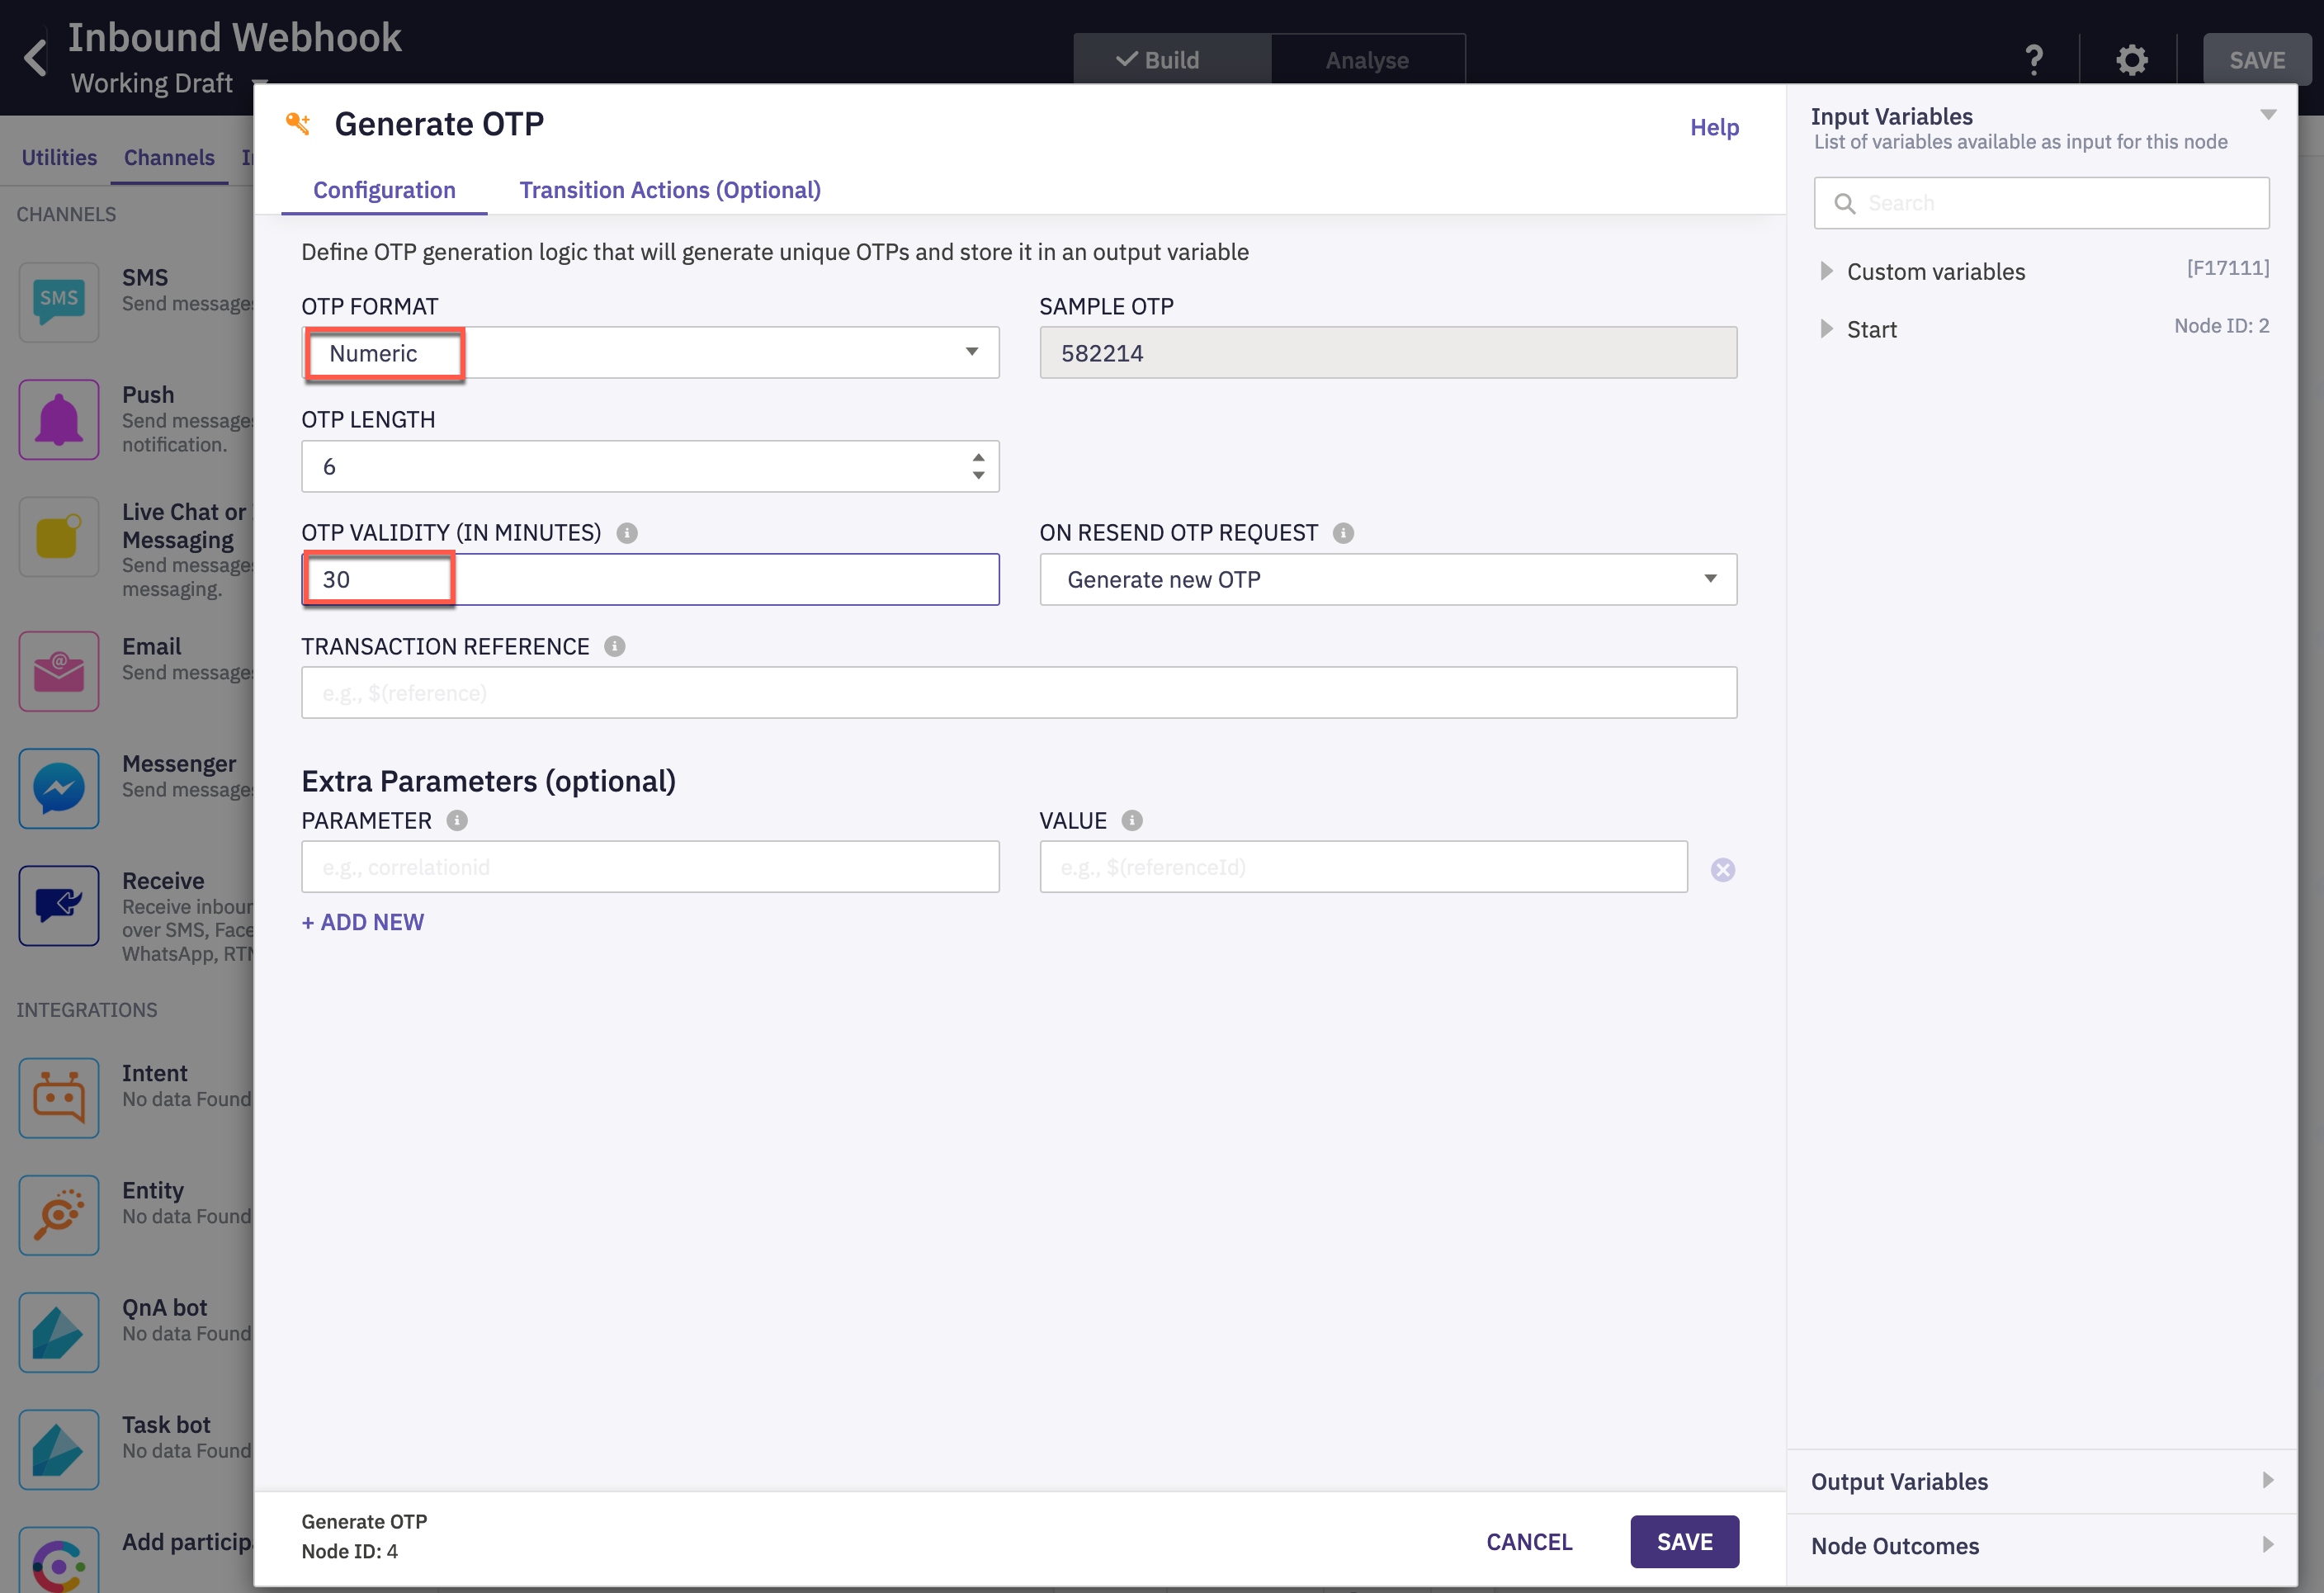
Add Generate OTP to the flow builder UI. Connect the trigger event success outcome to the Generate OTP node. Double click the node.
-
Select OTP Format as ‘Numeric’ and OTP Validity as ‘30’
-
Select the getOTP variable in the Transaction Reeference section and click Save
-
Set the value for getOTP variable at exit of the Generate OTP node.
-
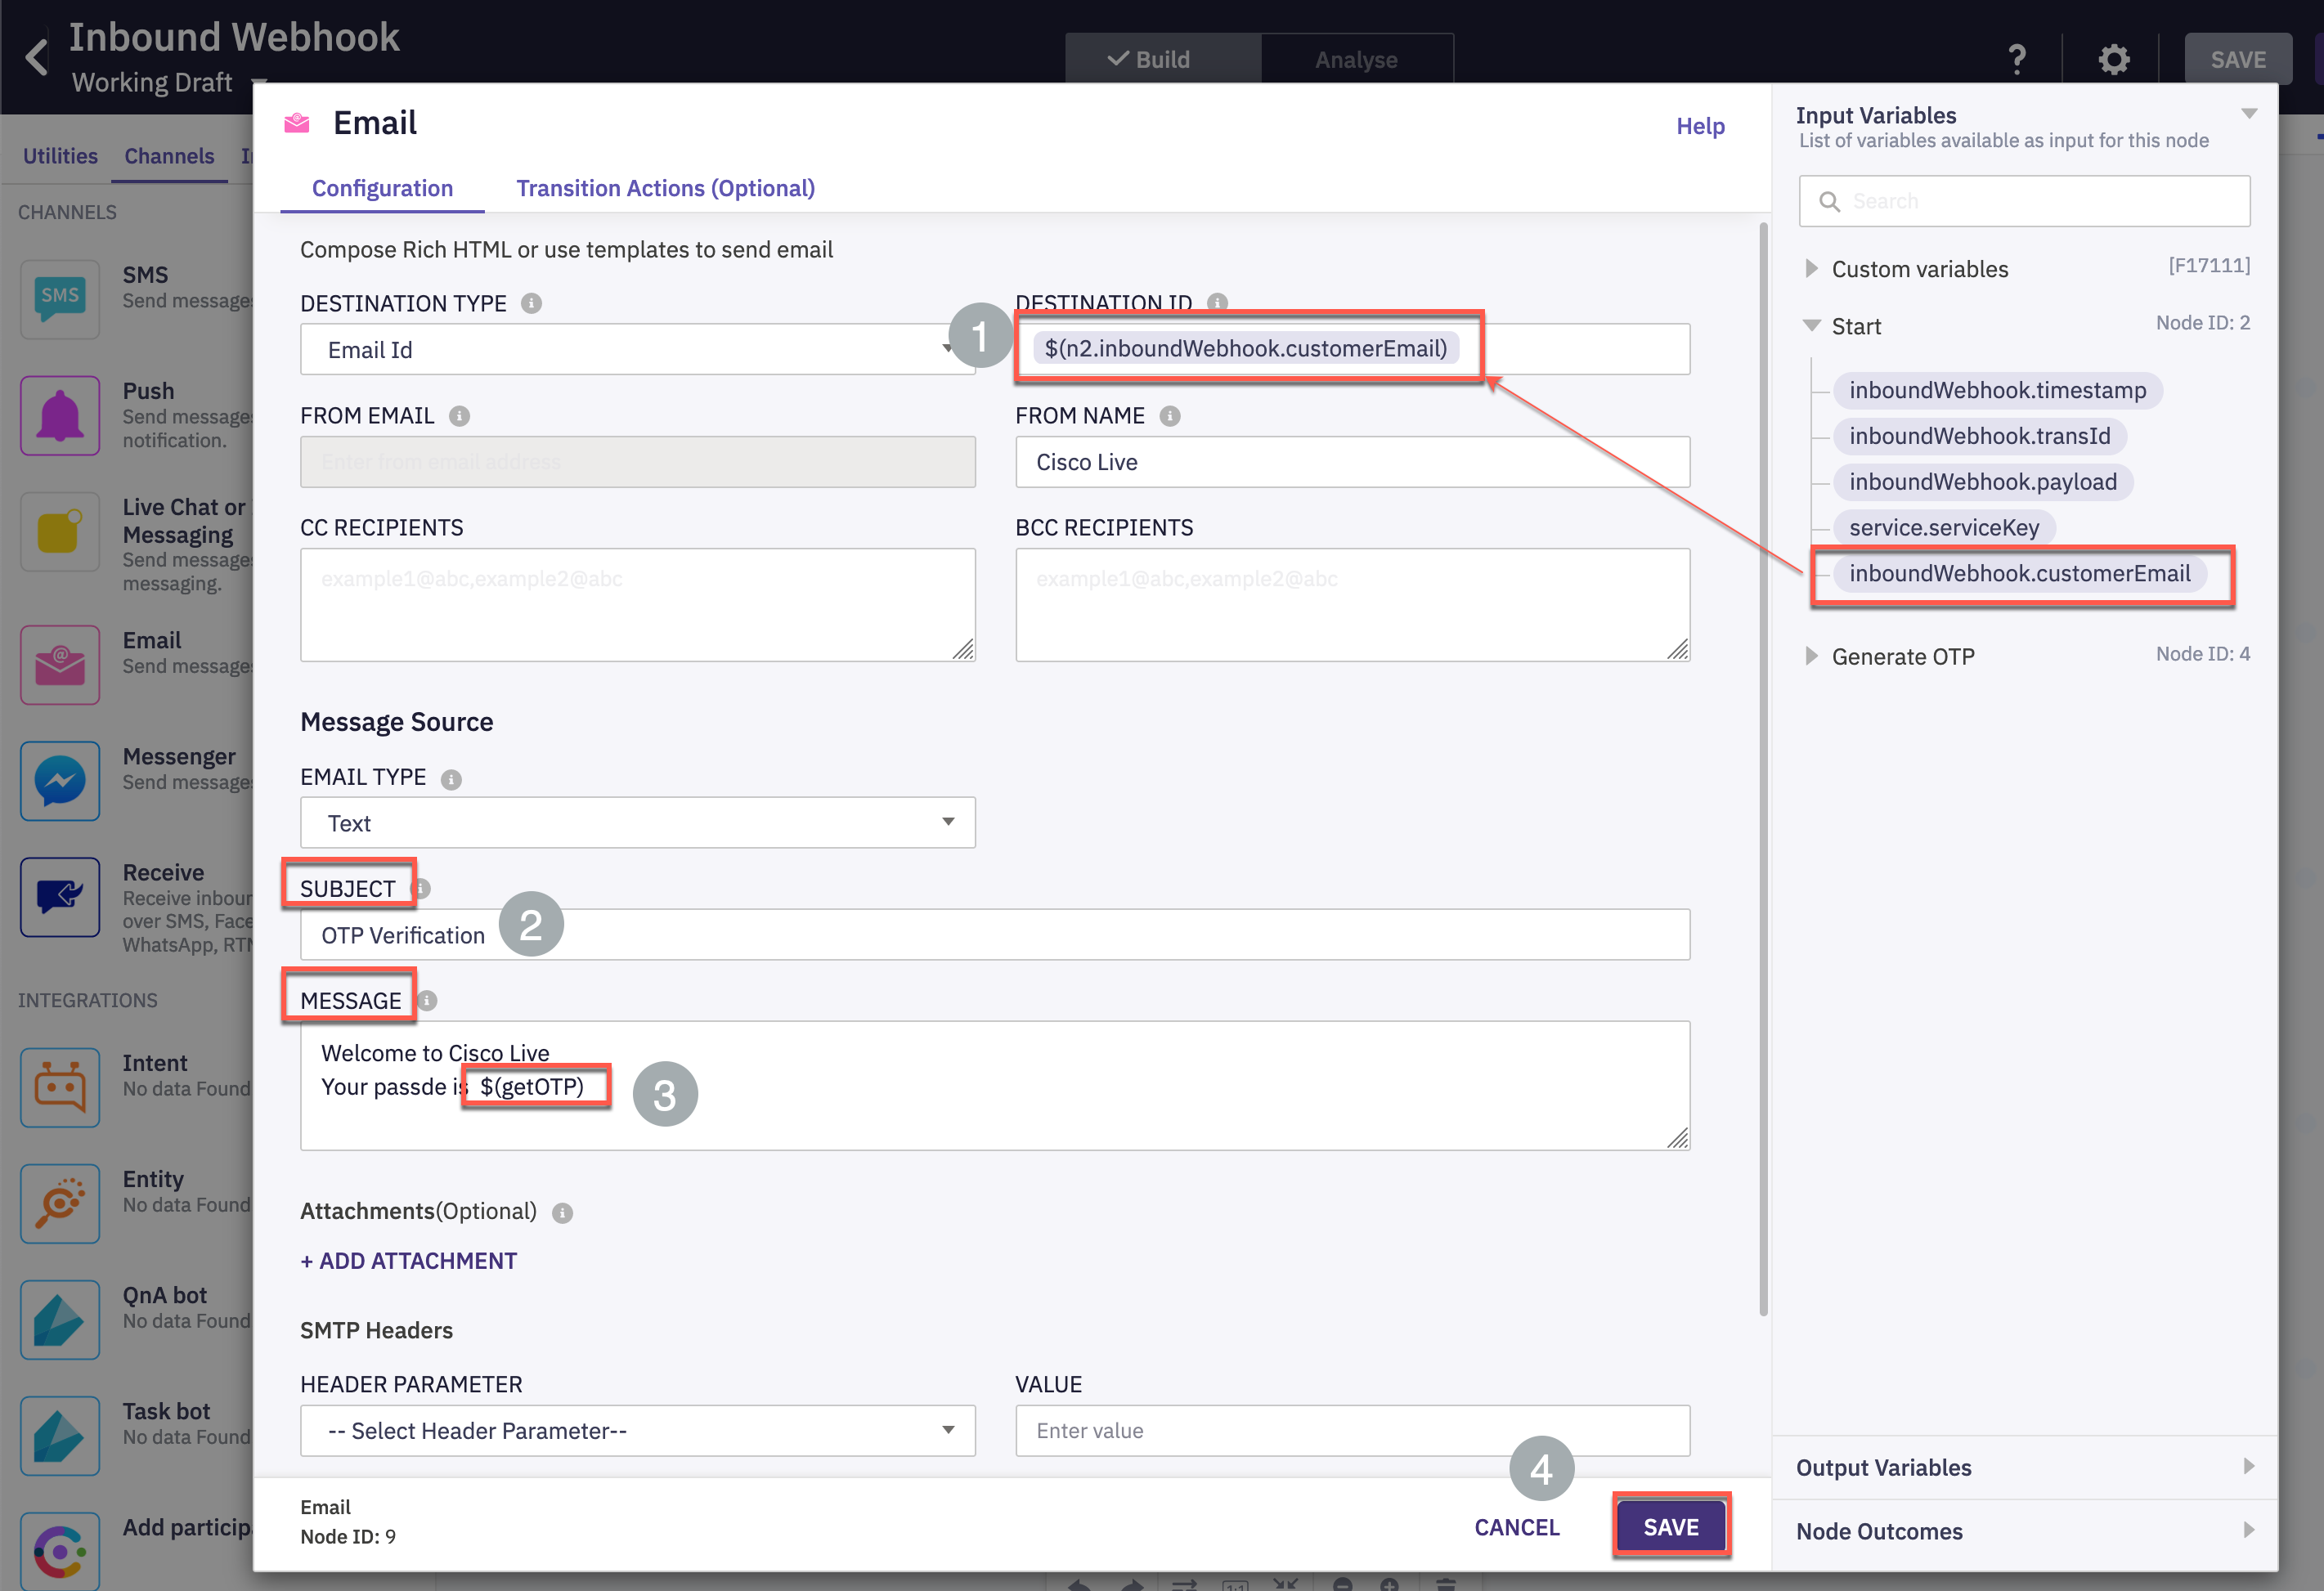
Add Email node to the flow builder UI and connect the success outcome of Generate OTP to the Email node. Double click the node.
-
Select the Destination ID as the customerEmail output variable of the trigger (Start) node. Enter desired Subject name for the email and in the Message field include the getOTP variable as shown in the image below.
-
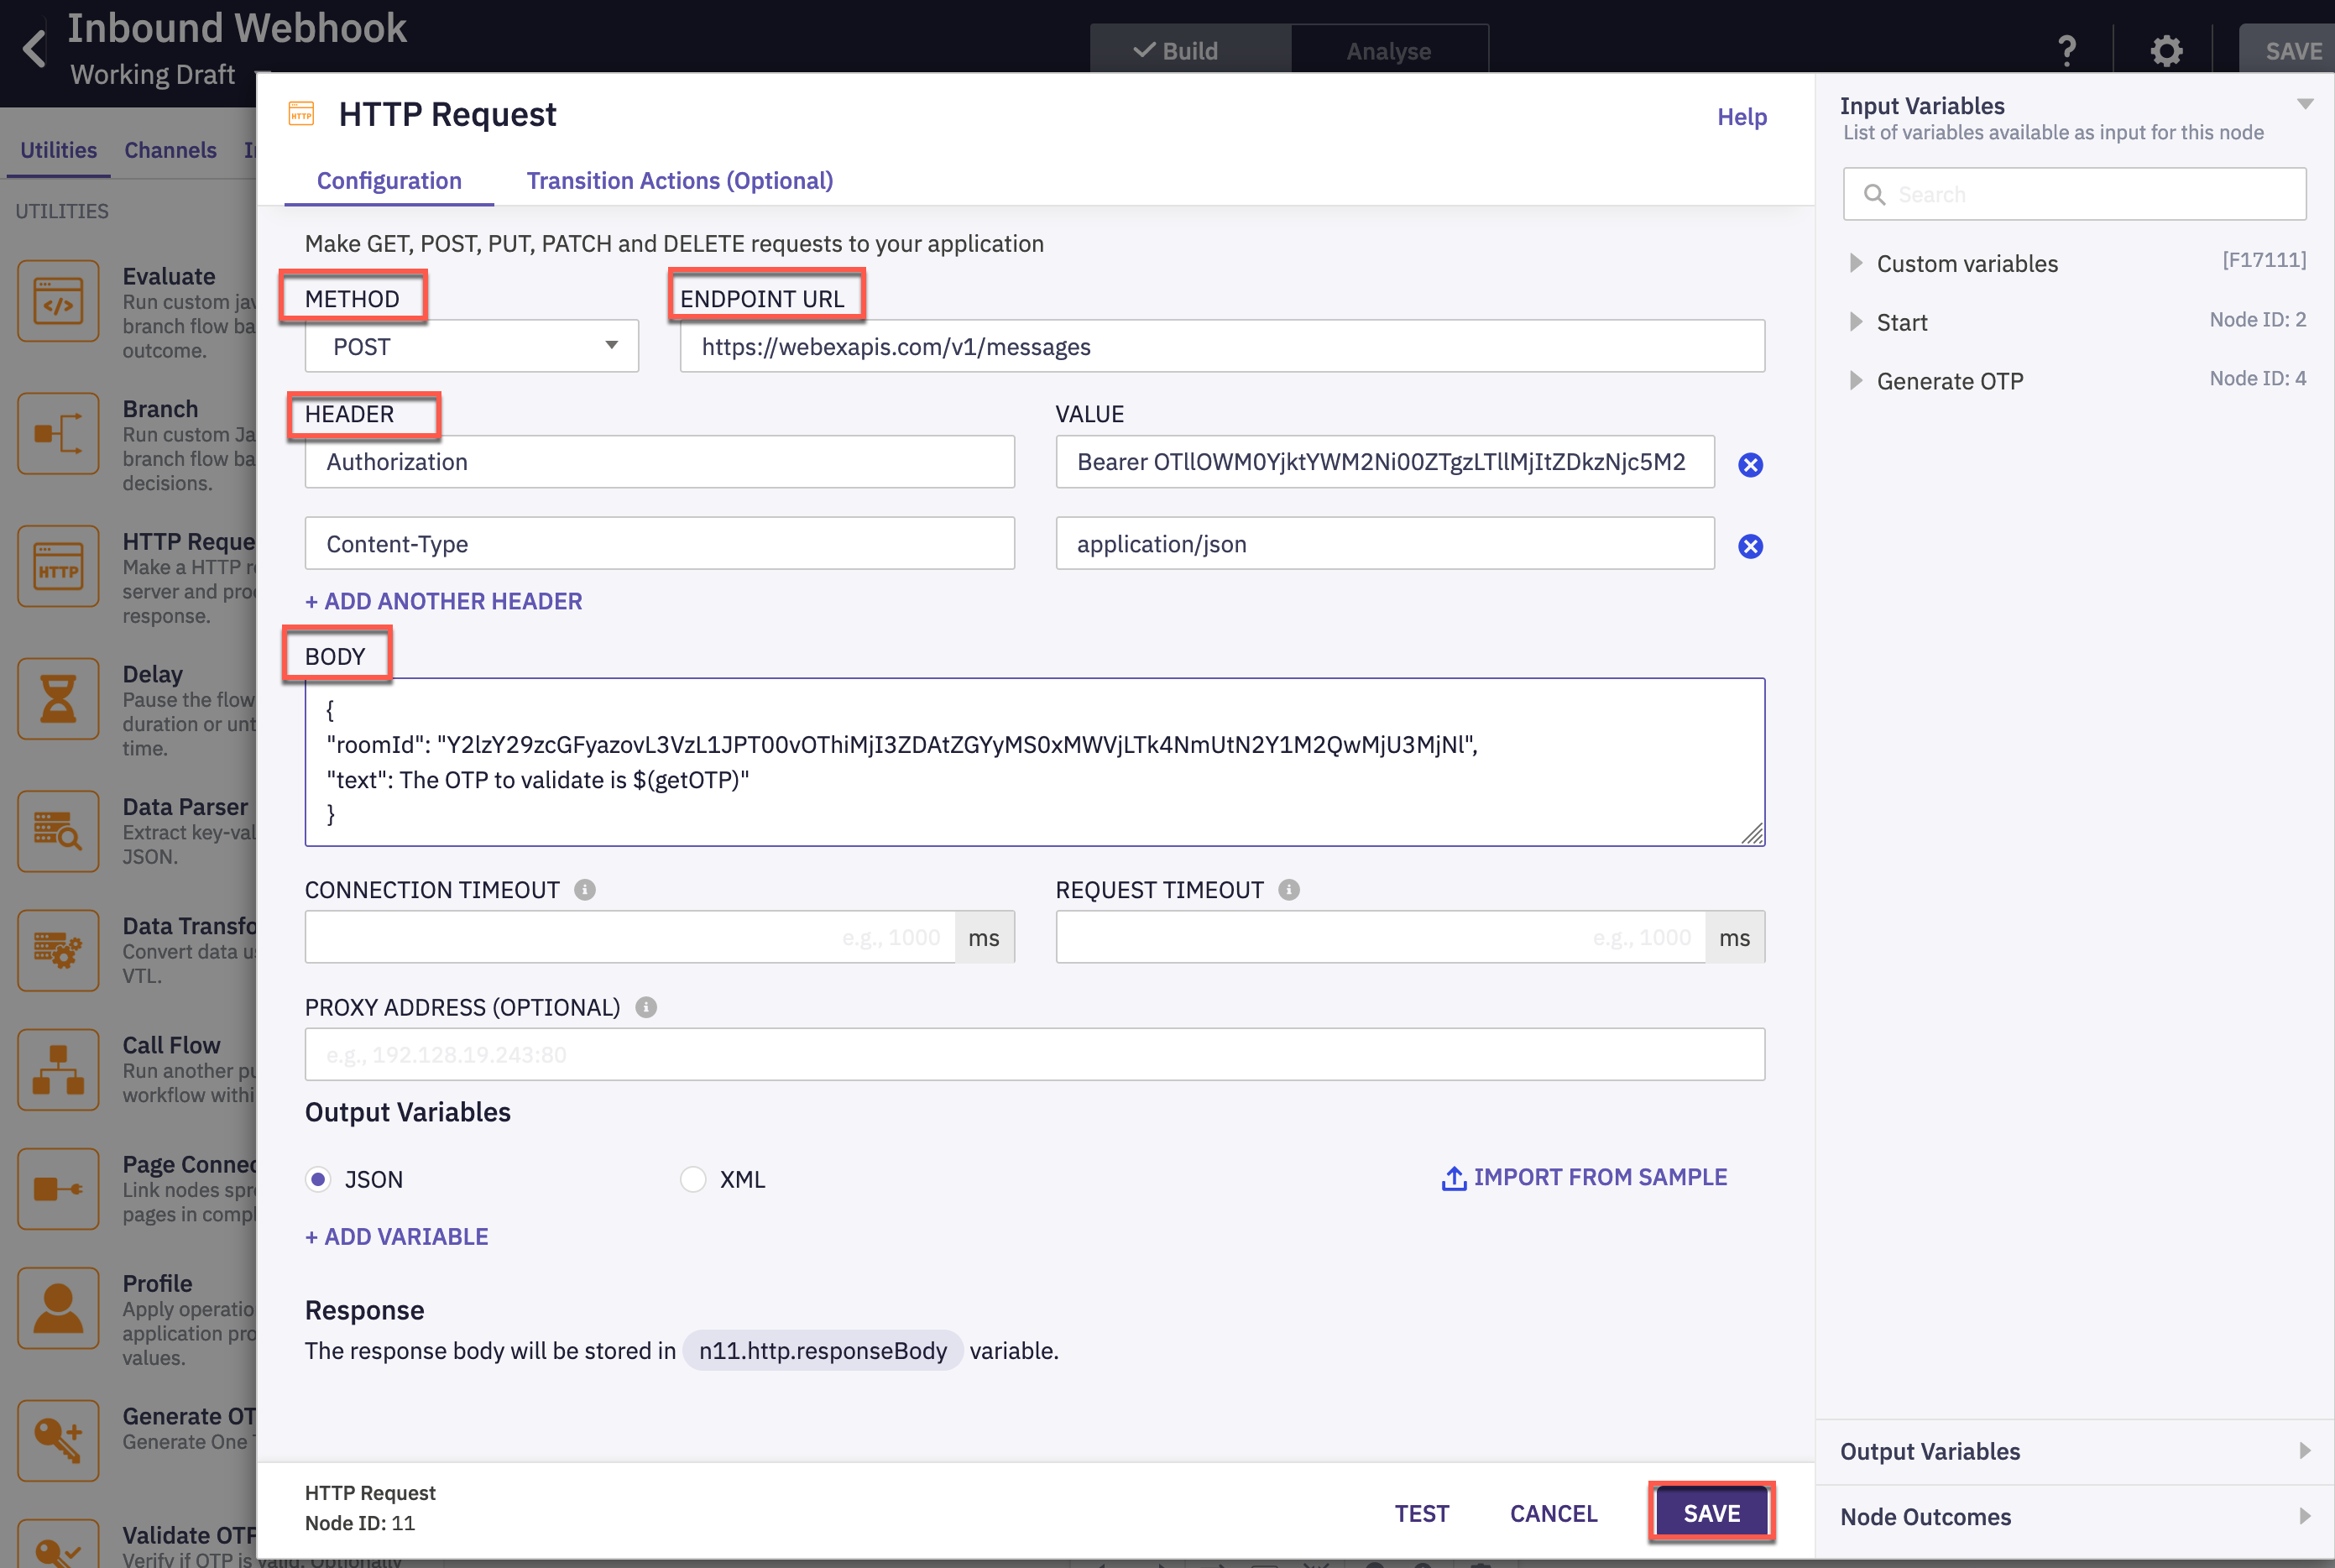
Add HTTP Request node to the flow builder UI and connect the success outcome of Email to the HTTP Request node. Double click the node.
-
Configure the node with the below details,
Method: POST Endpoint URL: https://webexapis.com/v1/messages
Header:
Authorization: Bearer
Body:
{
“roomId”: “
-
Configure the success path of the HTTP Request node by click and drag of the green dot in the node.

-
Configure the error path of all 3 nodes - Generate OTP , Email and HTTP Request by click and drag out of the red and orange dots in the nodes.
-
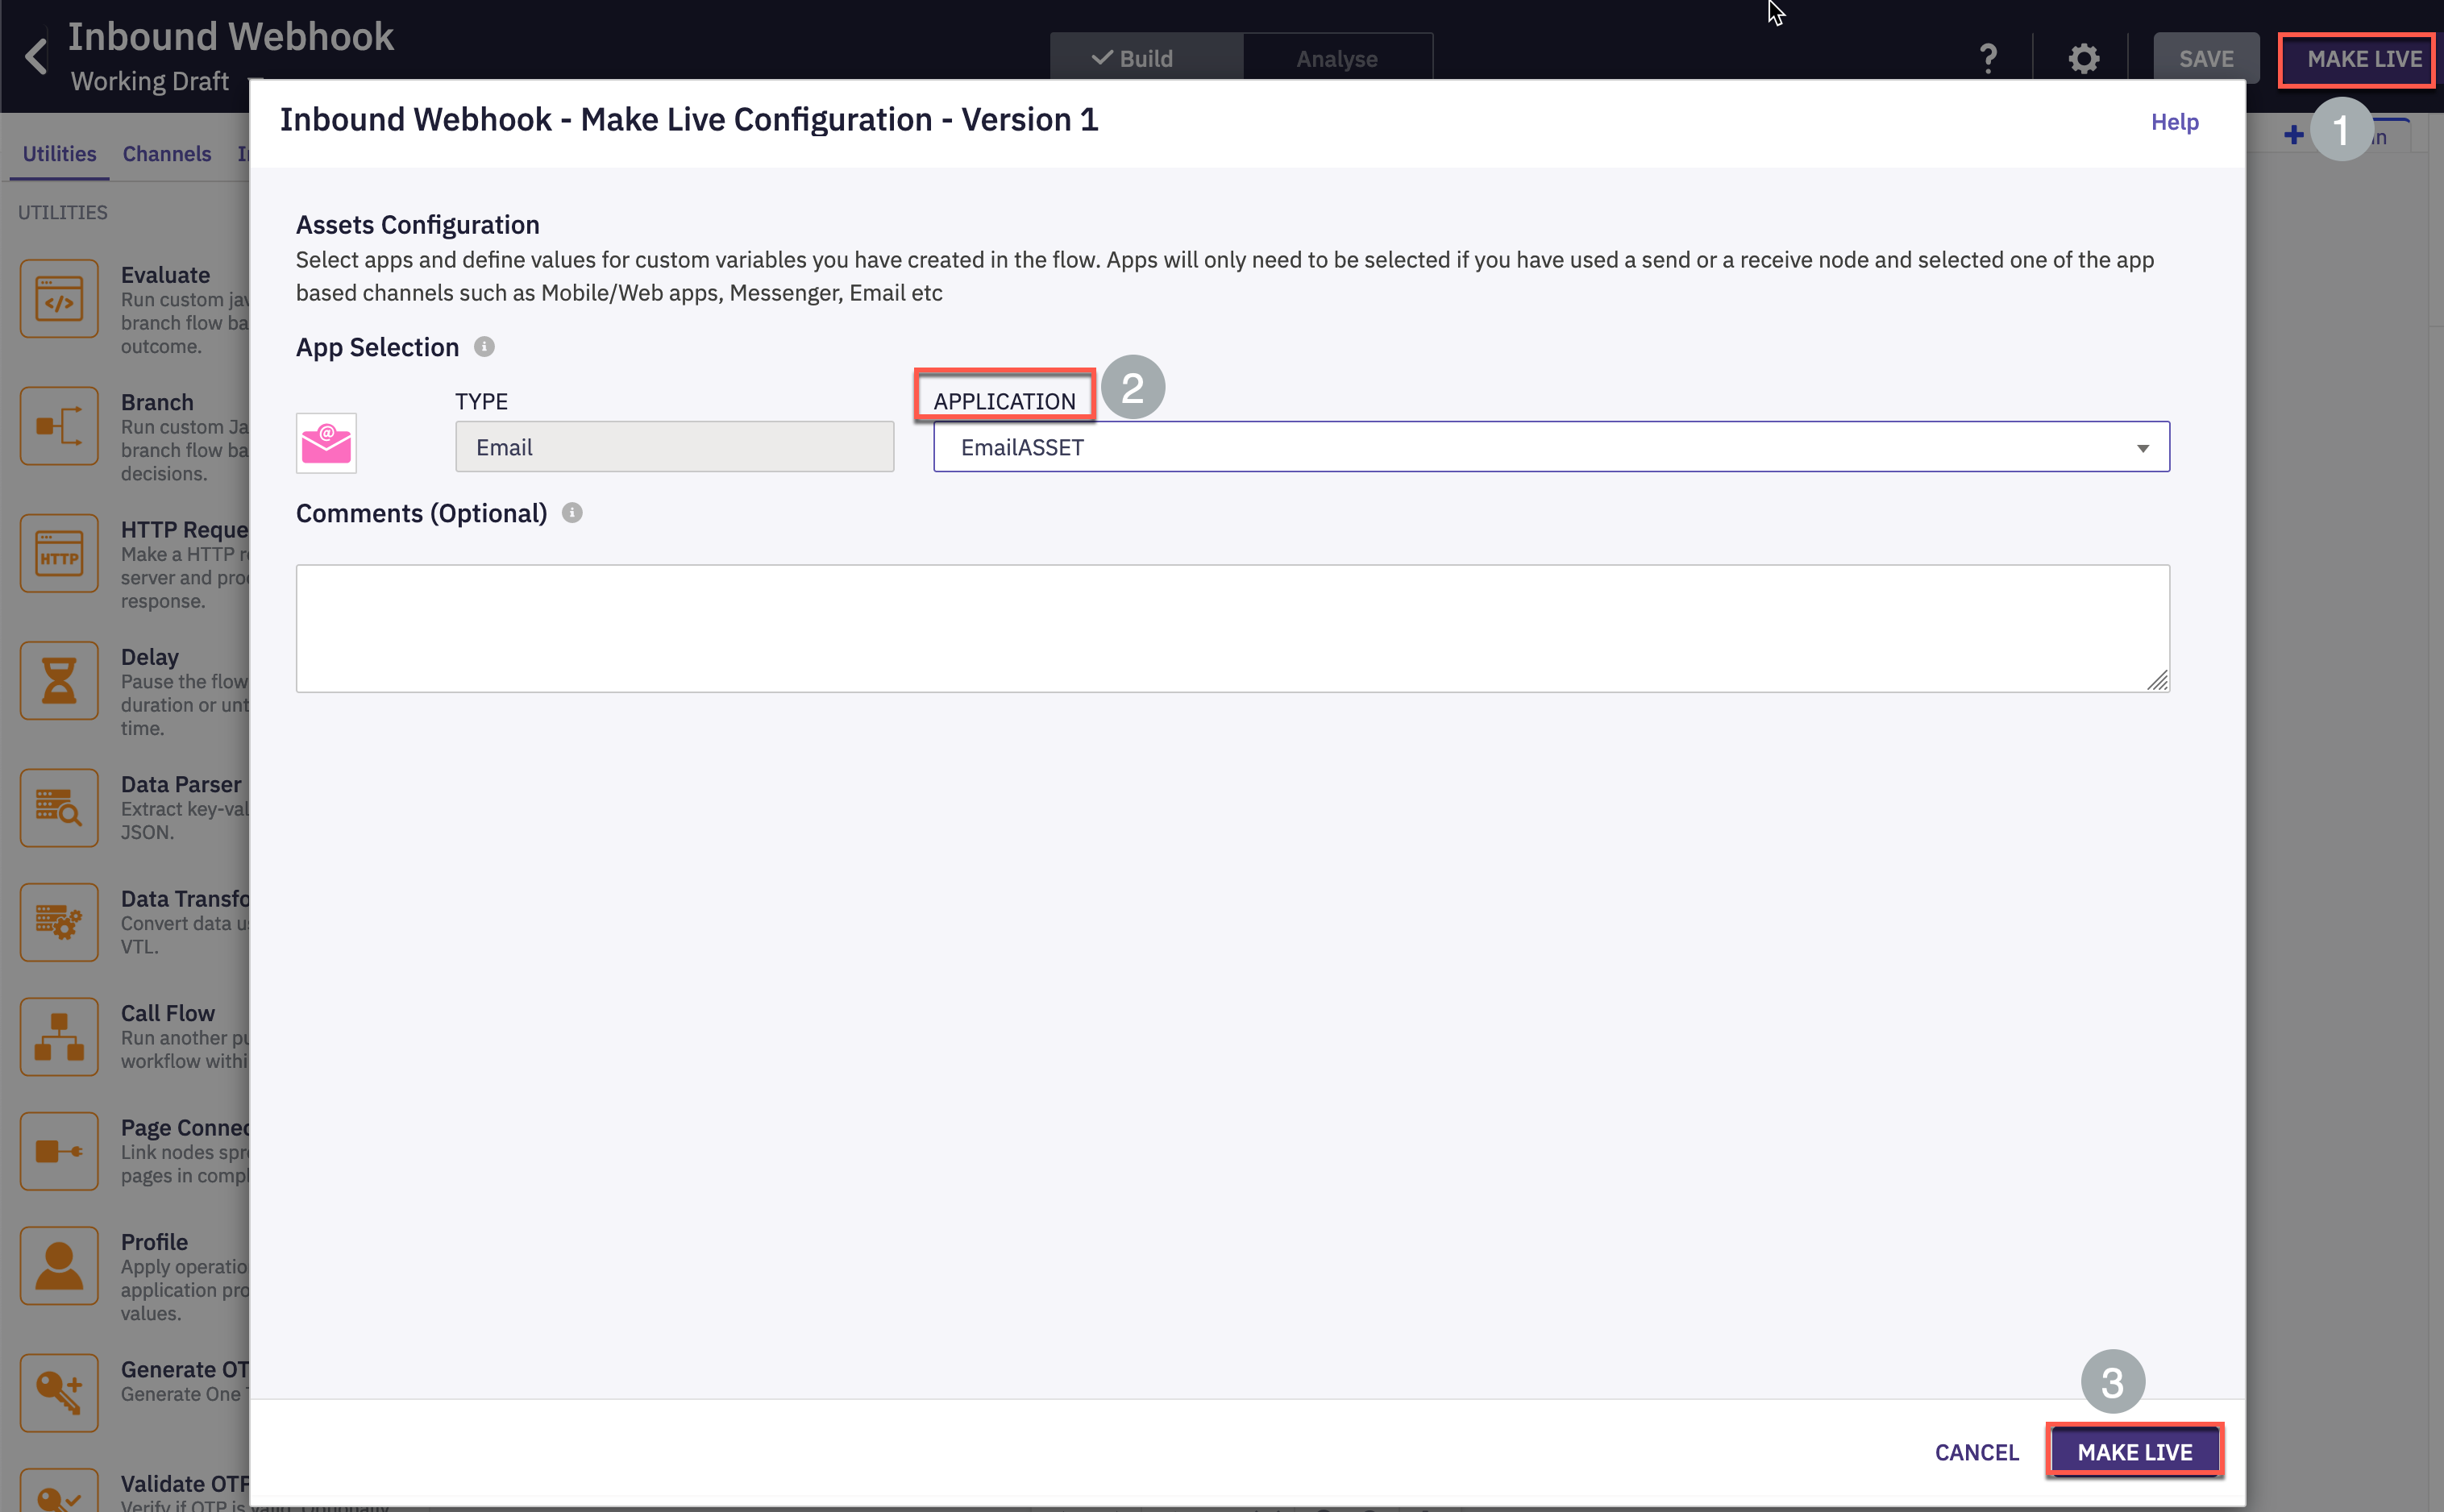
Click Make Live option on the top right of the flow builder UI, select the Email application and click Make Live
Step 6. Agent desktop layout update
-
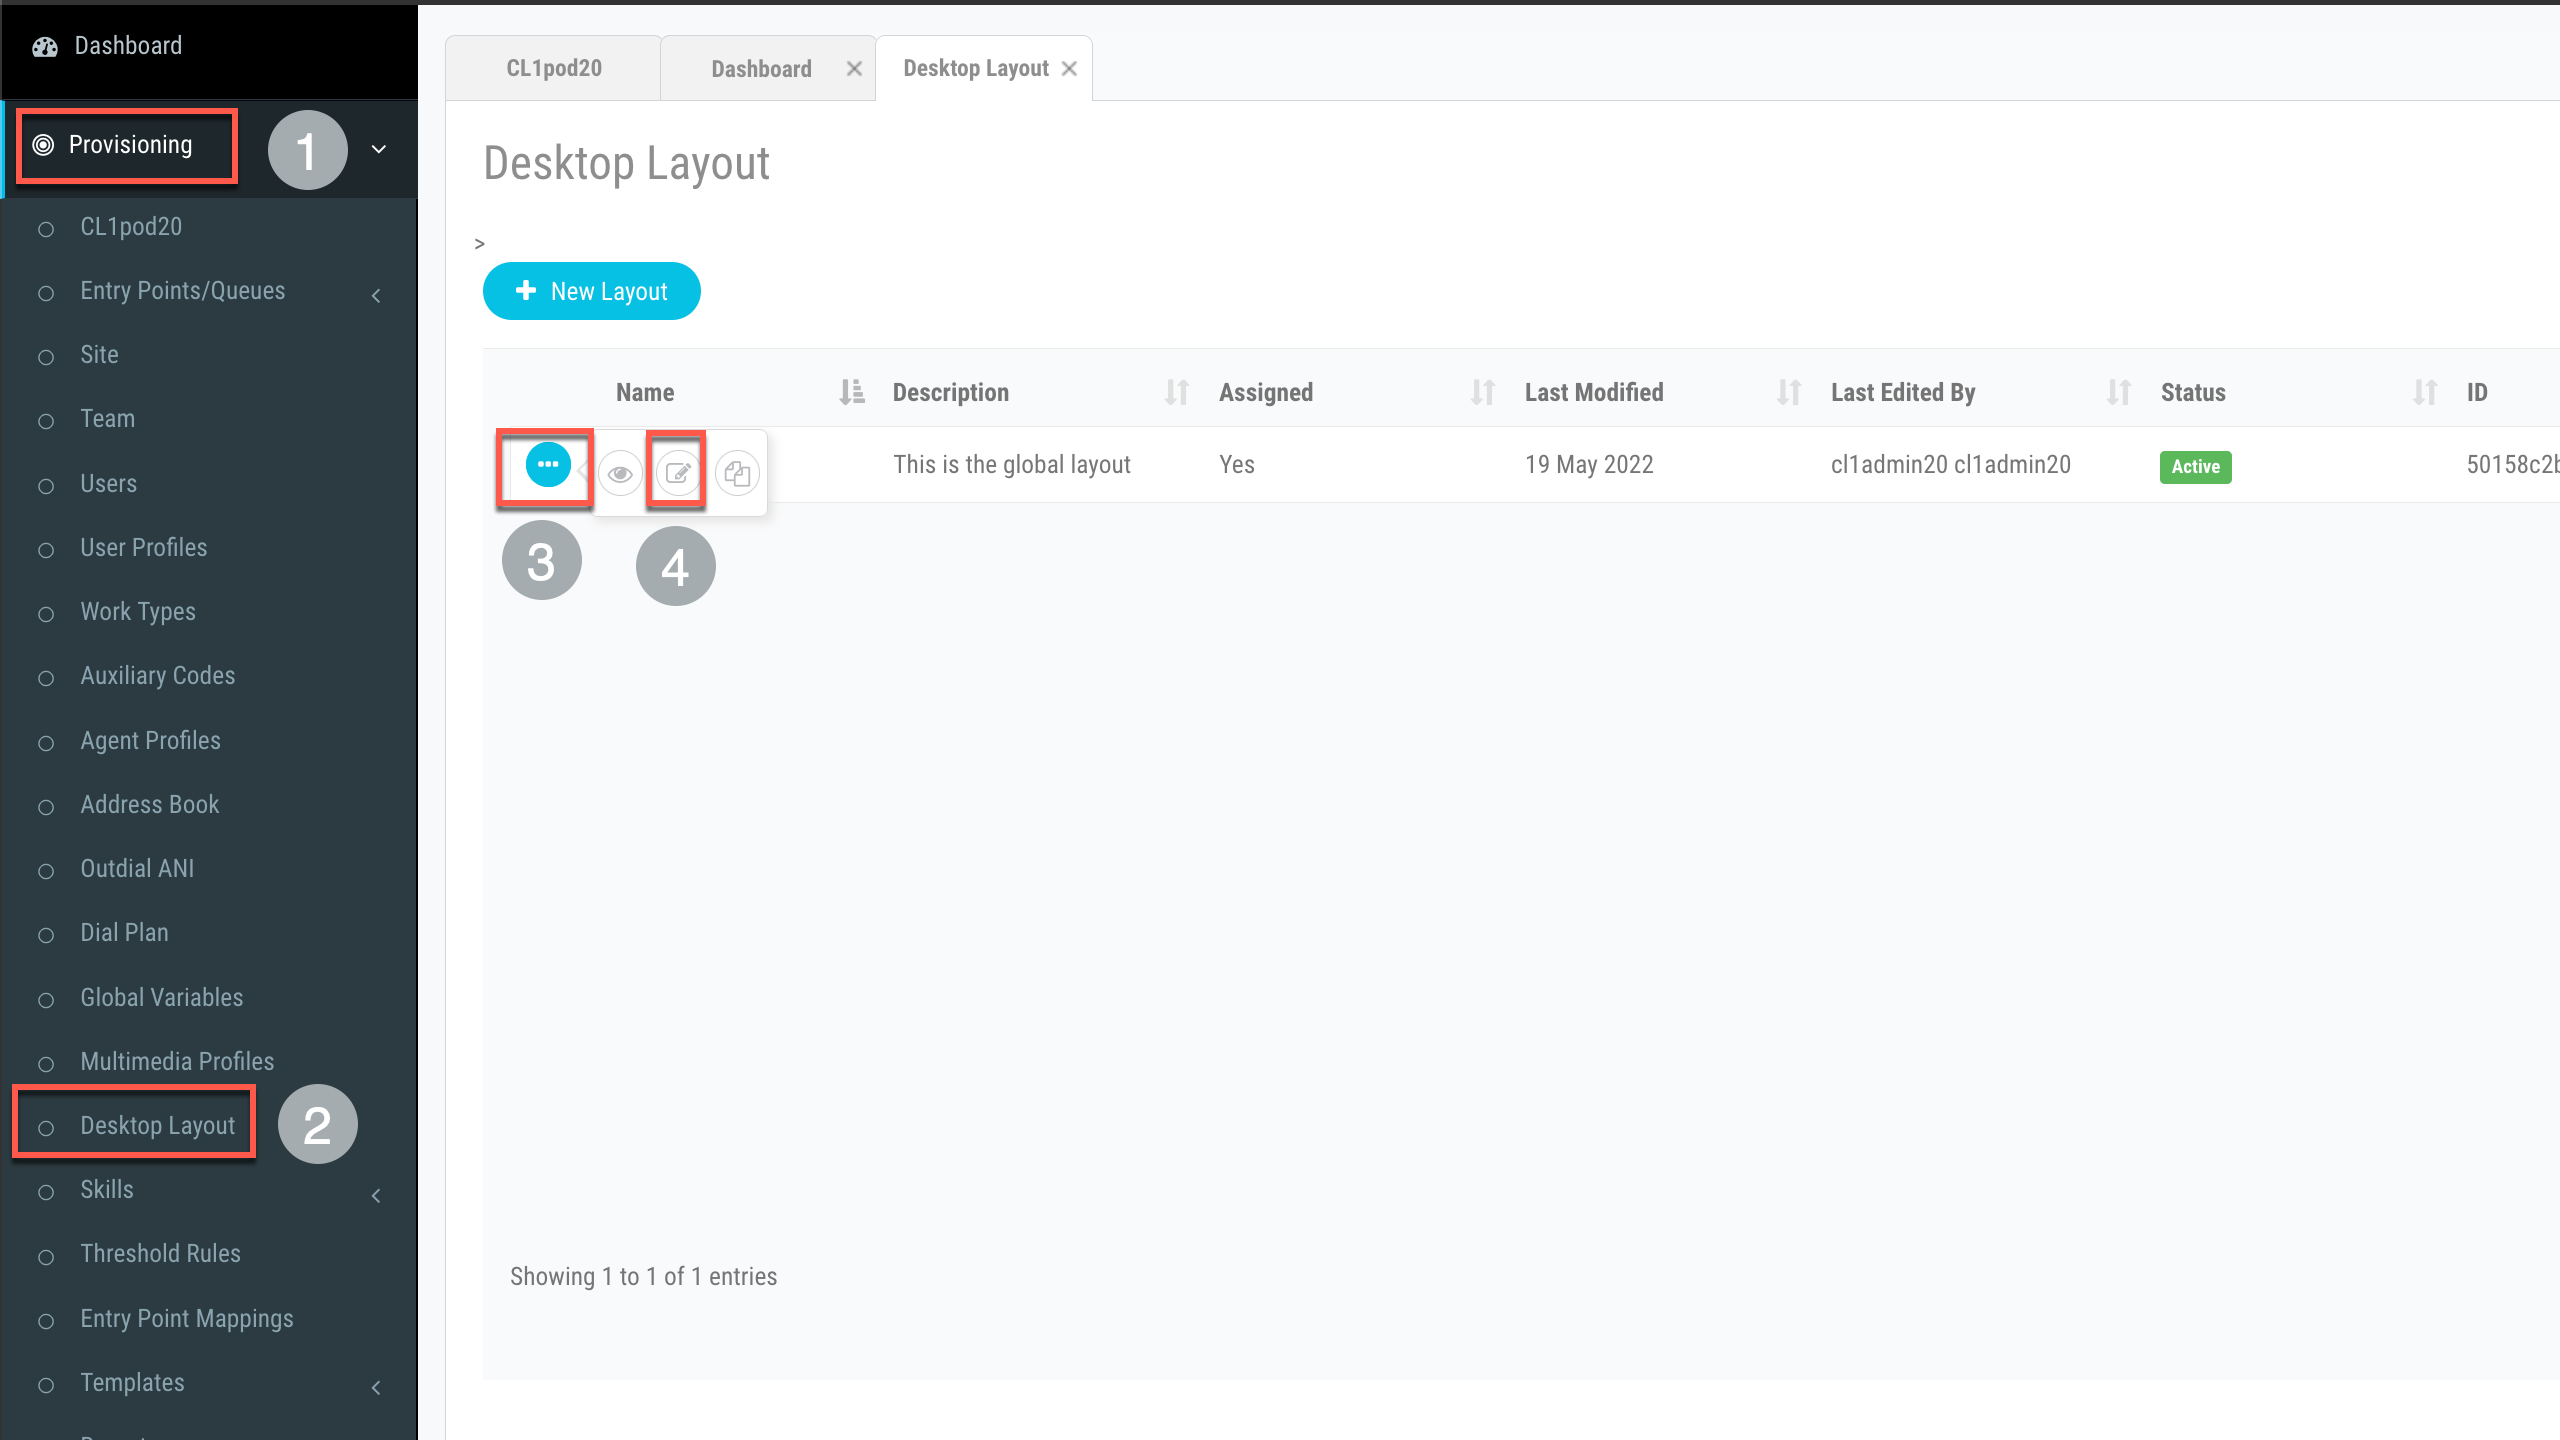
Login to Webex contact centre administration portal https://portal.wxcc-us1.cisco.com/portal and navigate to Desktop Layout section. Click Edit
-
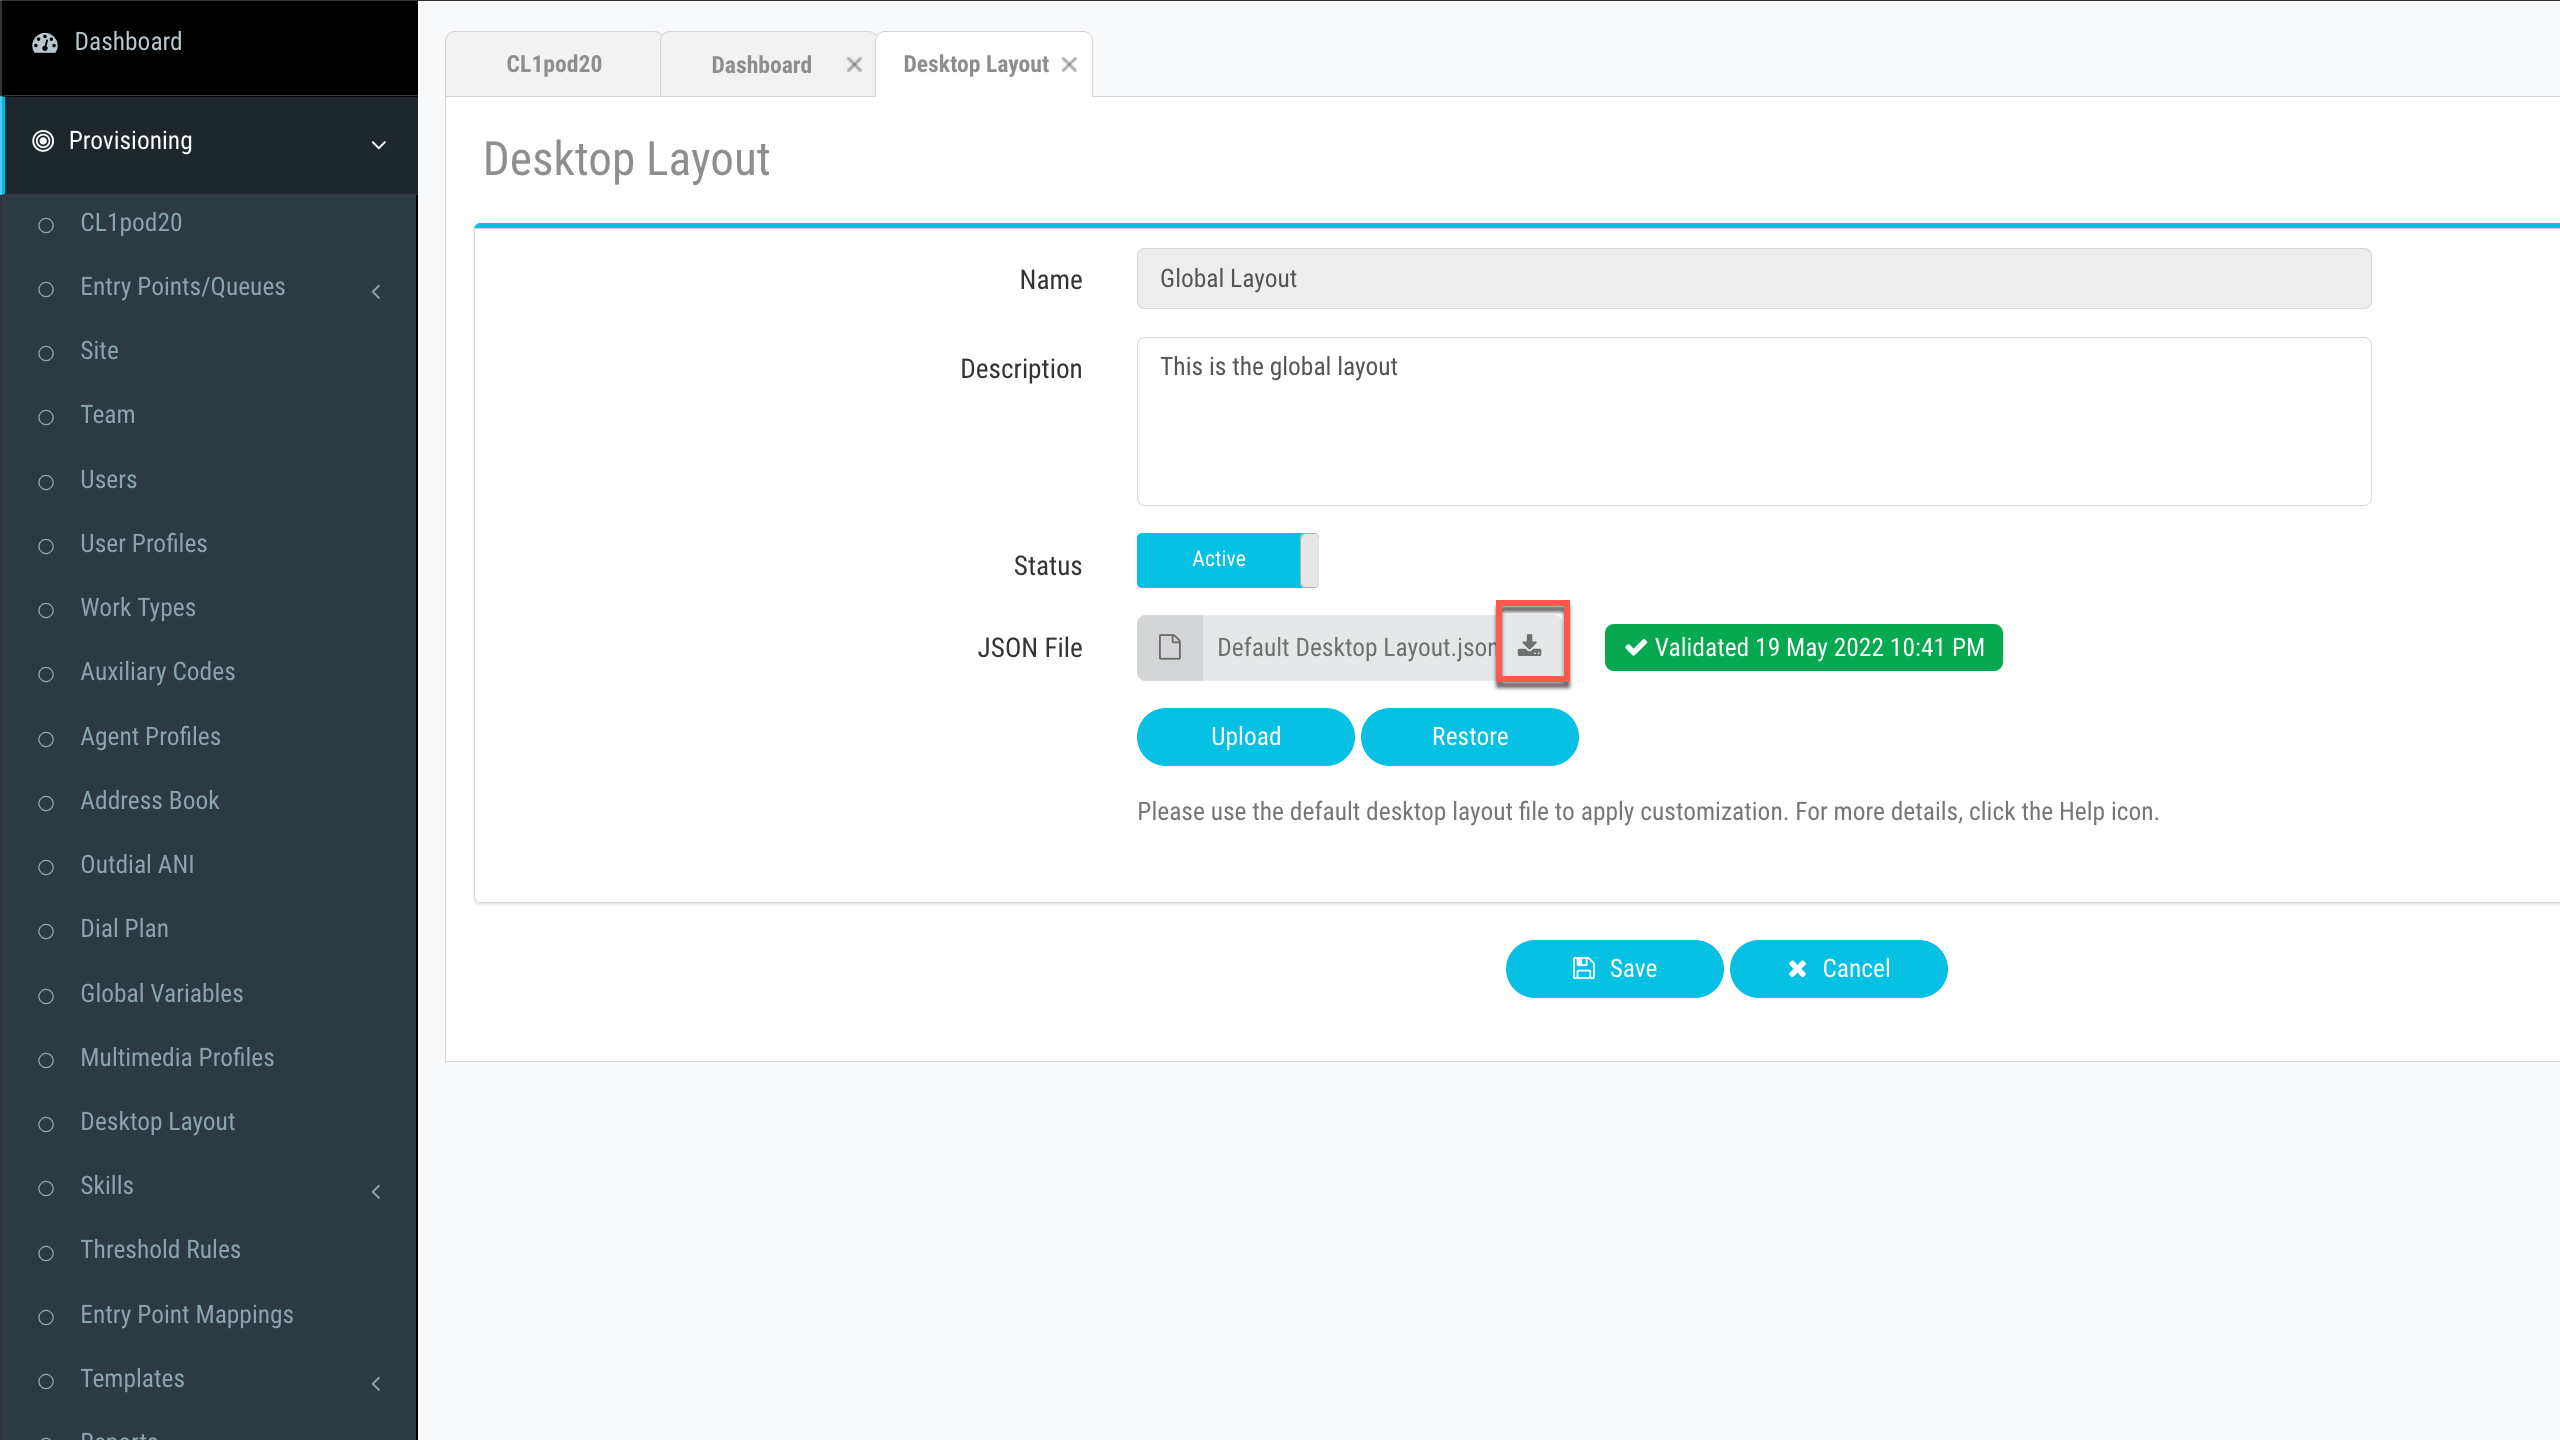
Download the desktop layout and open in a text editor.
-
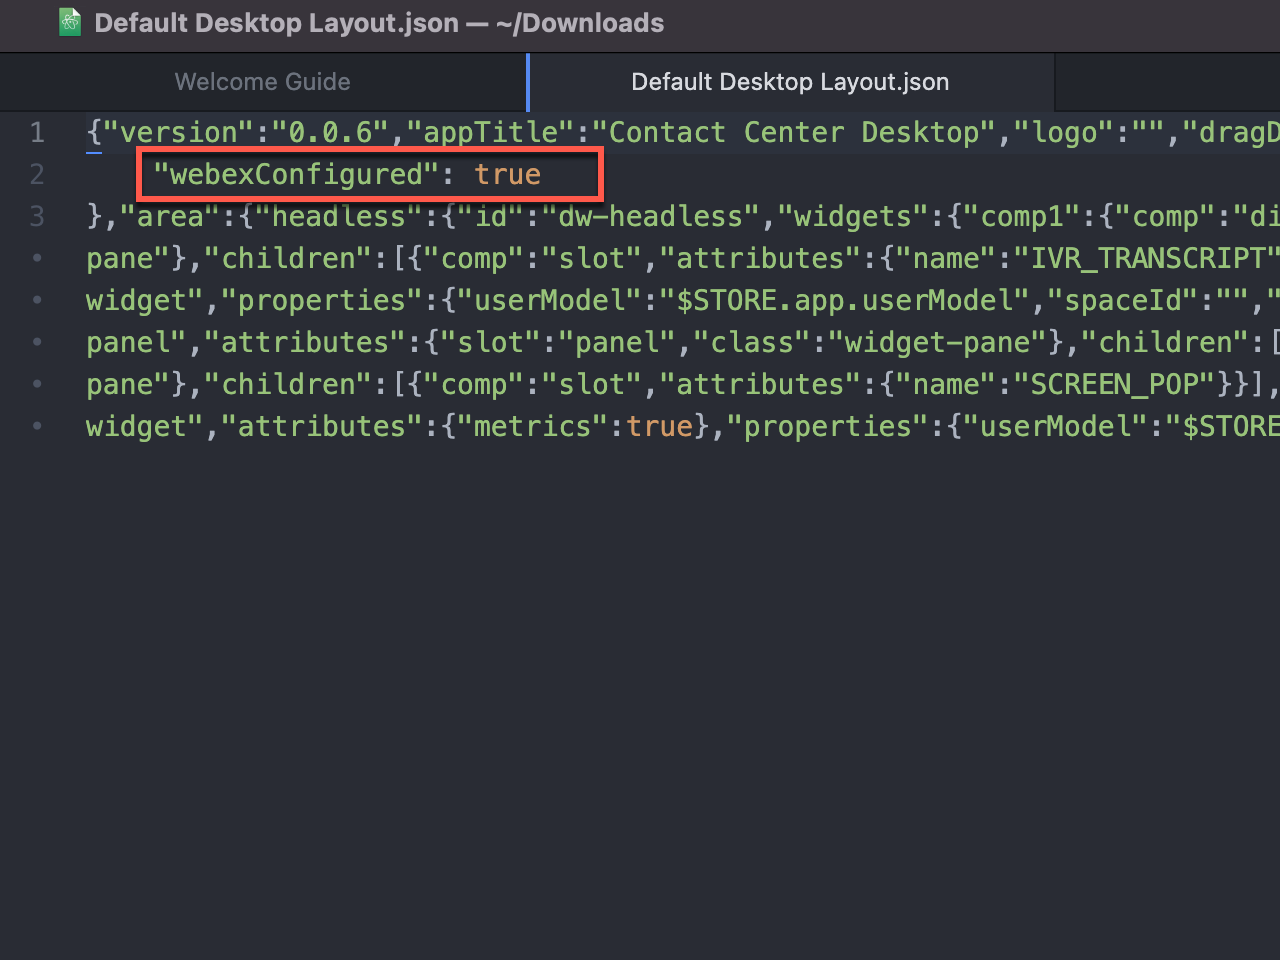
Set the value of “webexConfigured” parameter to “true” and save the file.
-
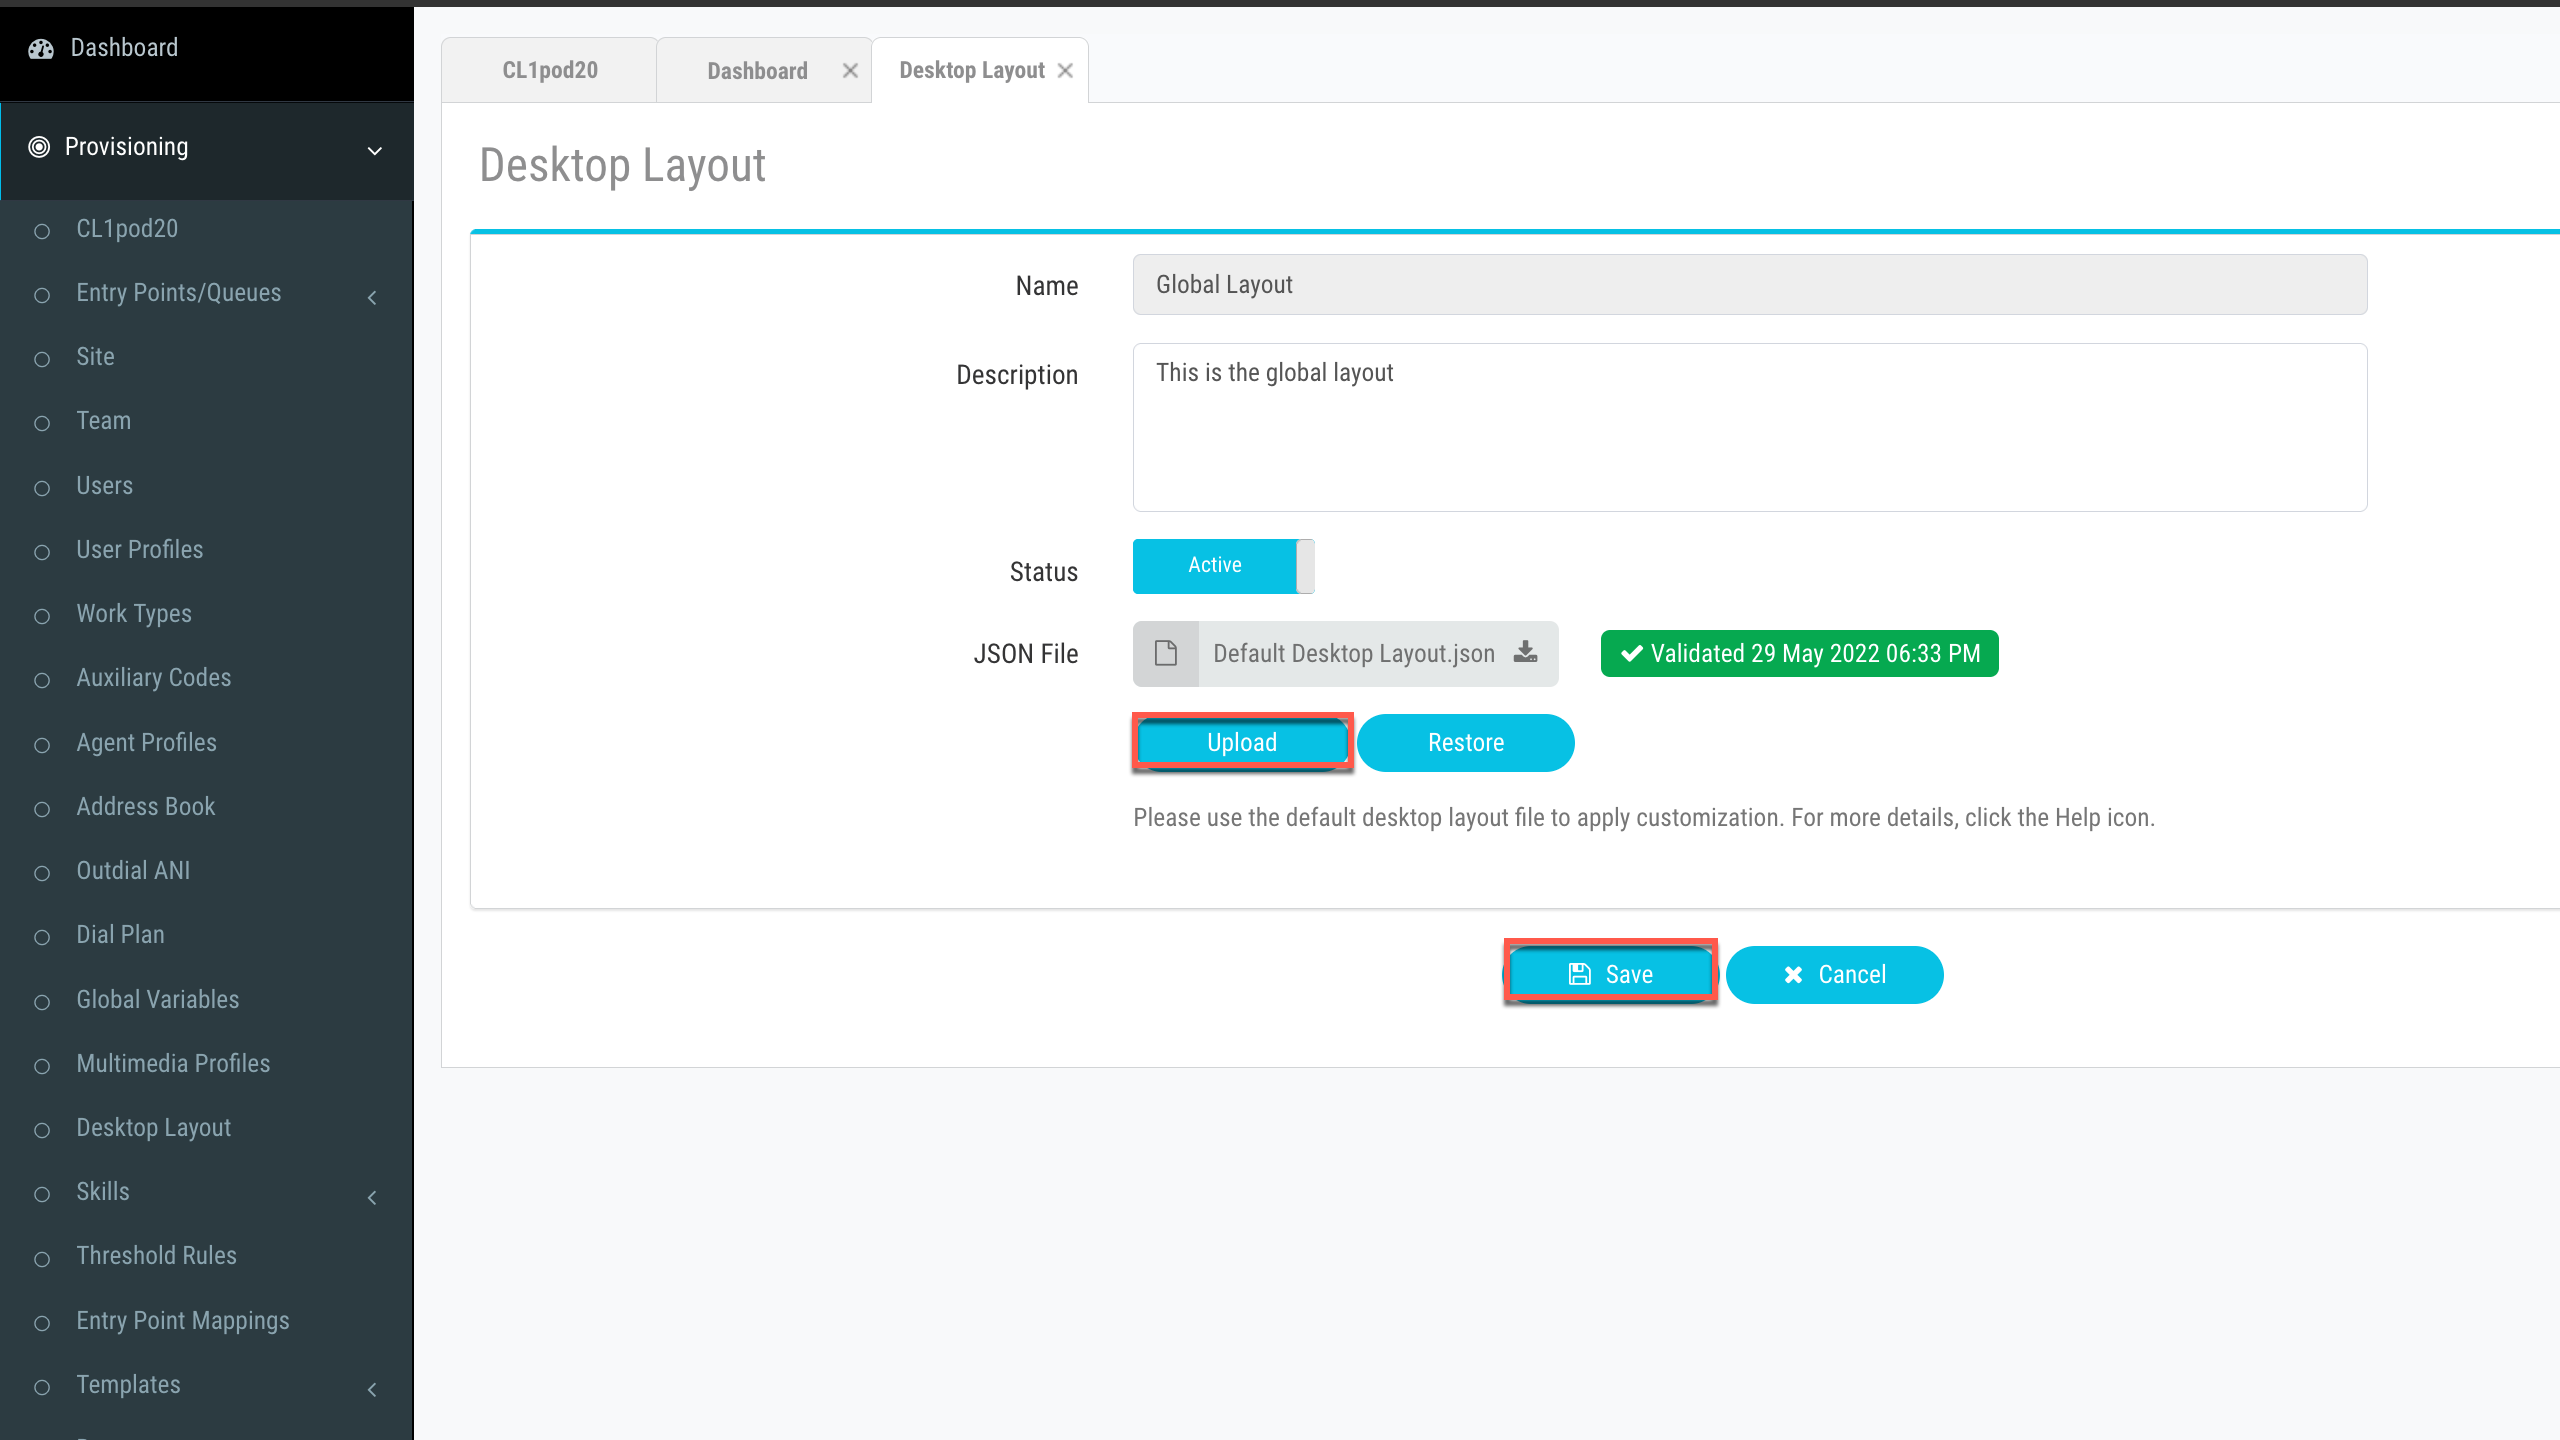
Upload this updated file in Webex contact centre administration portal and click Save
-
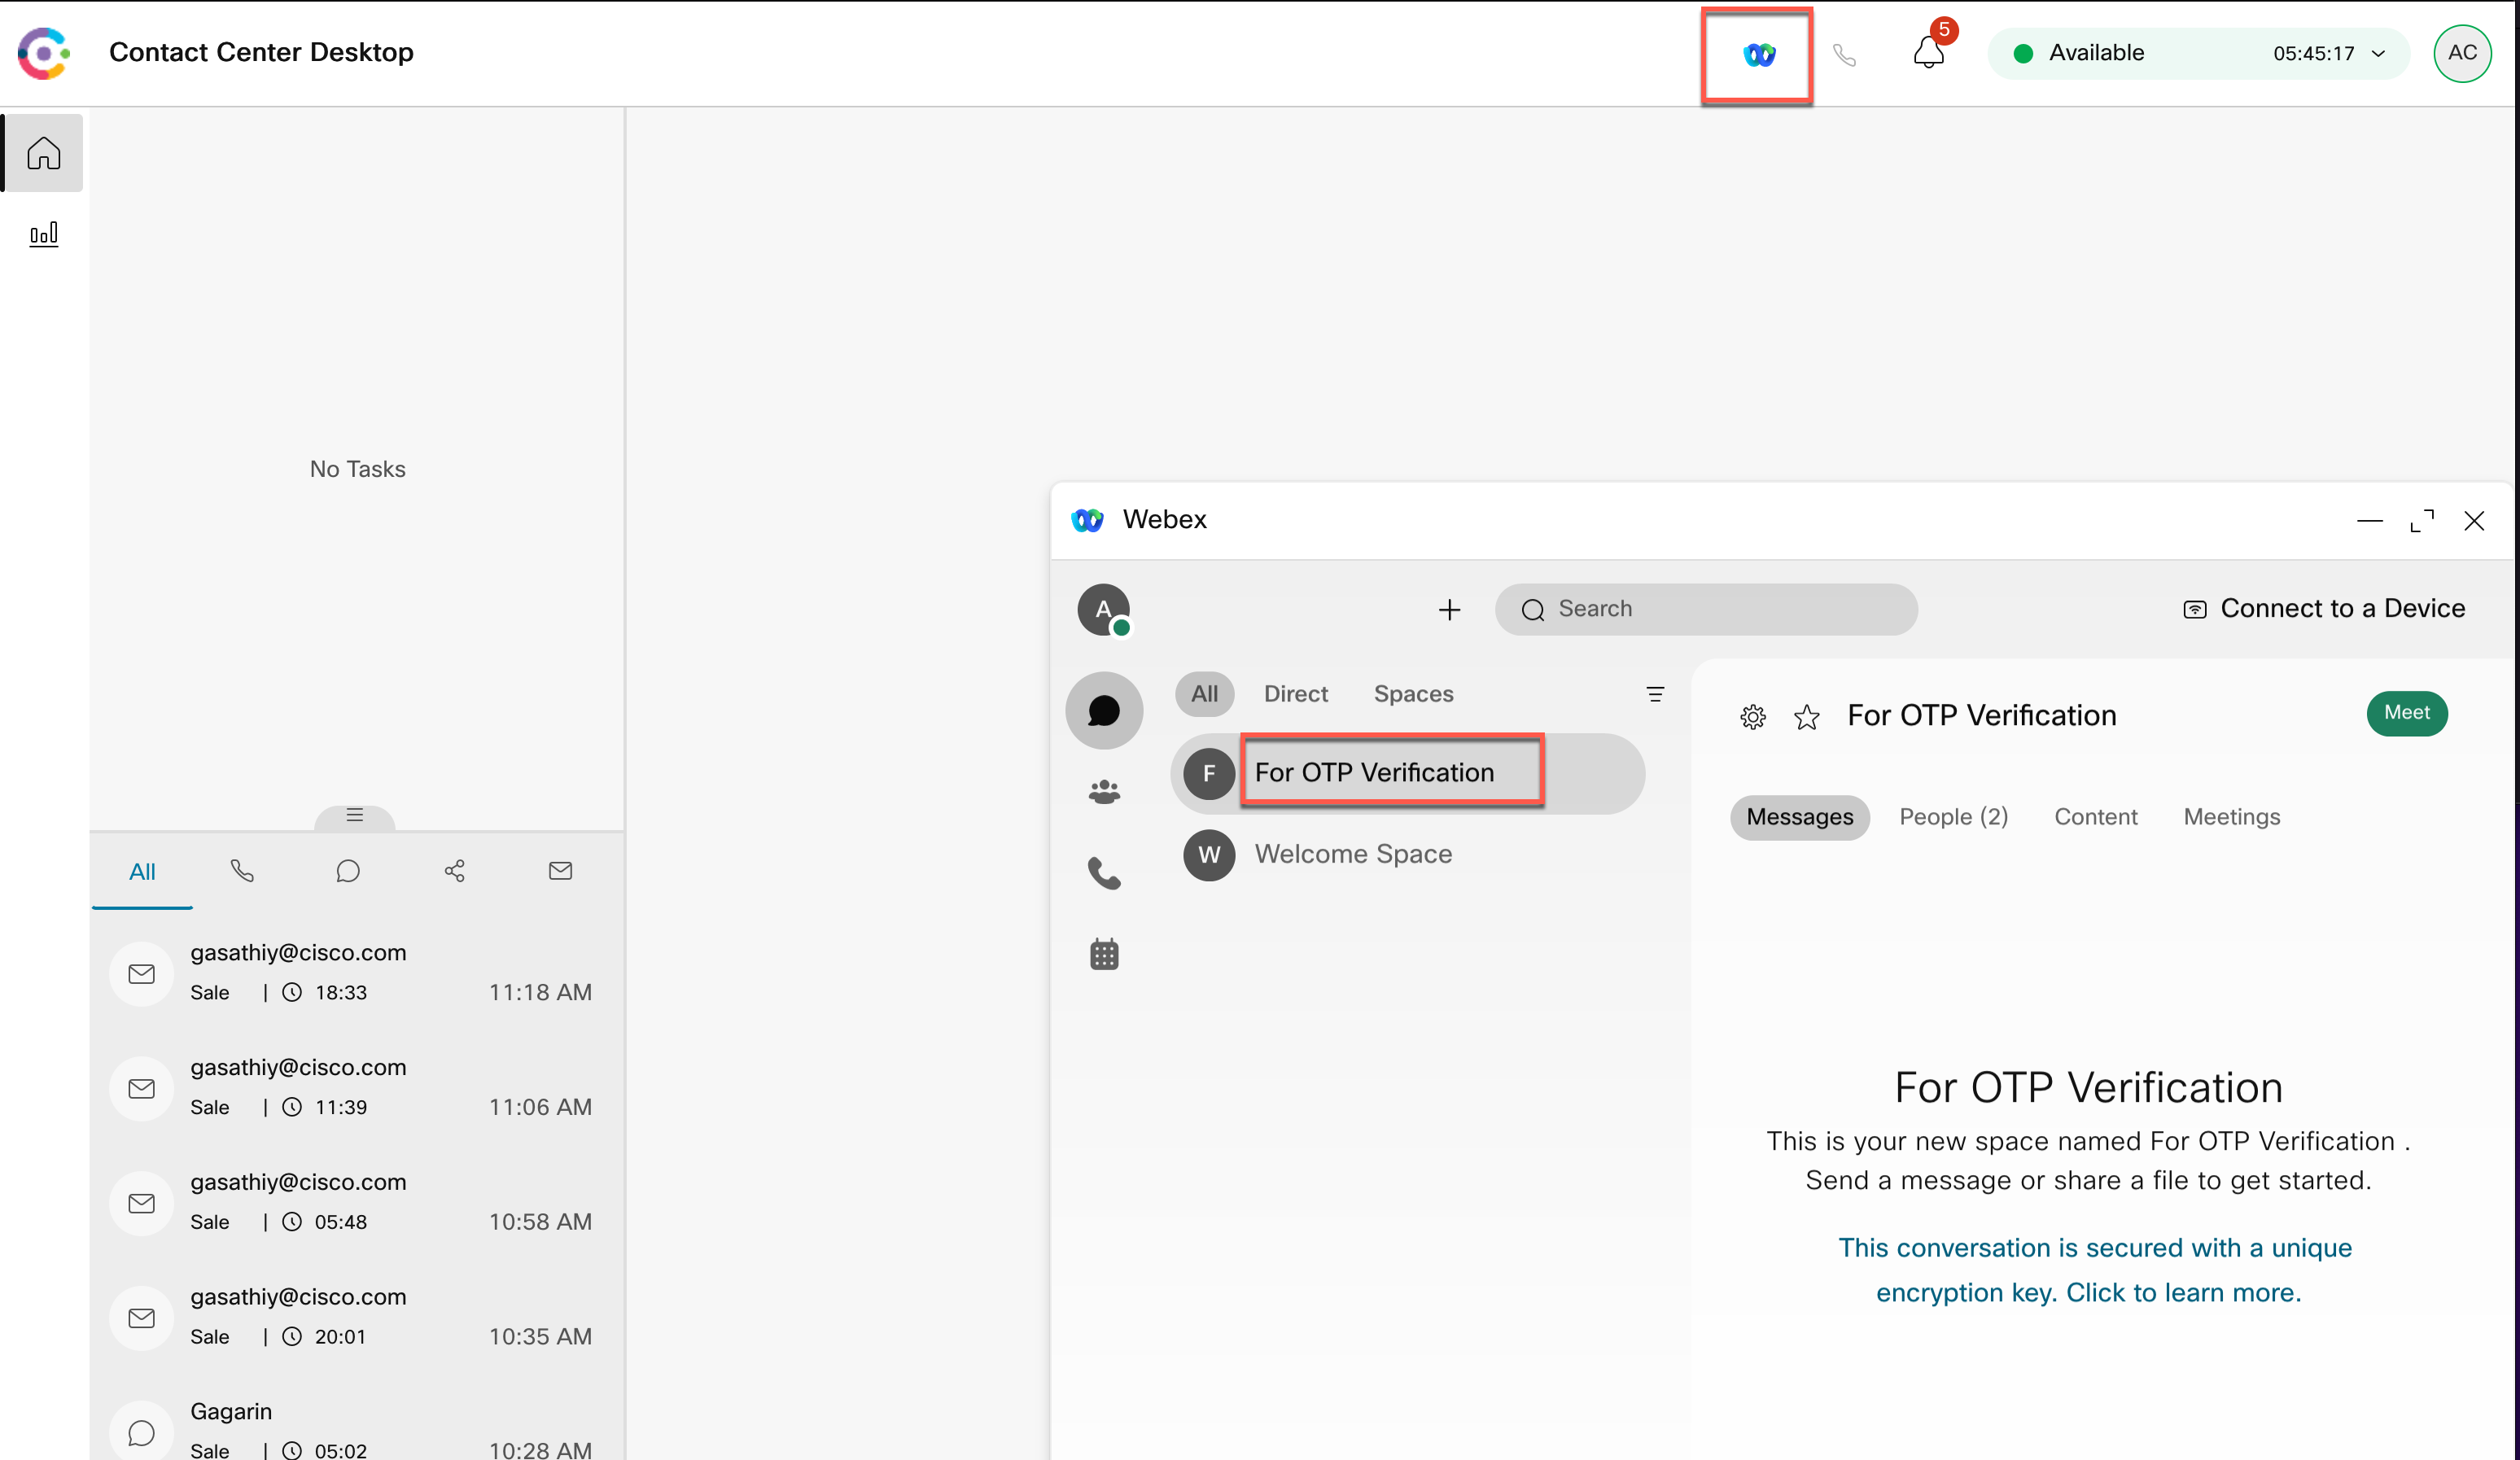
Login to agent dekstop and verify that the the Webex option is visible and the OTP verification room is seen. (If already logged in to agent desktop, please logout and login again)
Step 7. OTP scenario verification
-
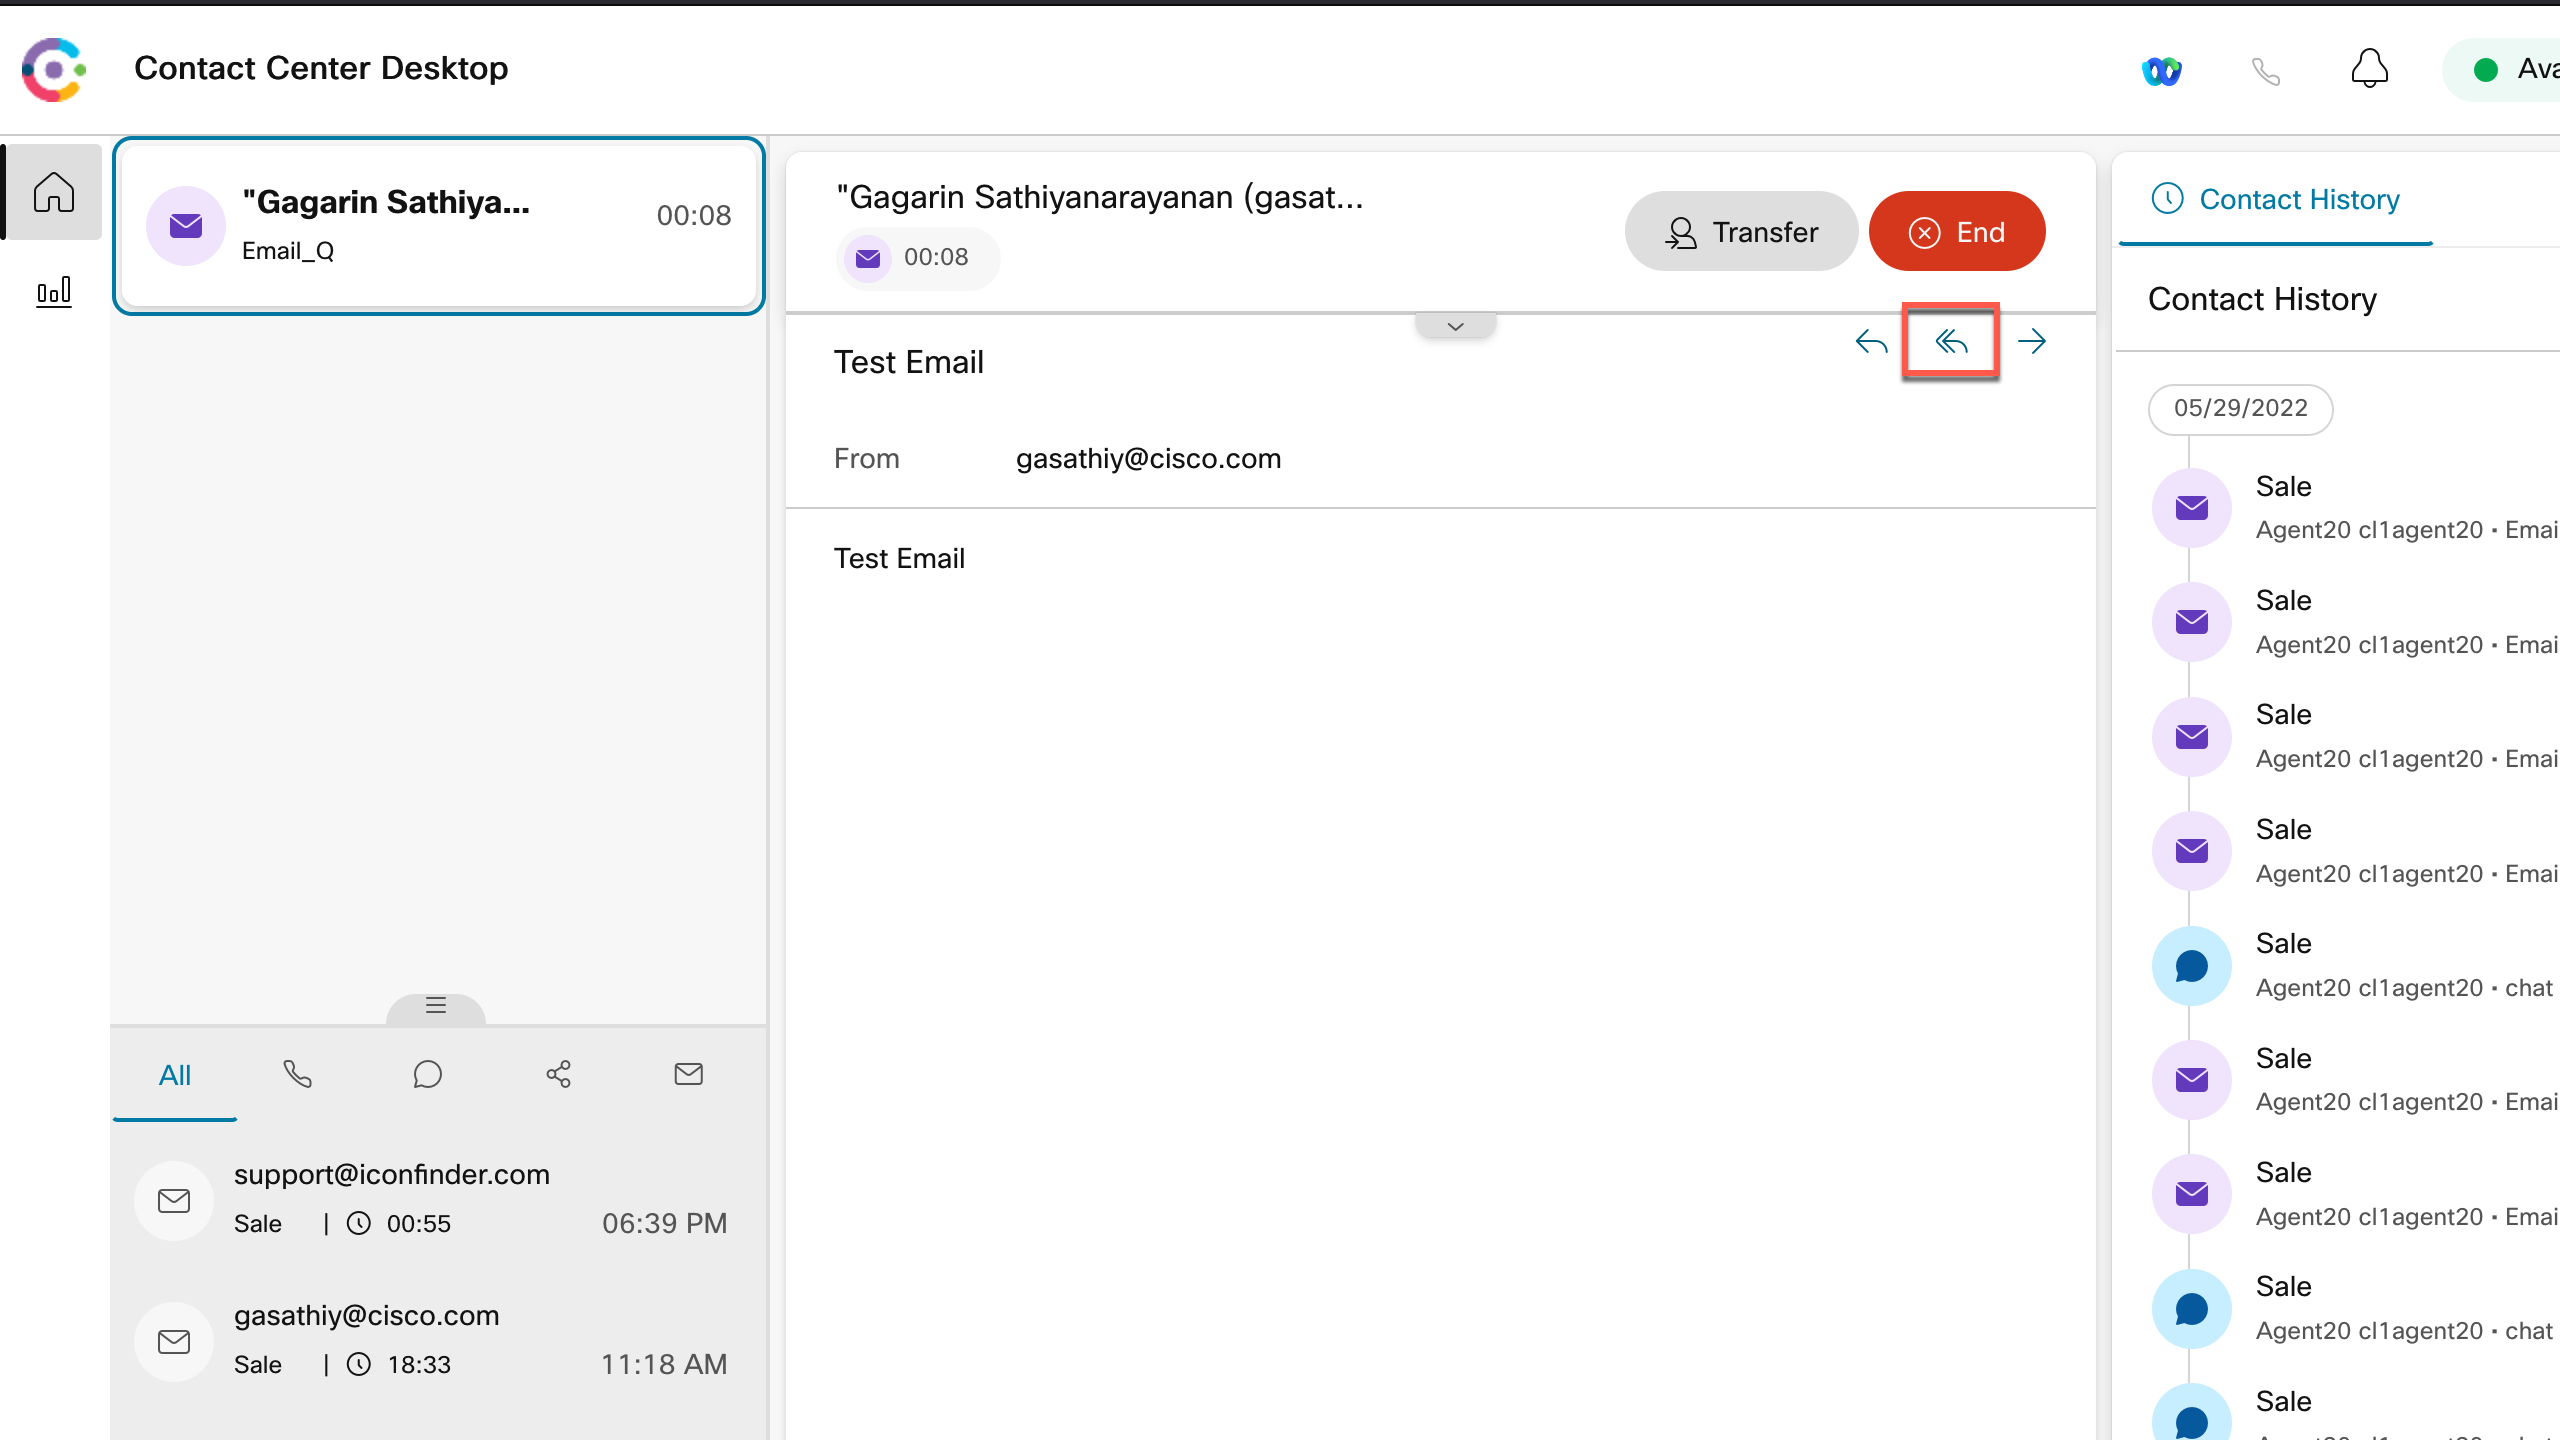
Initiate an email contact and accept the contact in Agent desktop. Click Relply All option.
-
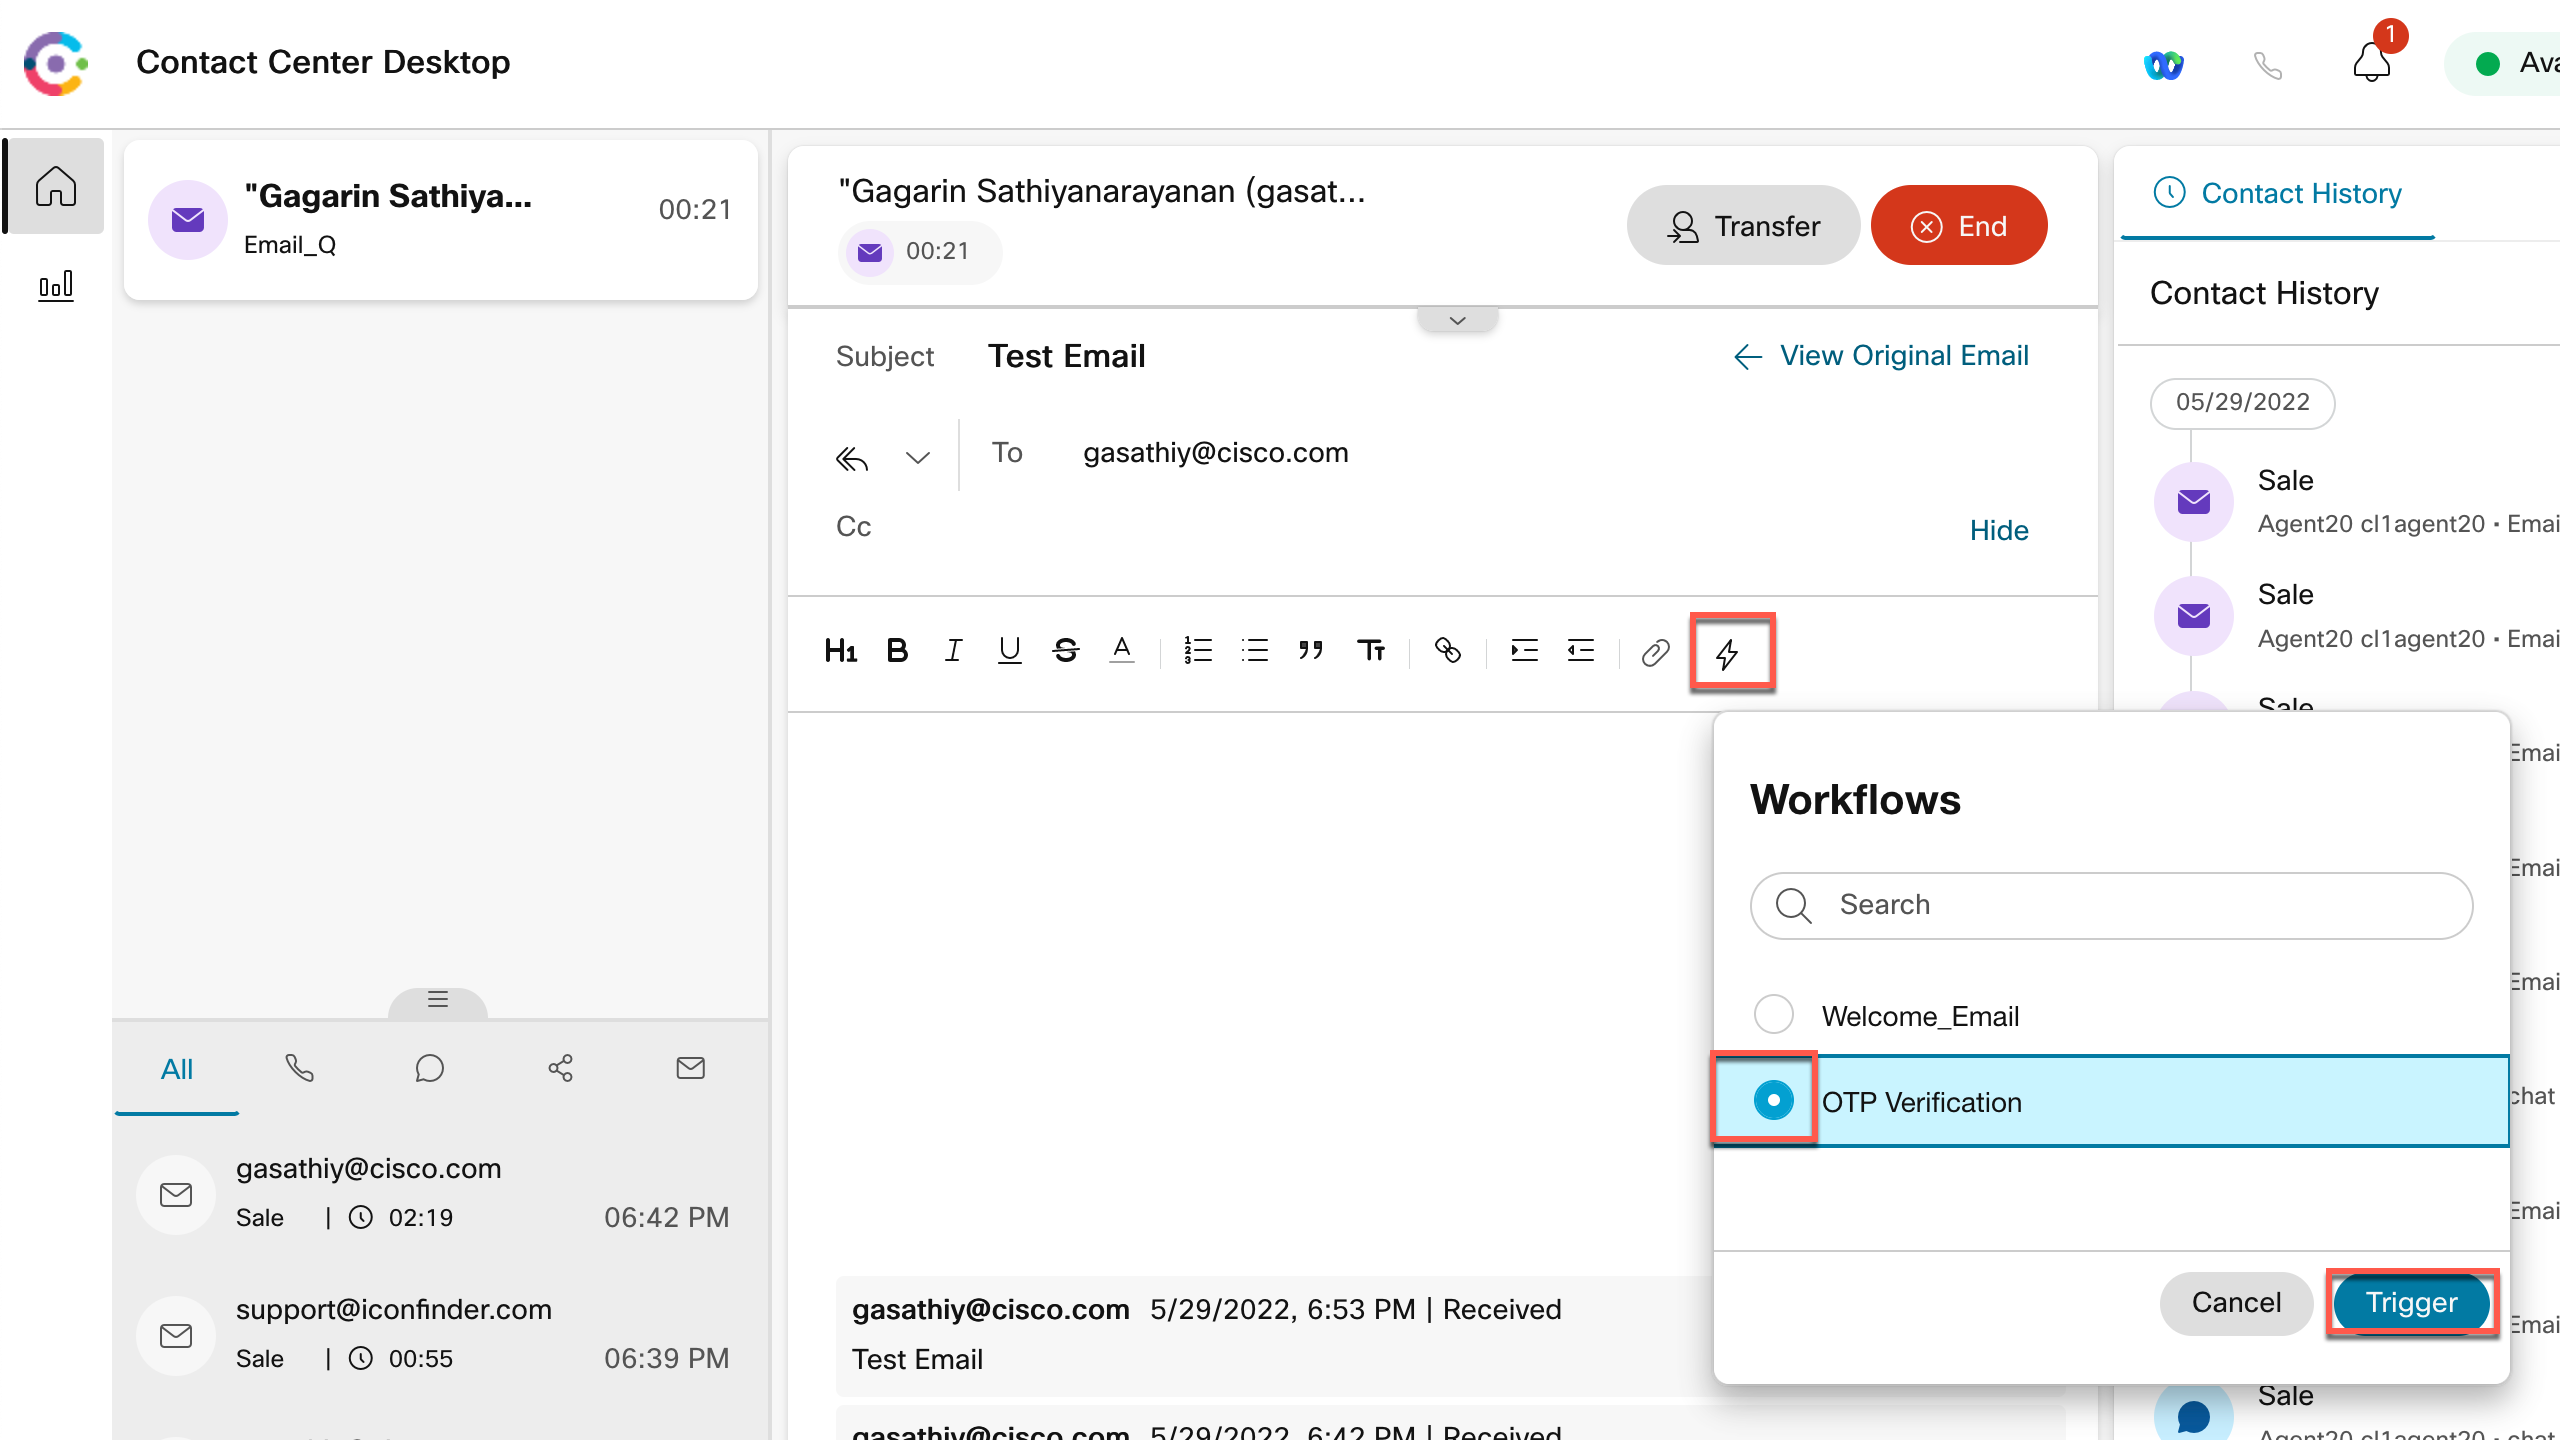
Choose the Trigger Workflow option, select OTP Verification and click Trigger
-
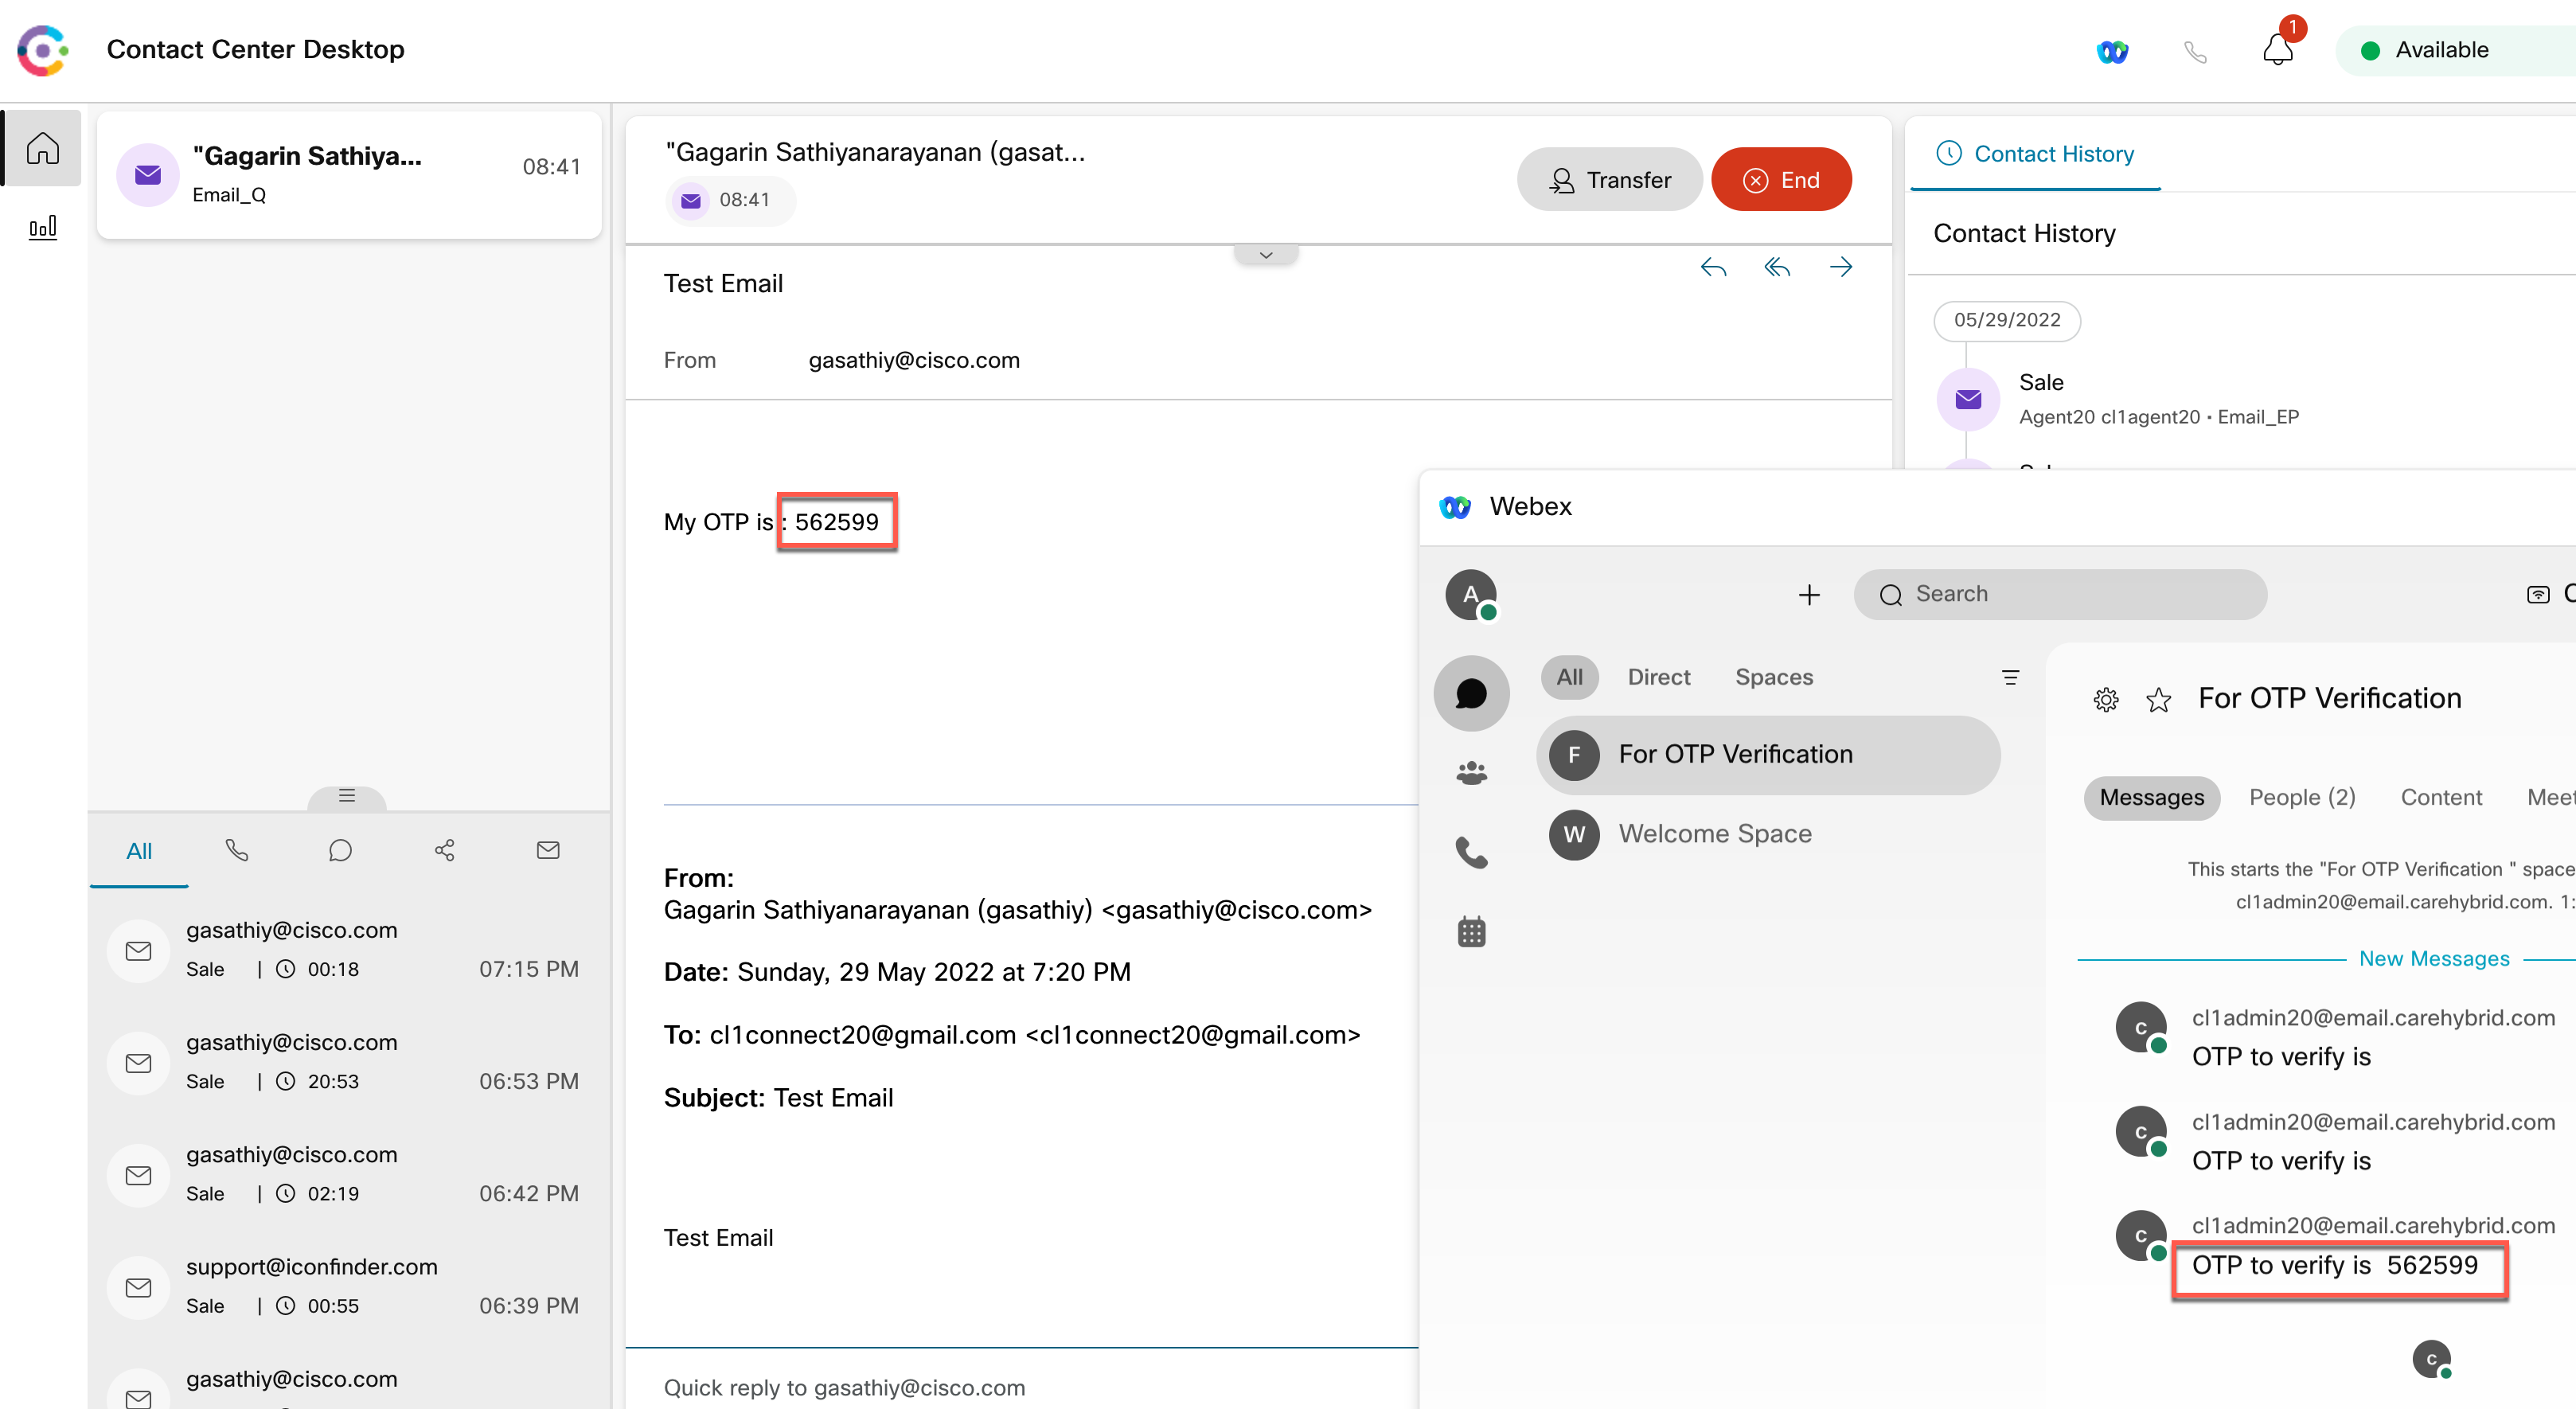
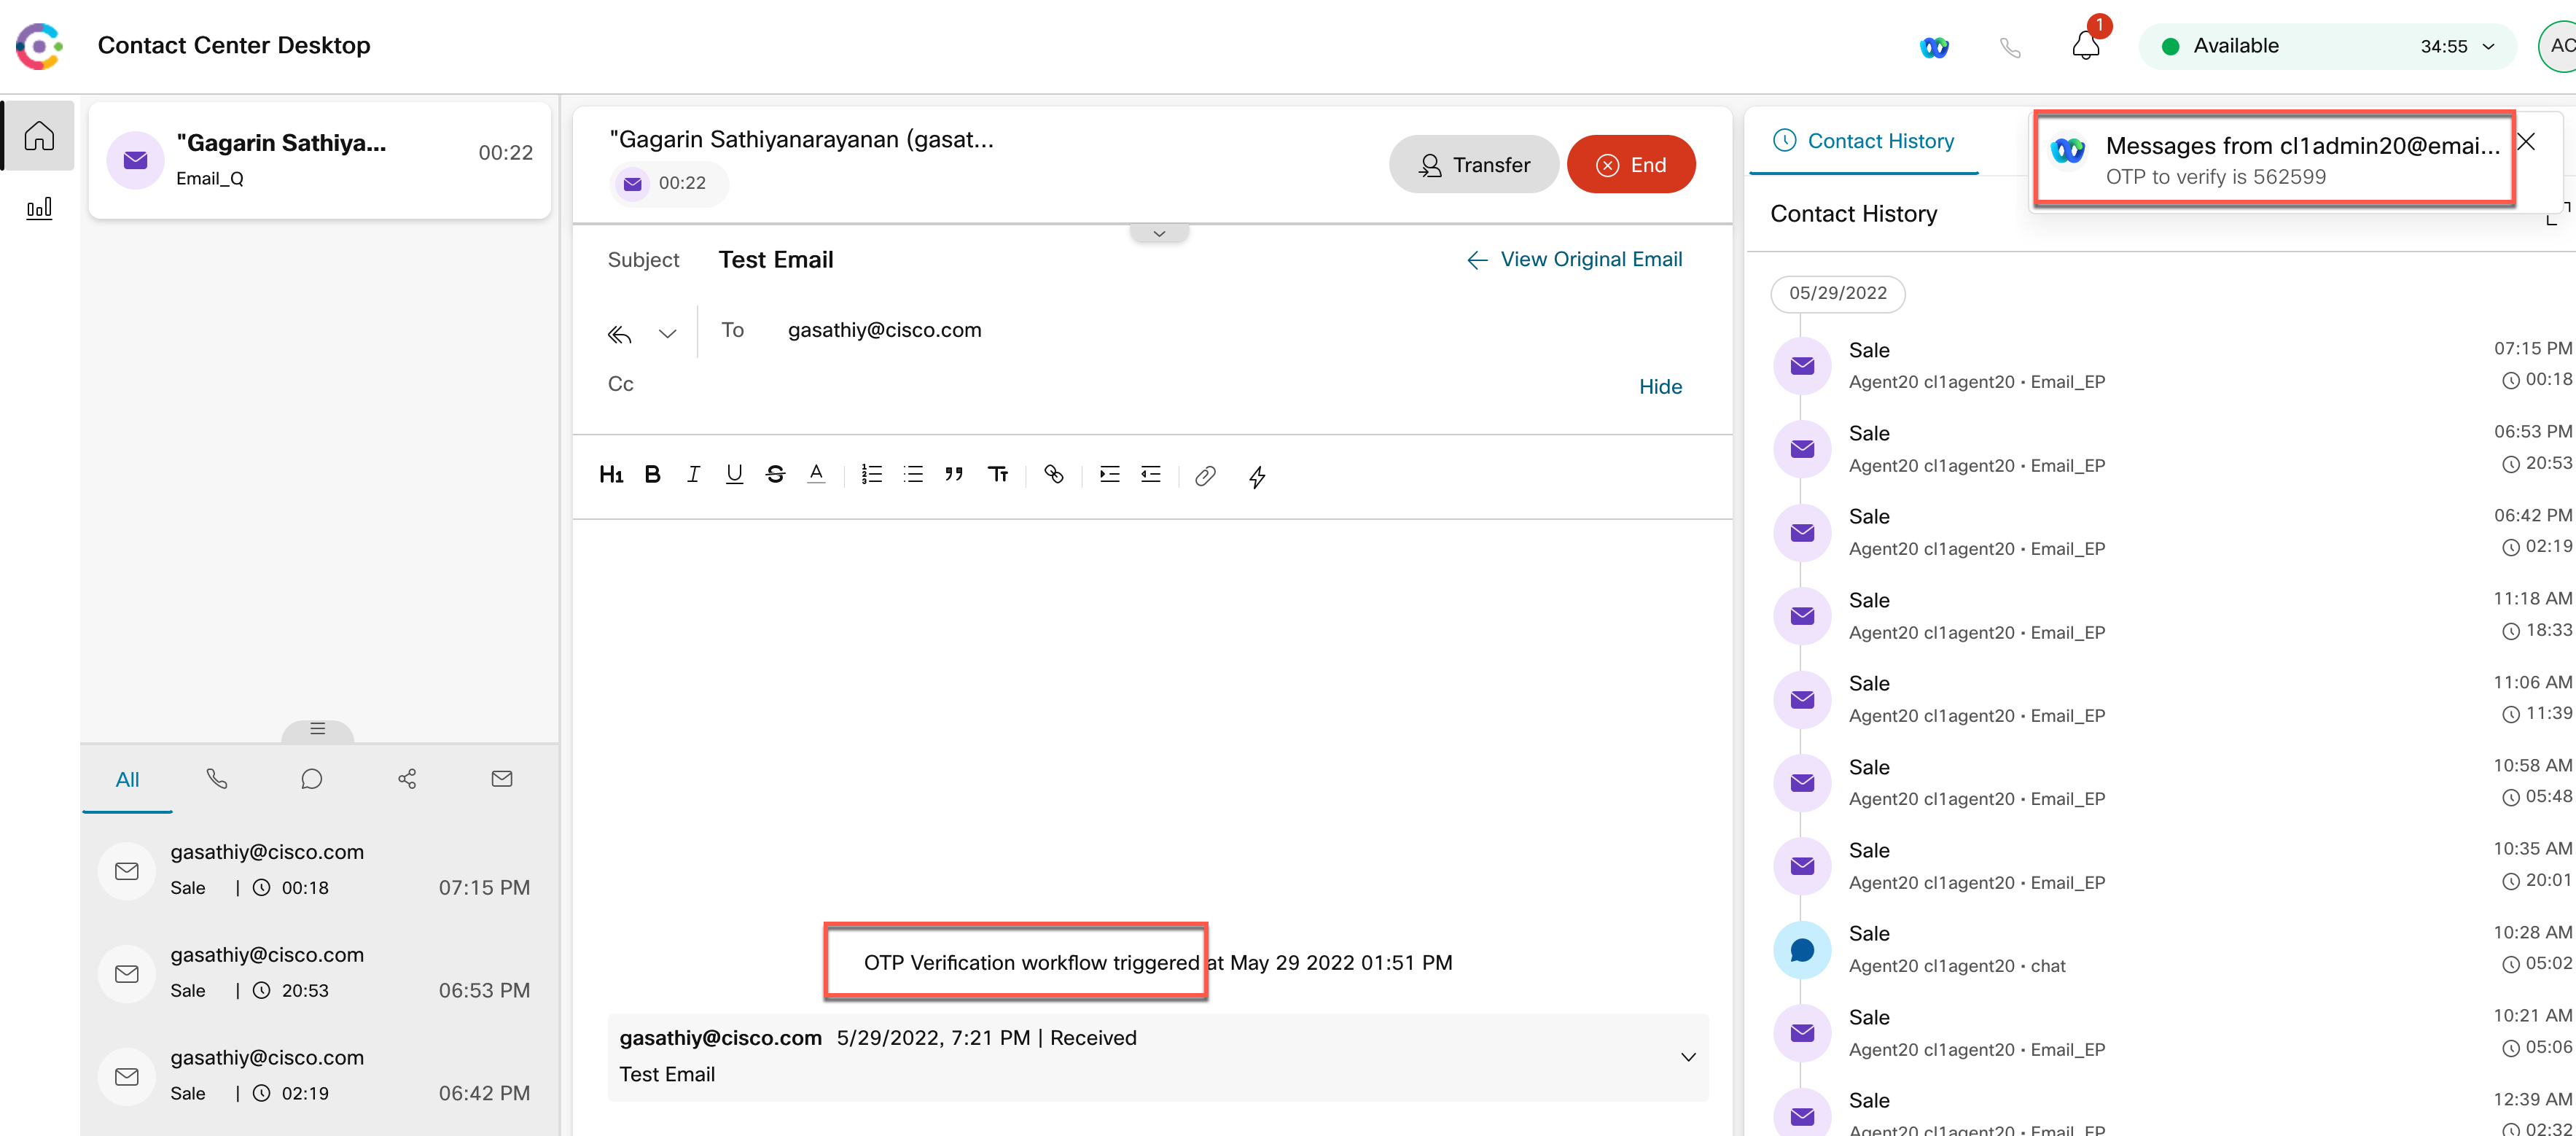
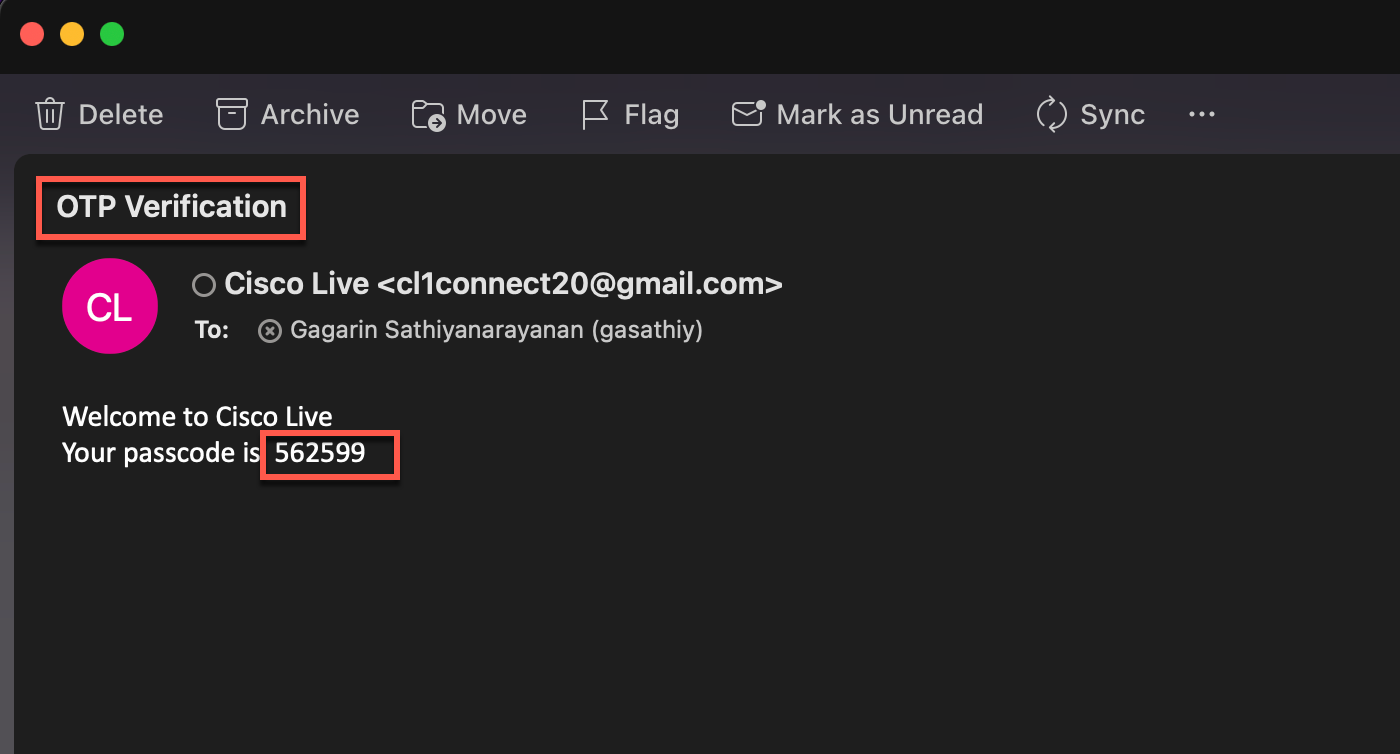
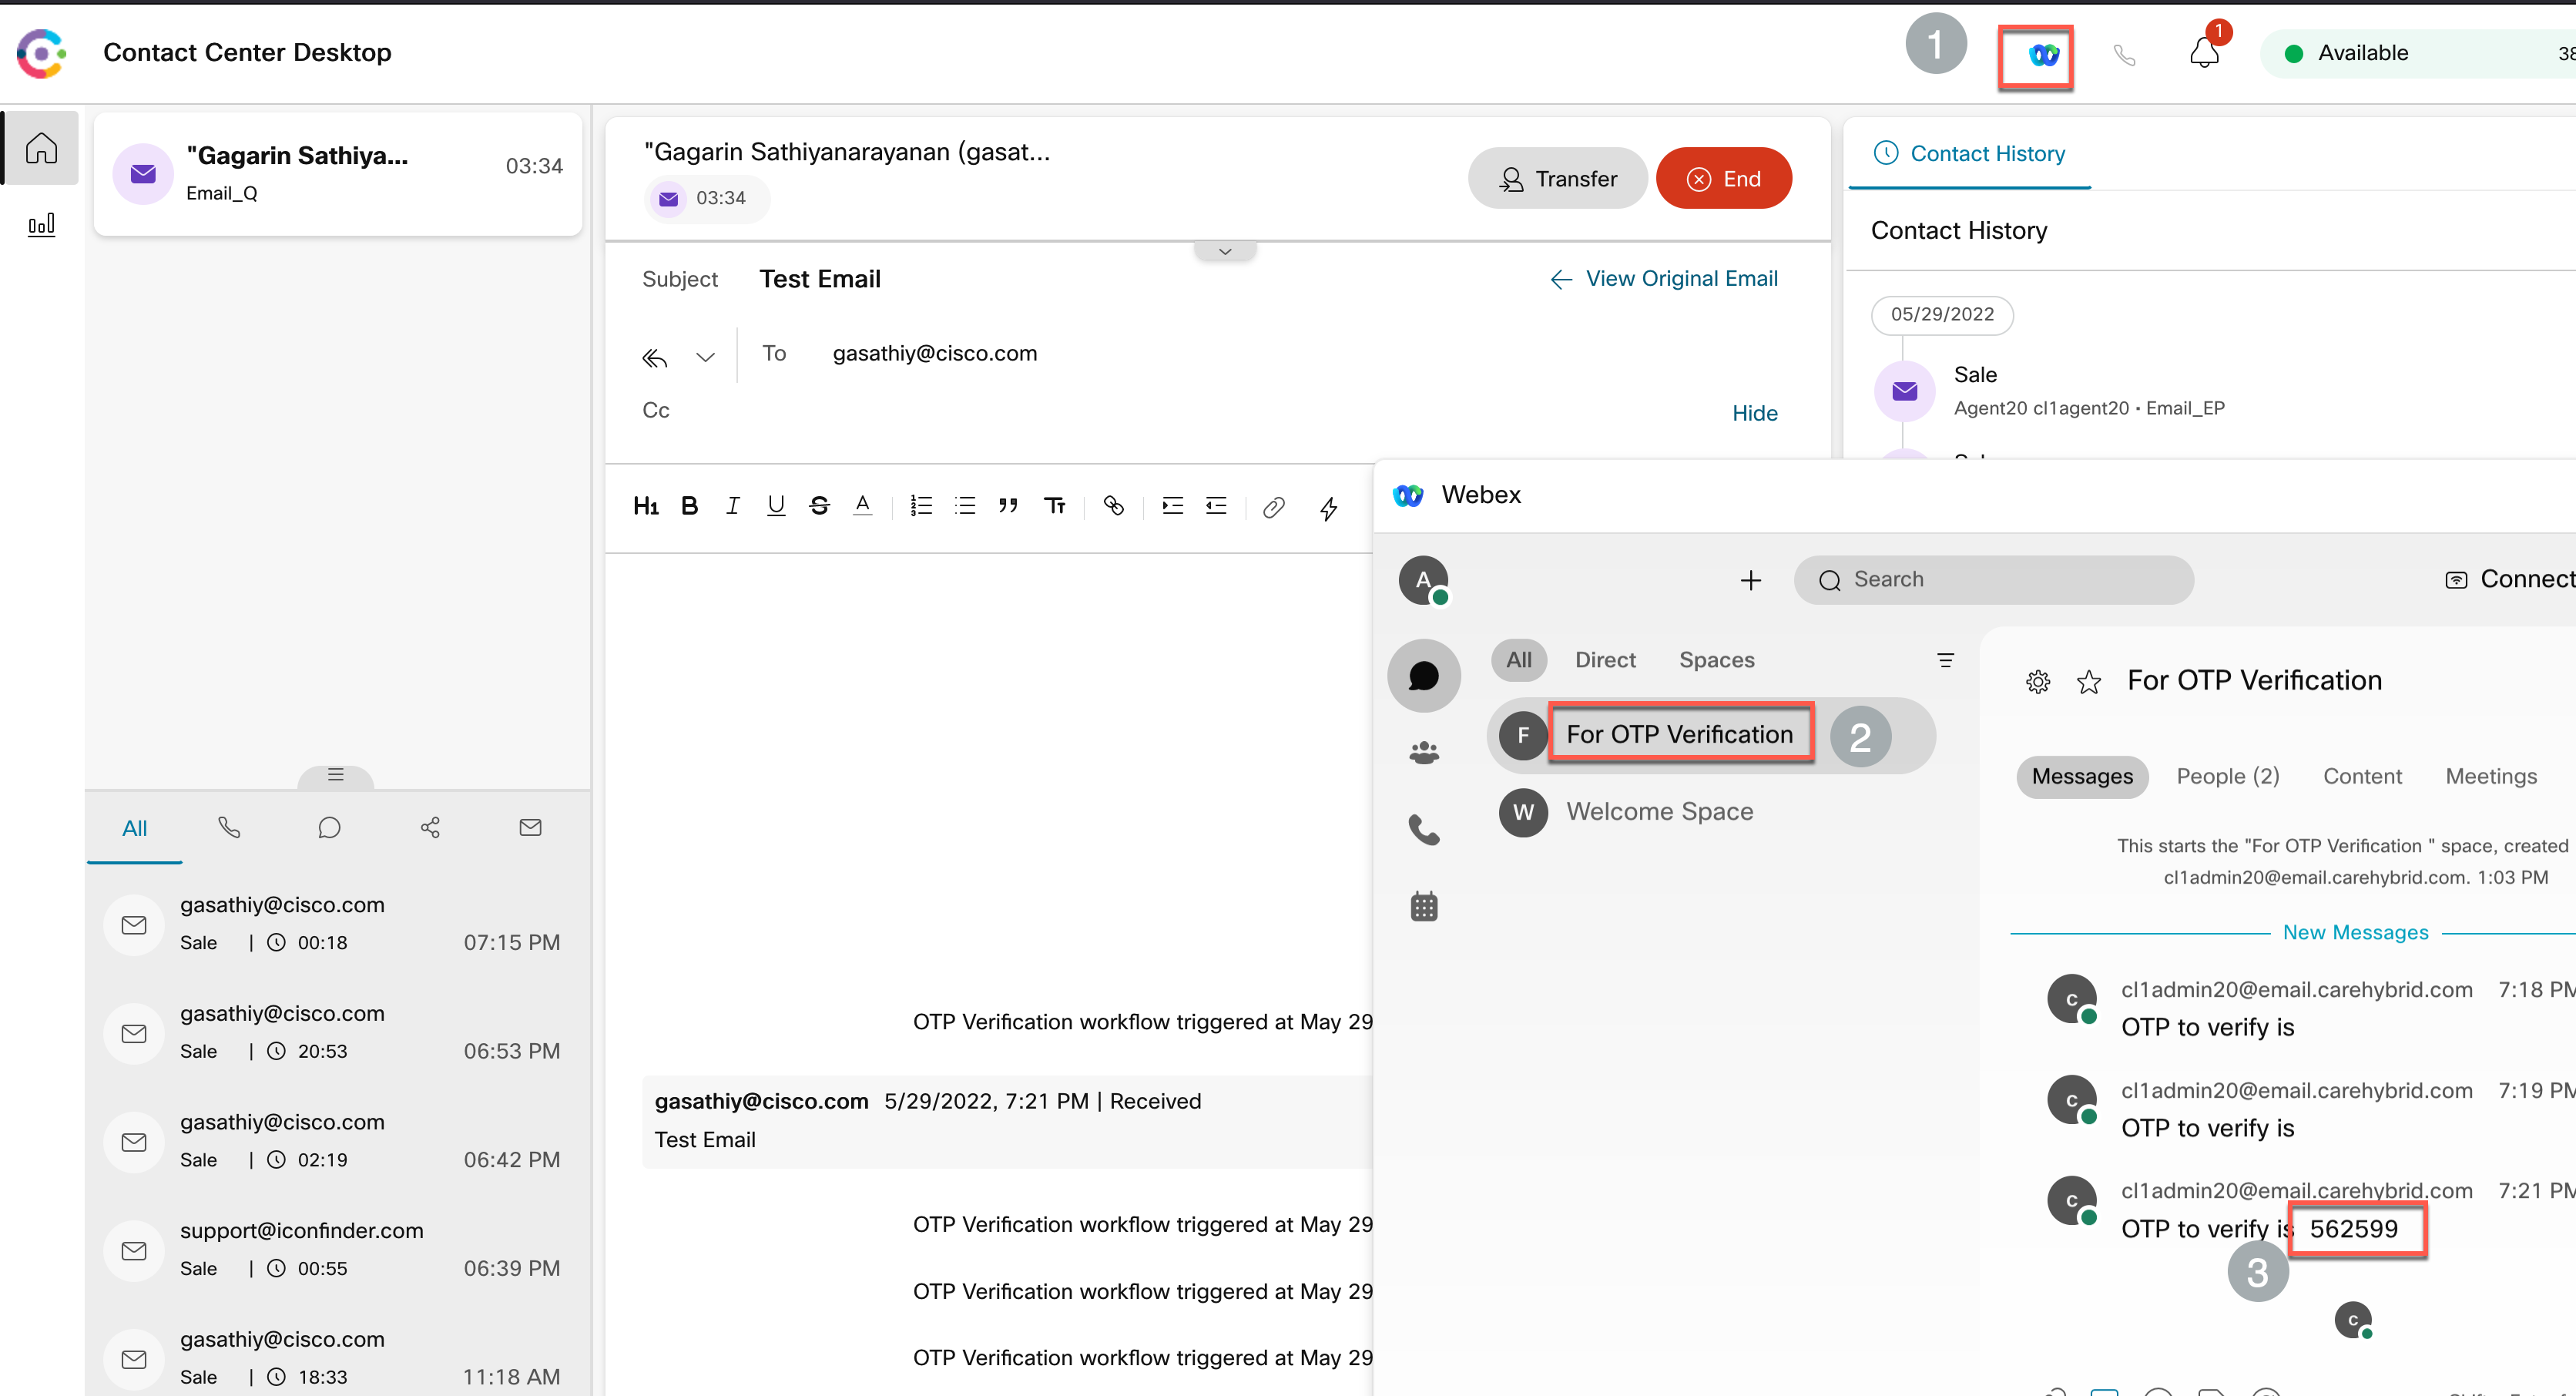
A confirmation that the workflow has been triggered will be displayed. Also, sender of the email will receive an OTP and the same OTP will be sent to agent through the Webex app integrated to agent desktop.
-
Customer OTP
-
Agent OTP
-
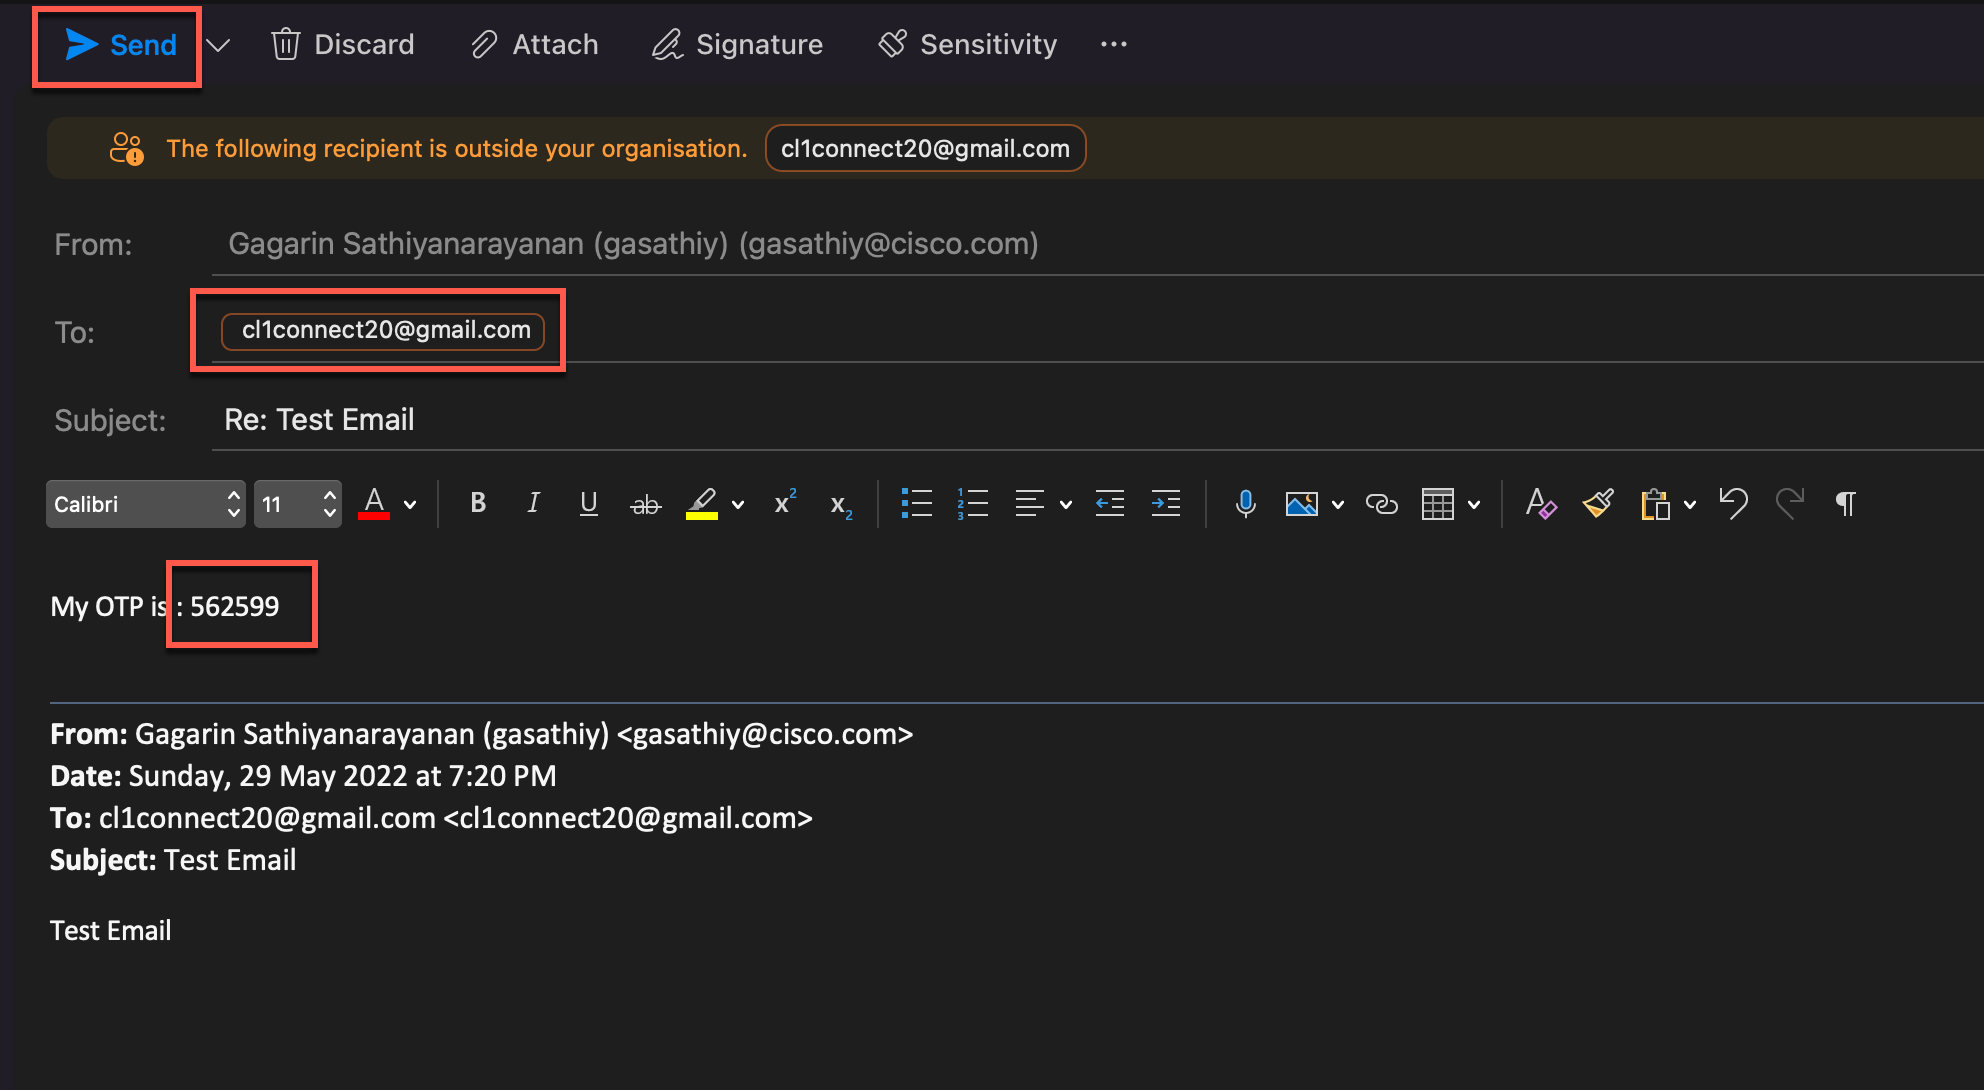
On the original mail thread, customer replying with the OTP received.
-
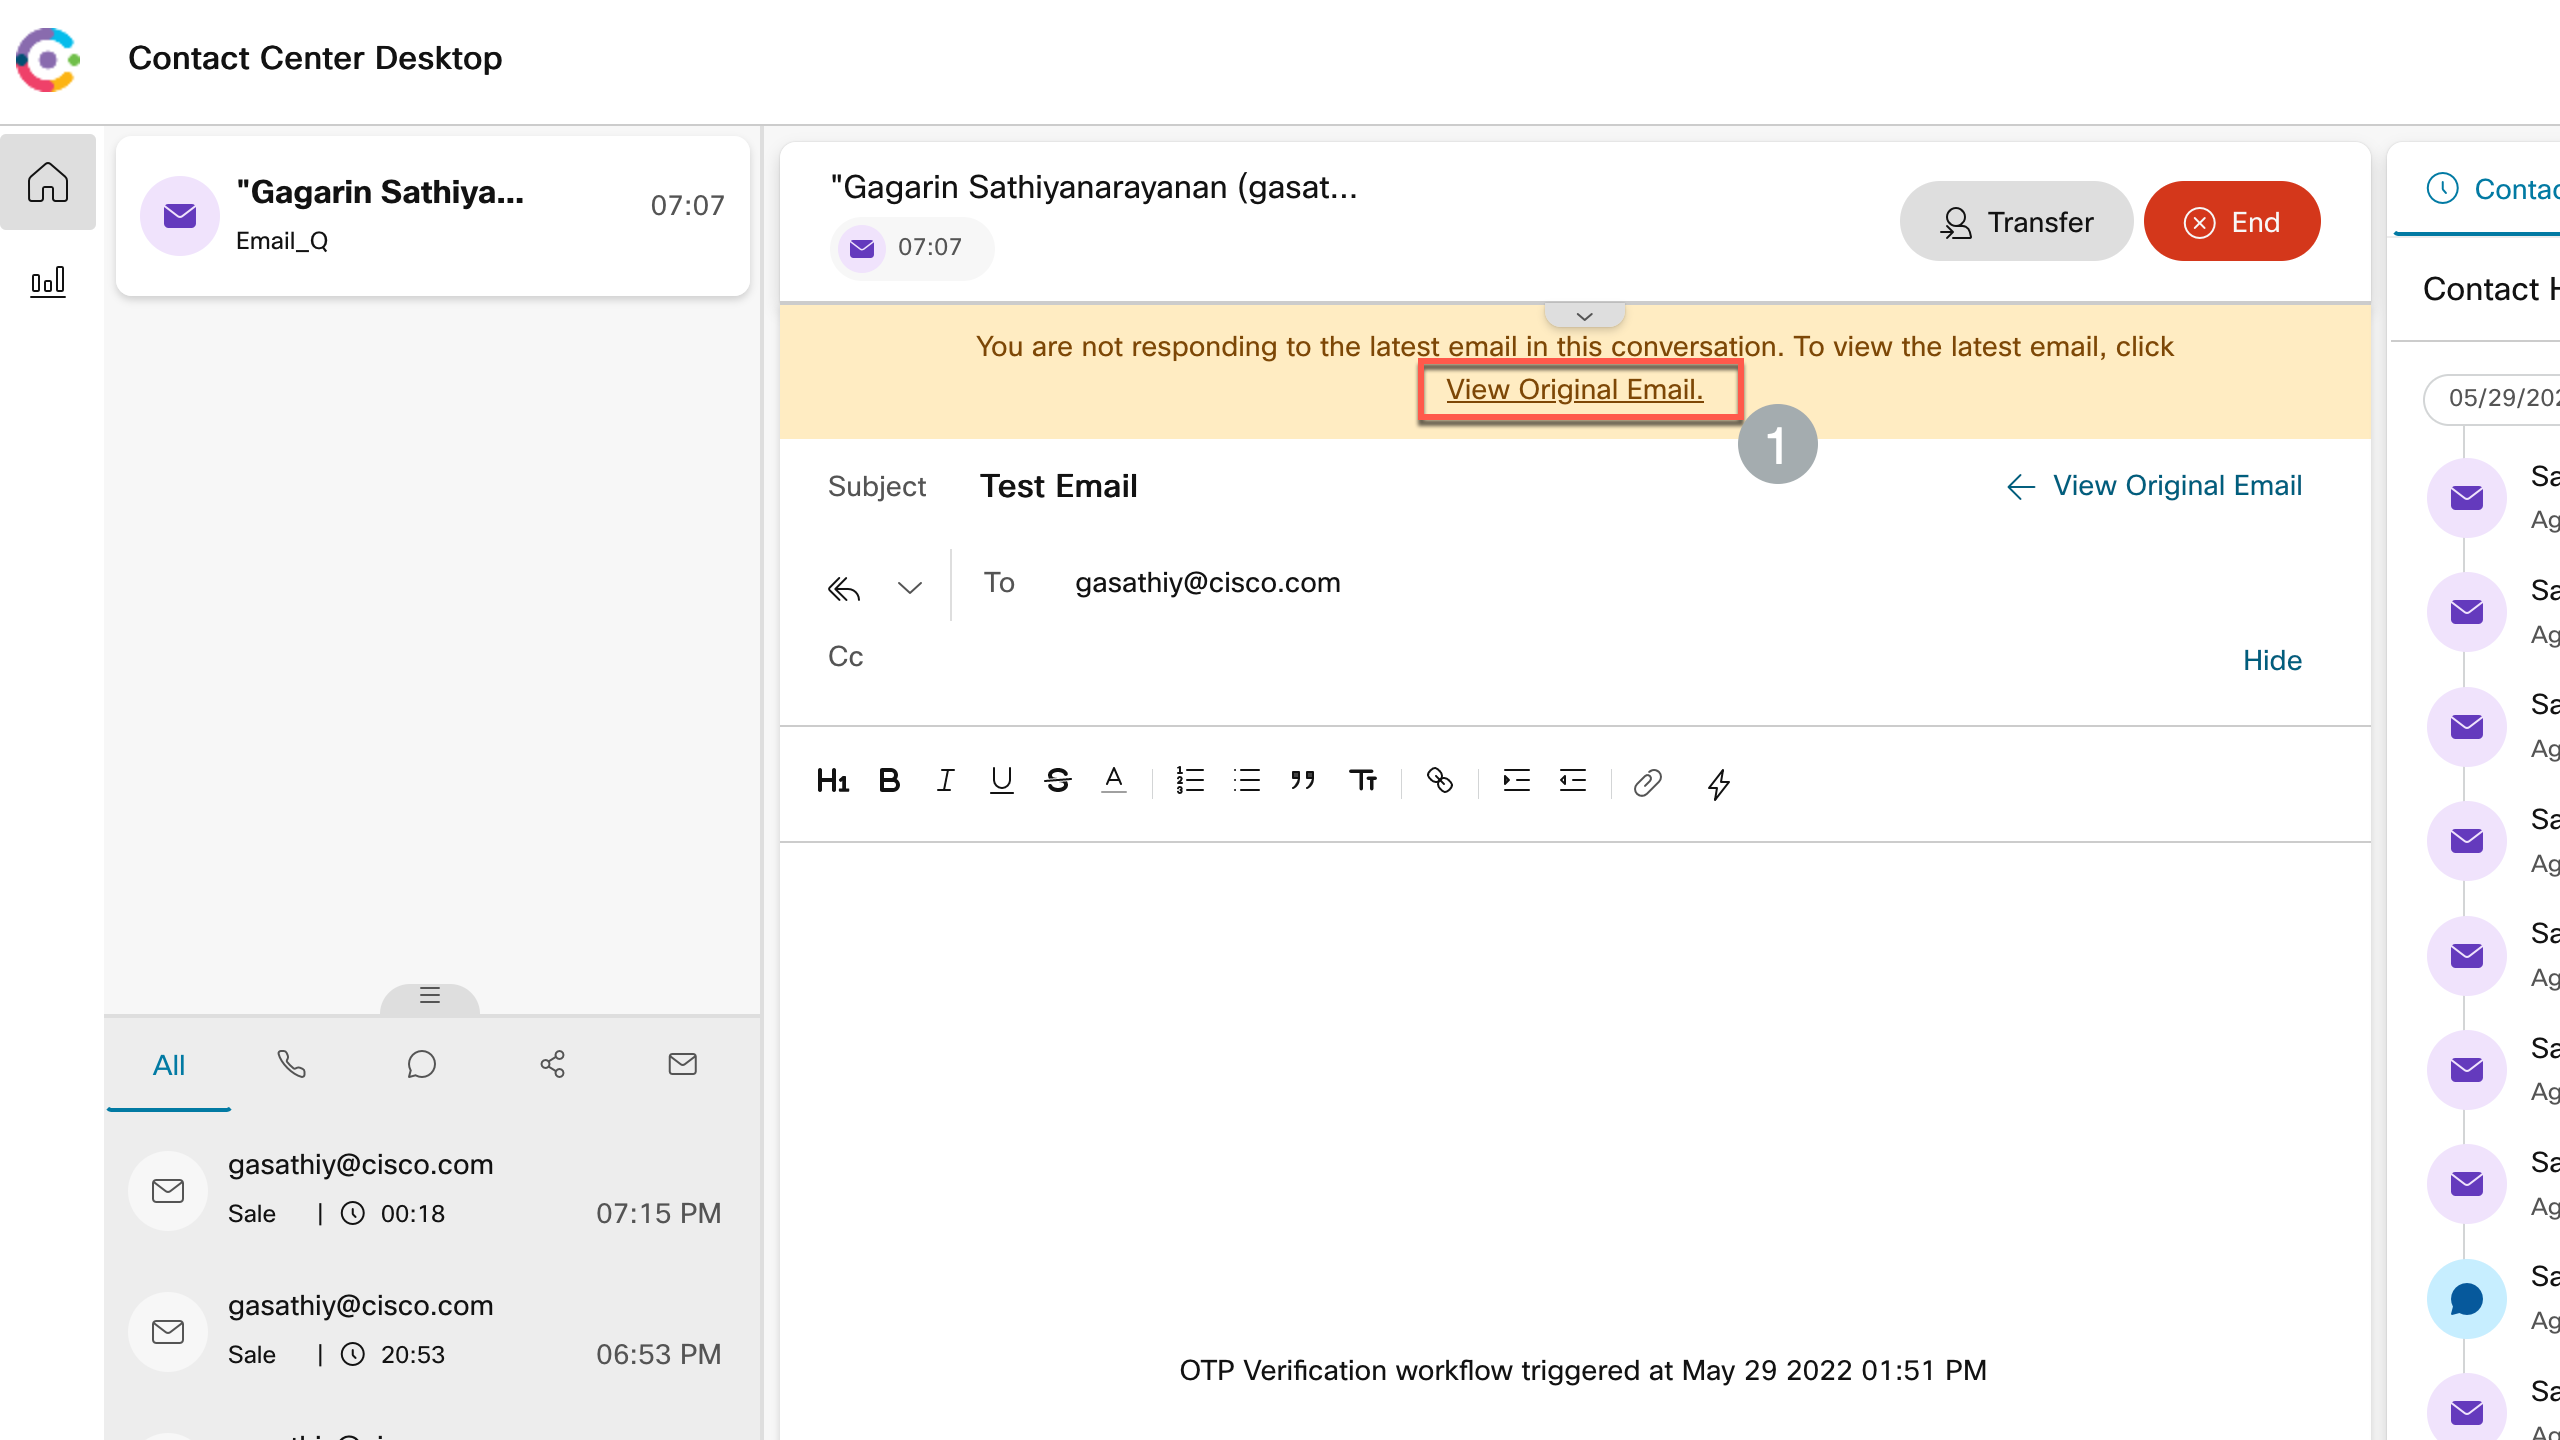
Within a minute, the agent receives an update on the agent desktop that there is a latest email available and if they would like to view it. Click ‘View Original Email’
-
Agent can now verify the OTP.