Lab 2.1: Basic Chat
Table of Contents
- Table of Contents
- Introduction
- Lab Section
Introduction
Lab Objective
In this Lab, we will go through the tasks that are required to complete the basic Live chat integration. You will be able to initiate a Chat contact to the Contact Center from a sample website and be able to accept/respond to the contact by logging in as an agent.
In this lab you will be configuring Service, Chat Assets, Entry Point, Queue, Chat Template, Website Settings, and corresponding workflows.
Pre-requisite
- You received an admin credentials to configure in Management Portal and Webex Connect.
- You have successfully completed the previous Lab Preconfiguration
Quick Links
Control Hub: https://admin.webex.com
Portal: https://portal.wxcc-us1.cisco.com/portal
Agent Desktop: https://desktop.wxcc-us1.cisco.com
Connect: https://cl2podX.imiconnect.io/ (where X is your POD number)
Lab Section
Step 1. Live Chat Asset creation & register to Webex Engage
-
Login to your respective Webex Connect UI using the provided URL https://auclpodX.au.webexconnect.io/ (where X is your POD number).
-
Navigate to
Assets>Apps>Configure New App>Mobile / Web
-
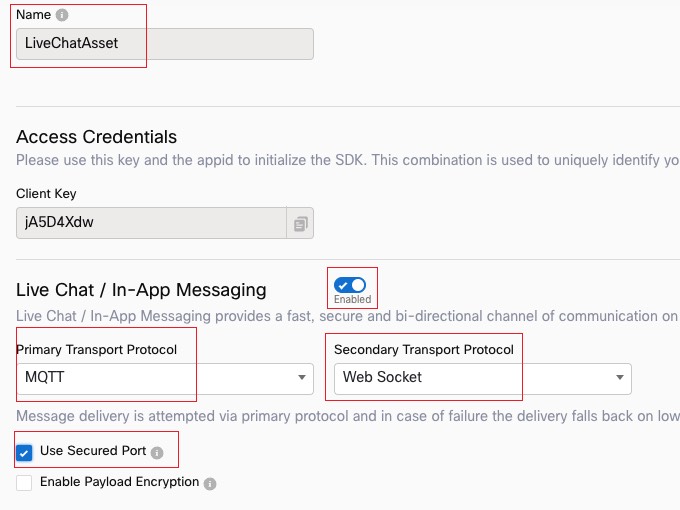
Provide a
Name -
Toggle/Enable
Live Chat / In-AppMessagingto “ON” and choosePRIMARY TRANSPORT PROTOCOLas MQTT” &SECONDARY TRANSPORT PROTOCOLas Web Socket” and enableUse Secured PortandSAVE.
- Select
Register To Webex Engageand choose the Service you have created and REGISTER
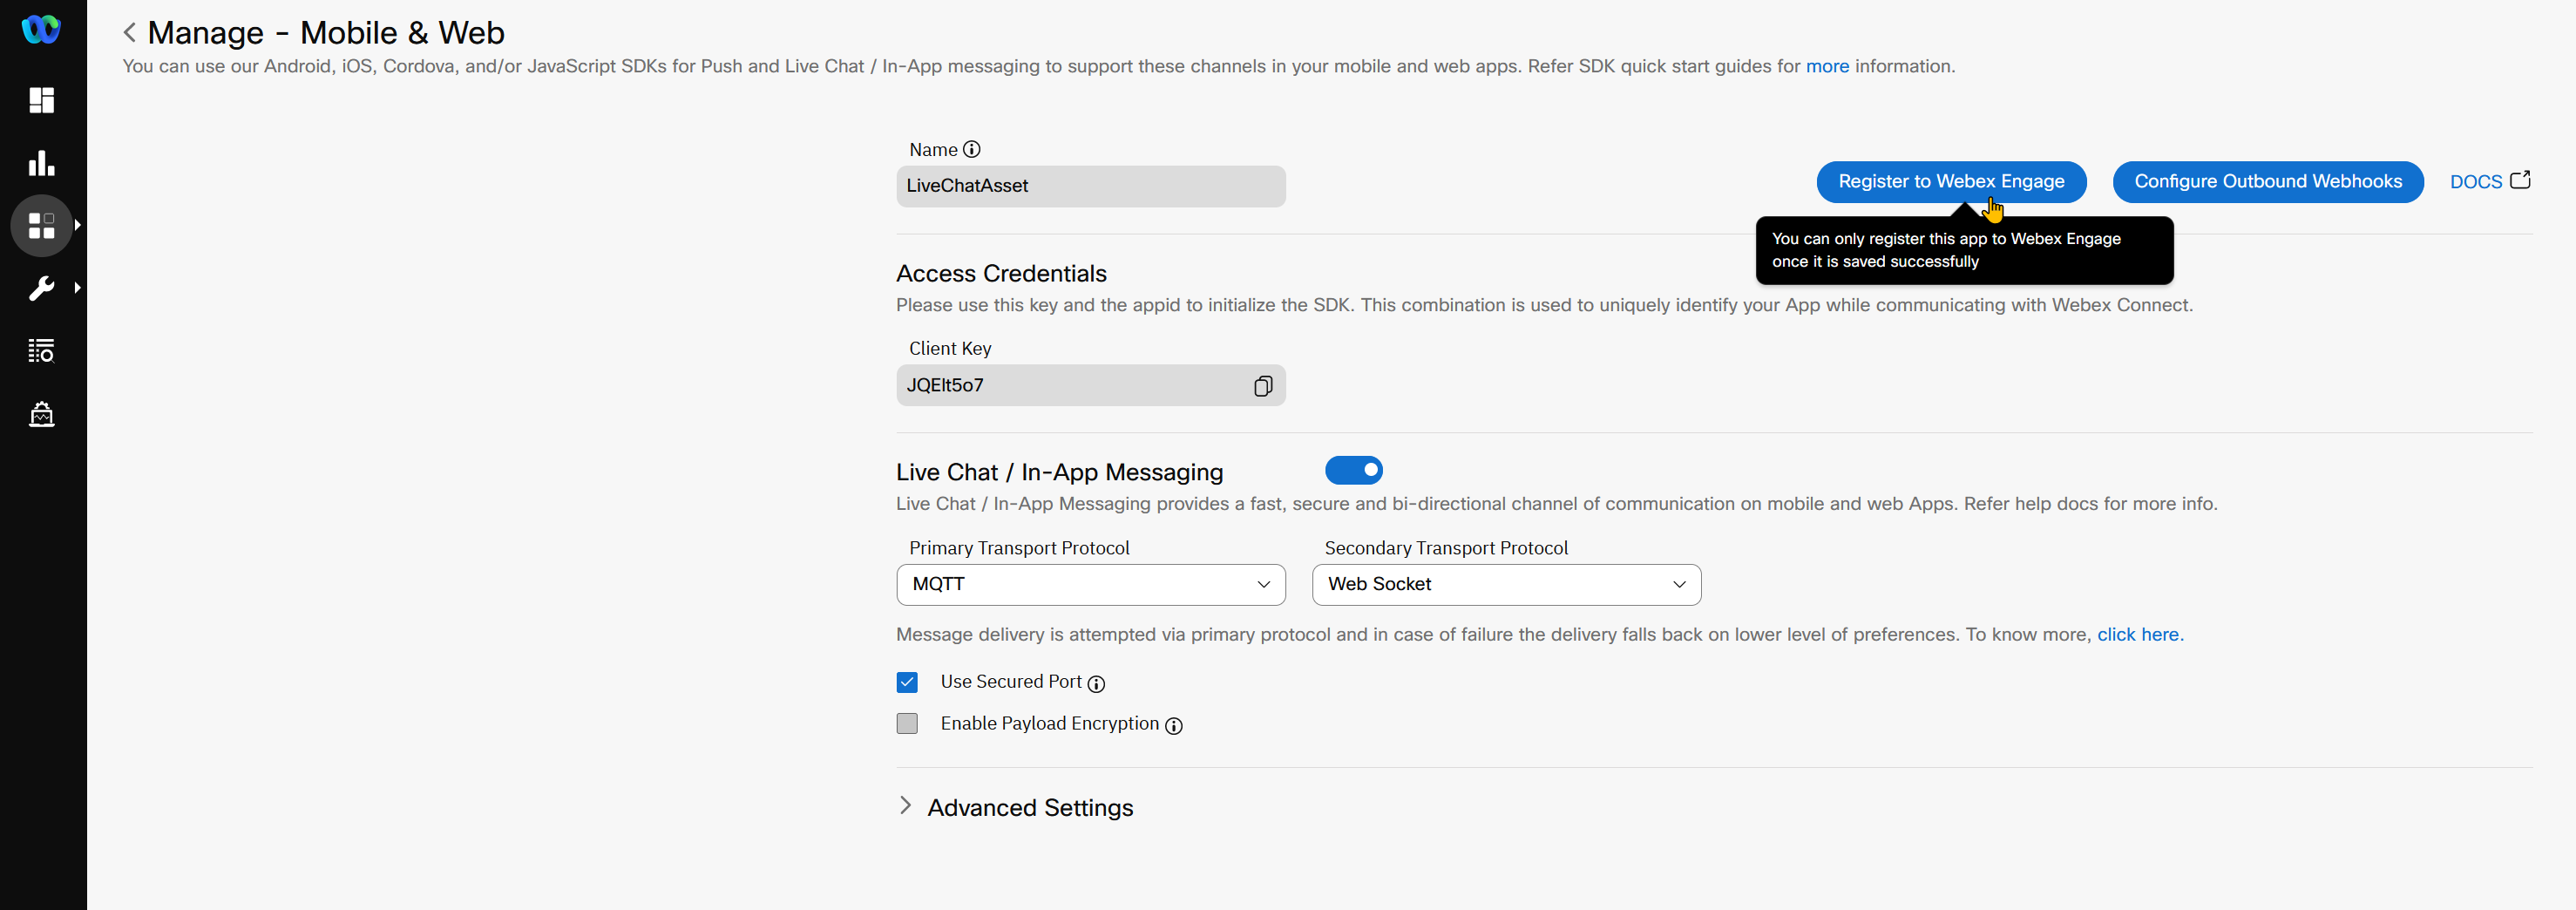
- In the resulting window, select a service under which this asset would be managed
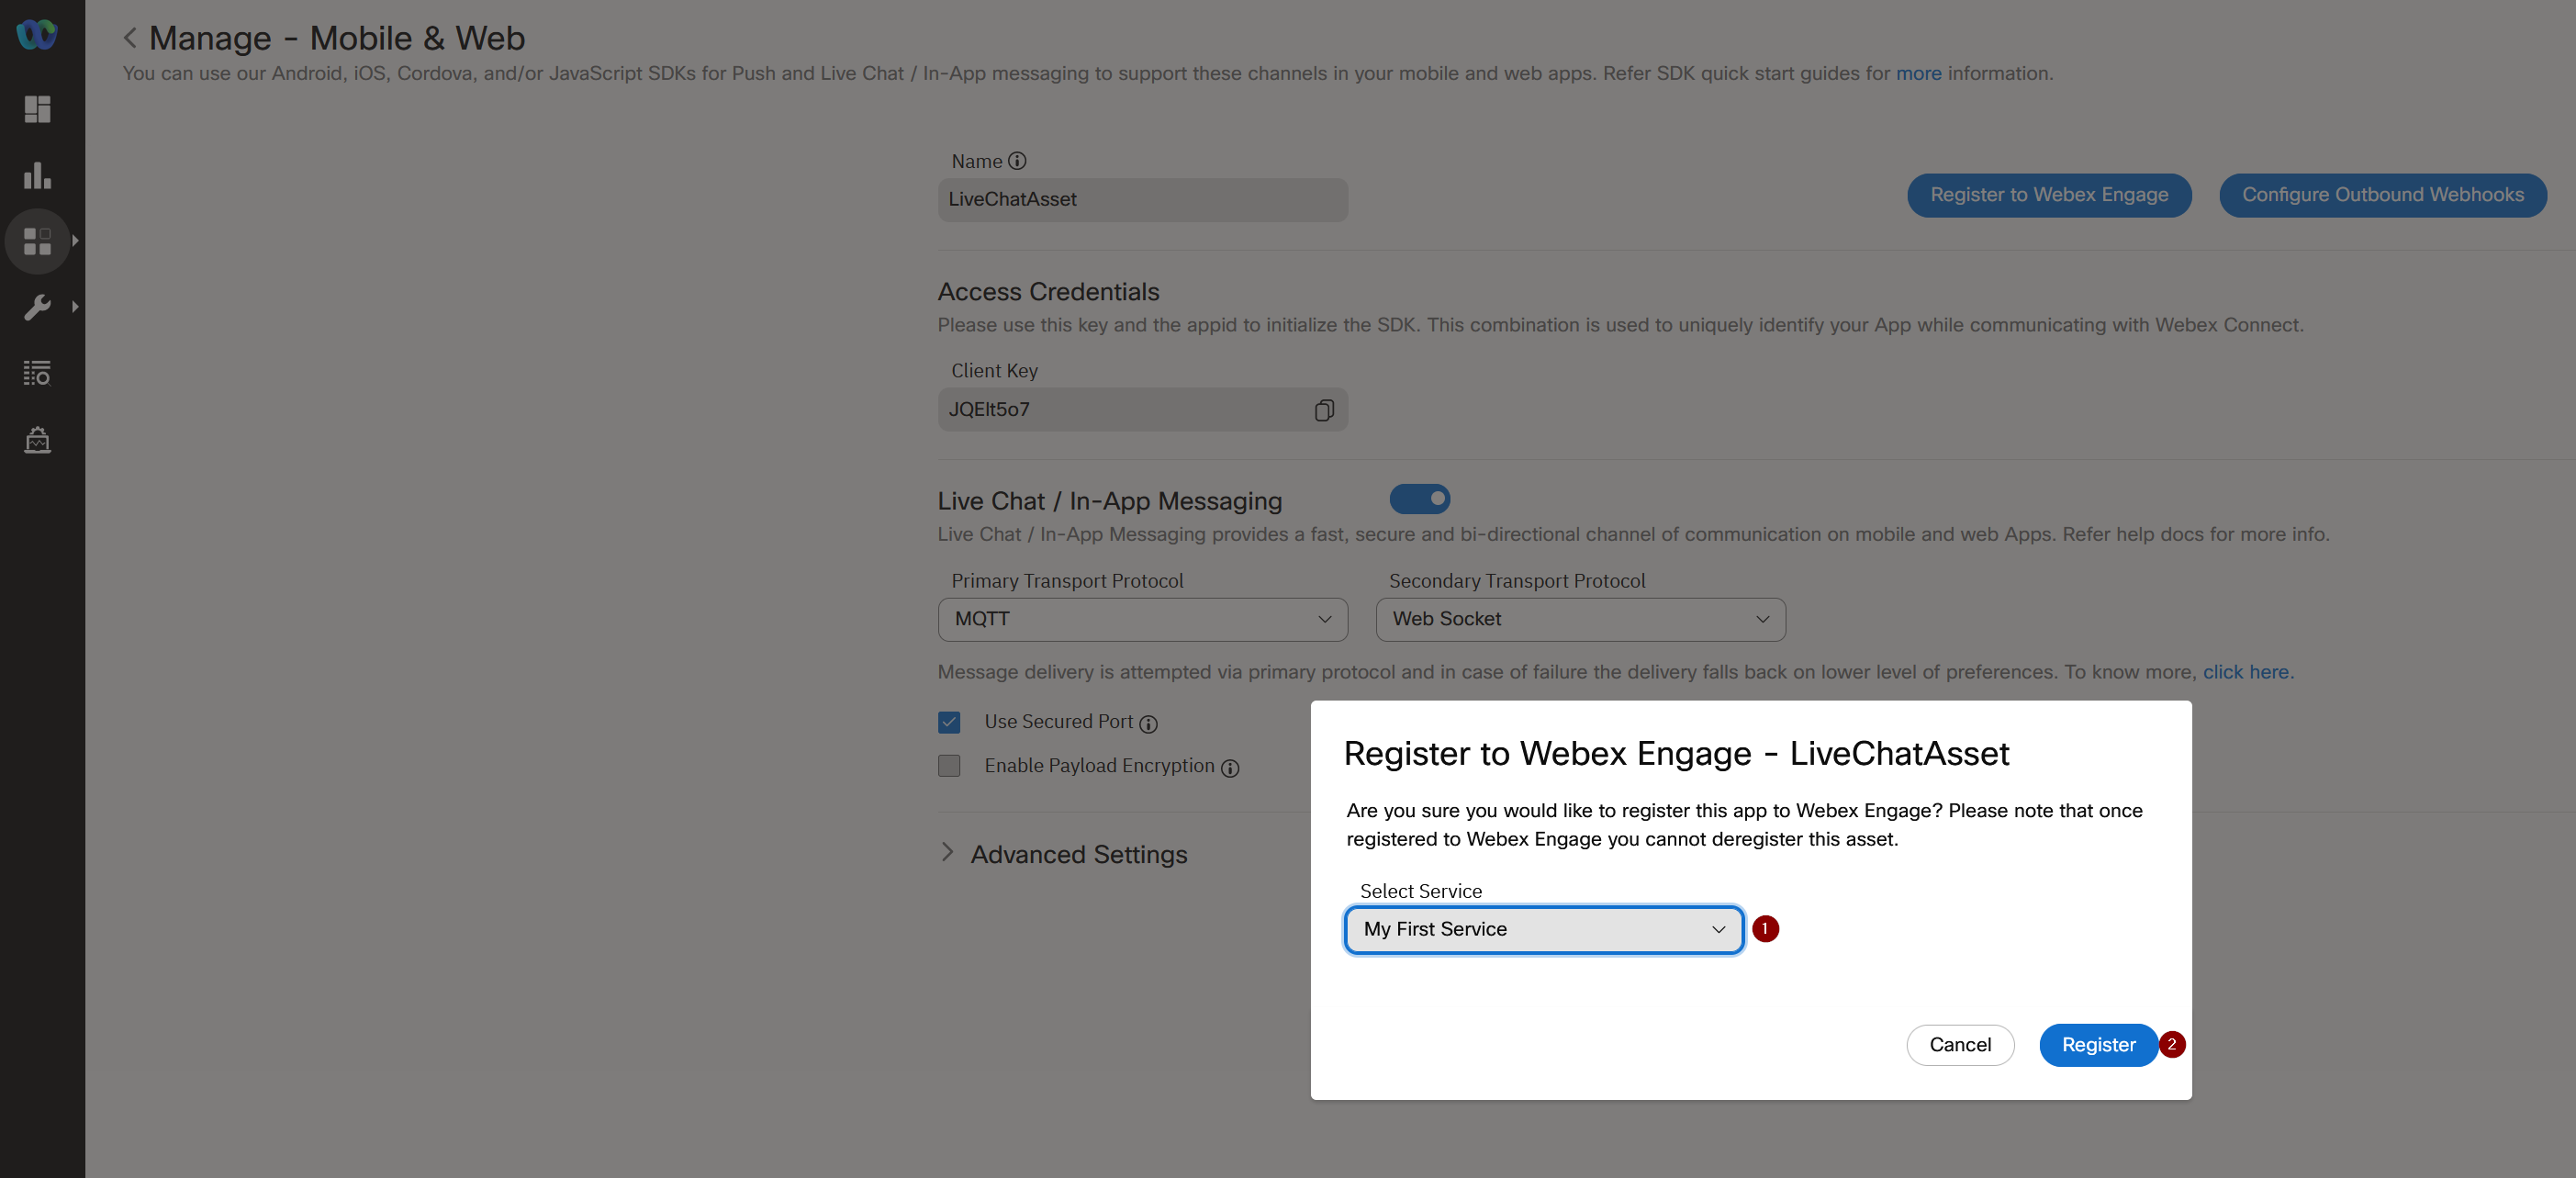
- Verify that the
Register To Webex Engageoption is now disabled and there is a message indicating the time when the asset was registered along with the service to which it is assigned.

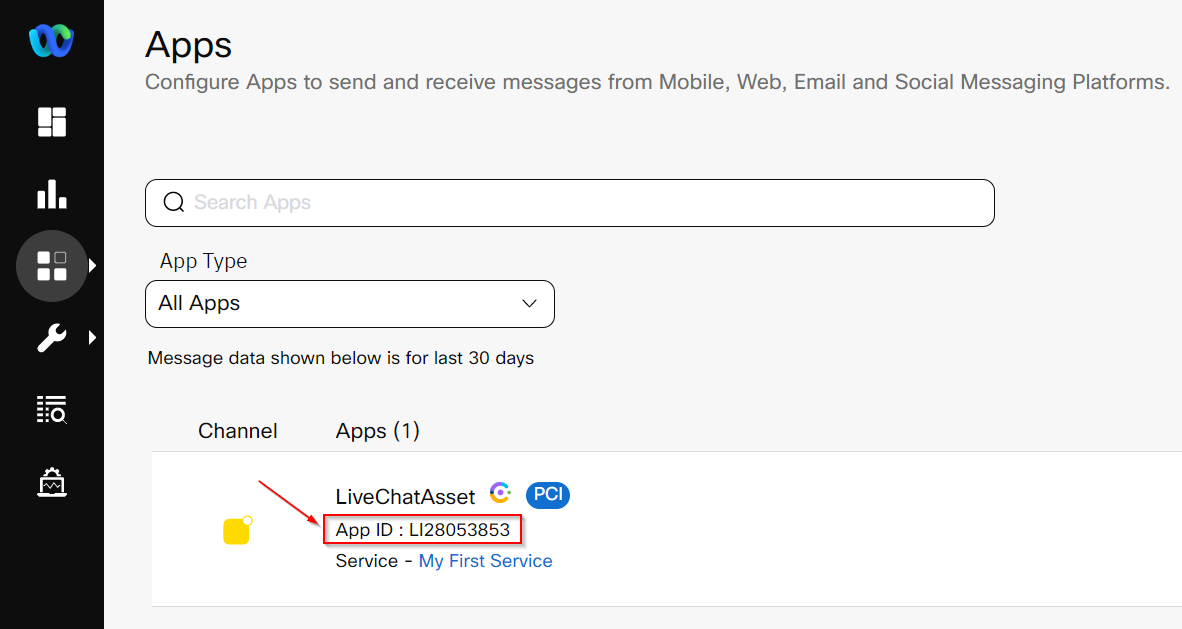
- Click the back arrow next to go back to the list of Apps. Then take note of the Application ID (App ID). We will need this later so please copy this ID somewhere handy like a text file or take note of it.
Step 2. Chat Template creation for website integration
-
Chat template creation allows you to configure a pre-defined chat form that will presented to the customer. Data points can be collected from the customer in a chat-like interface.
-
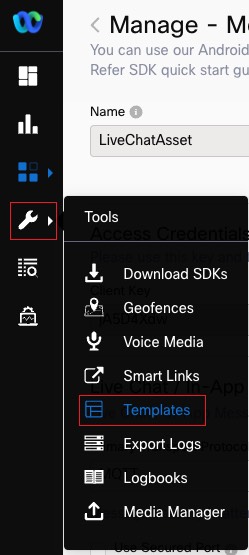
From Webex Connect interface, go to
TOOLS>Templatesthen click onAdd New Template
-
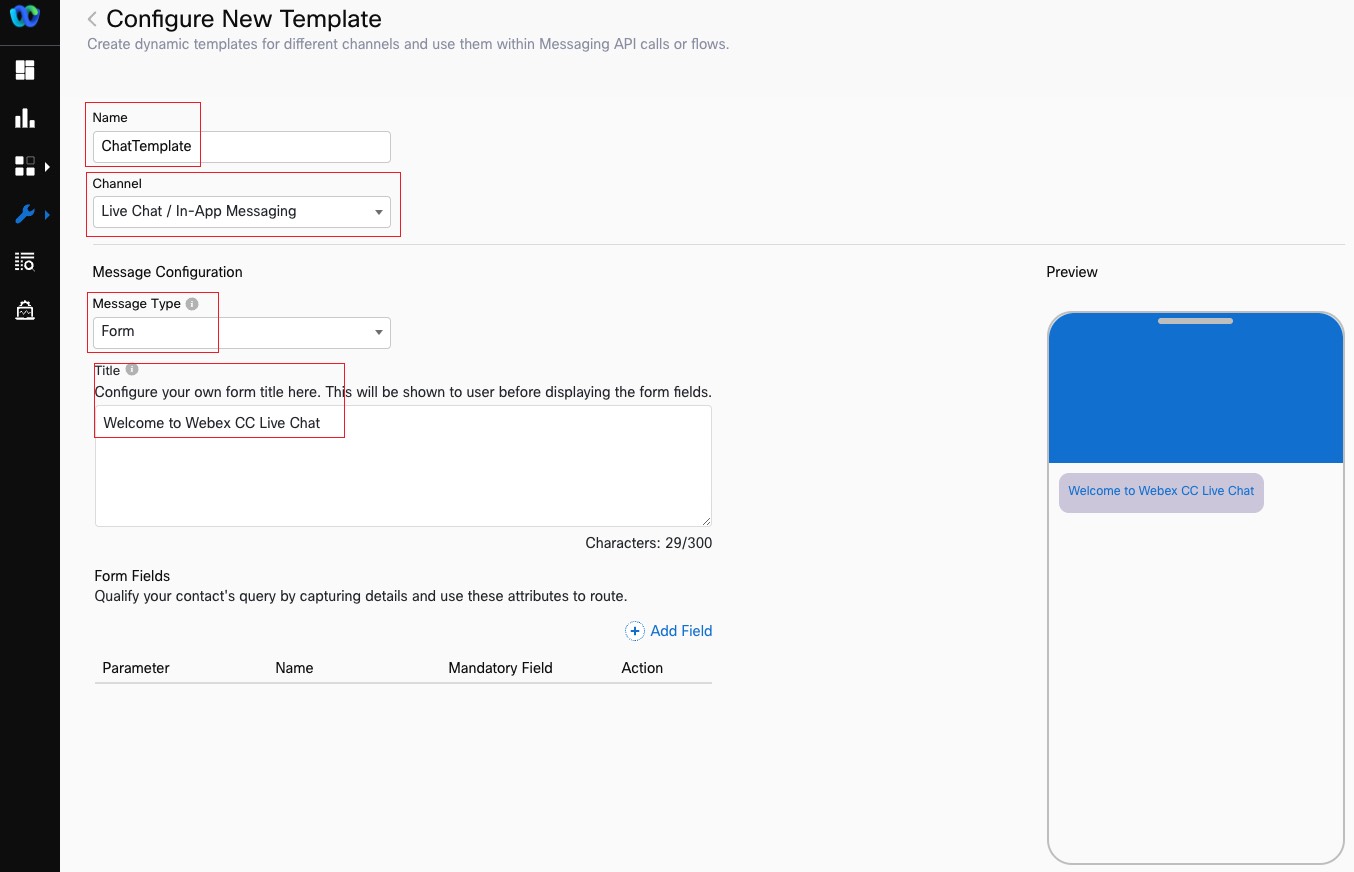
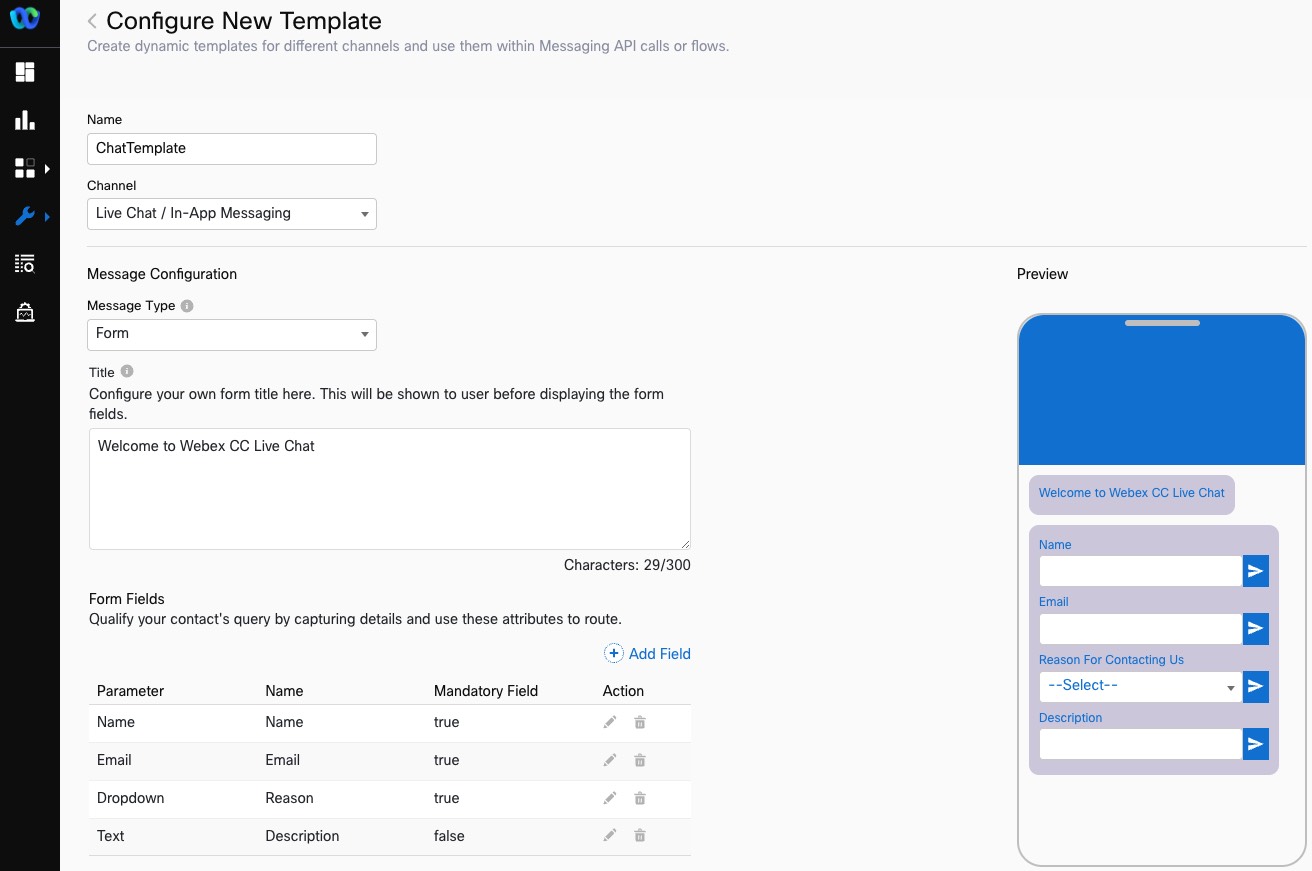
Provide a Name and choose Channel as
Live Chat / In-APP Messaging -
Message Type as
Form -
Provide the Title as
Welcome to Webex CC Live Chator some other message.
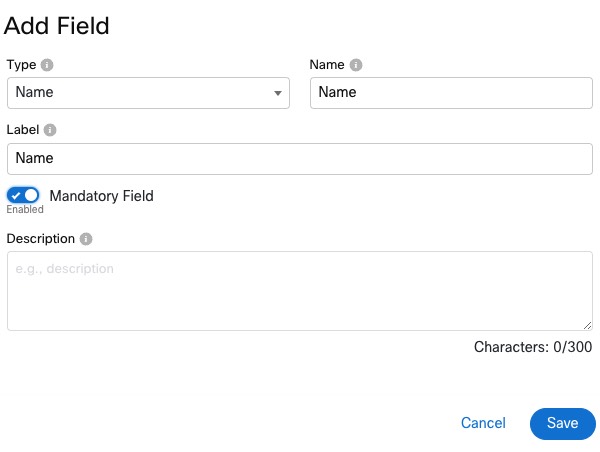
- We will be adding form fields now. Firstly the Name. Click on
Add fieldand then fill in the details as per the screenshot
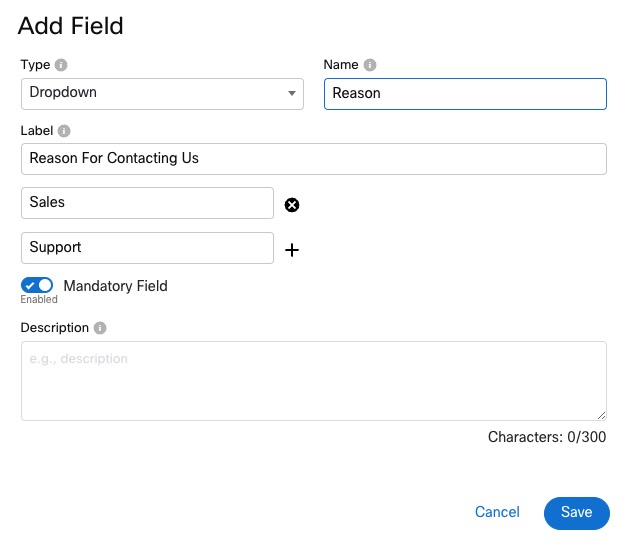
-Continue by adding the Email and Reason fields in the same manner with the info in this table.
| Type | Name | Label | Mandatory Field |
|---|---|---|---|
| Name | Name | Name | true |
| true | |||
| Dropdown | Reason | Reason for Contacting Us | true |
| Text | Description | Description | false |
Here is a screenshot of the Dropdown configuration with 2 options, one for Sales and one for Support.
- Finally click
SAVE
Step 3. Chat Entry Point and Queue creation
1. Create Entry Point in Management Portal
-
Click on Provisioning and select Entry Points/Queues > Entry Point.
-
Click on
New Entry Point. -
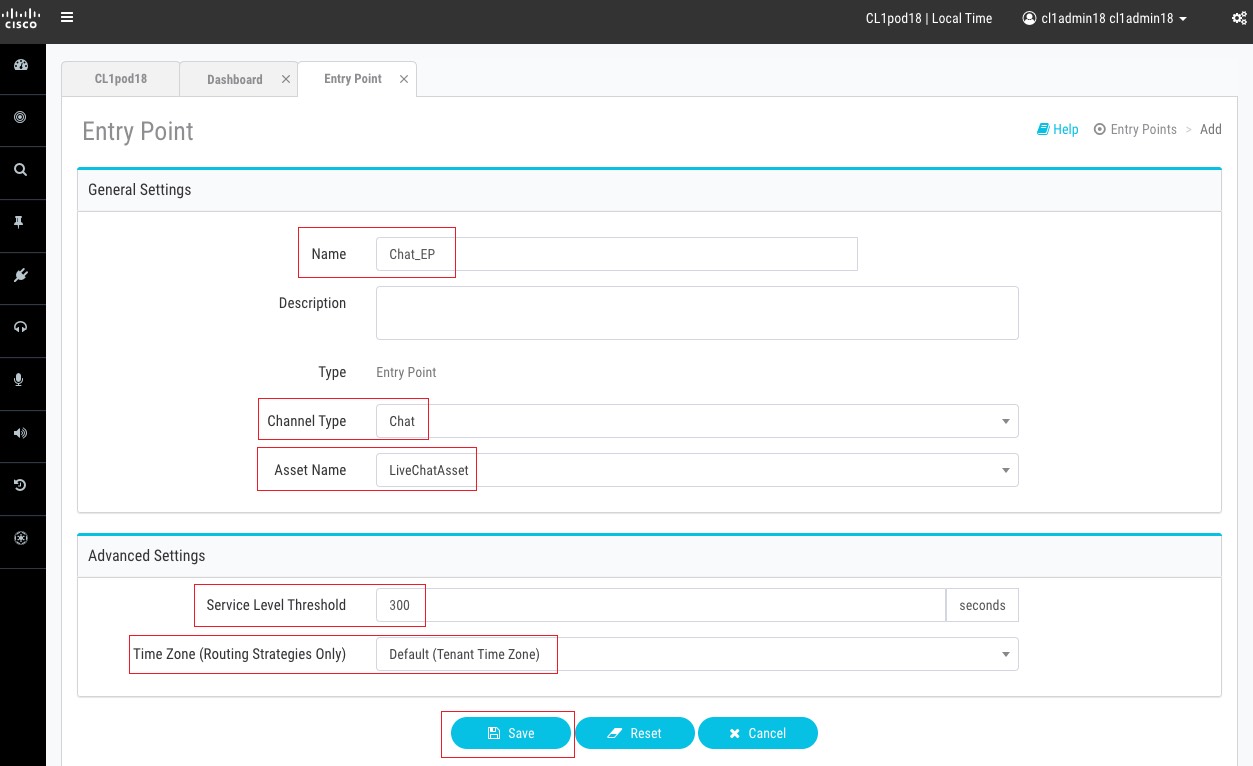
Input Name as
Chat_EP. -
Select
Chatin the Channel Type section. -
Leave the Asset Name as the configured value earlier.
-
Set Service Level Threshold as
300seconds. -
The Time Zone can stay as default value.
-
Click on Save after comparing your values with the screenshot below.
2. Create Queue in Management Portal
-
Click on Provisioning and select Entry Points/Queues > Queue.
-
Click on
New Queue. -
Input Name as
Chat_Queue. -
Select
Chatin the Channel Type section. -
Select Queue Routing Type as
Longest Available Agent. -
In the the Chat Distribution click on Add Group and select
Team1. -
Set Service Level Threshold as
90seconds. -
Set Maximum Time in Queue as
600seconds. -
The Time Zone can stay as default value.
-
Click on Save after comparing your values with the screenshot below.
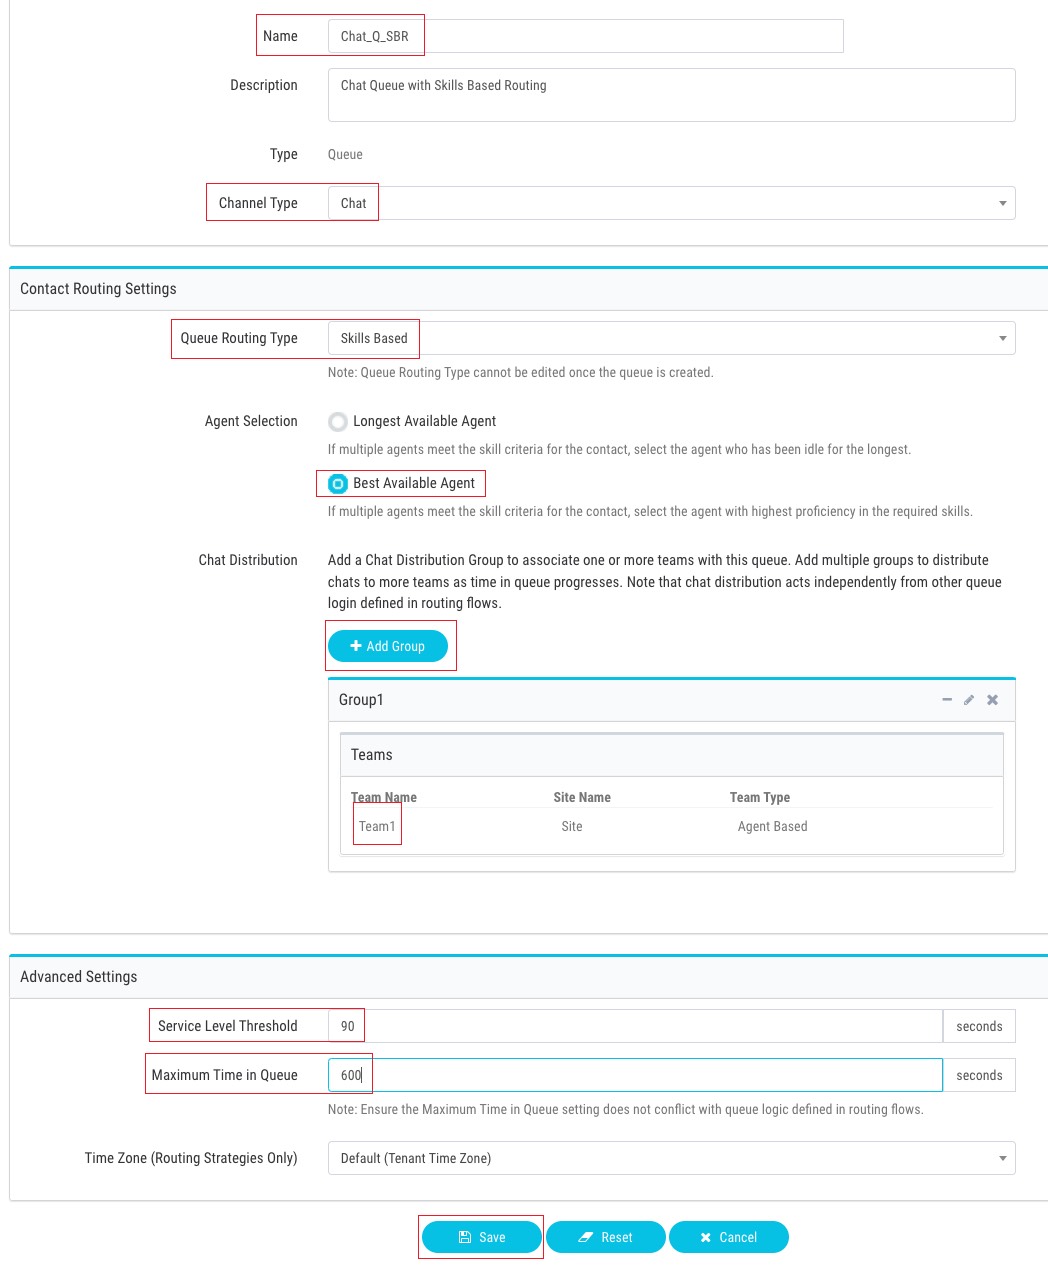
NOTE: Ignore the config in the GIF and create a
Longest Available Agenttype of Queue, rather thanSkills Based
Step 4. Website Settings
1. Configure Live Chat widget
- From Management Portal, access the menu and cross launch New Digital Channels Admin Portal by choosing
New Digital Channels
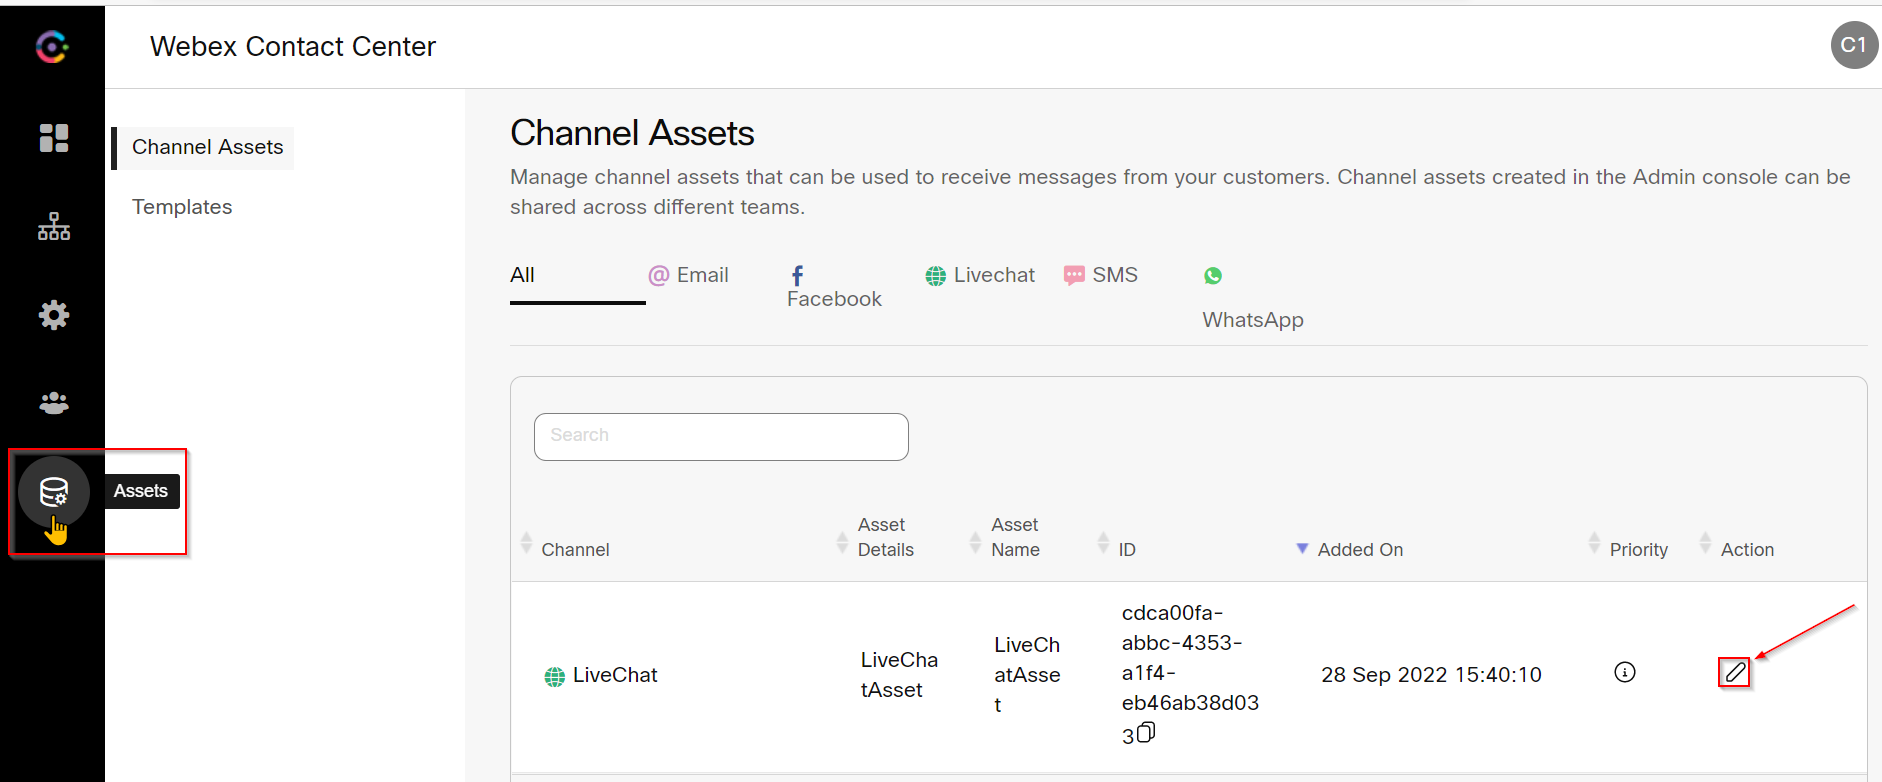
- Go to
Assets> search and edit the chat asset which we created earlier in Step 1

- Scroll down and choose
Save Changes
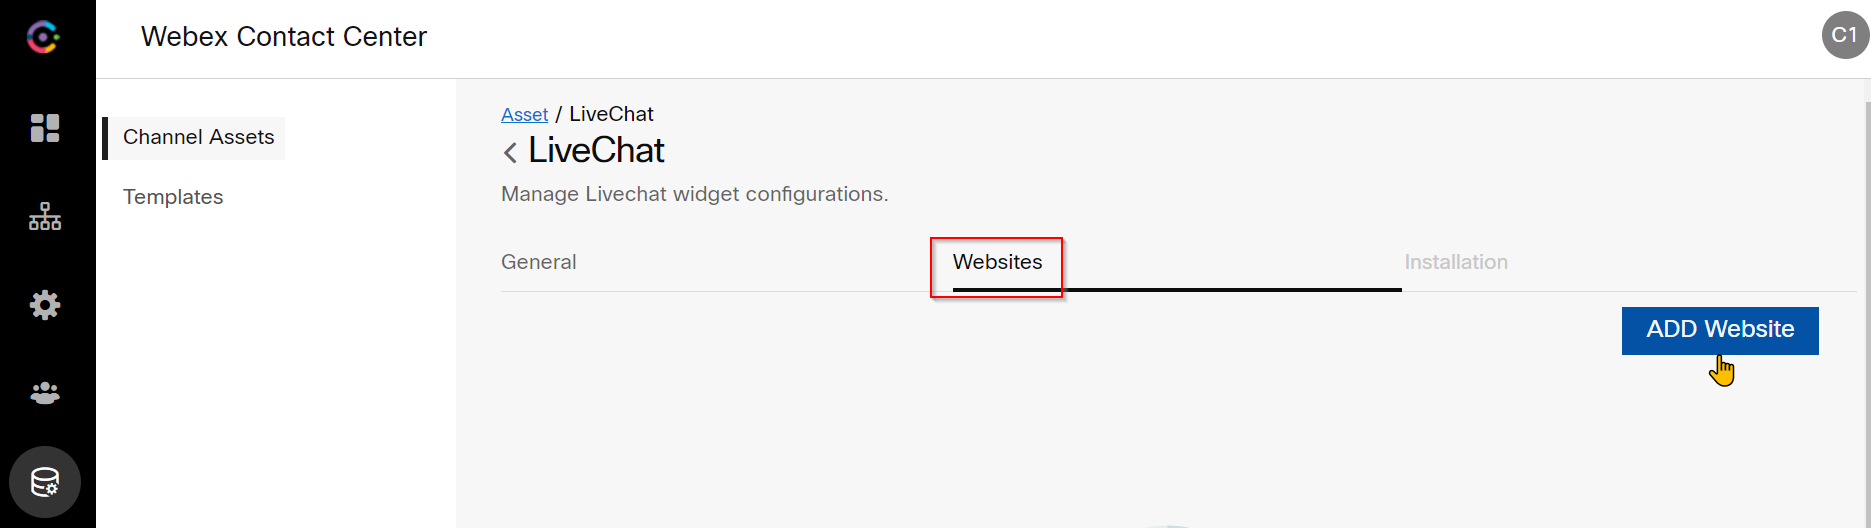
- Scroll to top of the page and choose
Websitesand then clickAdd Website
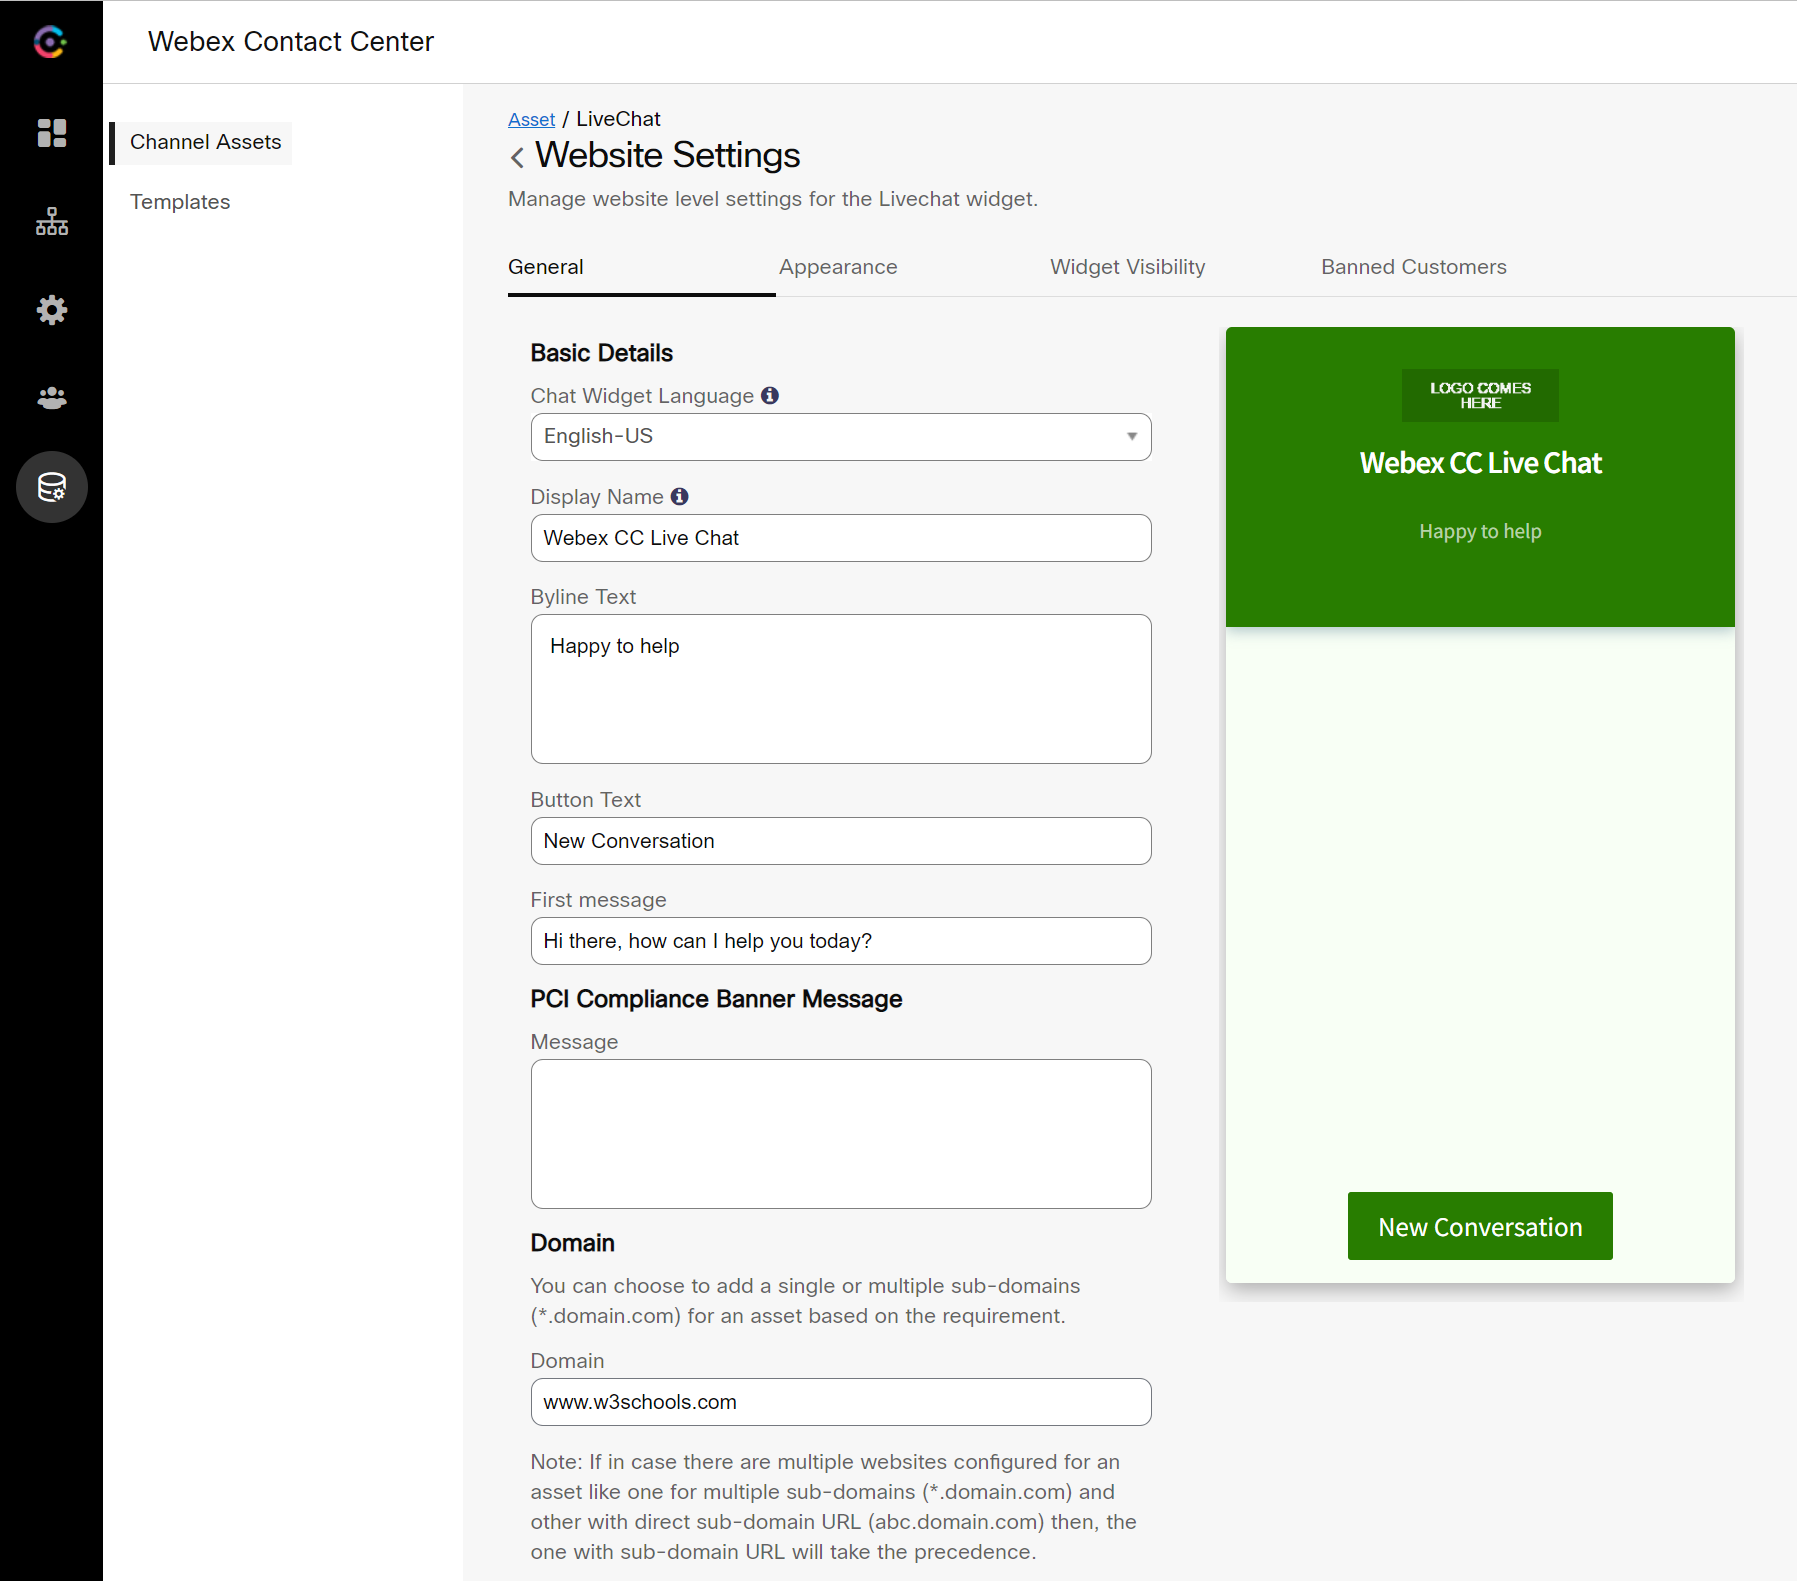
- Enter the respective fields as per Screenshots below. Note we are going to insert the chat bubble into an online HTML editor for testing www.w3schools.com. The
Domainfield should contain the domain where you will insert the chat bubble.
-
Take a moment to explore the rest of the customization options for the chat bubble and then click
SAVE CHANGES -
Scroll up, select the
Appearancetab and change the settings (Widget Color, Logo, Emojis, attachments etc.;) as per your requirement andSAVE CHANGES -
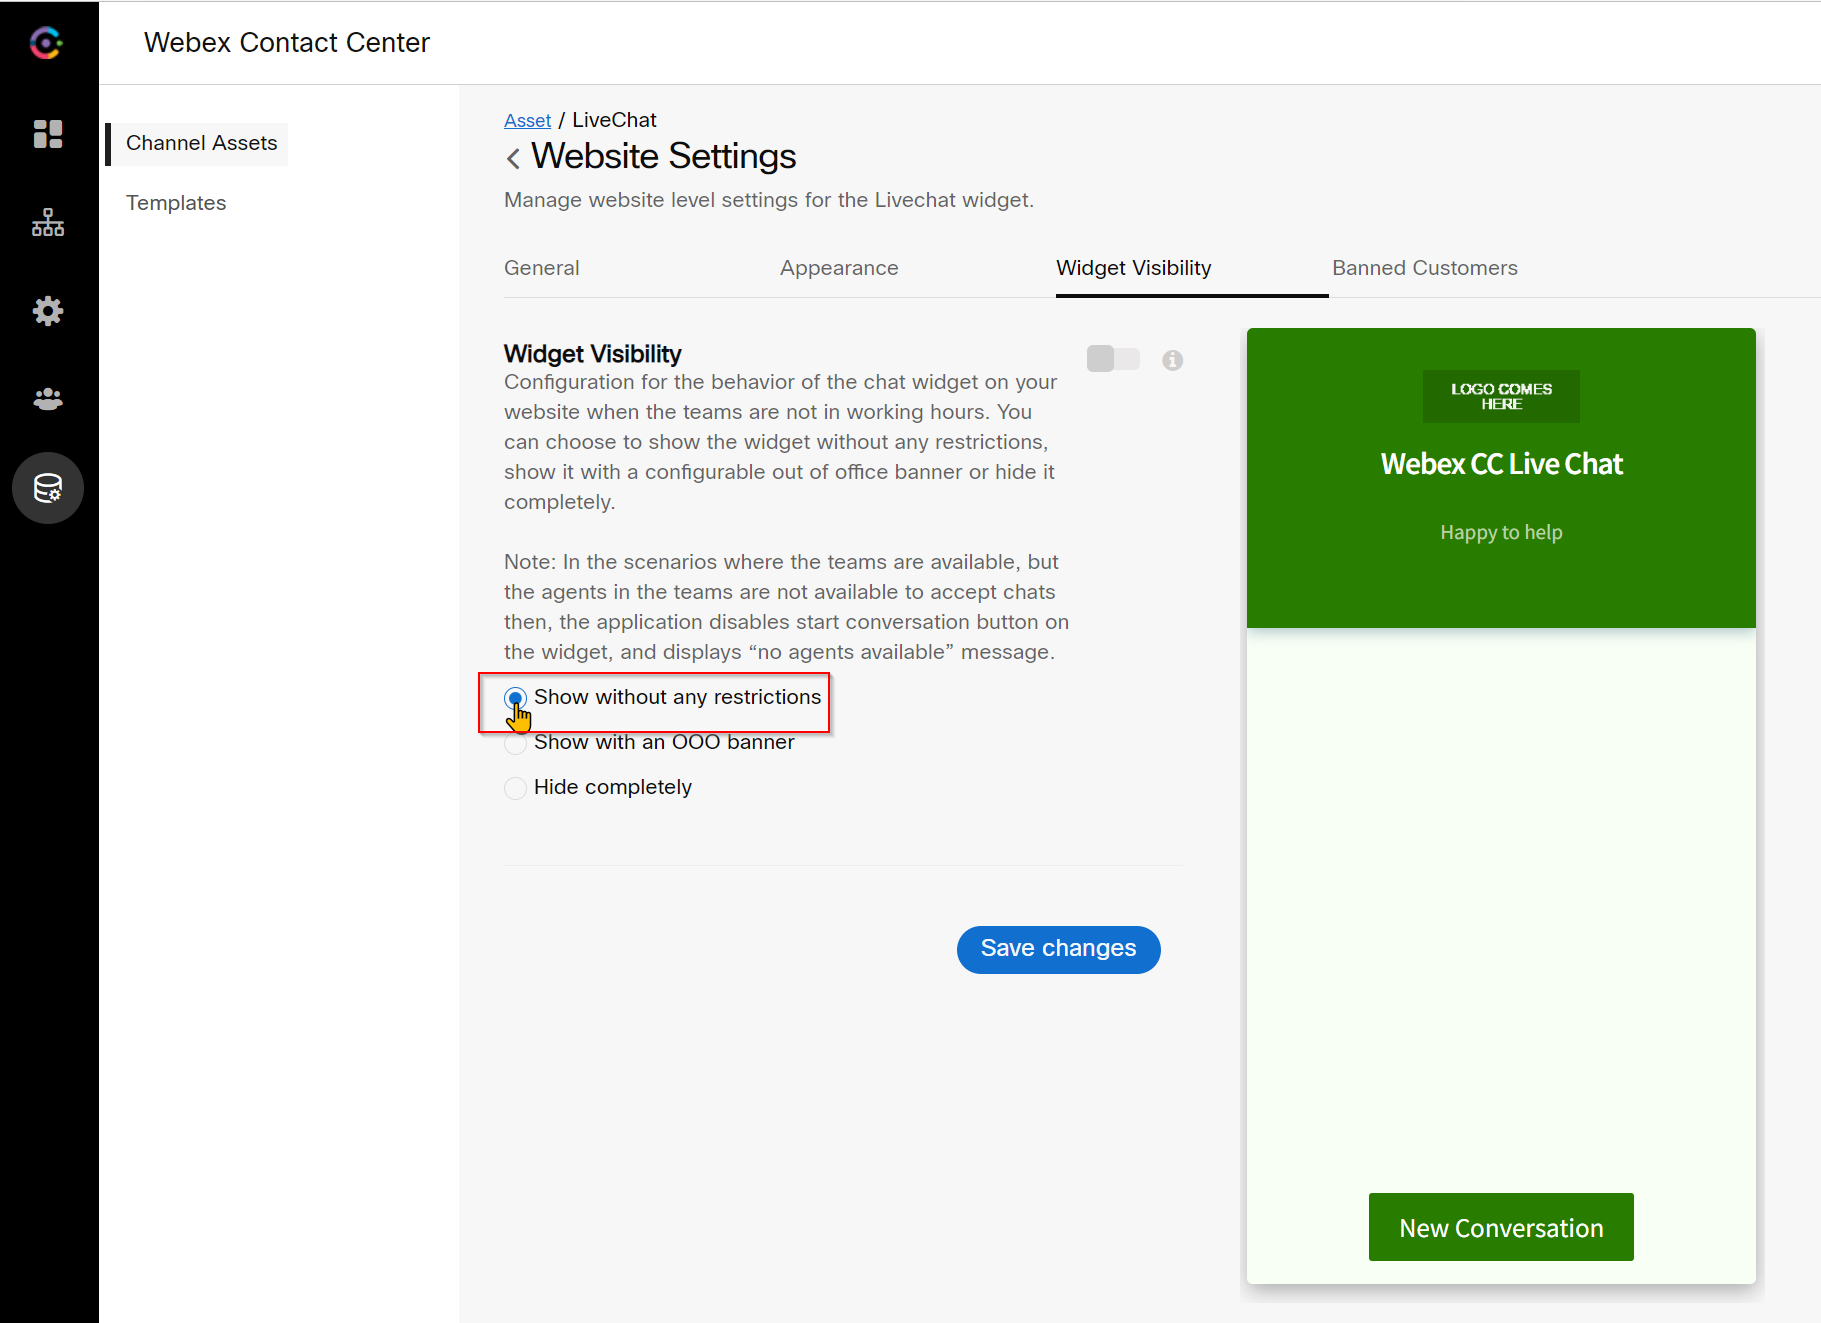
Select the
Widget Visibilitytab and click onShow without restrictionandSAVE CHANGES
- Explore and
Banned Customerstab so you are familiar with the settings but we are not going to change the default settings for those at this point
2. Verify that live chat widget loads
- There’s still a few bits to configure but we can now verify that the live chat widget loads.
- Go back to Webex Connect Engage portal, select Installation tab and Copy the chat script code.

-
Open a new tab in your browser and navigate to W3Schools Online HTML Editor.
-
In the HTML example section, click on Try it yourself. (A new tab opens).
-
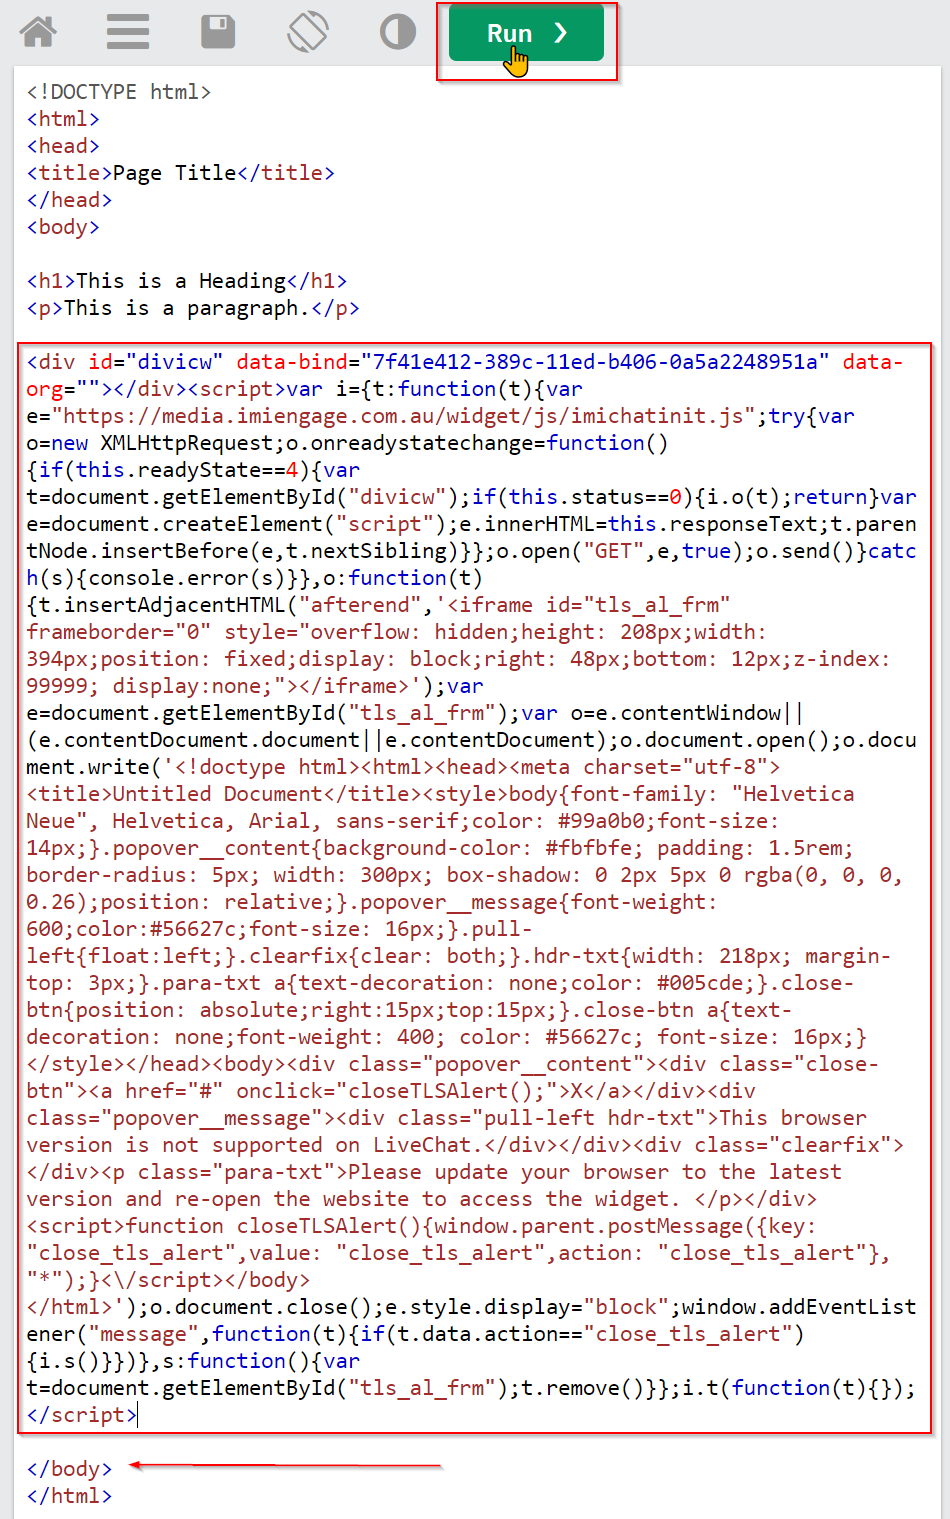
Paste the chat bubble code just above the
</body>tag and click on Run button
- A chat bubble should appear on the right side of the HTML online editor. Verify your settings if that does not happen and contact the lab proctor.
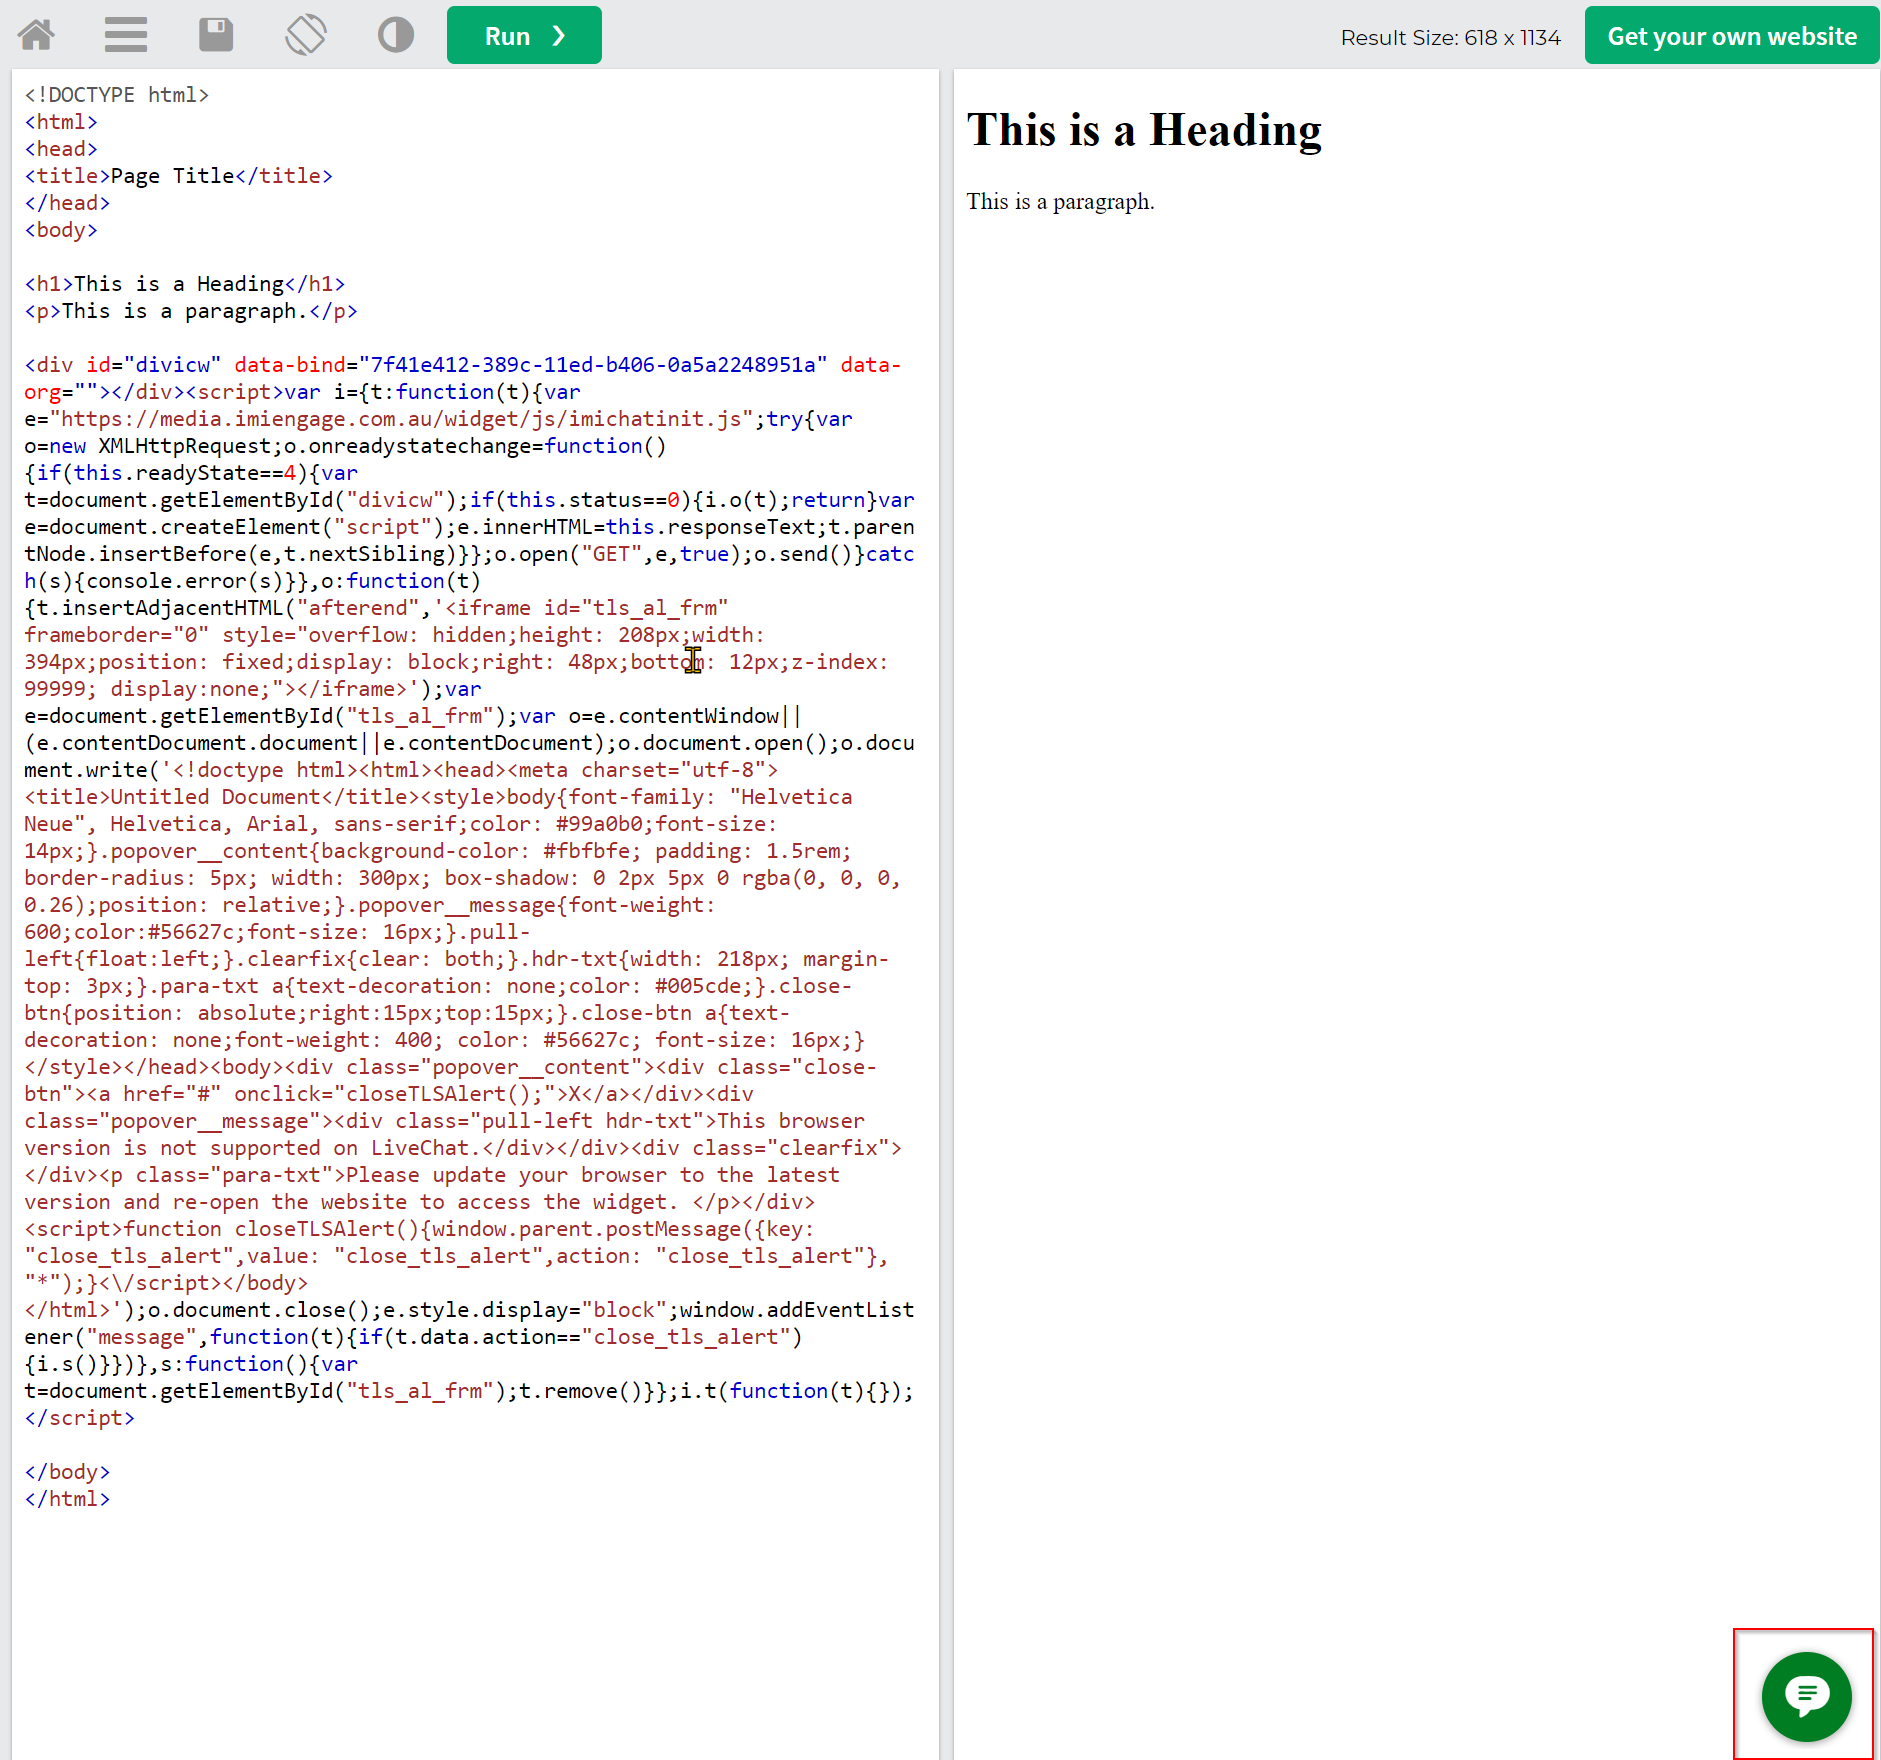
- Click on the chat bubble icon and it should show the previously configured livechat widget.
Step 5. Create/Upload Live Chat flow
1. Initial flow loading
-
Download the default Inbound and Close Chat Flow from the GitHub page.
-
Navigate to Webex Connect Flows -> v2.1 -> click on Live Chat Inbound Flow.workflow.zip and click download. Repeat the same steps to download Live Chat Close Flow.zip.
-
Unzip the downloaded file.
-
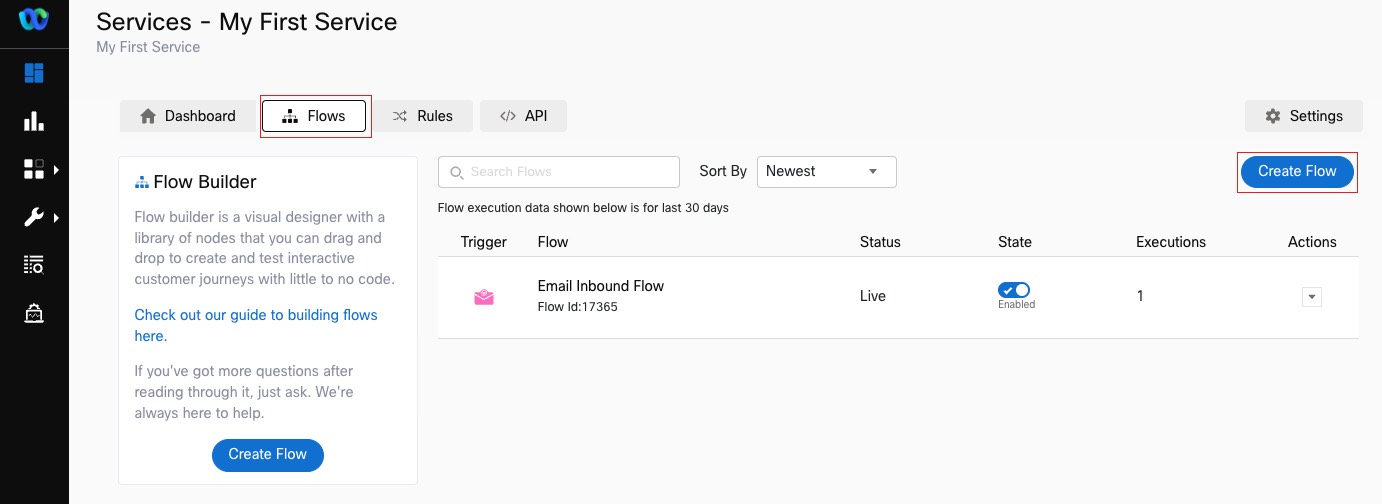
Go to Webex Connect, click on Services and select the service in which the Asset is created in step 2. It should be My First Service
-
In the service click on FLOWS -> CREATE FLOW .
-
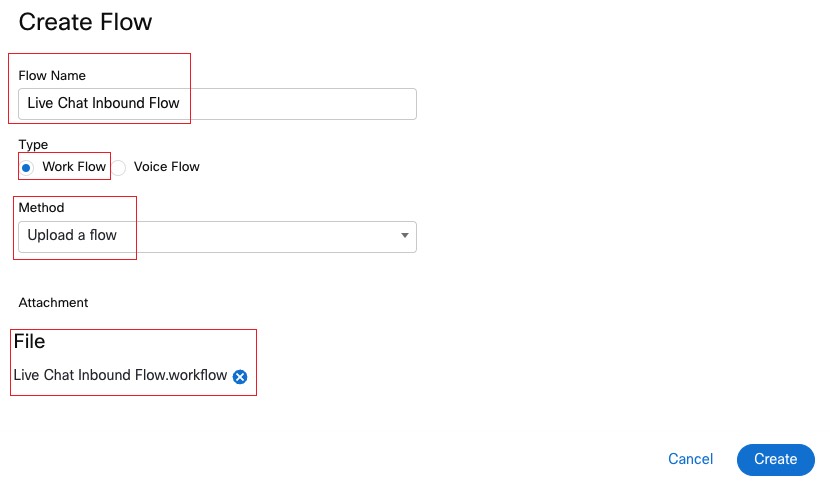
Enter the FLOW NAME as Live Chat Inbound Flow, select the TYPE as Work Flow and under METHOD select Upload a flow.
-
Drag and drop the Live Chat Inbound Flow.workflow flow file that you unzipped, click CREATE and then click SAVE.
2. Start node and Custom Variables
-
A page will load with the imported workflow. We must make some changes to the default inbound flow based on our setup.
-
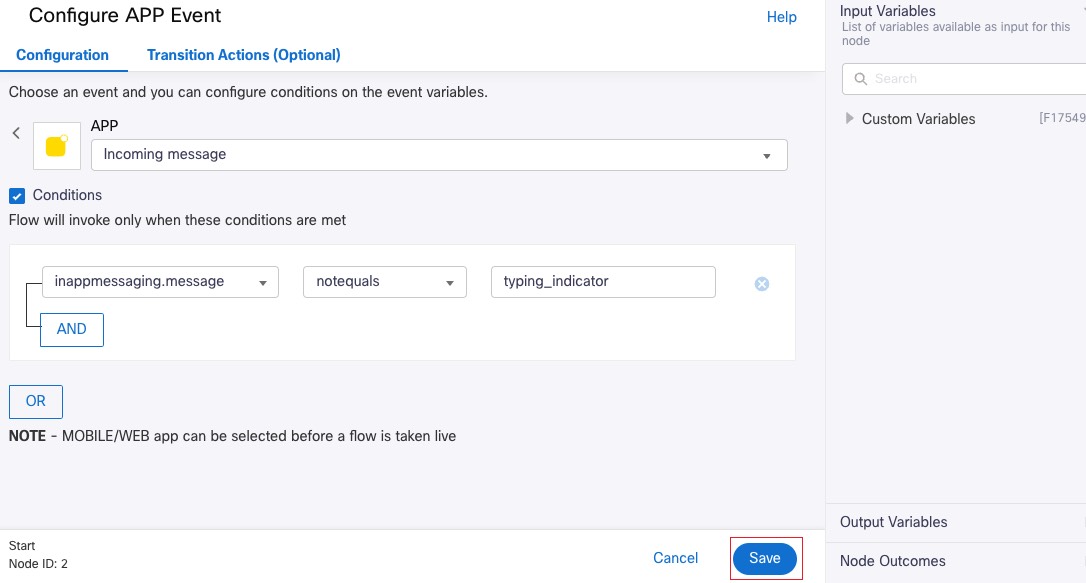
First Click
Savein theConfigure APP Eventpage that loaded, this defines what will trigger the flow and the default settings are already good.
- Click on the gear button on the top right to load the flow settings dialog
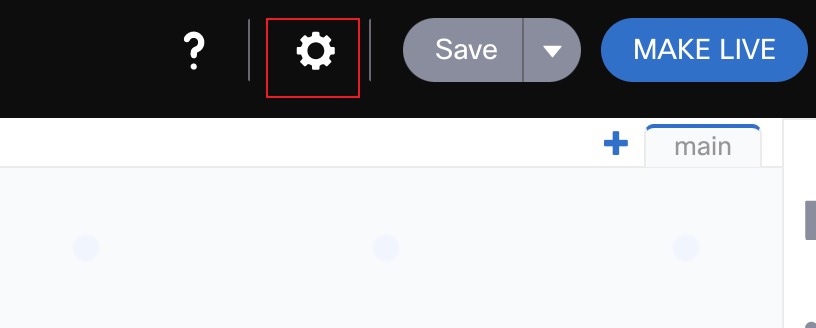
- Select the Custom Variables tab and set the following variable defaults:
appid: Set it to the value you copied in Step1
domain: Set it to www.w3schools.com
liveChatDomain: Set it to www.w3schools.com
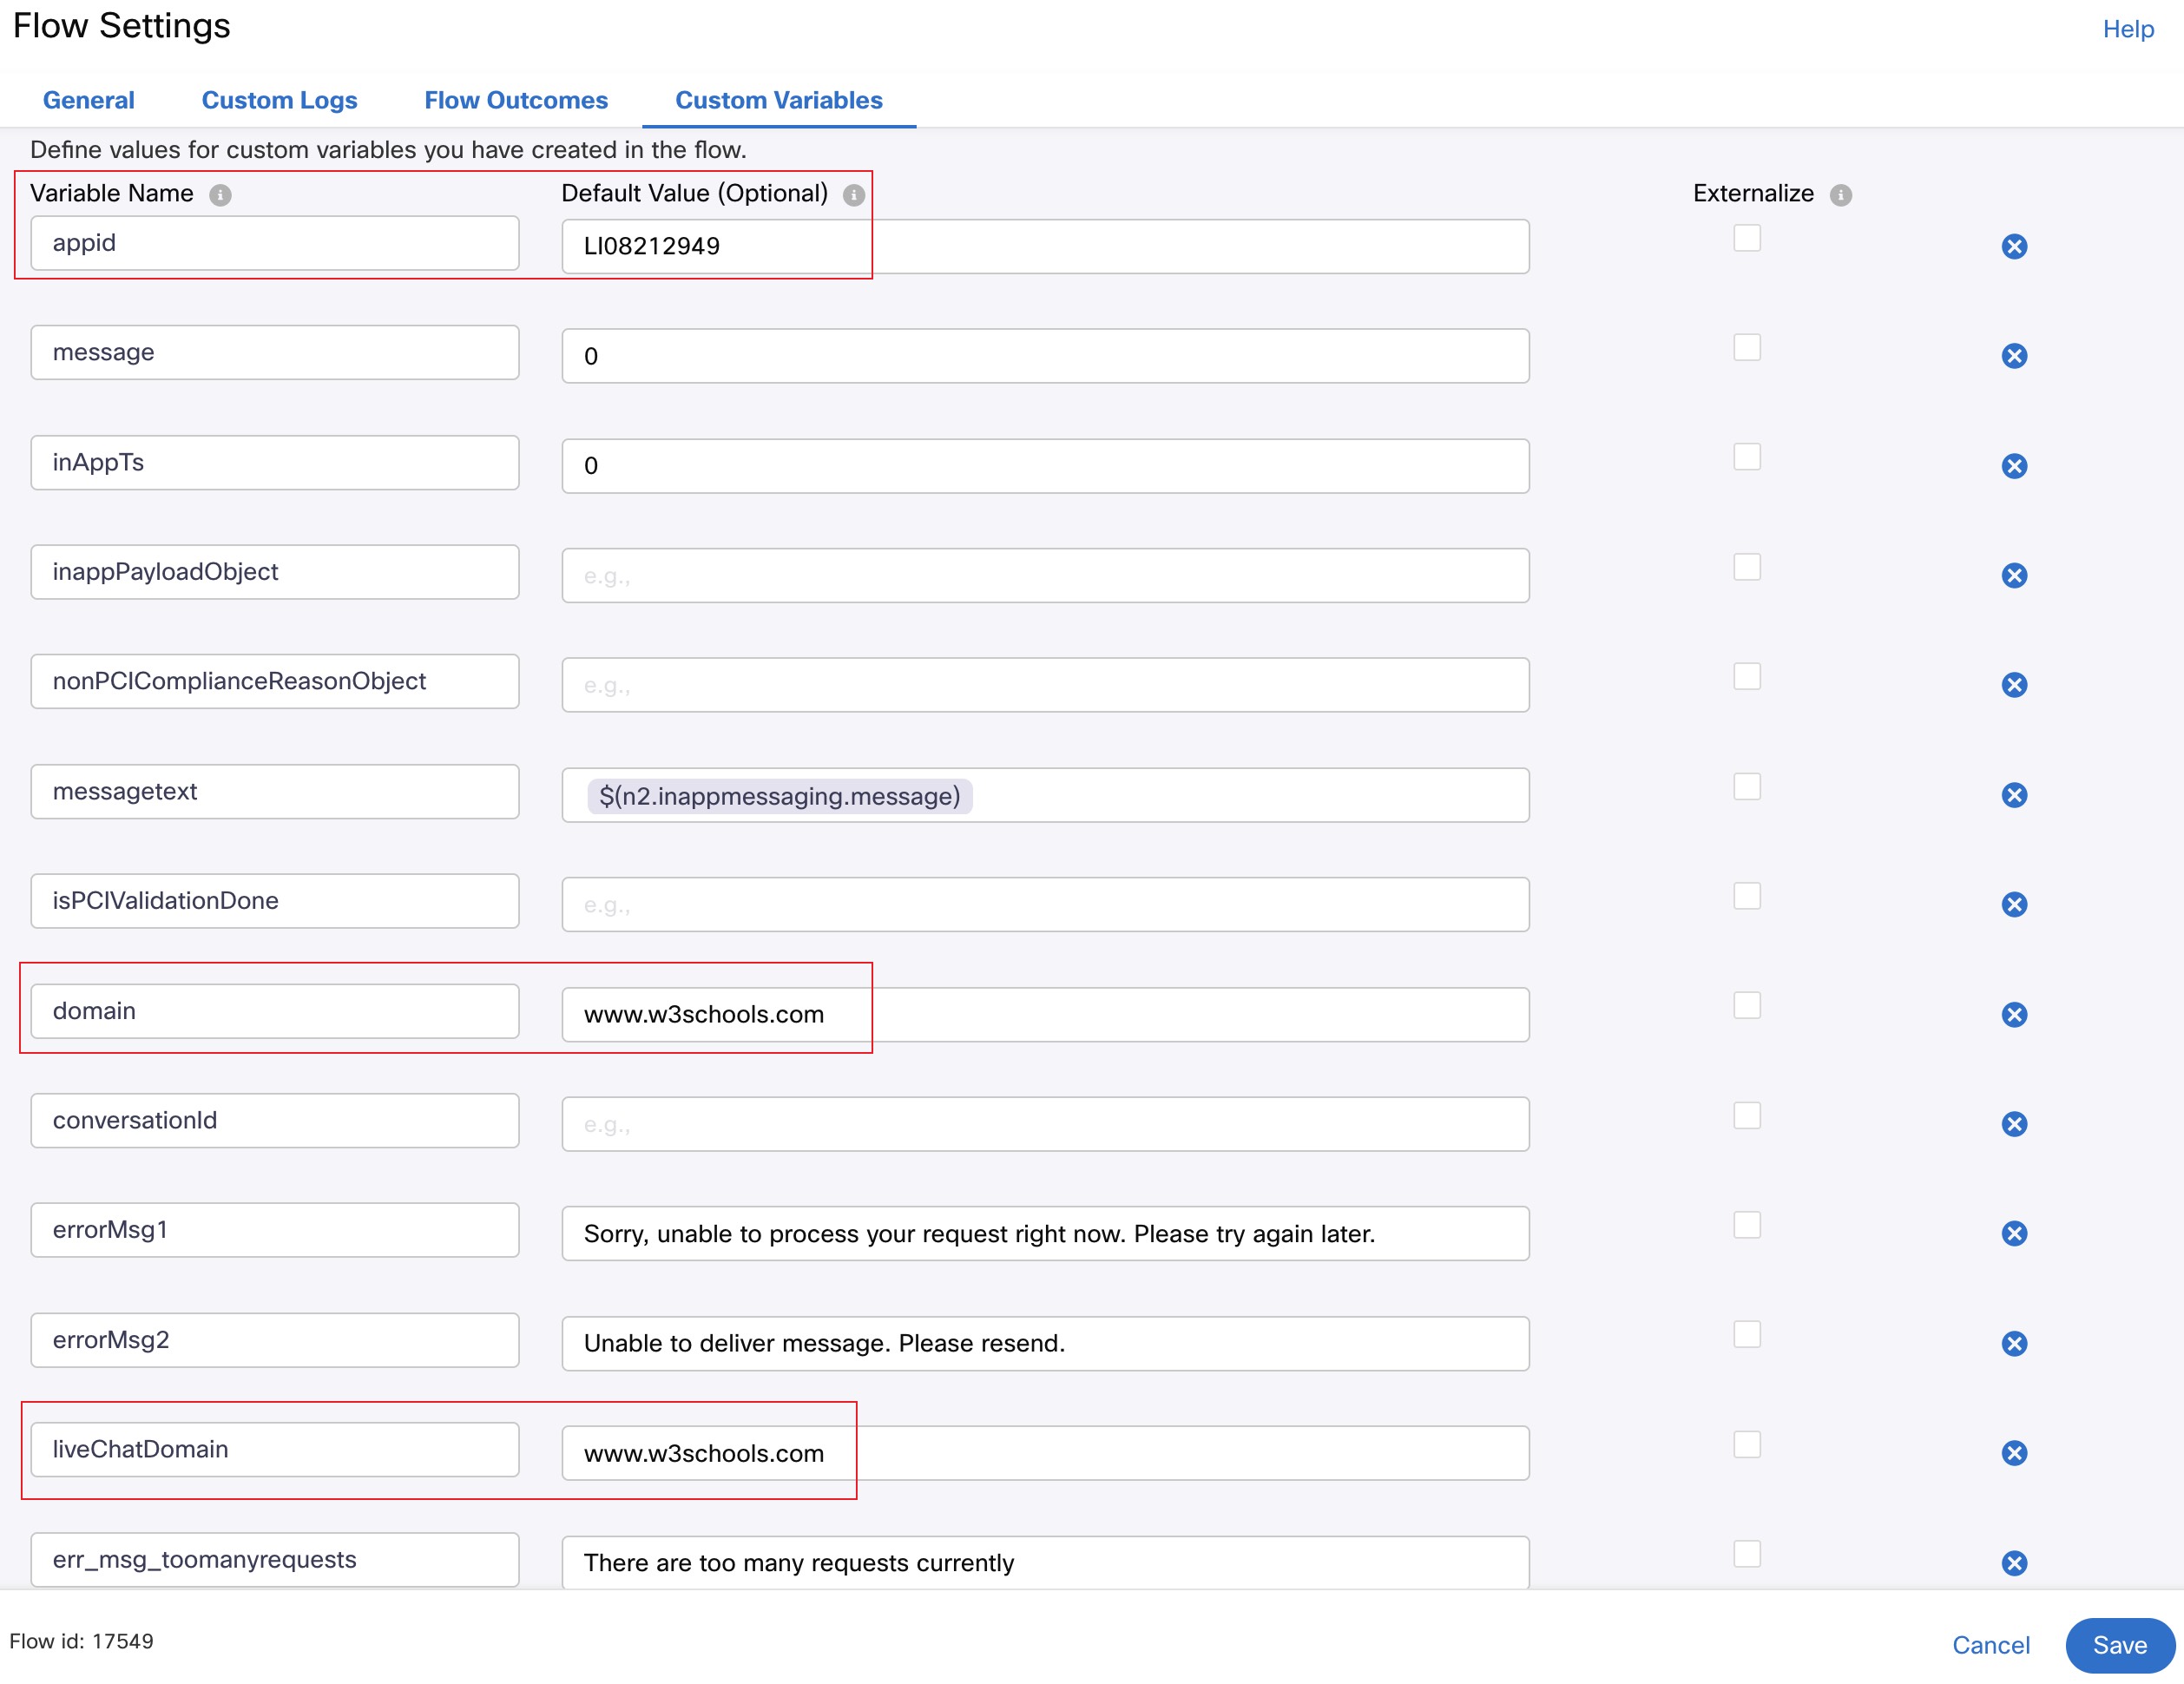
- In your production setup, domain should be set to your website’s domain.
3. Select Live Chat form
- We must select the right Live Chat Template as configured earlier so that the right Form is presented to the customer. Click on the
Pre-chat formnode and selectForm Templateas configured earlier andSave
- The same must be done in the Receive node, double click on it and select the Form from the dropdown menu and
Save
4. Edit Queue Task node
- In the created workflow find the Queue Task, click twice, select the QUEUE NAME as Chat_Queue and click on SAVE.
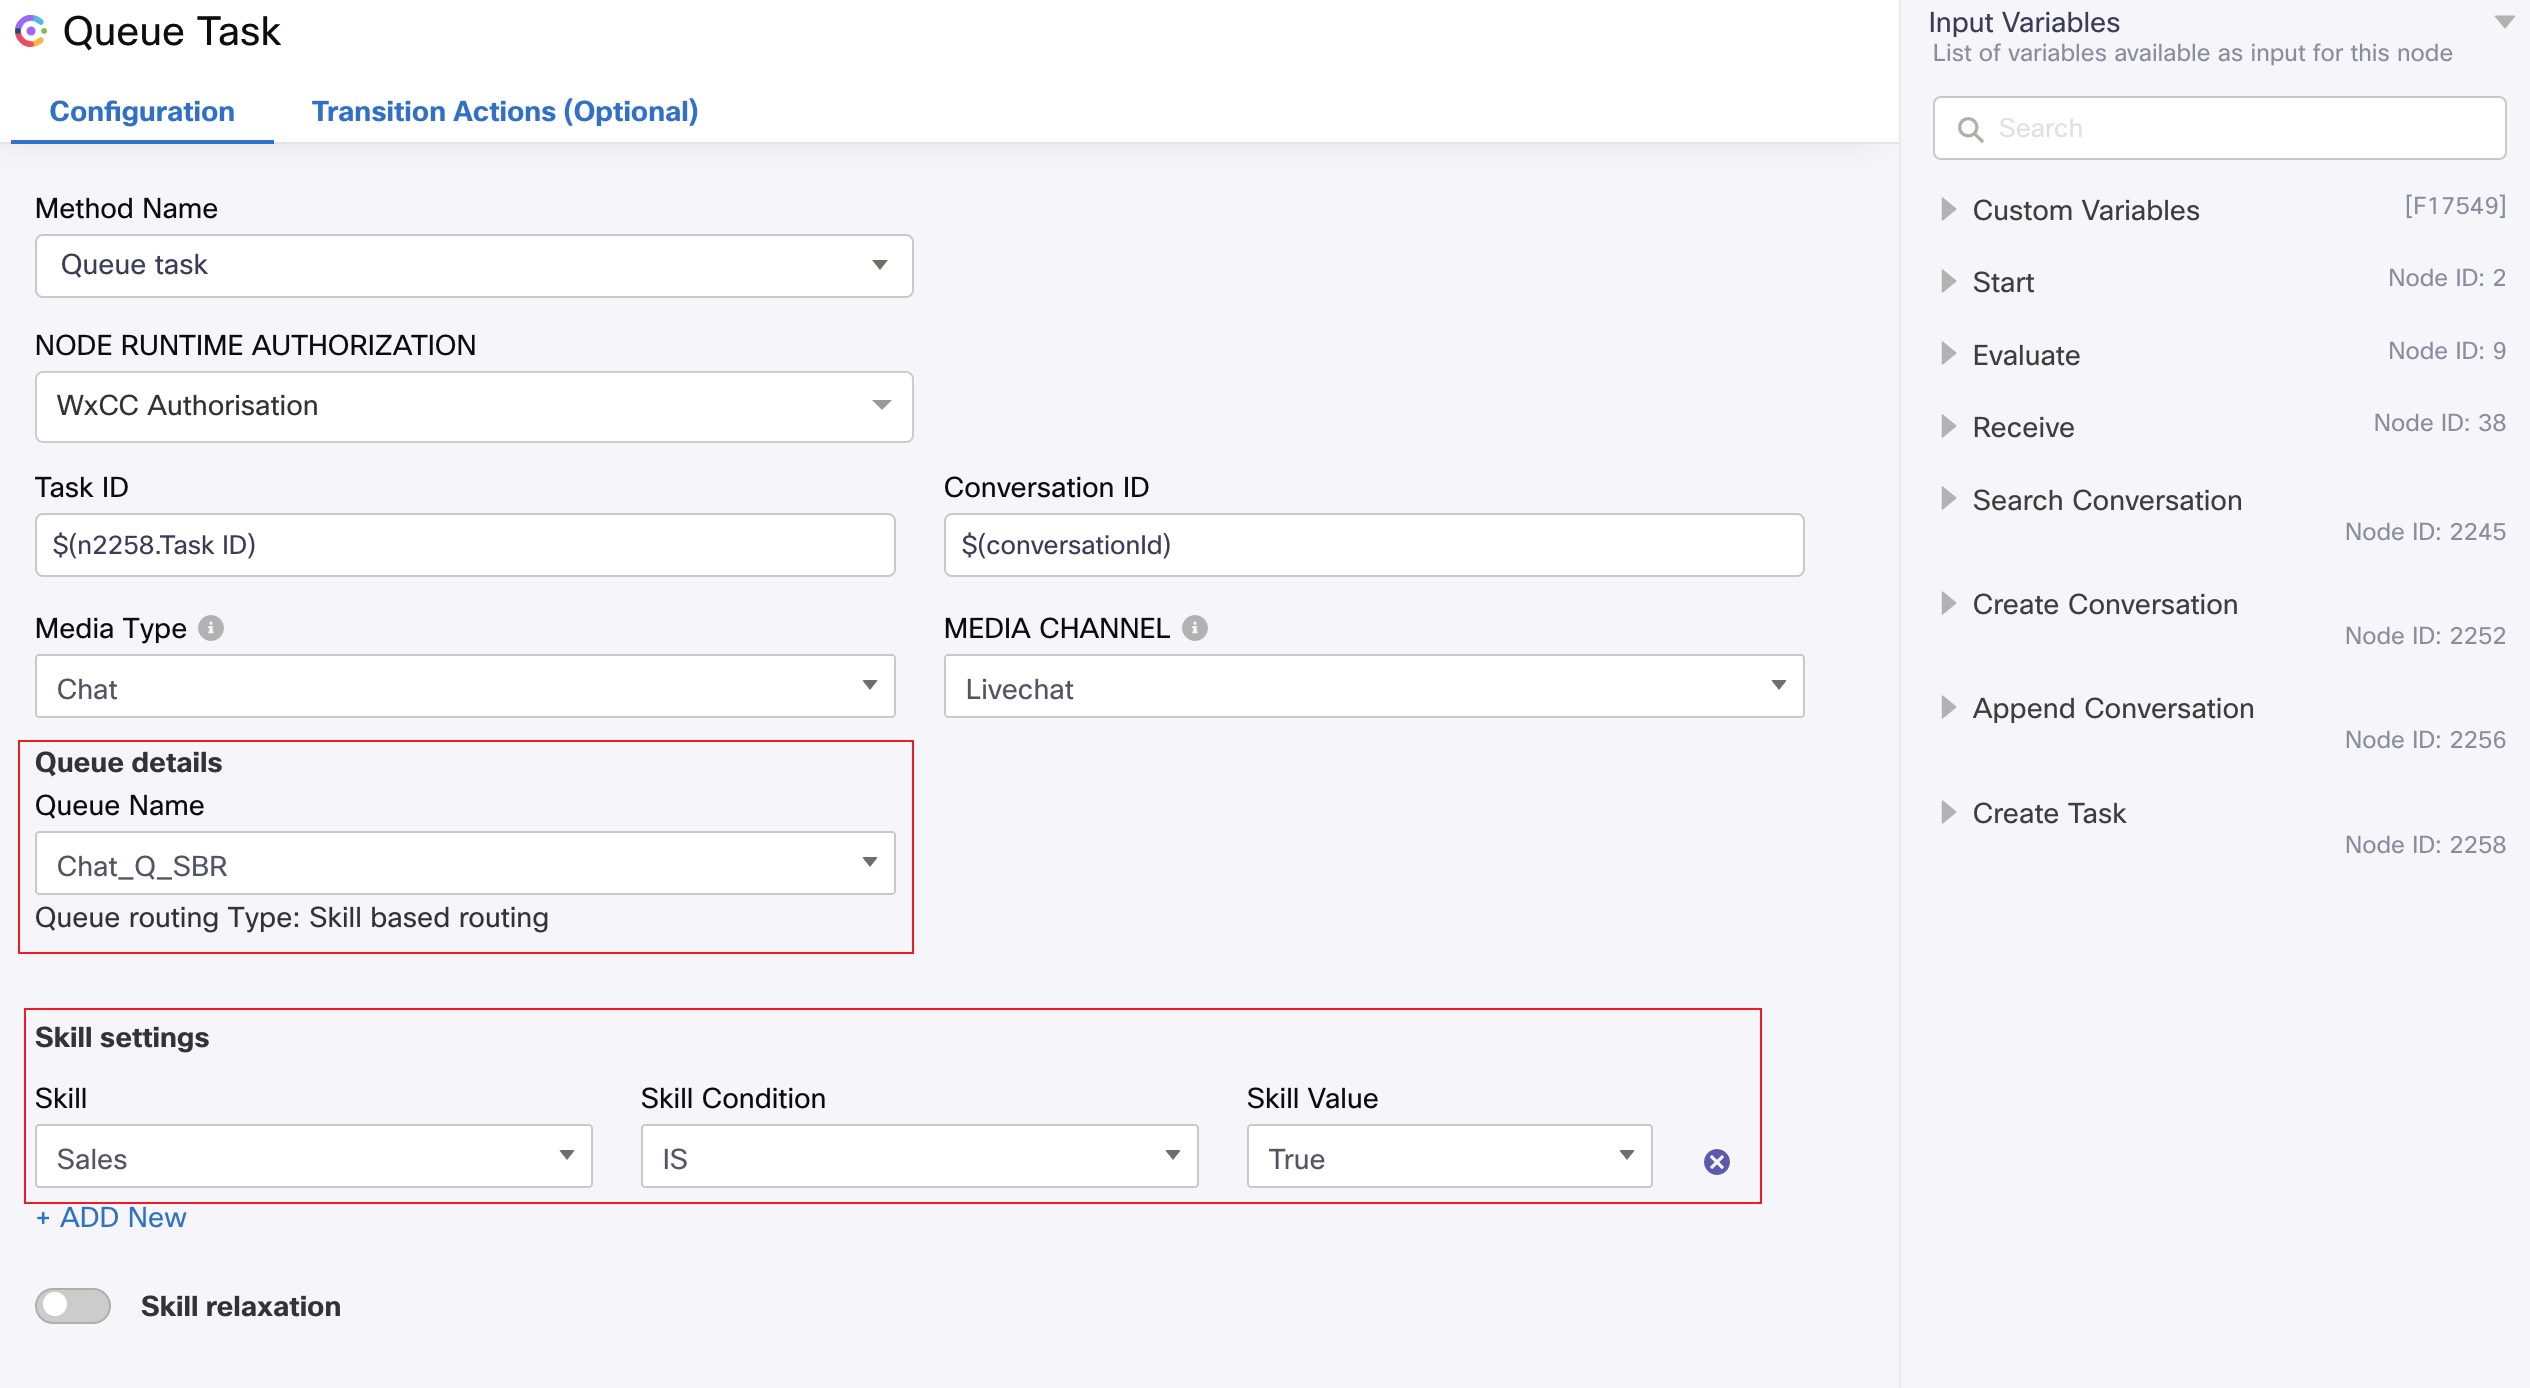
NOTE: Ignore Skill settings in the GIF. In this case we created a
Longest Available Agenttype of Queue.
- Finally click on Make Live on top right corner -> Select the Application/Asset that we have created and click
Make Live.
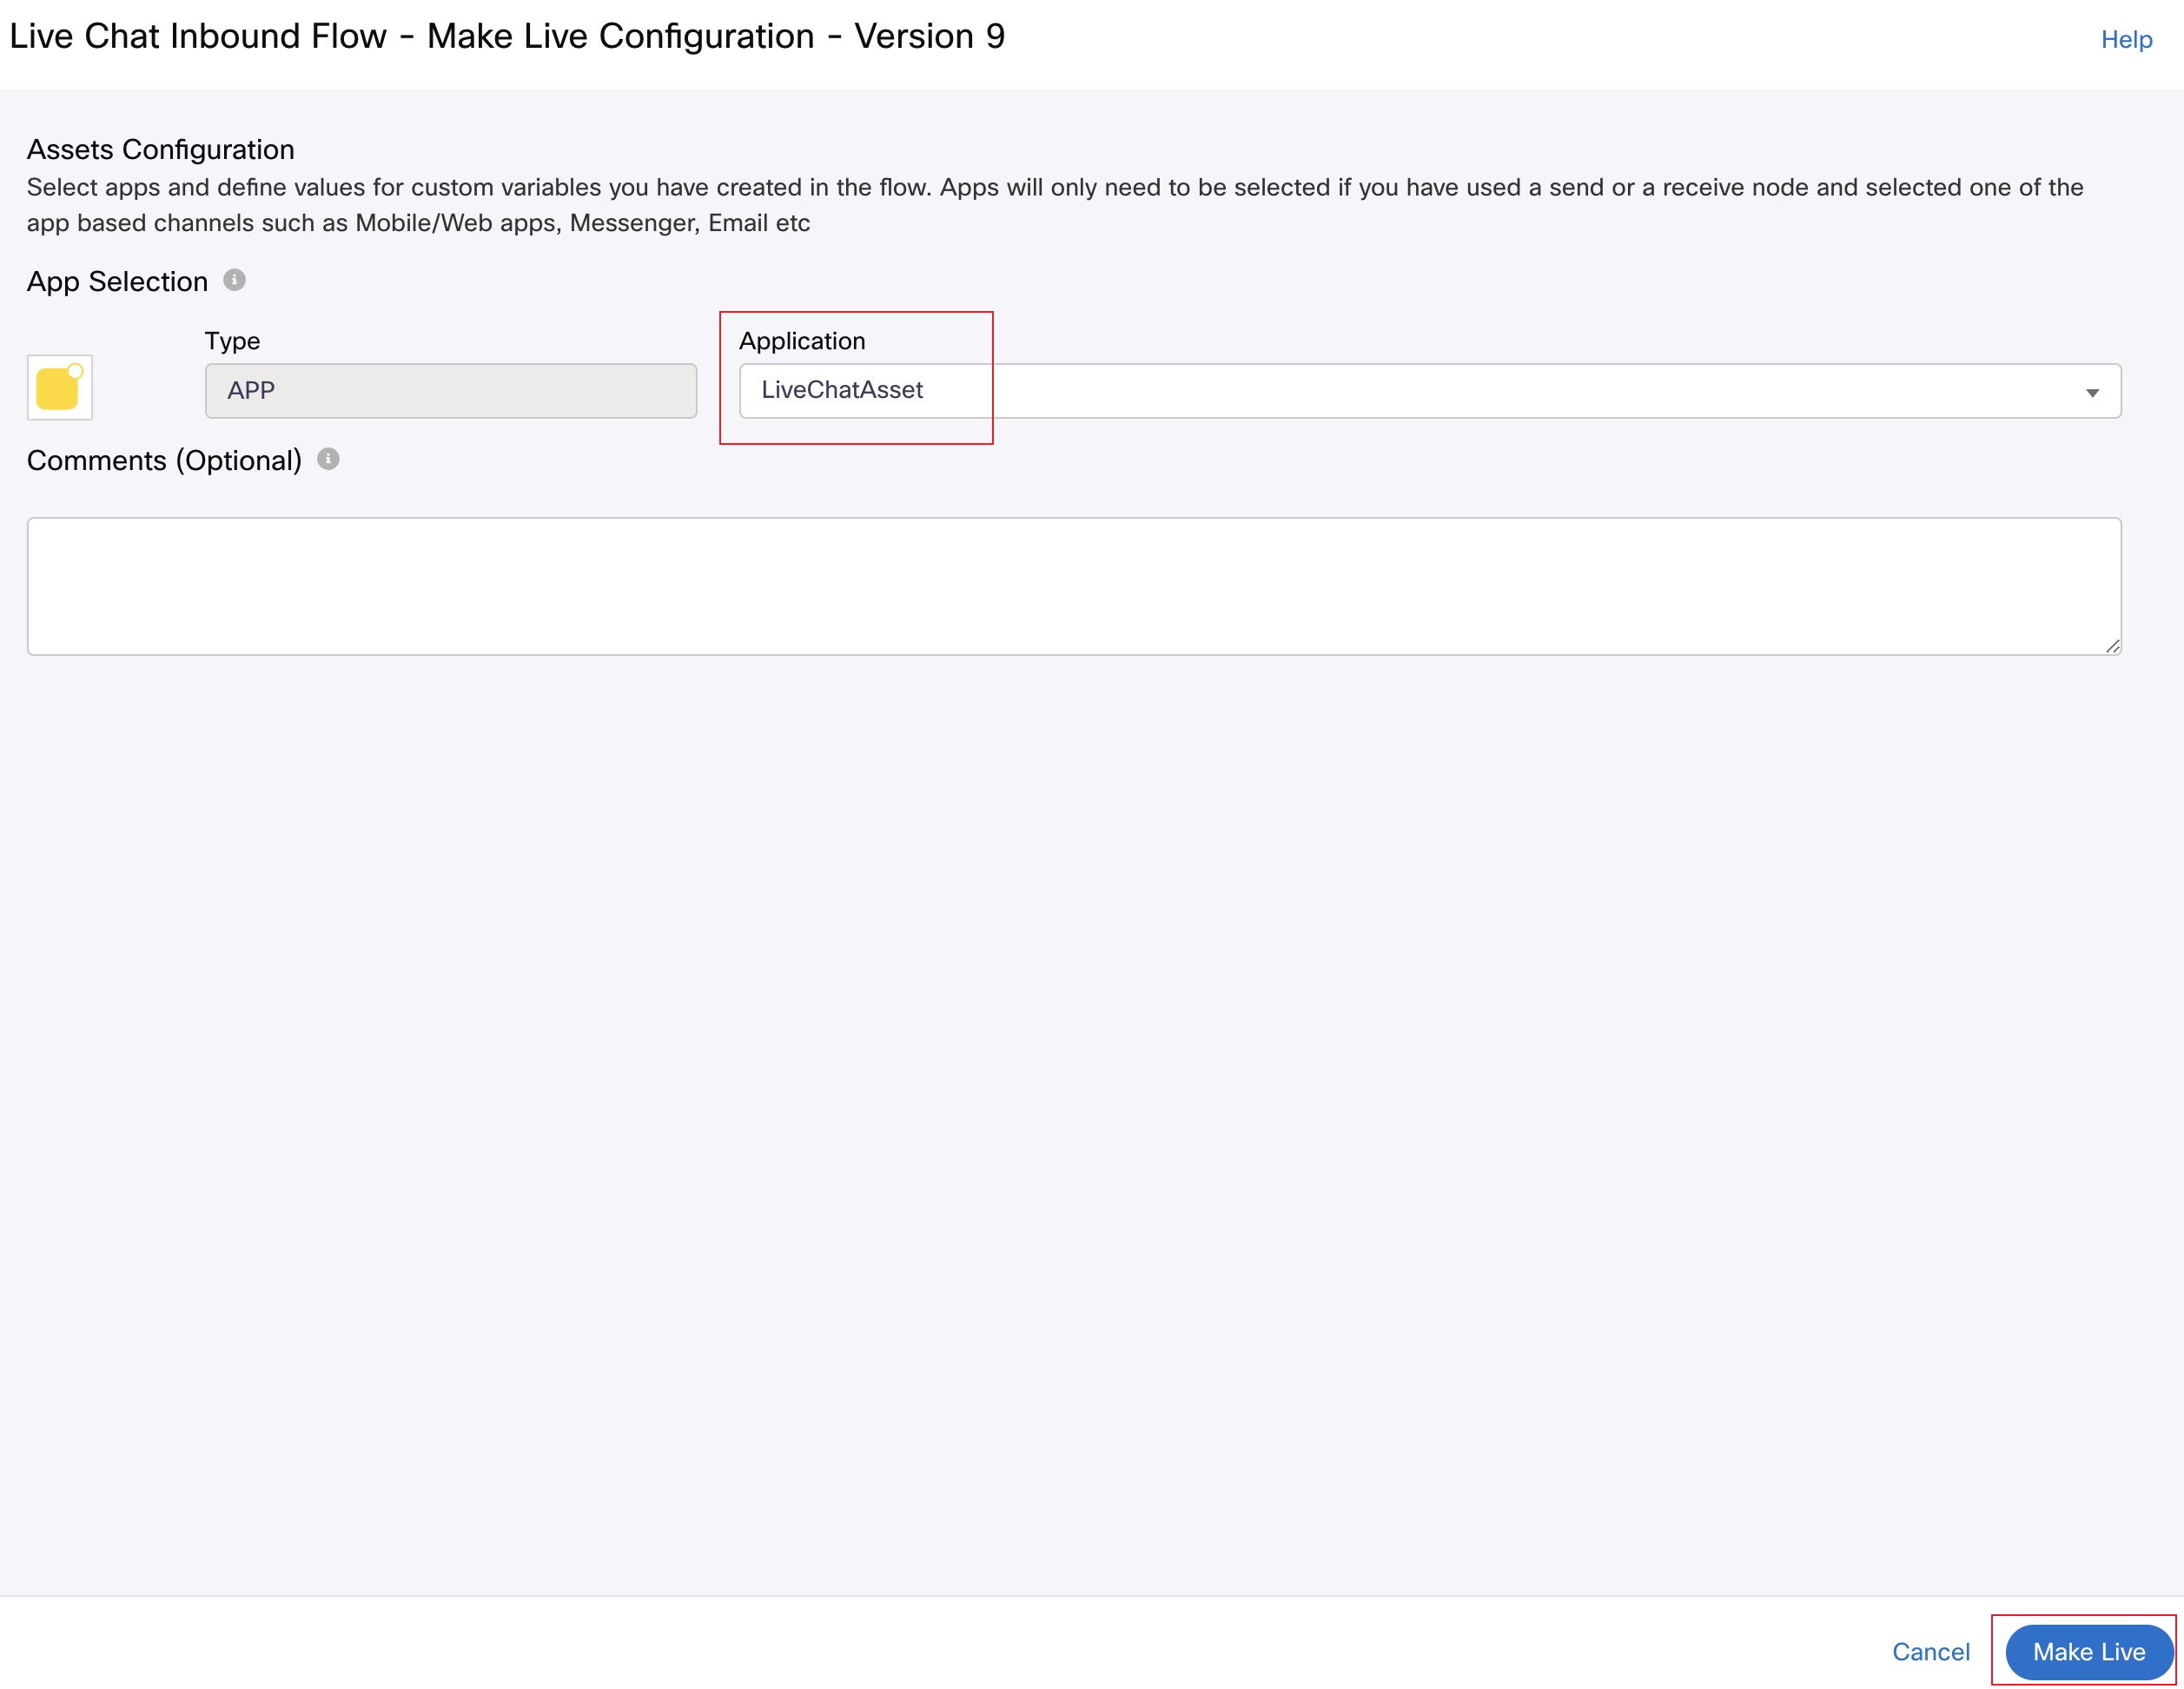
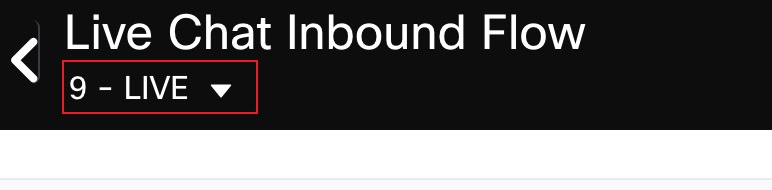
- Wait for 2 minutes and verify that the flow is published successfully.
Step 6. Verification - start live chat and accept the request.
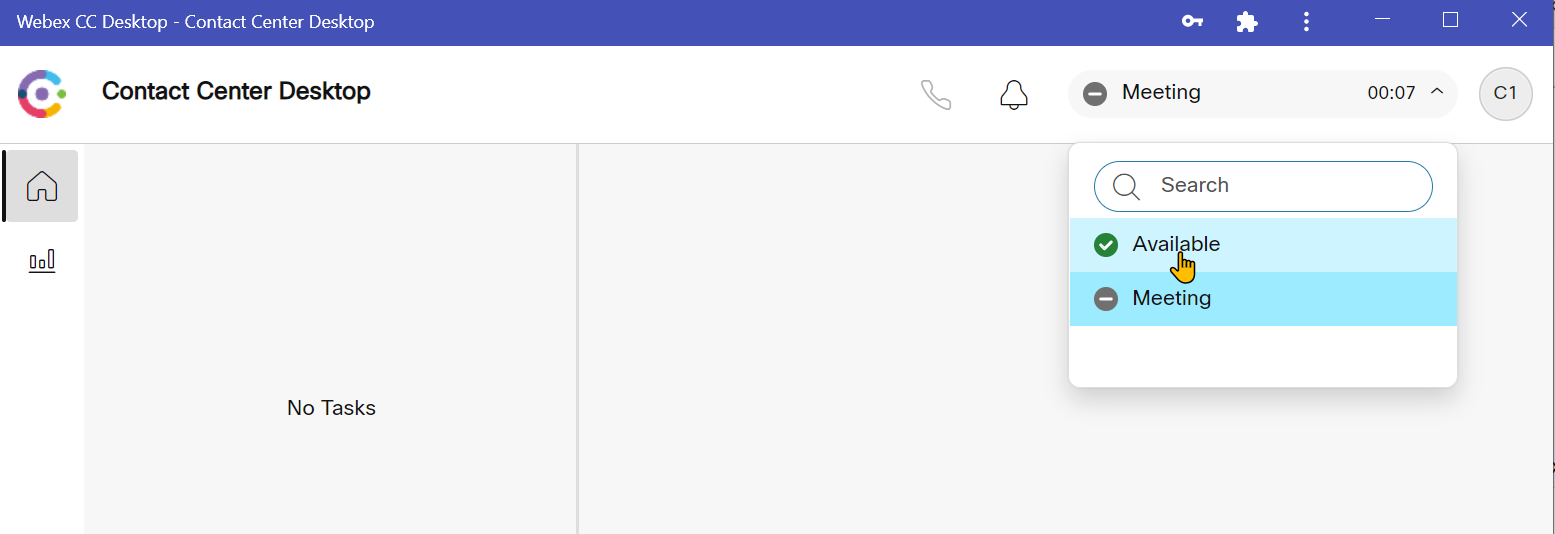
- Open a new incognito tab and login to the Agent Desktop and make the agent Available (if you haven’t done already in Lab1).
Agent Desktop: https://desktop.wxcc-us1.cisco.com\
- Go back to Webex Connect Engage portal, LiveChat > edit the Livechat asset you created, click on installation tab and Copy the chat script code.

-
Open a new tab in your browser and navigate to W3Schools Online HTML Editor.
-
In the HTML example section, click on Try it yourself. (A new tab opens).
-
Paste the chat bubble code just above the
</body>tag and click on Run button

- Click
Start Conversation
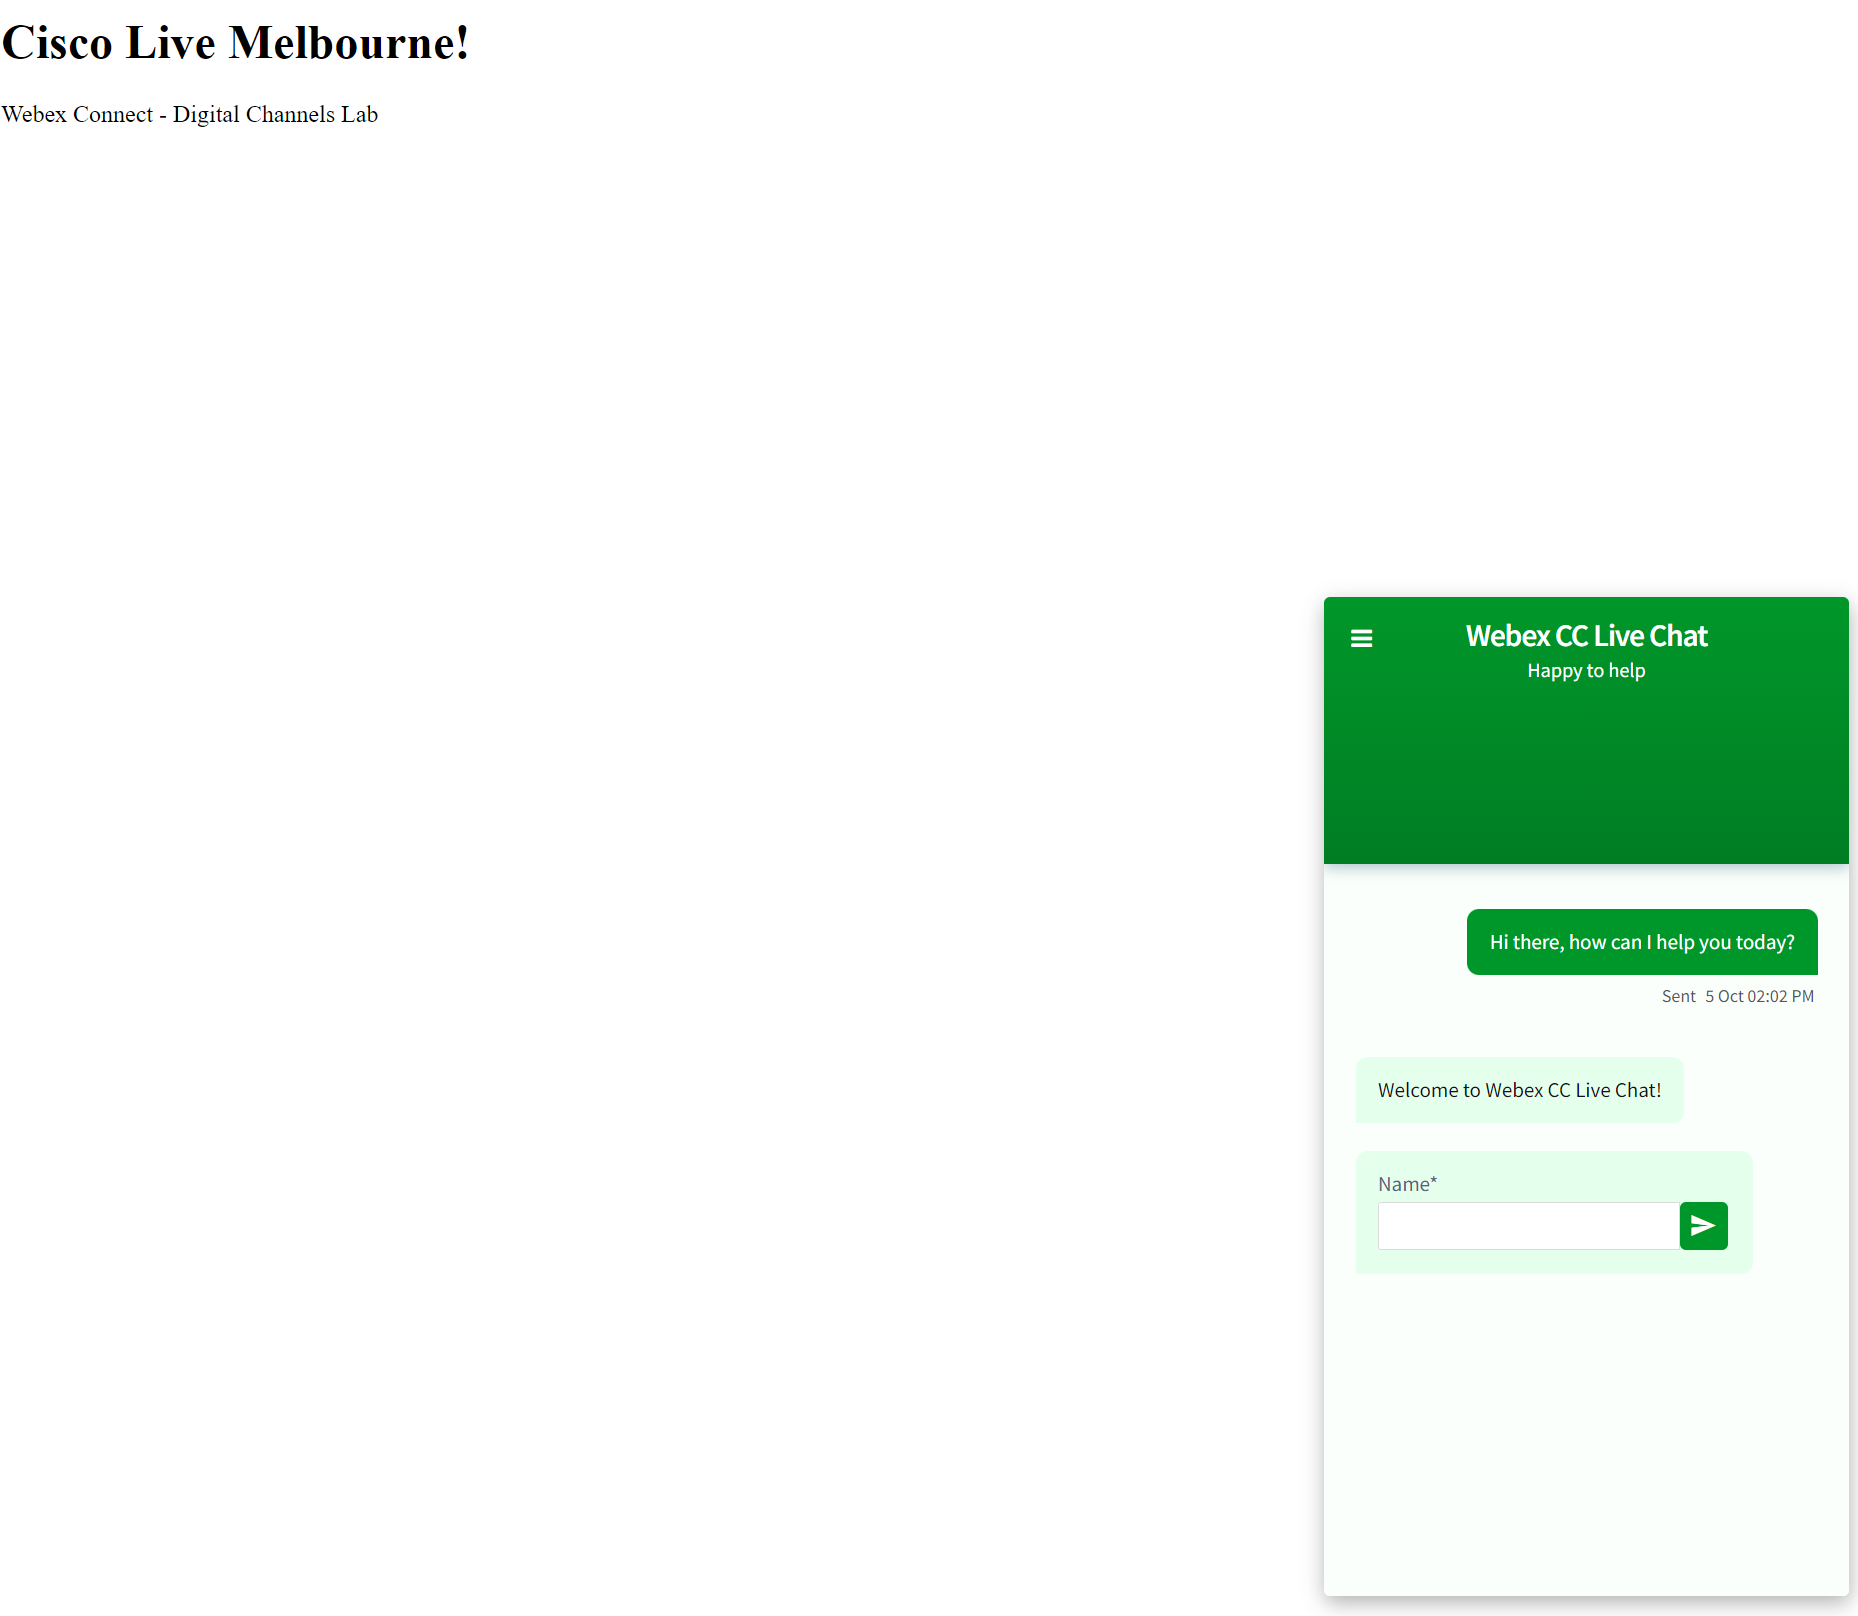
- Fill in the form with customer options
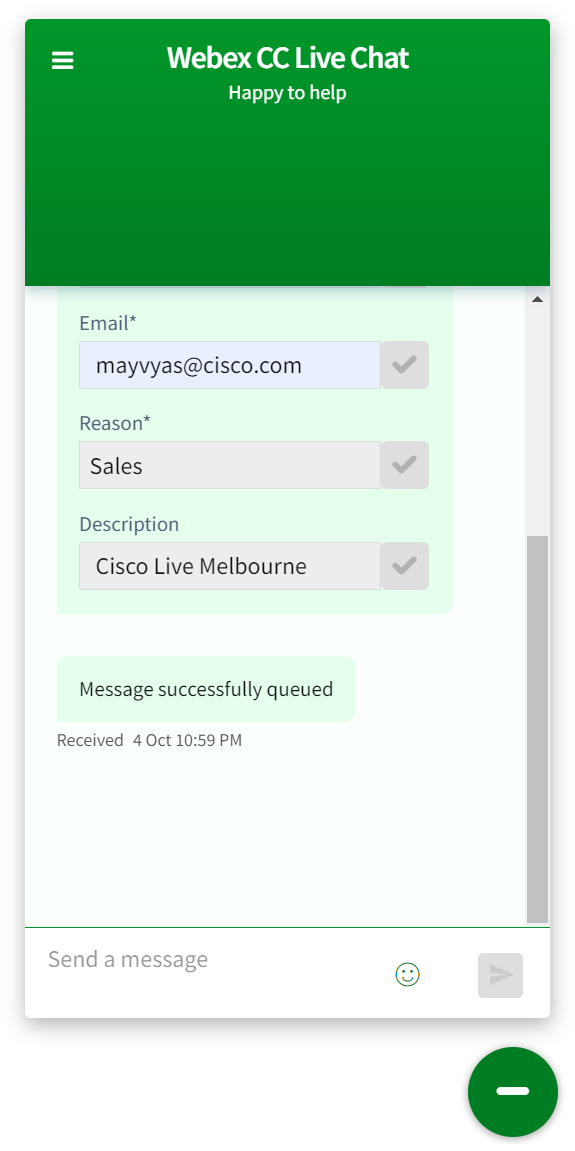
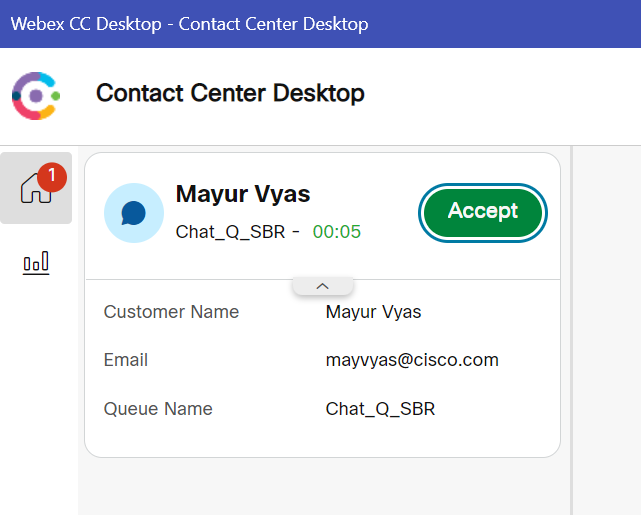
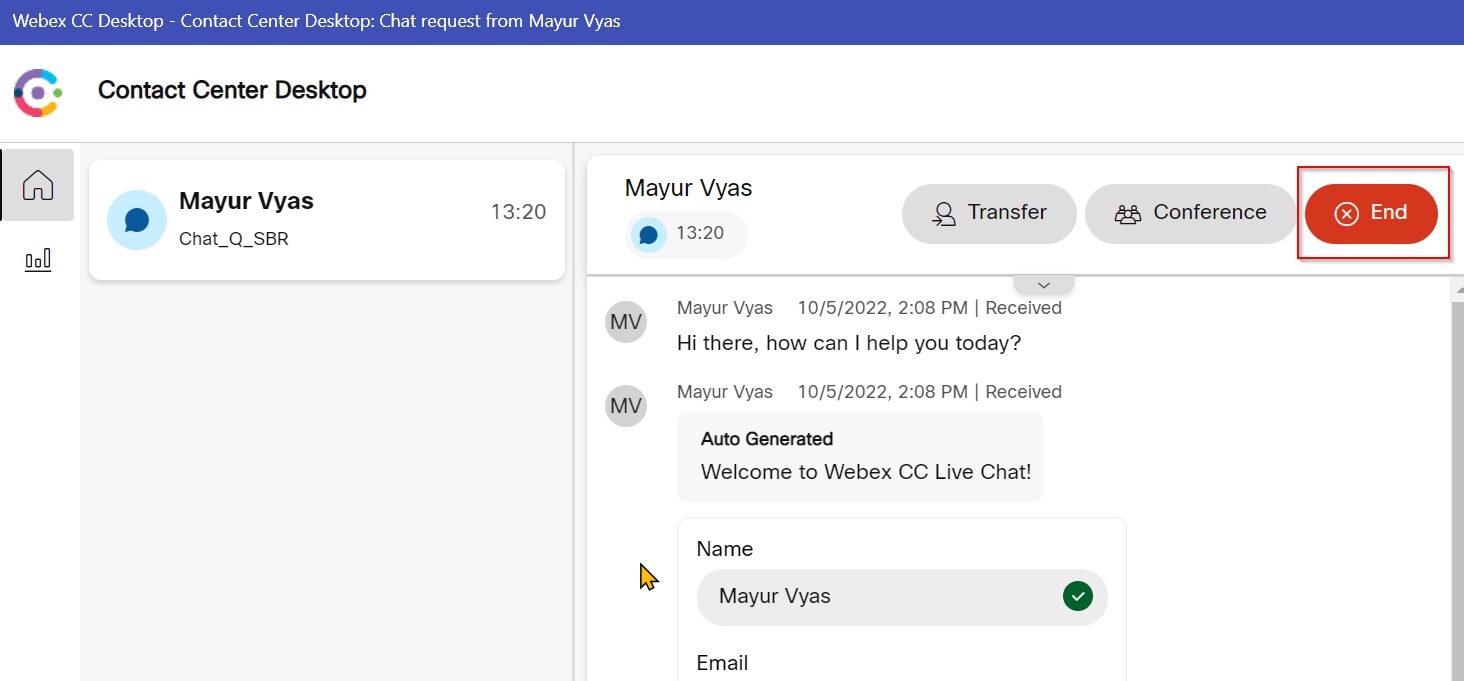
- The Live Chat will be offered to the agent. Click Accept to handle the Chat.
- The form submission will be presented to the Agent
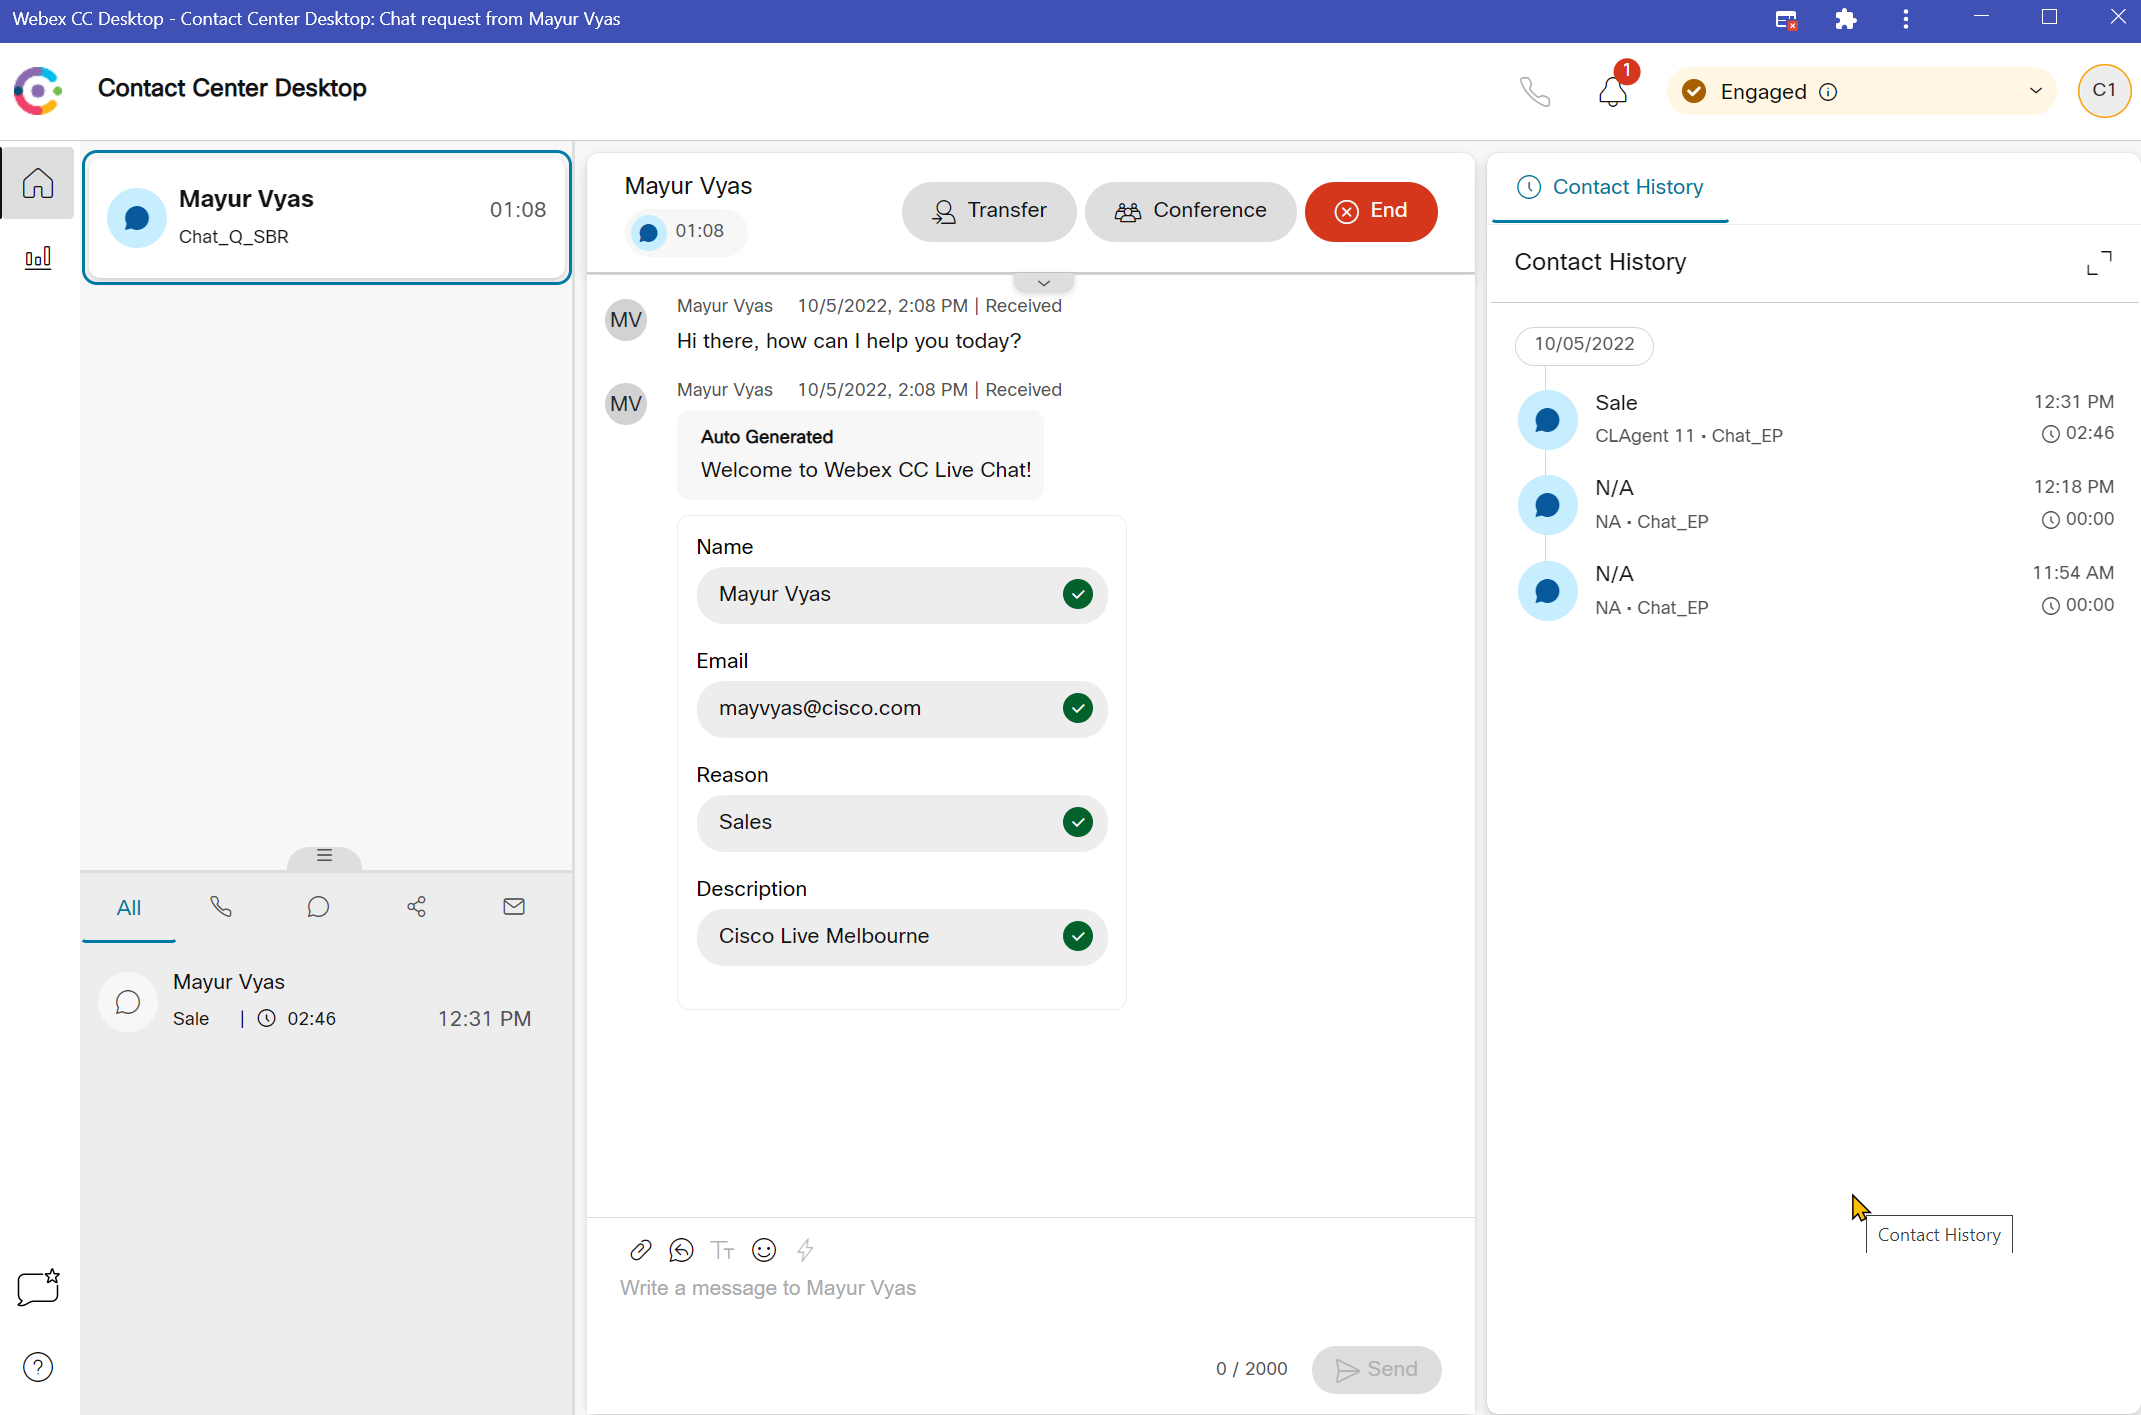
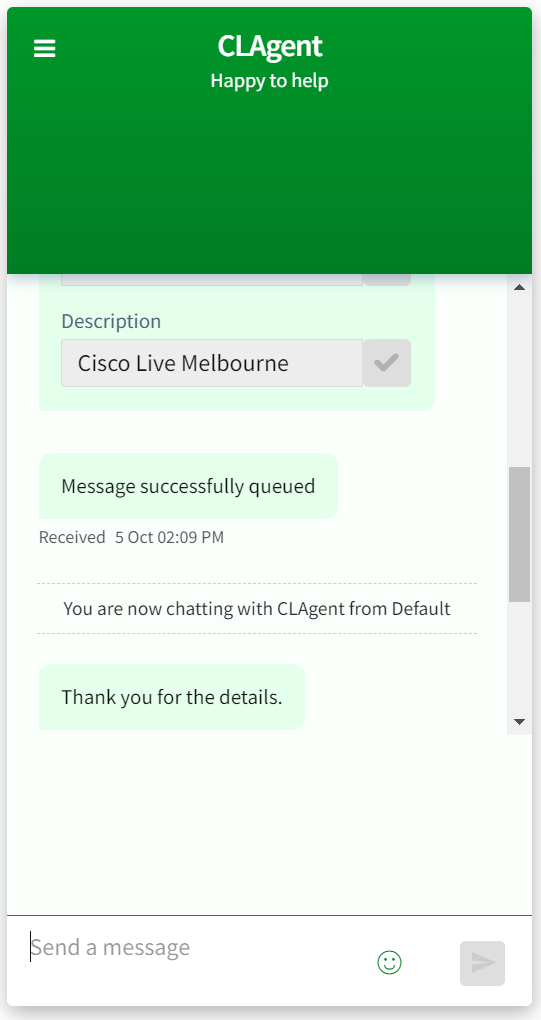
- Type a response and hit send button.
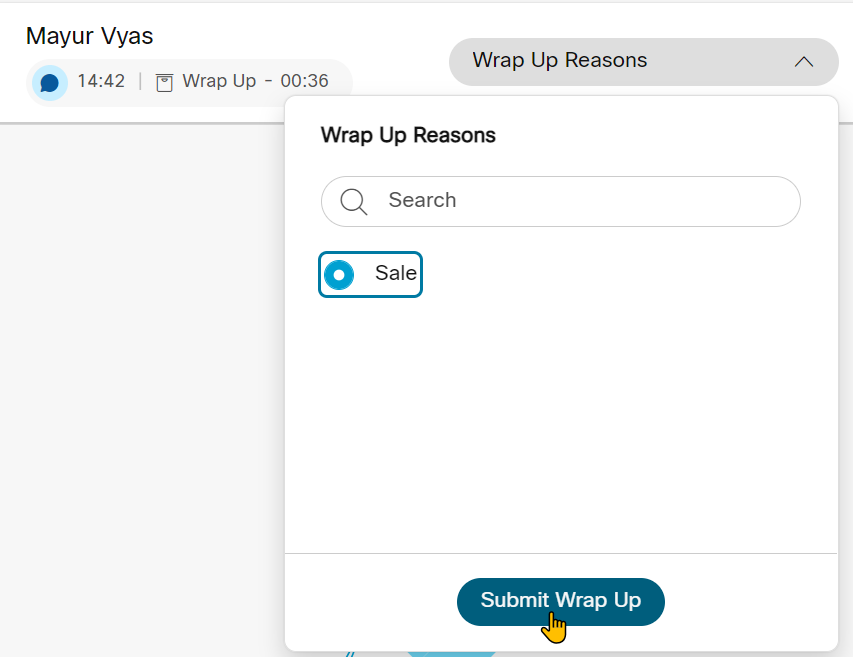
- End the contact
- Add wrap up and close the task.