Lab 4.2: Webex Connect Task Bot Integration within Flow
Table of Contents
Introduction
Lab Objective
In this lab we will modify the default Chat Flow to integrate our task bot. We will collect the intents from the end-customer and get the value of the requested information using HTTP Requests.
Pre-requisites
- You have received the access credentials with a full admin access
- Lab 2 should be completed successfully and chat routing to agent is working
- The previous sections in Lab 4 should be completed successfully
Quick Links
Control Hub: https://admin.webex.com
Portal: https://portal.wxcc-us1.cisco.com/portal
Agent Desktop: https://desktop.wxcc-us1.cisco.com
Connect: https://cl2podX.imiconnect.io/ (where X is your POD number)
Lab Section
NOTE: Please read carefully the lab guide and follow the instructions. It might be possible that some GIFs are not accurate.
Step 1. Integrate Task bot into the flow
-
Retun to Services
-
Click on the service that you created and Copy from existing flow > View My Flows > Create Flow
-
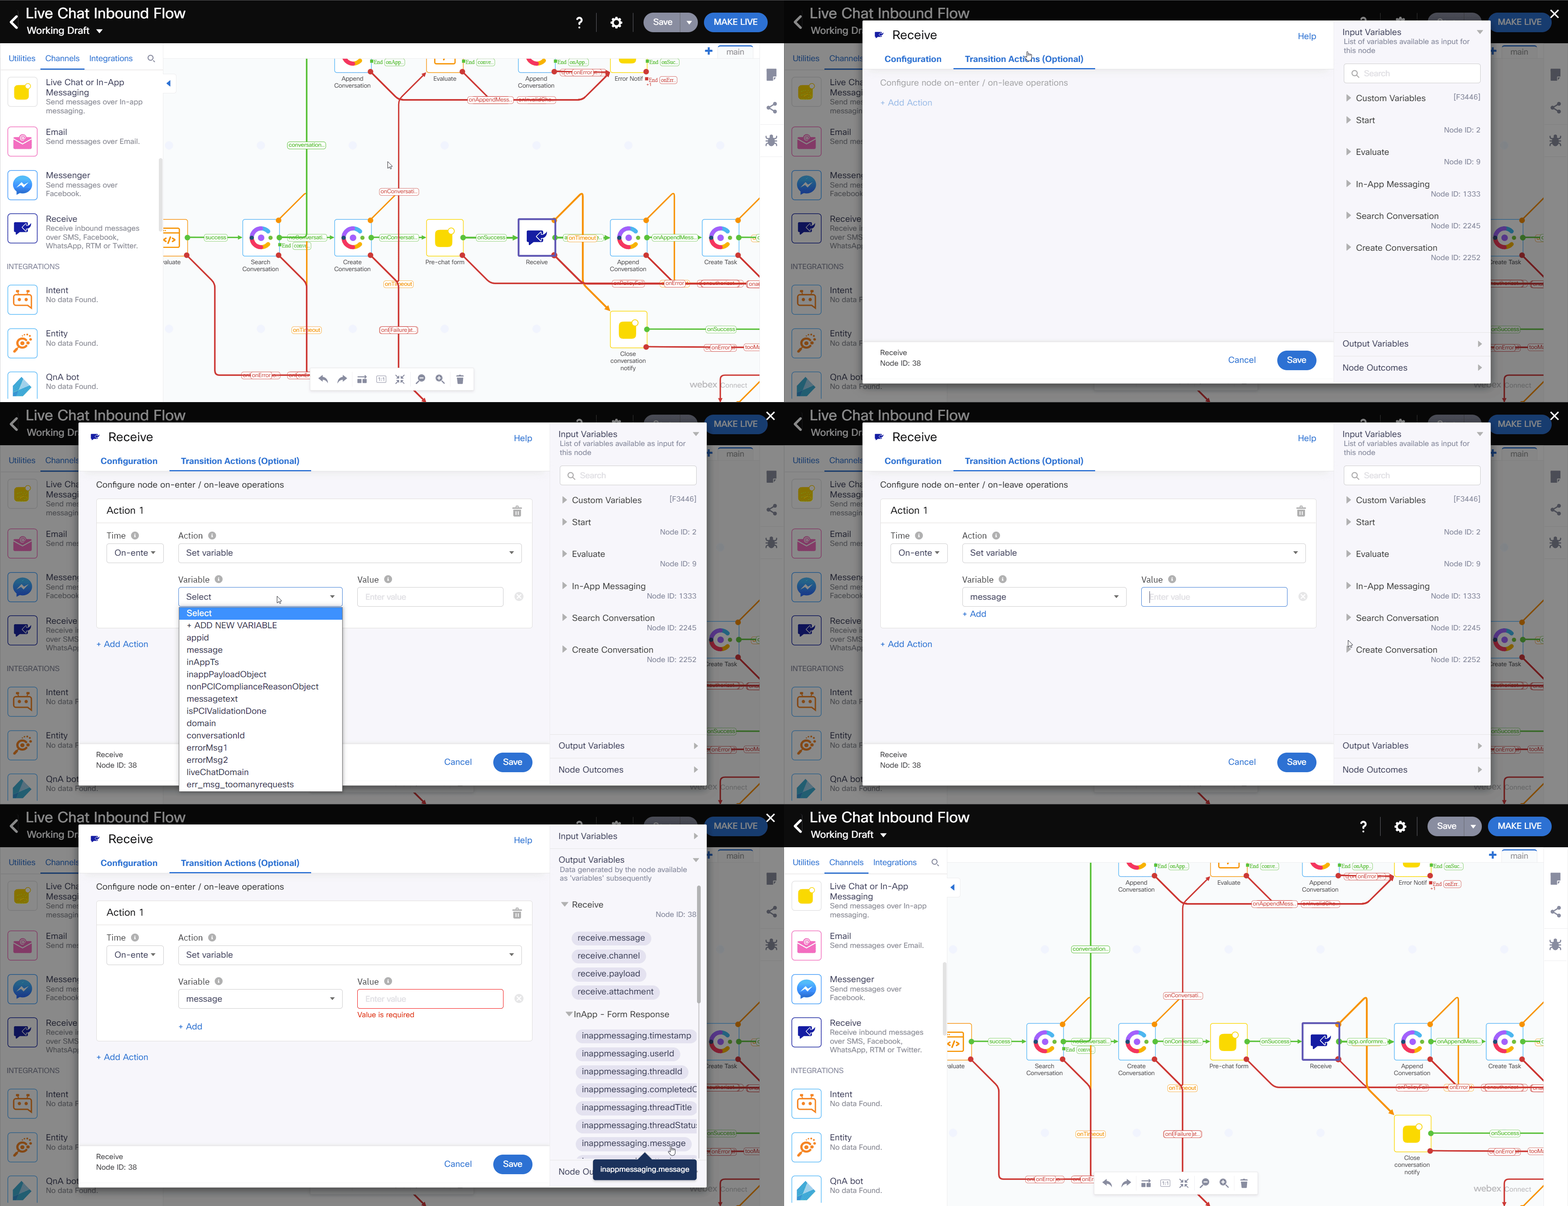
Open the Receive Node and update the Transition Actions:
Add Action
Time: On-Leave
Action: Set Variable
Variable: message
Value: Output Varriables > InApp - Form Response > inappmessaging.message $(n38.inappmessaging.message)
-
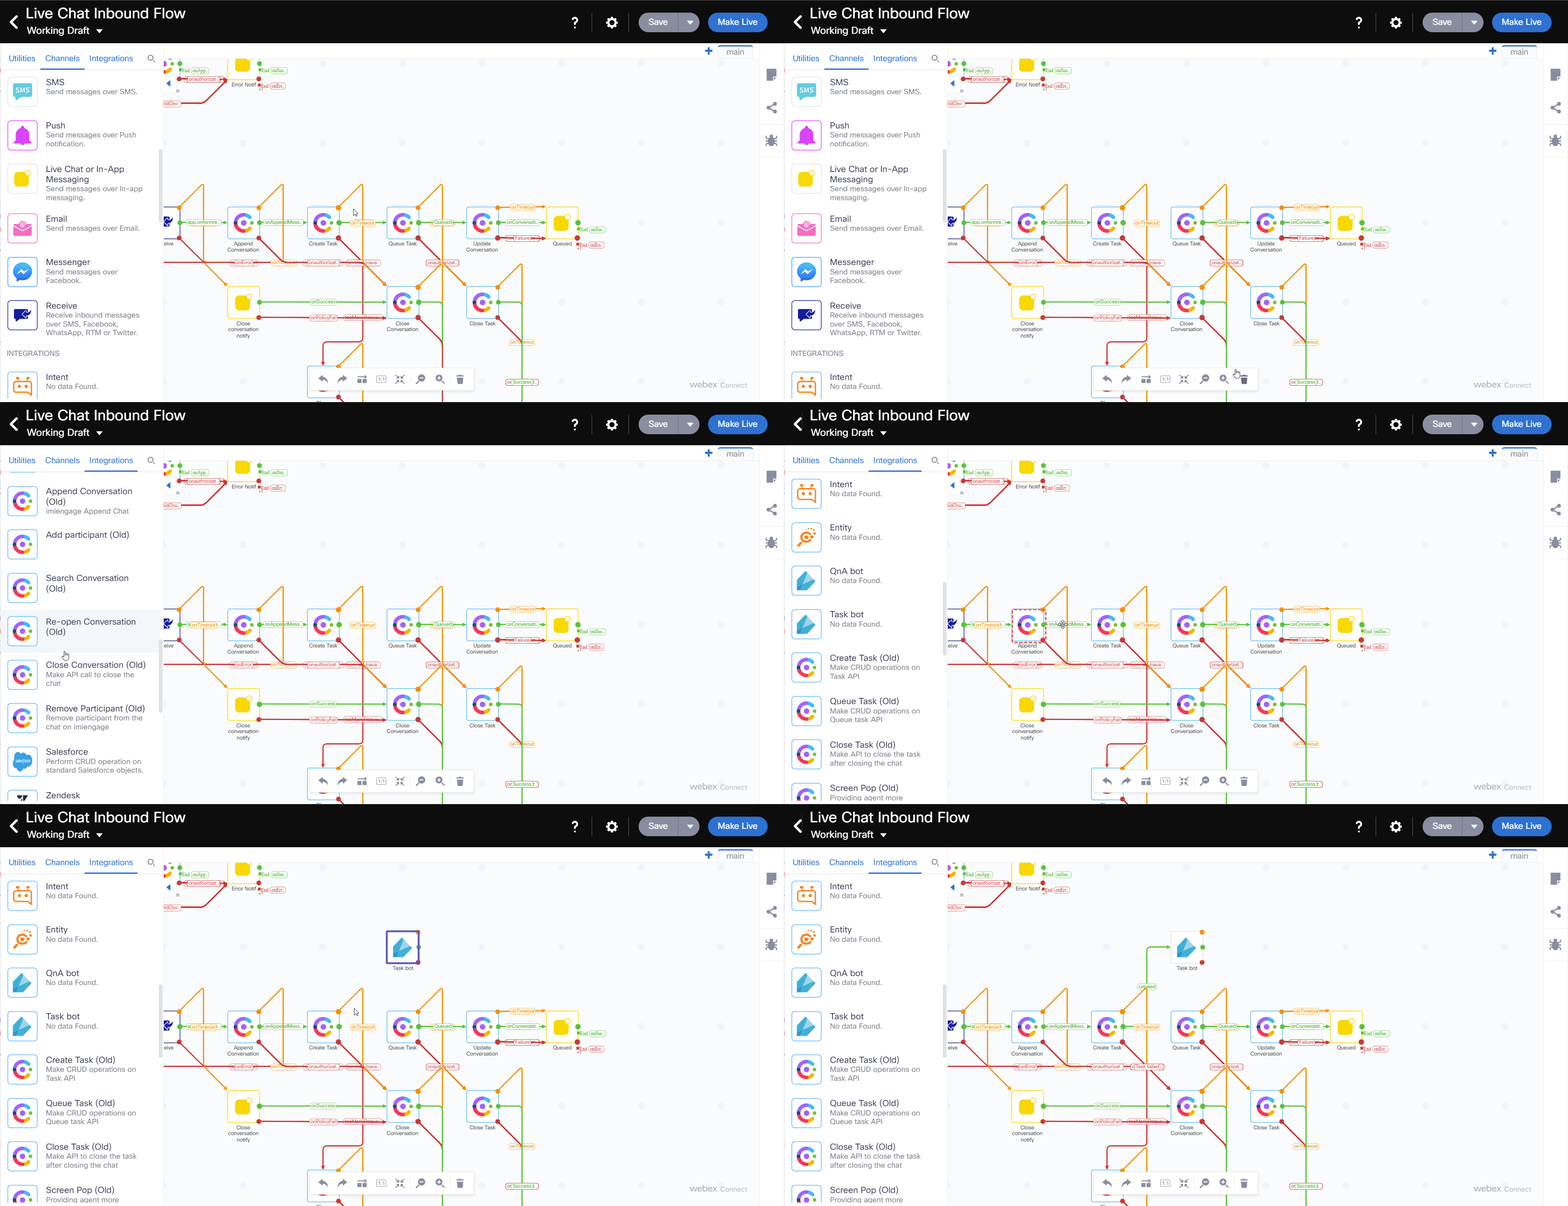
Find the Create Task node and delete the green line that says created, which connects to the queue Task node.
-
Add Task Bot node and link it with the Create Task node
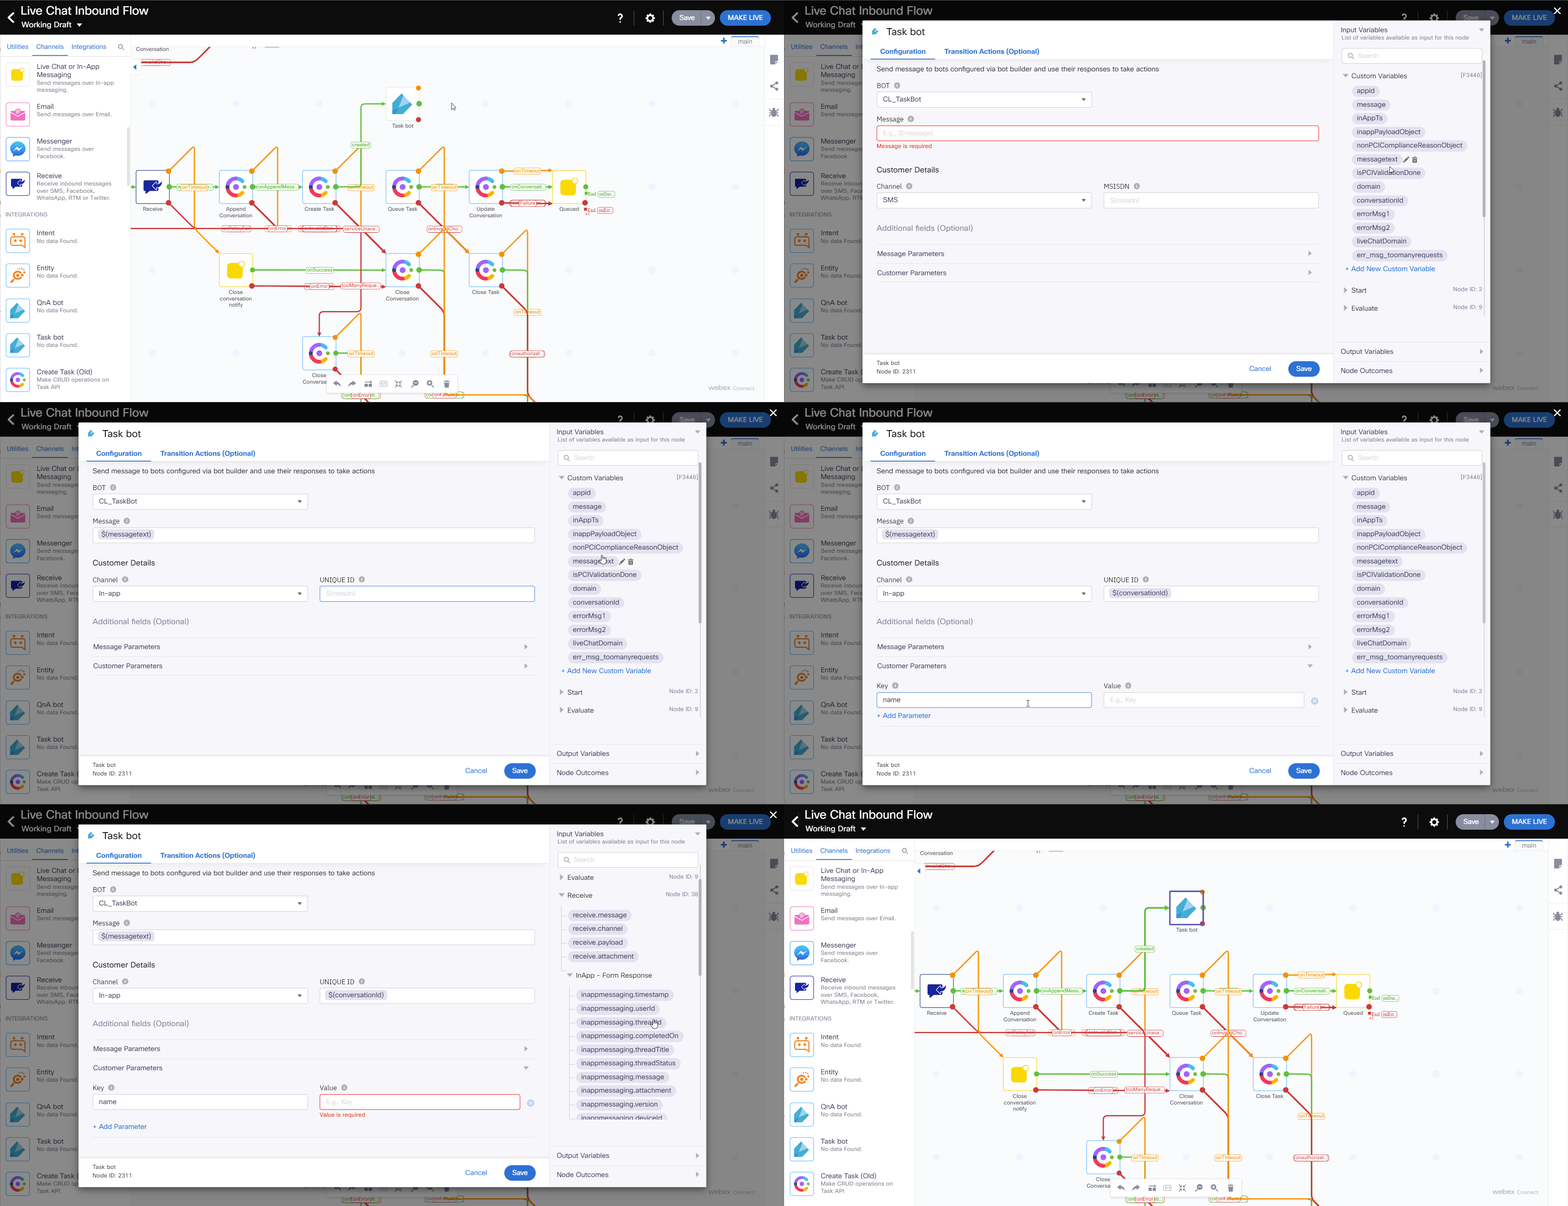
- Open the Task Bot node and update the following parameters
Message: Custom Variables > messageForBot $(messagetext)
Channel: In-App
Unique ID: Custom Variables > conversationId $(conversationId)
Customer Parameters
Key: name Value: Receive > inappmessaging.formFields.Name
Step 2. Add Live Chat and Append Conversation nodes
-
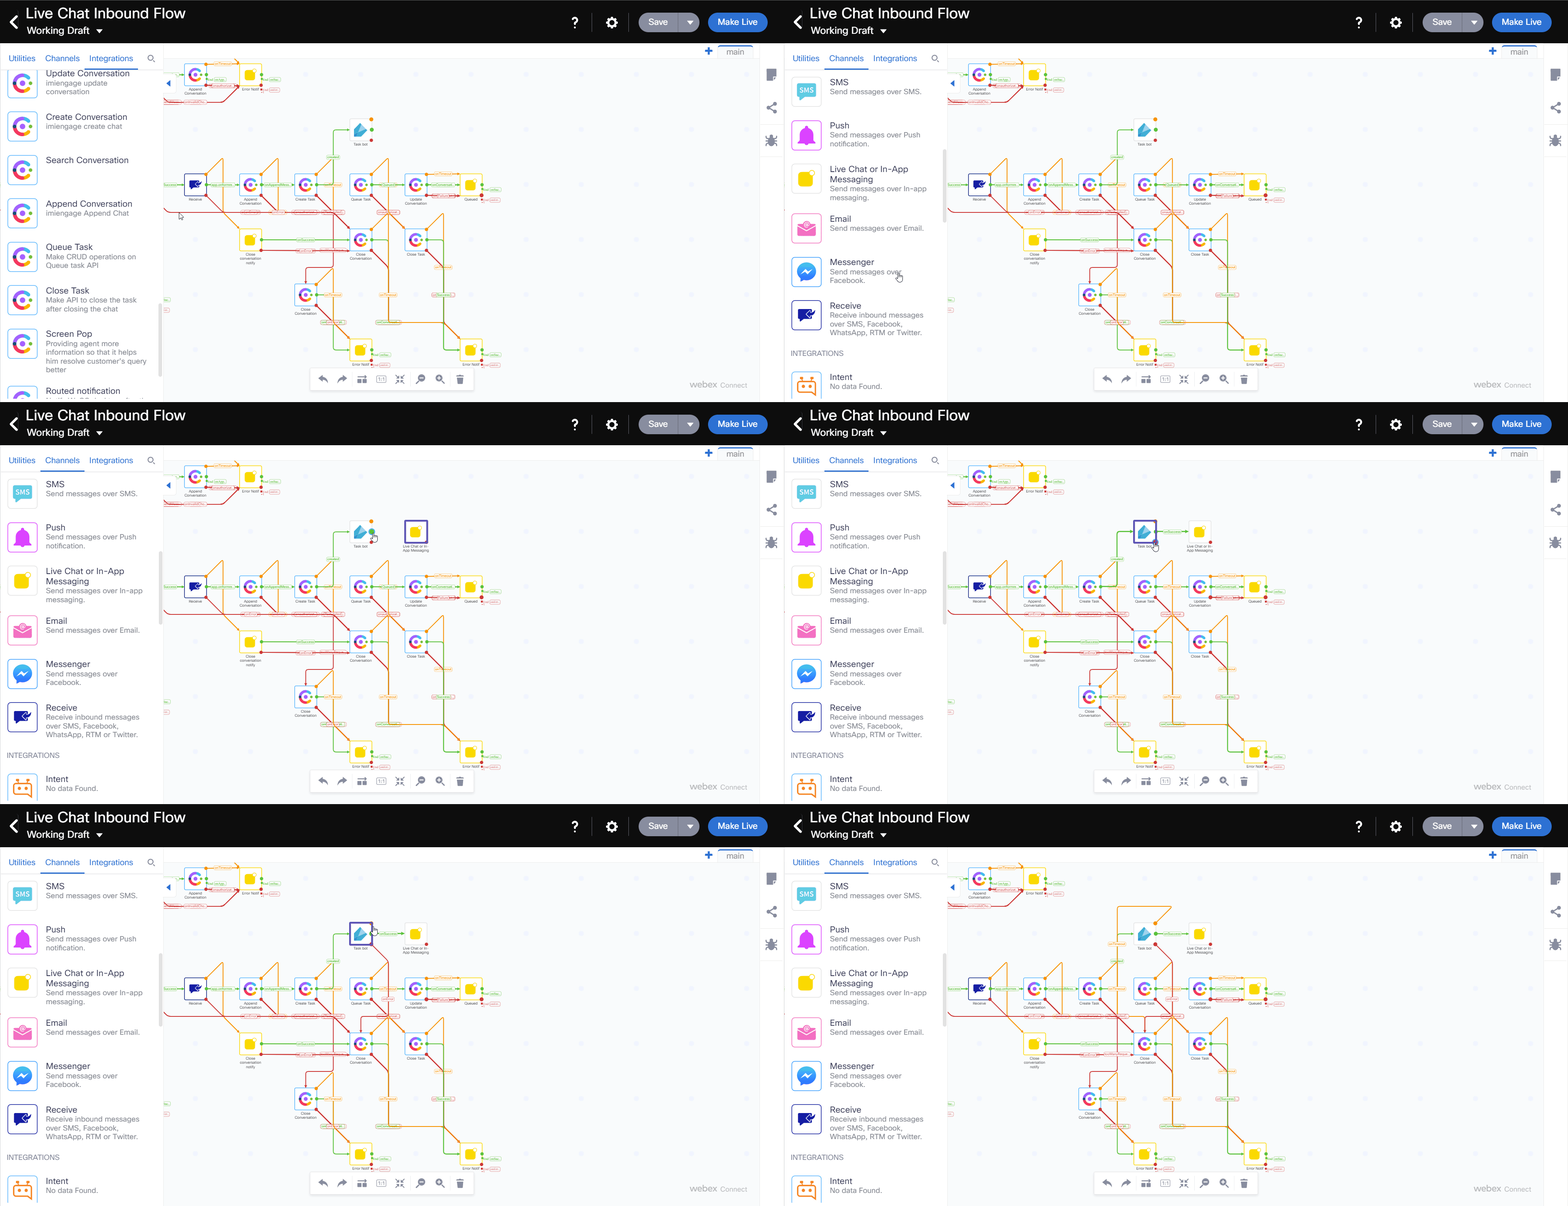
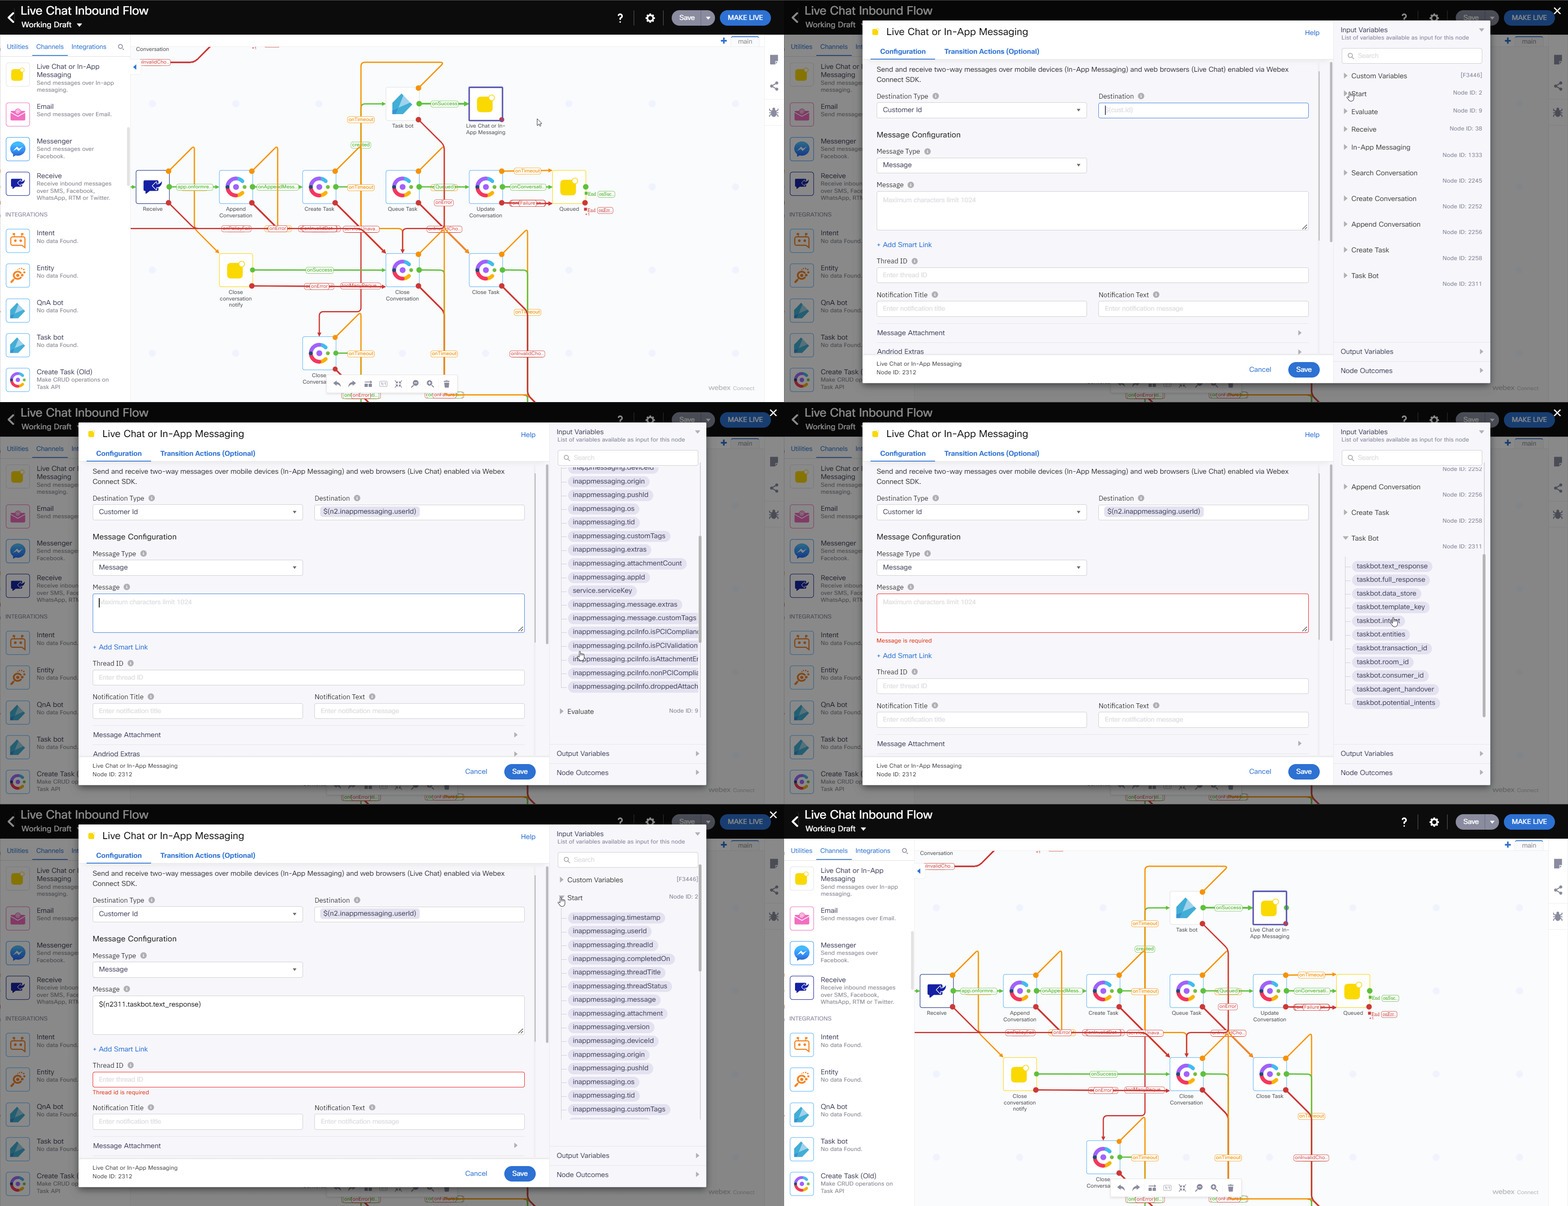
Add Live Chat or In-App Messaging Node and link it with the Task Bot node
- Link the Task Bot node also with the Queue Task Node. It will automatically create the connection for onAgentHandover
- Open the Live Chat or In-App Messaging Node and update the following parameters:
Destinaton Type: UserId
Destination Type: Start > inapppessaging.userId $(n2.inappmessaging.userId)
Message: Task Bot > taskbot.text_response $(n2303.taskbot.text_response)
Thread ID: Start > inappmessaging.threadId $(n2.inappmessaging.threadId)
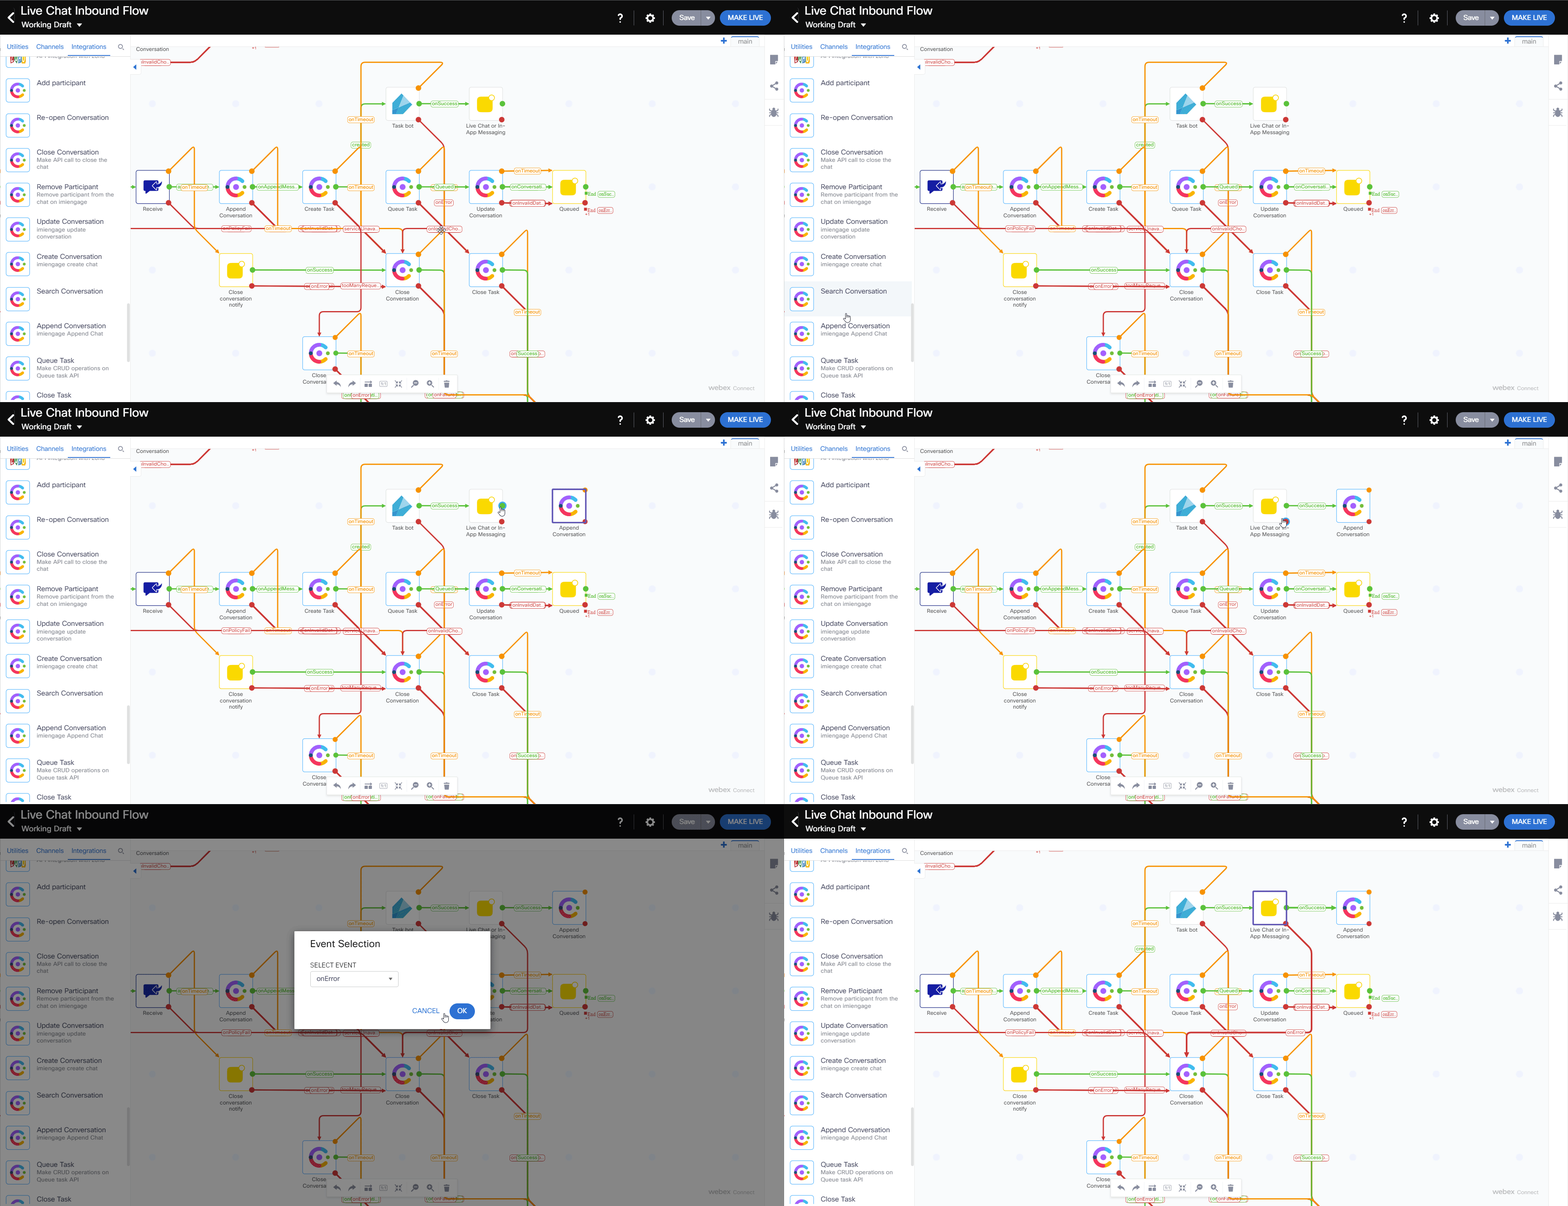
- Add Append Conversation Node and link it with the Live Chat or In-App Messaging node
-
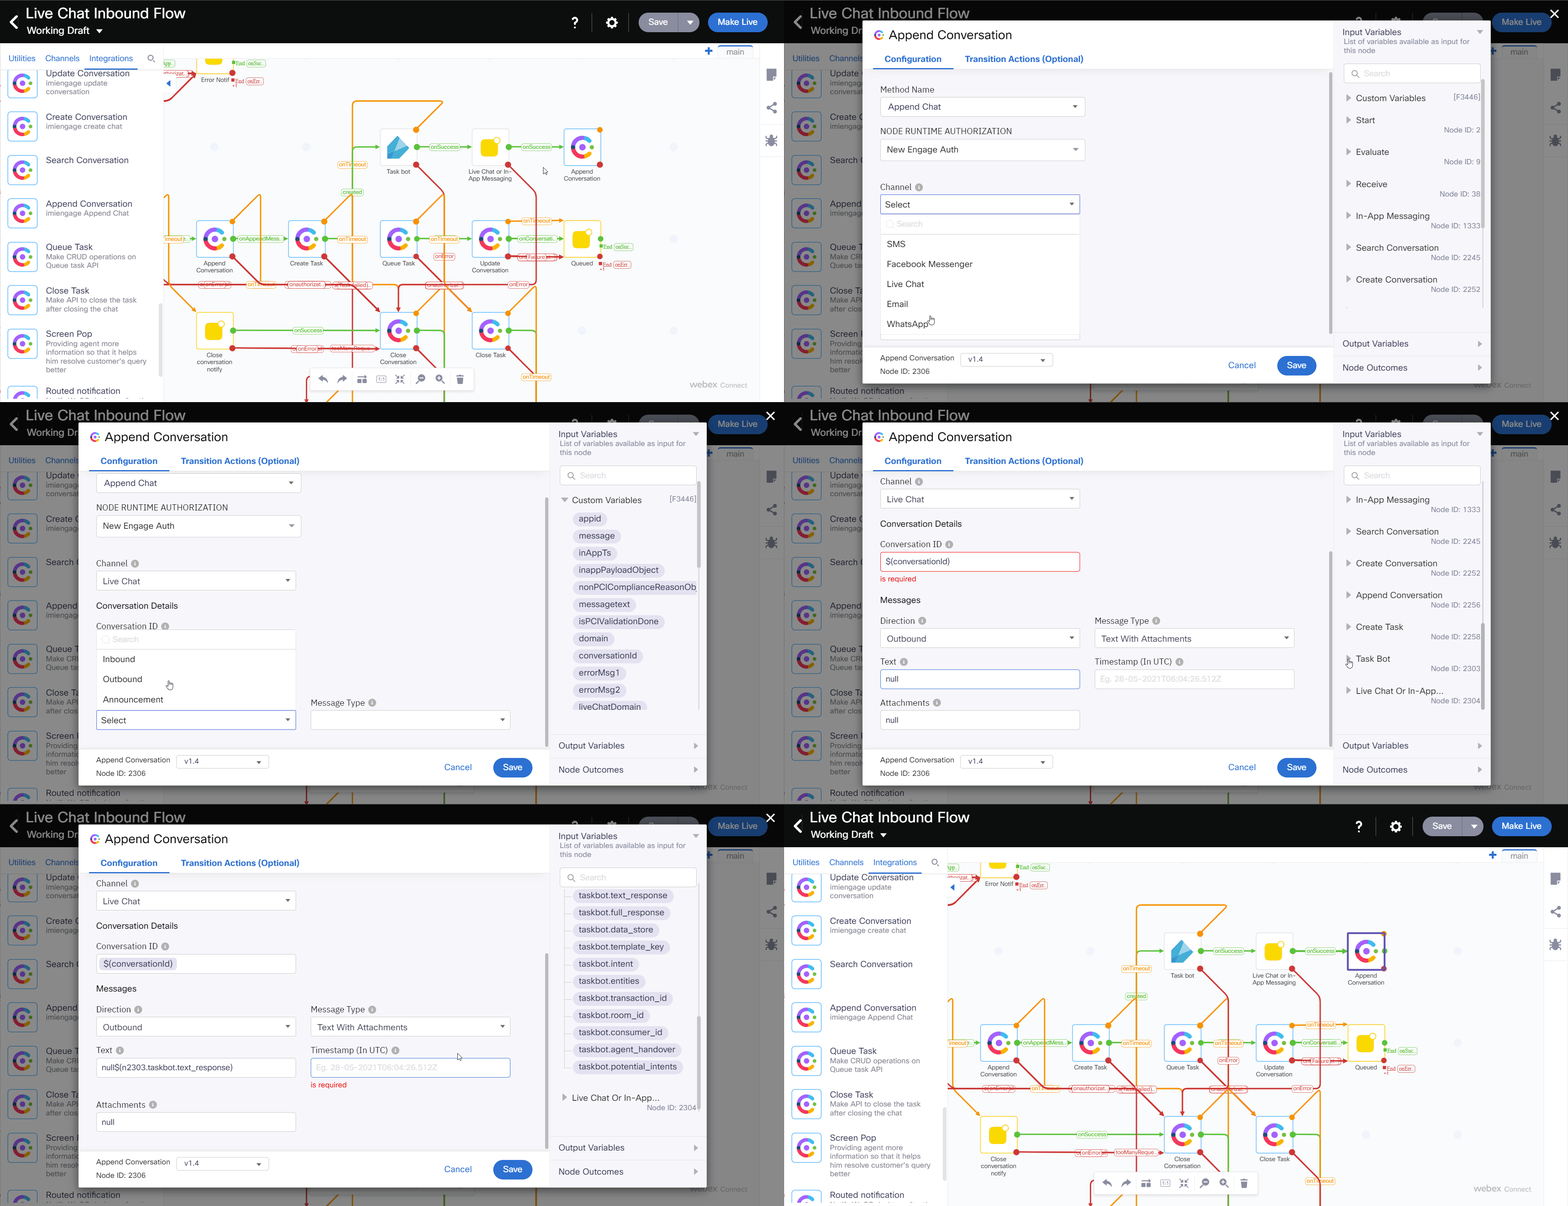
Open the Append Conversation Node and update the following parameters:
Method Name: Append Chat
Node Runtime Authorization: Pick default
Channel: Livechat
Conversation ID: Custom Variables > conversationId $(conversationId)
Message Type: Text With Attachments
Direction: Outbound
Text: Task Bot > taskbot.text_response $(n2303.taskbot.text_response)
Timestamp: Start > inappmessaging.timestamp $(n2.inappmessaging.timestamp)
Attachments: null
- Add a Receive node and link it with the Append Conversation node
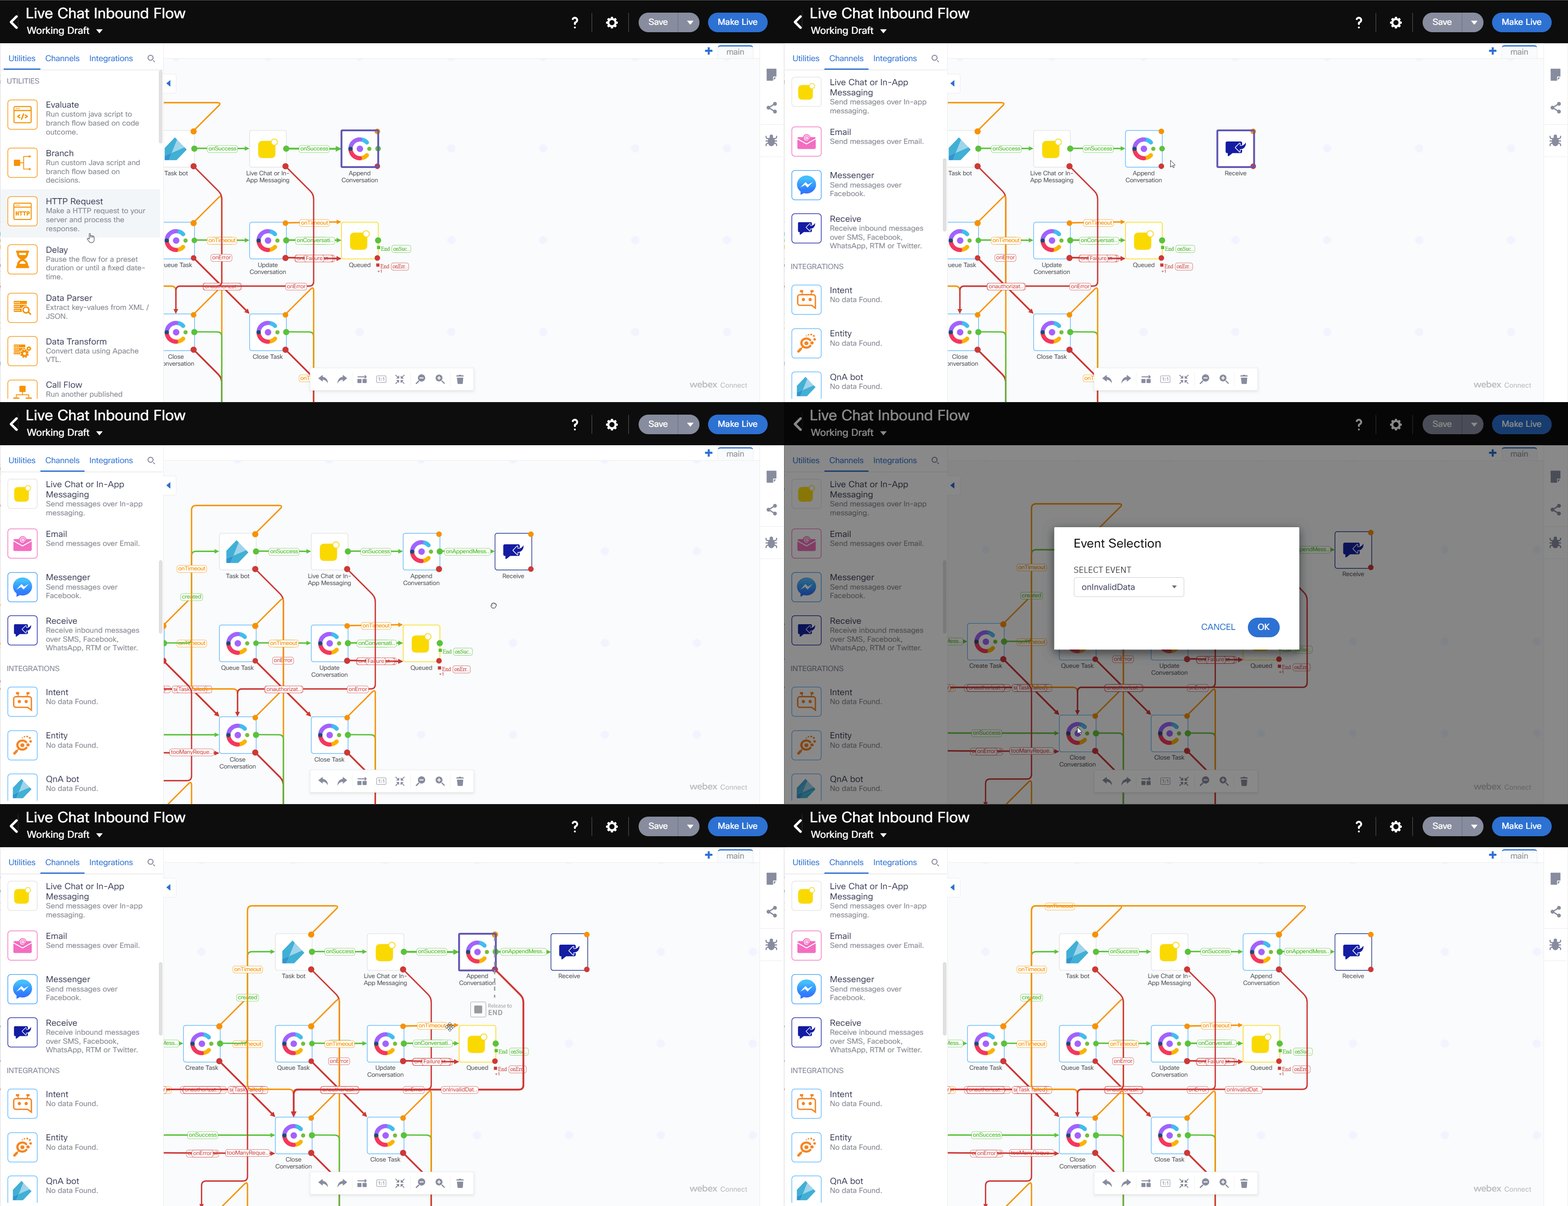
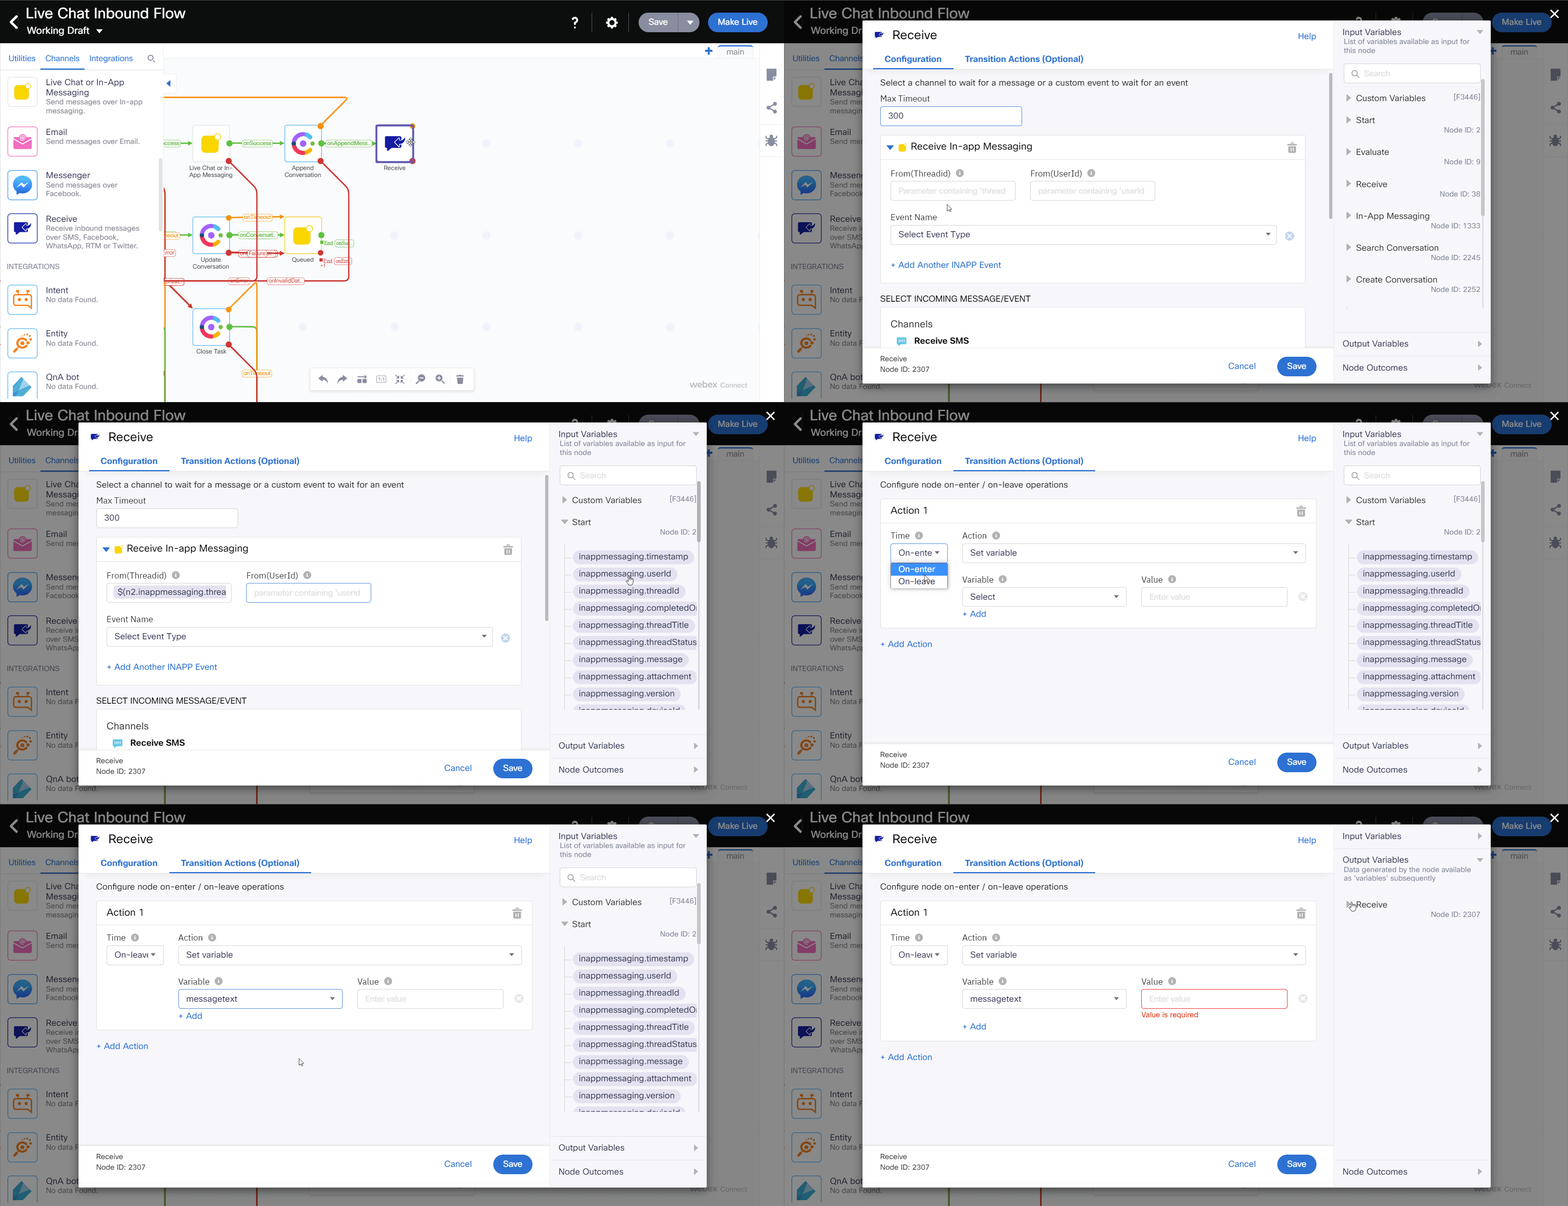
- Open the Receive Node and update the following parameters:
Select Incoming Message/Event: Receive In-App Messaging
Max timeout: 300
From(threadID): Start > inappmessaging.threadId $(n2.inappmessaging.threadId)
From(userId): Start > inappmessaging.userId $(n2.inappmessaging.userId)
Event name: Incoming Message
Transition Actions:
Add Action
Time: On-Leave
Action: Set Variable
Variable: messagetext
Value: Output Variables > inappmessaging.message $(n2311.inappmessaging.message)
-
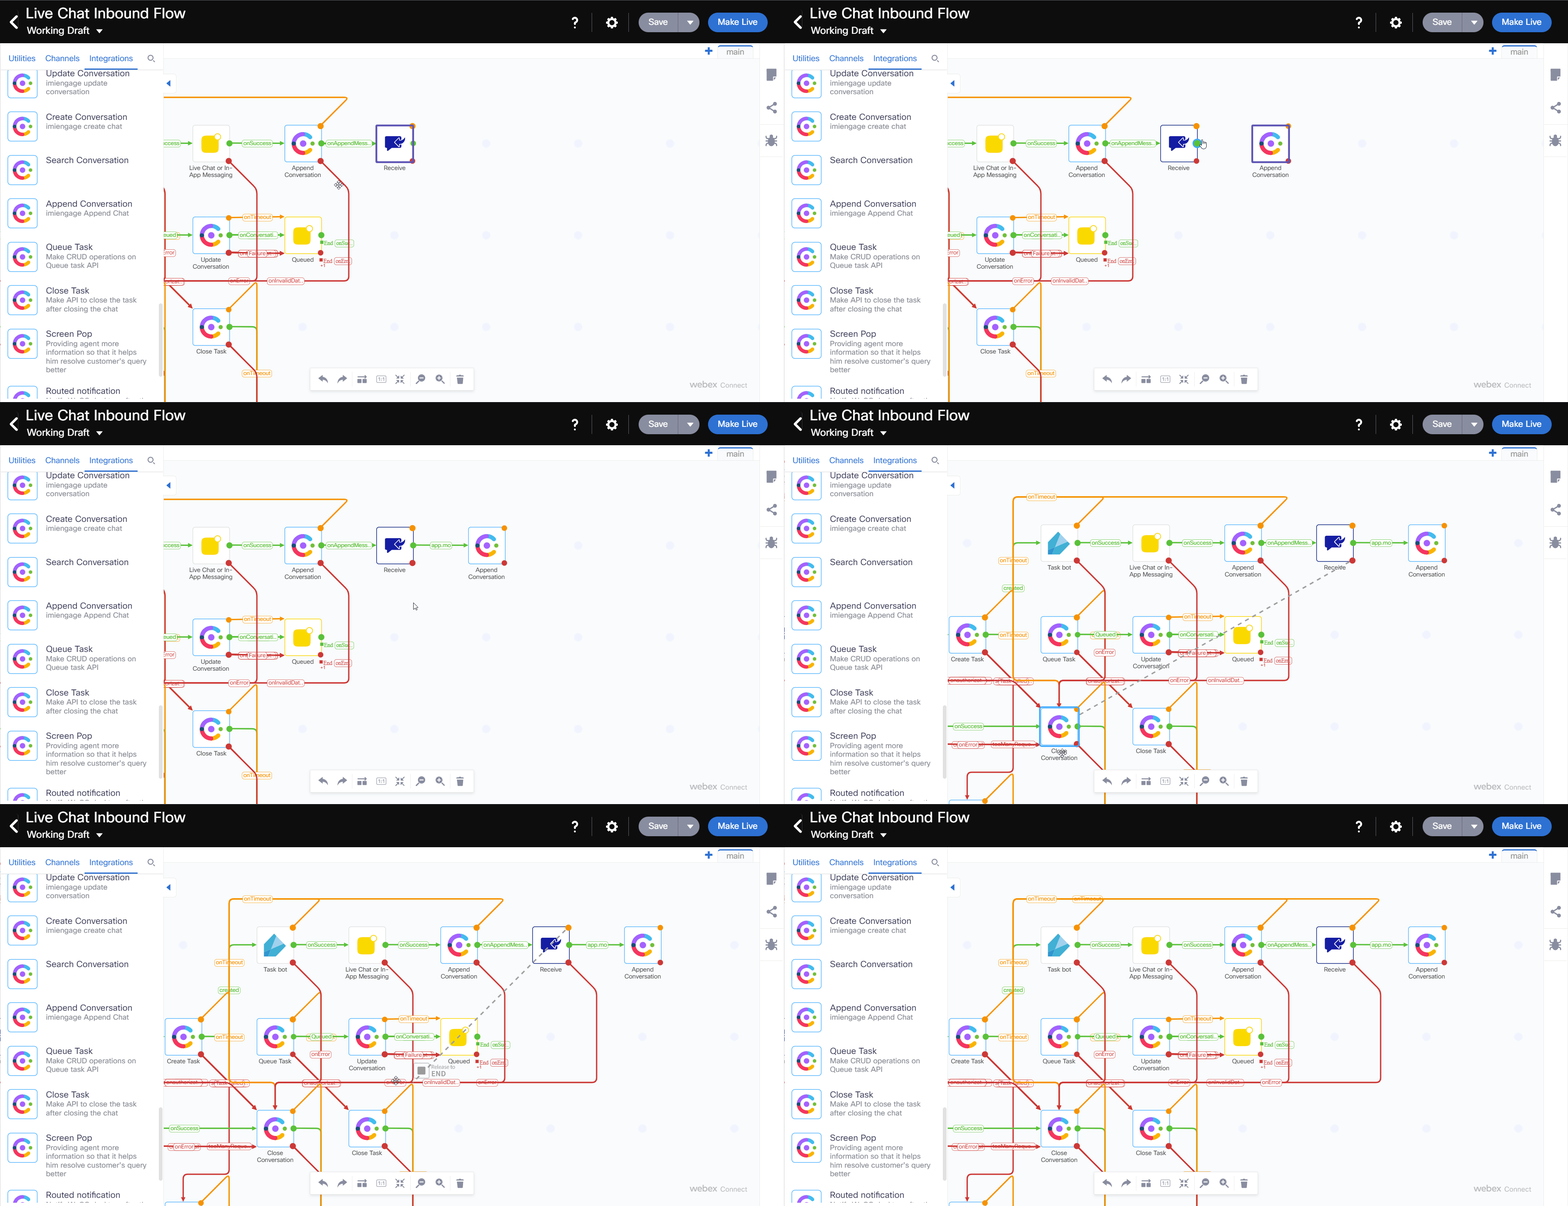
Add Append Conversation Node and link it with the Receive node
-
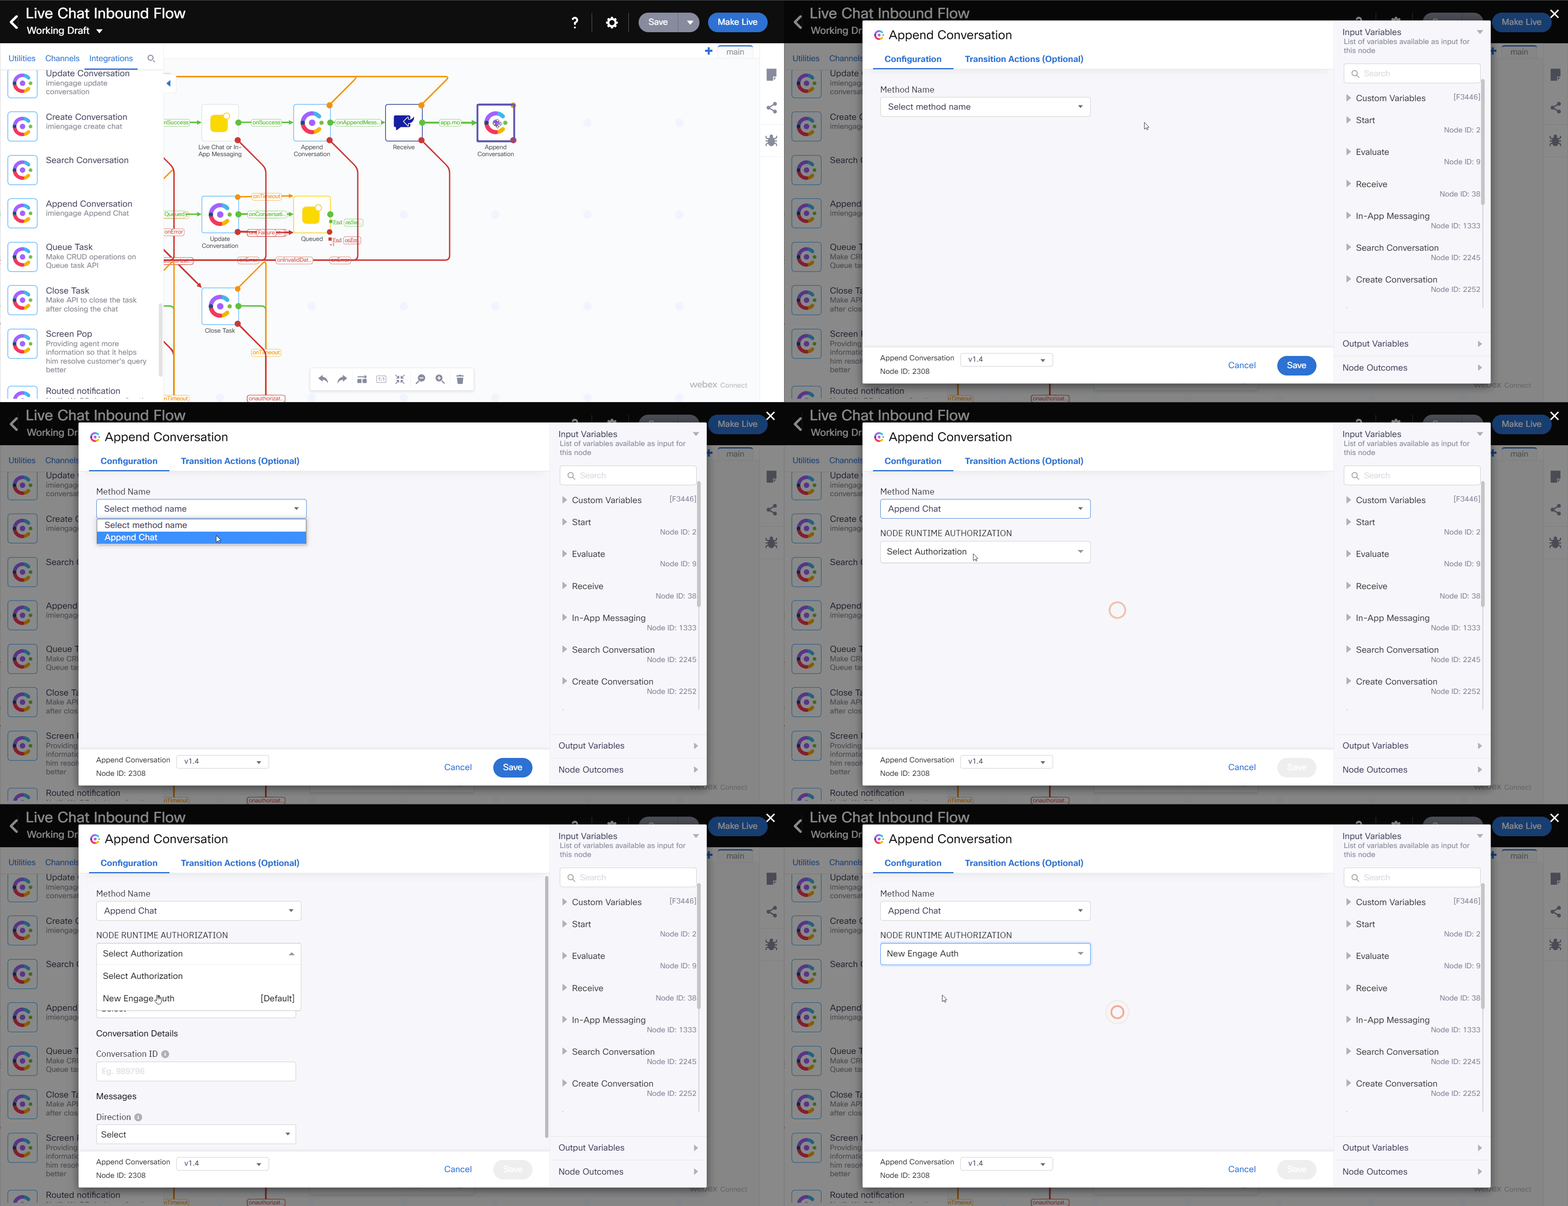
Open the Append Conversation Node and set the following parameters
Method Name: Append Chat
Node Runtime Authorization: Pick default
Channel: Livechat
Conversation ID: $(conversationId)
Message Type: Text With Attachments
Direction: Inbound
Text: messagetext $(messagetext)
Timestamp: Start > inappmessaging.timestamp $(n2.inappmessaging.timestamp)
Attachments: null
-
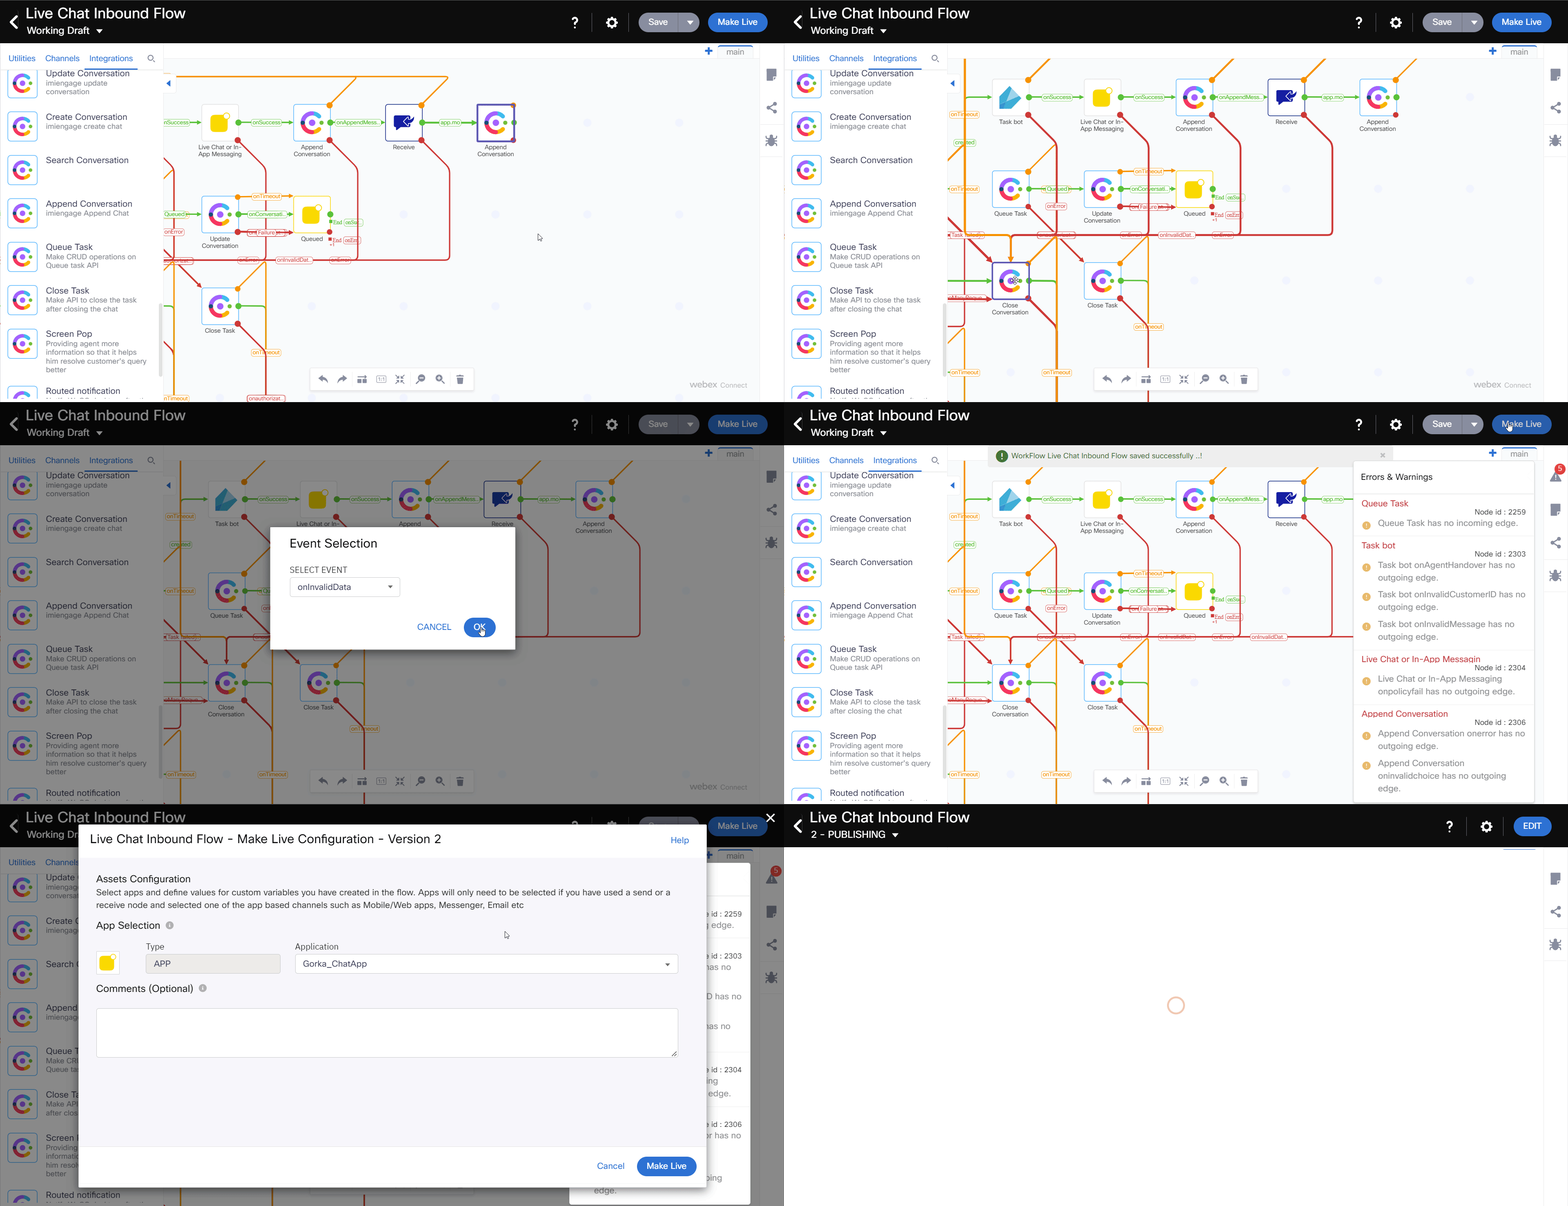
Drag the green node edge from the Append Conversation Node and connect it to the Task Bot Node
-
For each Red or Orange edges of each Flow nodes that we just added, drag a connector to the Close Conversation node until you can no longer grab any new node edges.
-
Save the Flow and click on Make Live
-
Select your Application and add any publish comments
Step 3. Check Intent, parse Entities and get number of Items
-
Find the Task bot node and delete the onSuccess connector
-
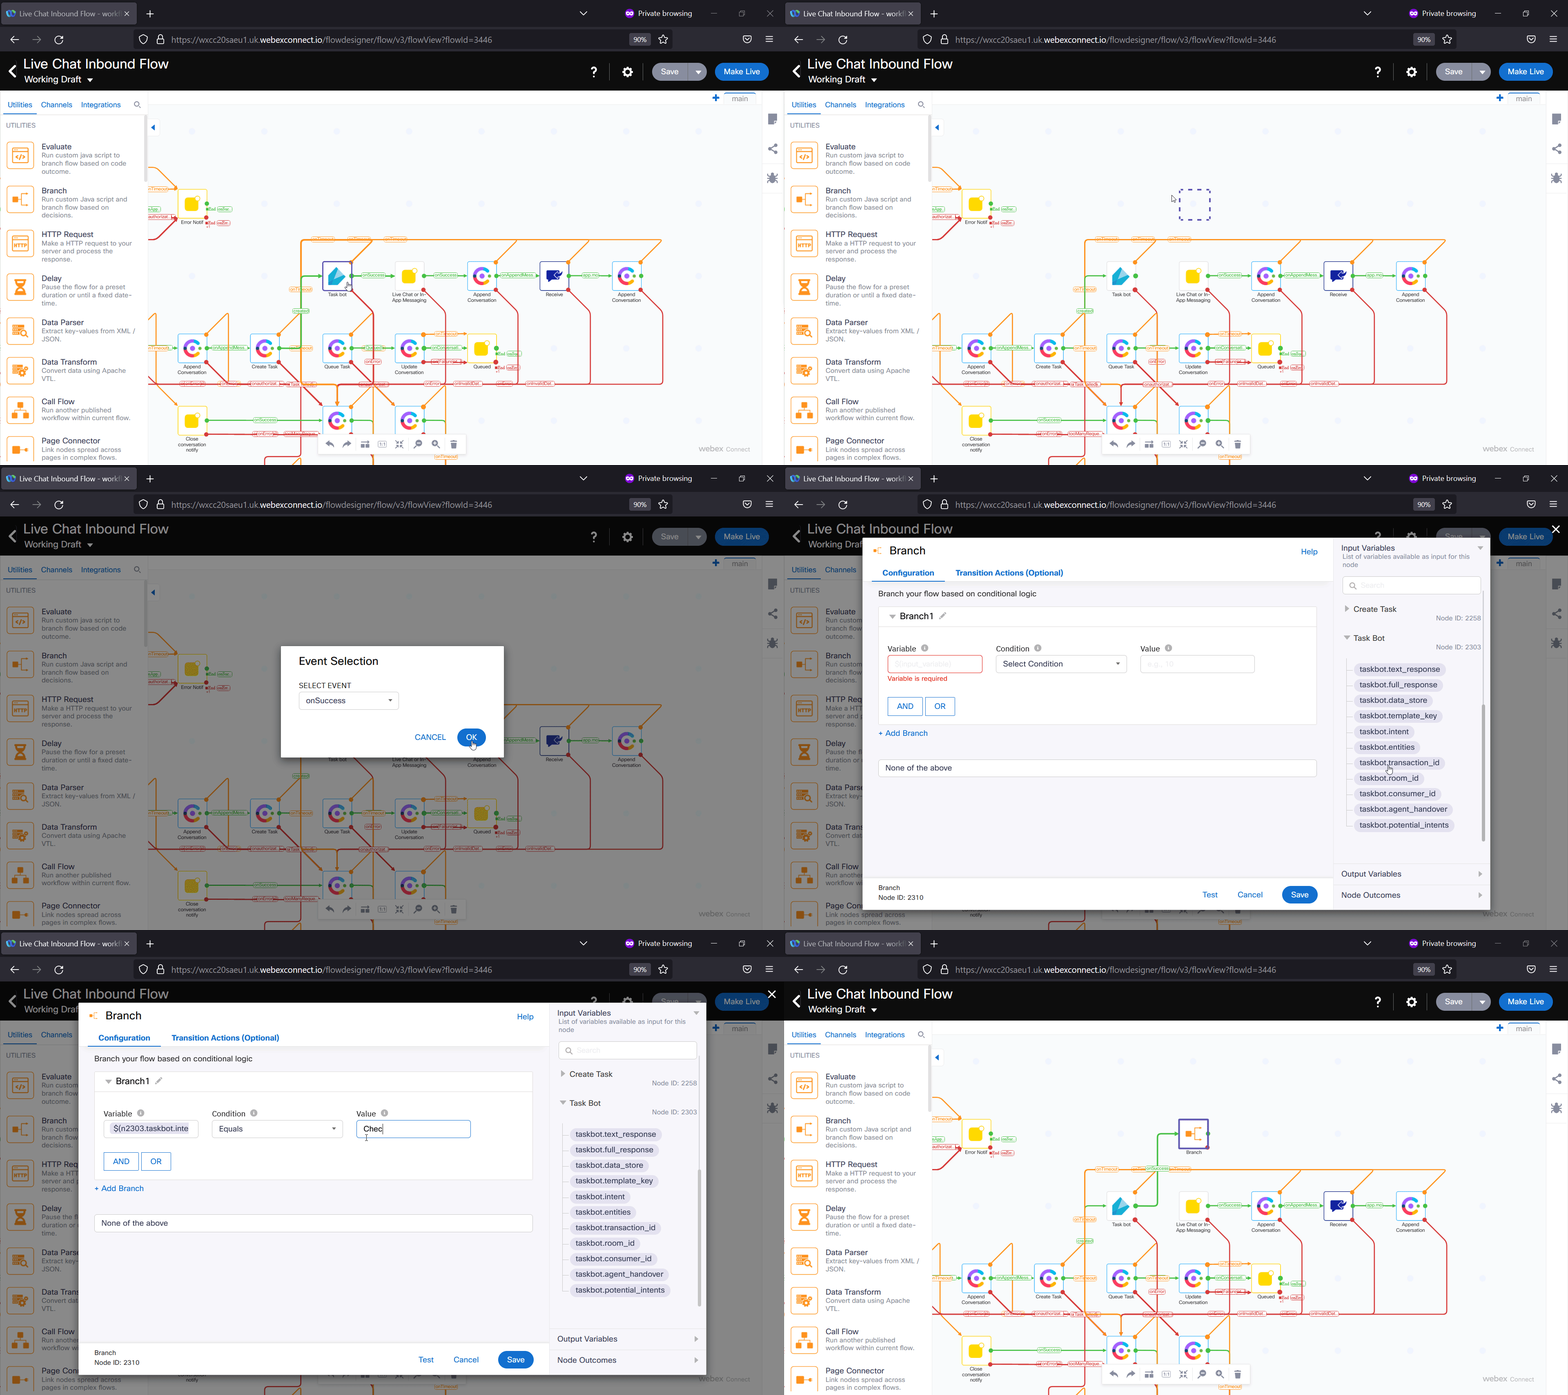
Add a Branch node and link it with the Task bot node
-
Open the Branch node and set the following parameters
Rename Branch1: checkStock
Variable: Task Bot > taskbot.intent
Condition: Equals
Value: intent value (Check stock)
-
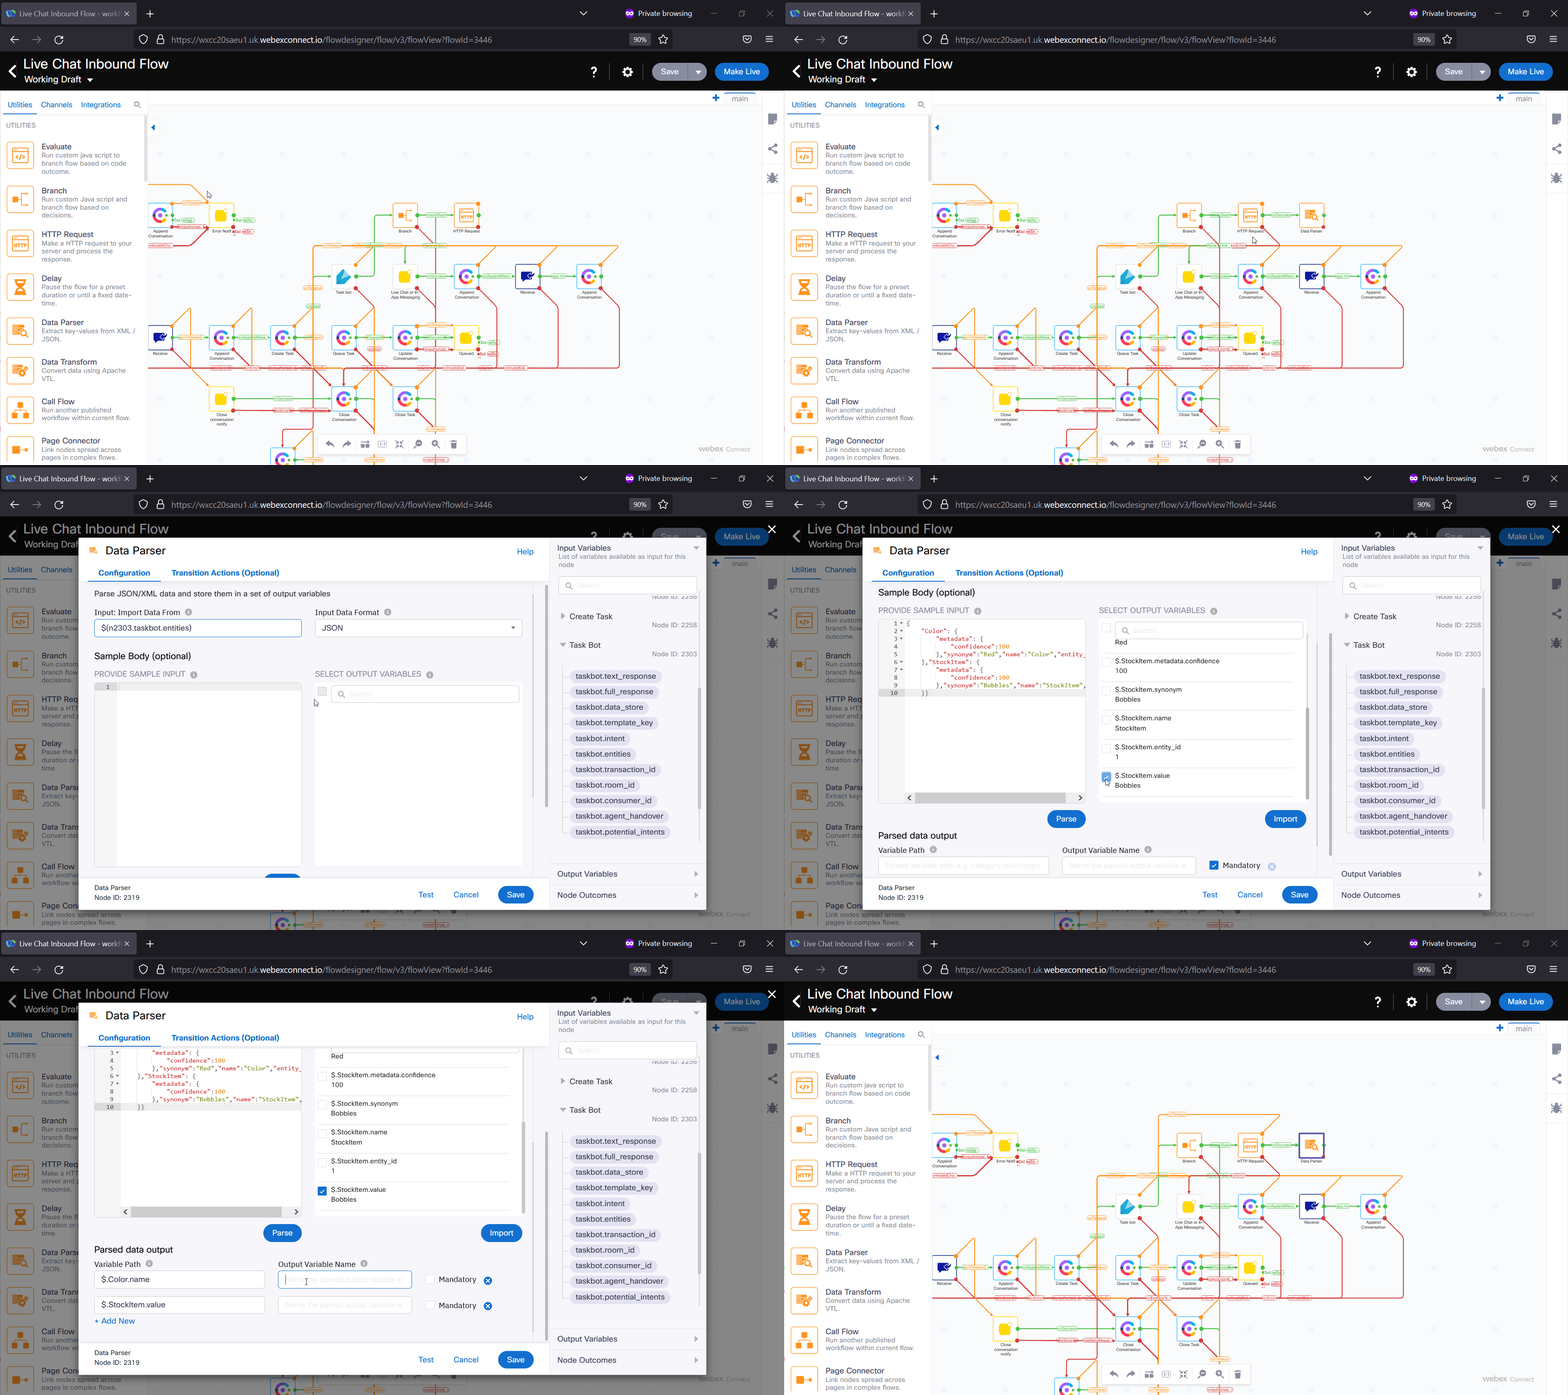
Drag a new Data Parser node and link it with Branch node
-
Connect both red node edges from the Data Parser to the Live Chat on In-App Messenger
-
Open the Data Parser node and set the following parameters:
Input: Task Bot > taskbot.entities
Sample Body: {
                            "Color": {
                                "metadata": {
                                    "confidence":100
                                },"synonym":"Red","name":"Color","entity_id":"2","value":"Red"
                            },"StockItem": {
                                "metadata": {
                                    "confidence":100
                                },"synonym":"Bobbles","name":"StockItem","entity_id":"1","value":"Bobbles"
                            }
                        }
Click Parse
Select the $.Color.name and $.stockItem.value
Click Import
Create Output variable names (like color and item) $.Color.value -> color $.StockItem.value -> item
Make both Variables Mandatory
-
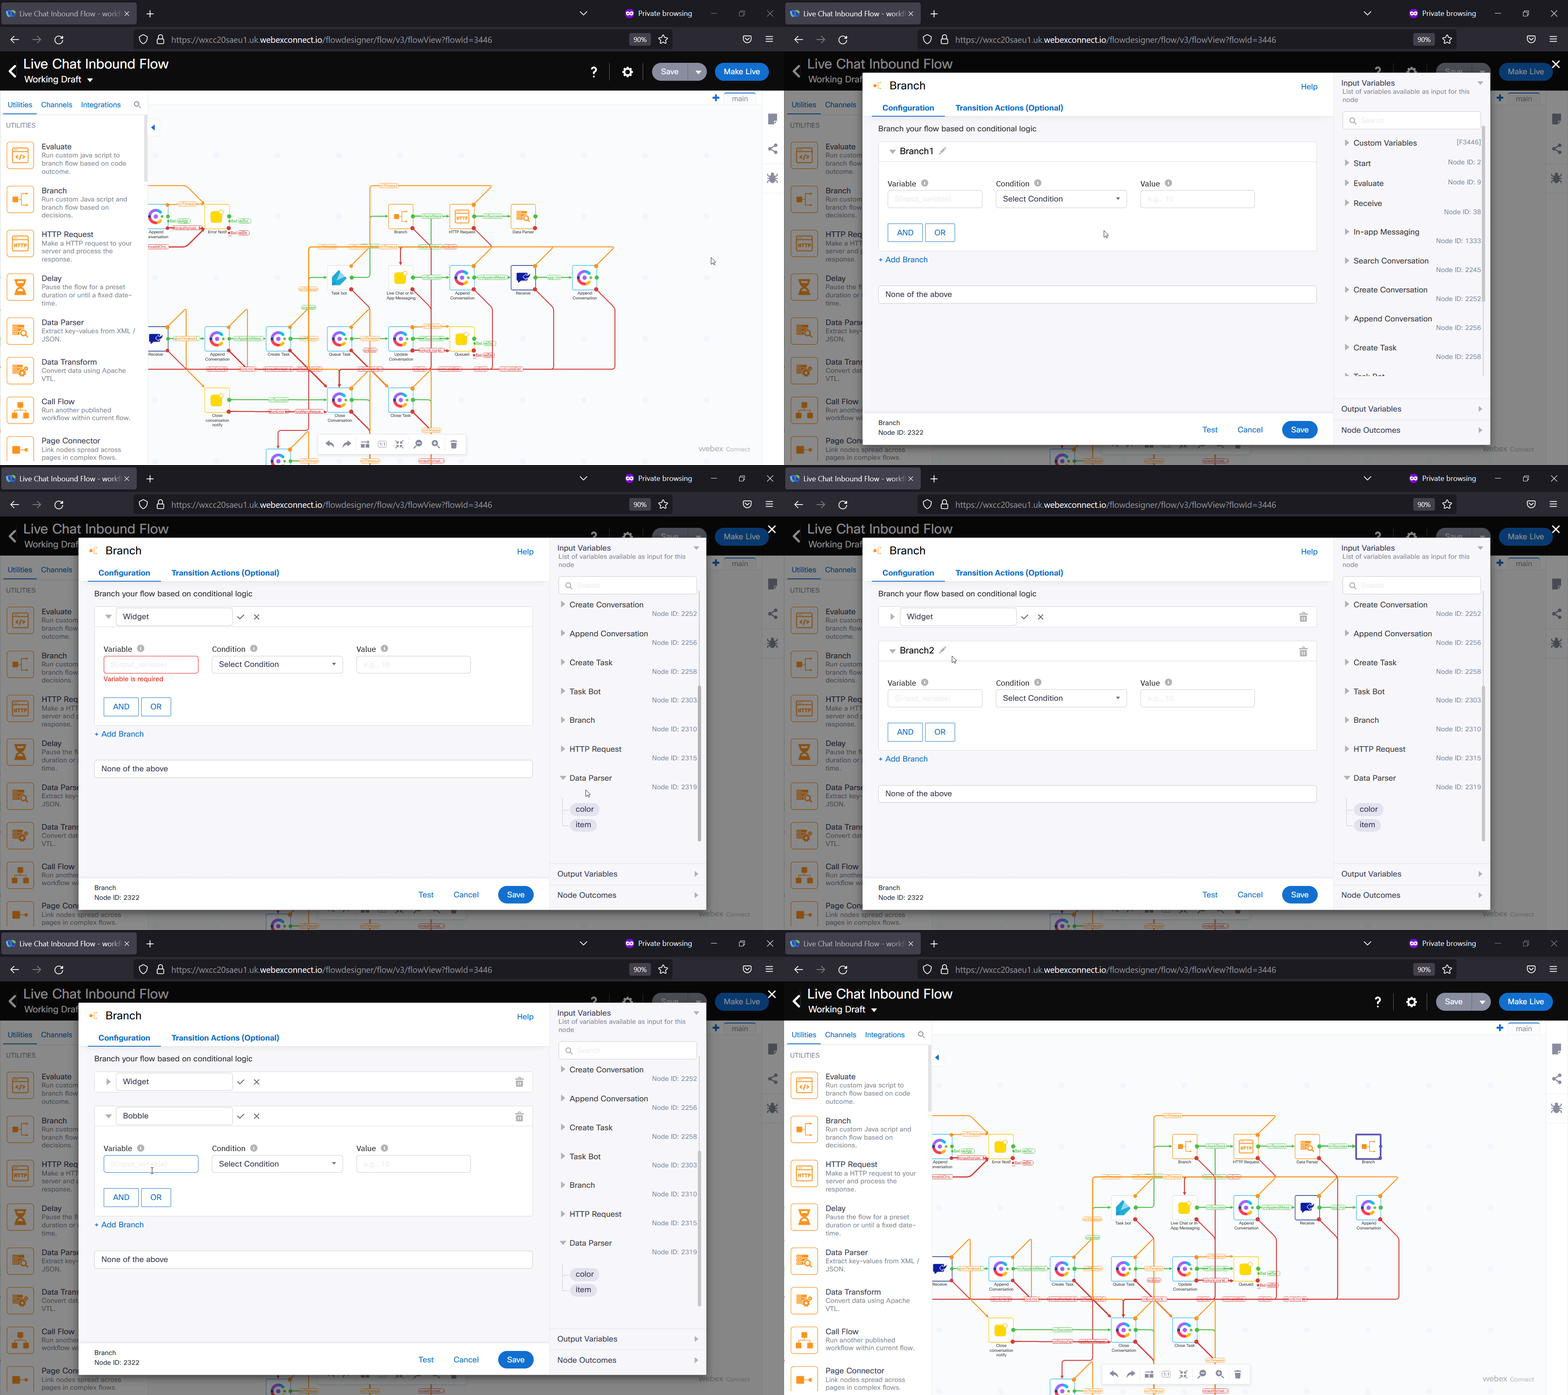
Drag a new Branch node and link it with the Data Parser node
-
Open the Branch node and set the following parameters:
Rename Branch1 to Widget
Variable: Data Parser > item Condition: Equals Value: Widget Add branch
Rename Branch2 to Bobble Variable: Data Parser > item Condition: Equals Value: Bobble
-
Drag 2 HTTP Request nodes into the flow and connect them with the Branch node (select Widget for one of them and Bobble for the other one)
-
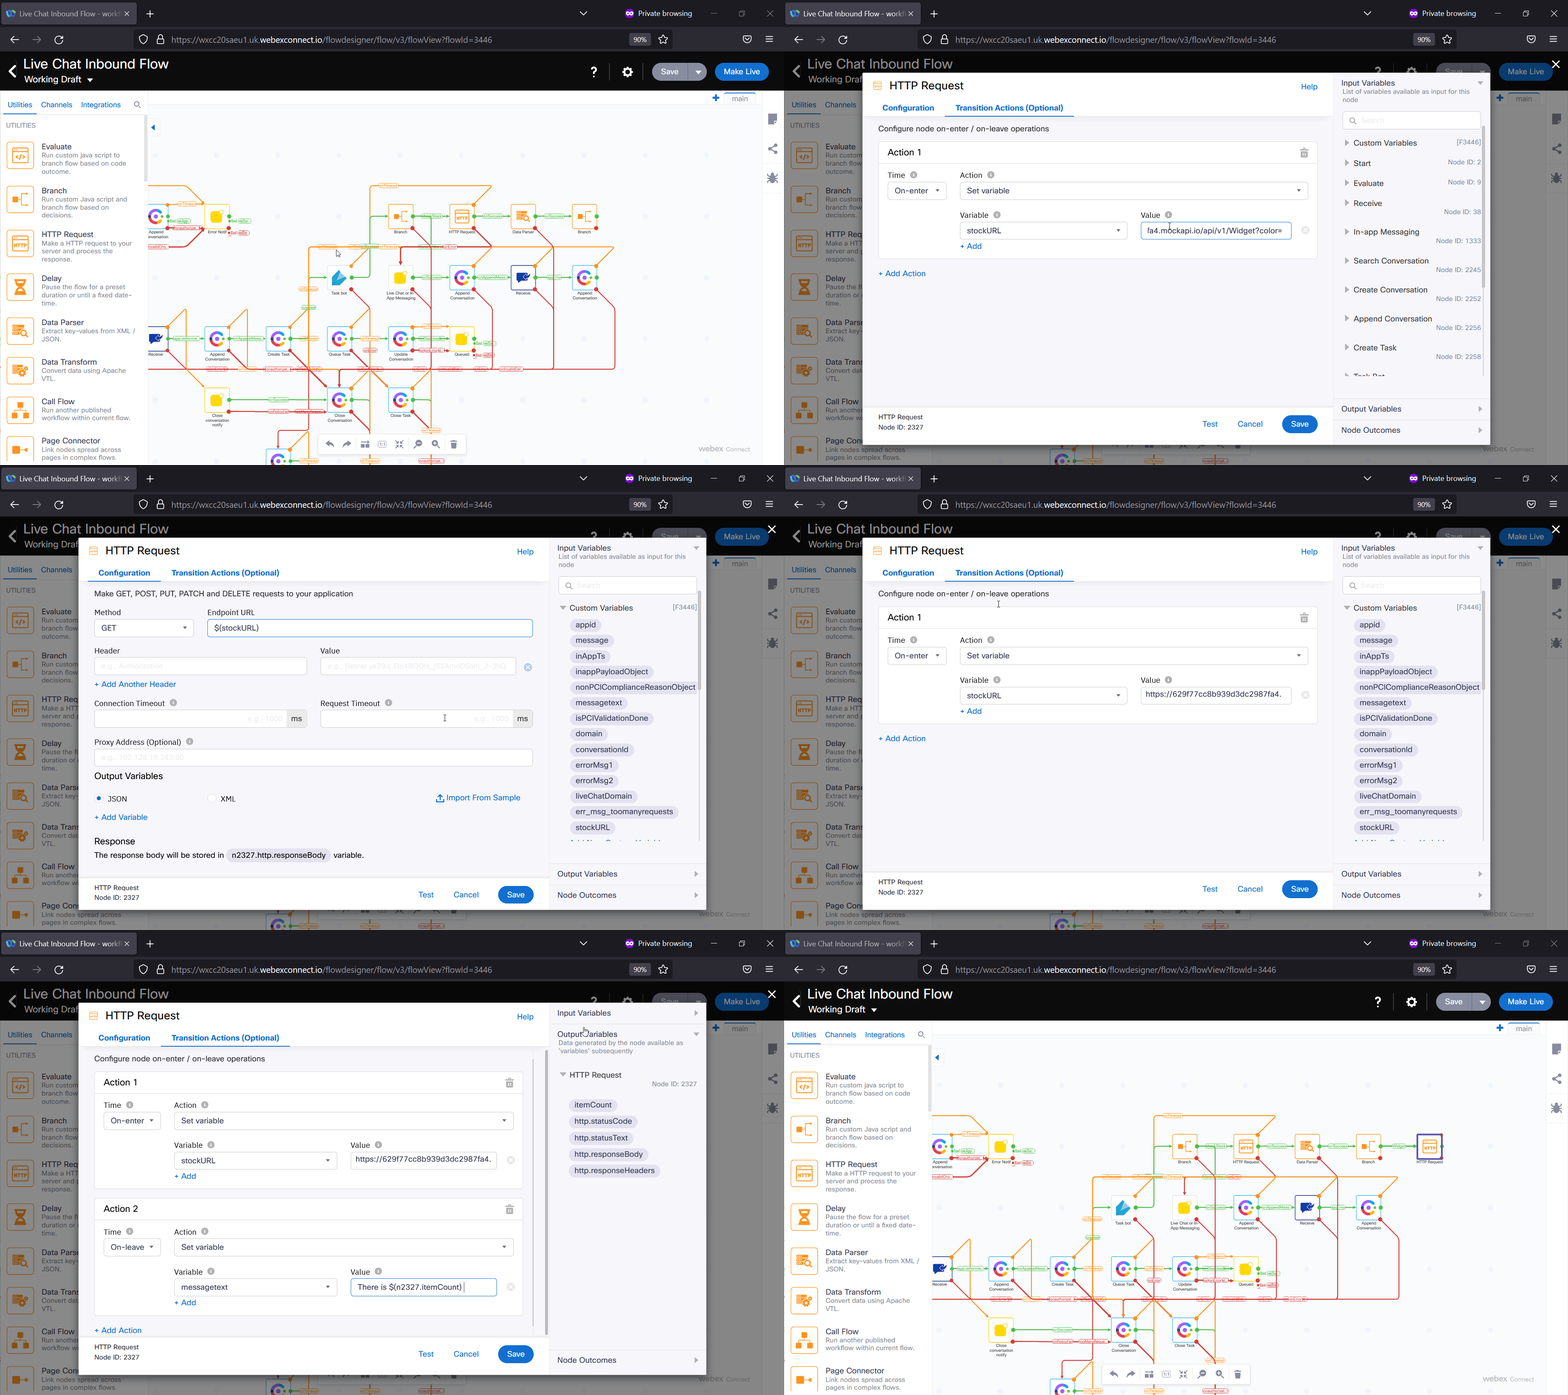
Open one of the HTTP Request nodes
- Click on Transition Actions and set the following parameters:
Click Add Action
Time: On-Enter
Action: Set Variable
Variable:
Add an new variable
Variable name: stockURL
Click Save
Value: the url with the param left empty and then Data Parser > color (Example: https://629f77cc8b939d3dc2987fa4.mockapi.io/api/v1/Widget?$(n2316.color)) Be aware that n2316 is an example, make sure to put correct NodeID of Parser node
- Click Configuration
Method: GET
Endpoint URL: Custom Variables > stockURL
Connection Timeout: 1000
Request Timeout: 1000
Output Variable Name: itemCount
Response Entity: Body
Response Path: $[0].stockcount (from Postman and JSON Path Finder/Import from Sample)
- Click Transition Actions
Add action
Time: on-leave
Action: Set variable
Variable: messagetext
Value: There is (output variables > itemCount) (Data Parser > color) (Data Parser > item)s in stock. Is there anything else I can do for you?
- Do the same with the other HTTP Request node
- You just need to change the Value of the stockURL with the appropiate entity: (Example: https://629f77cc8b939d3dc2987fa4.mockapi.io/api/v1/Bobble?color=$(n2316.color))
Step 4. Send the answer to the created conversation
-
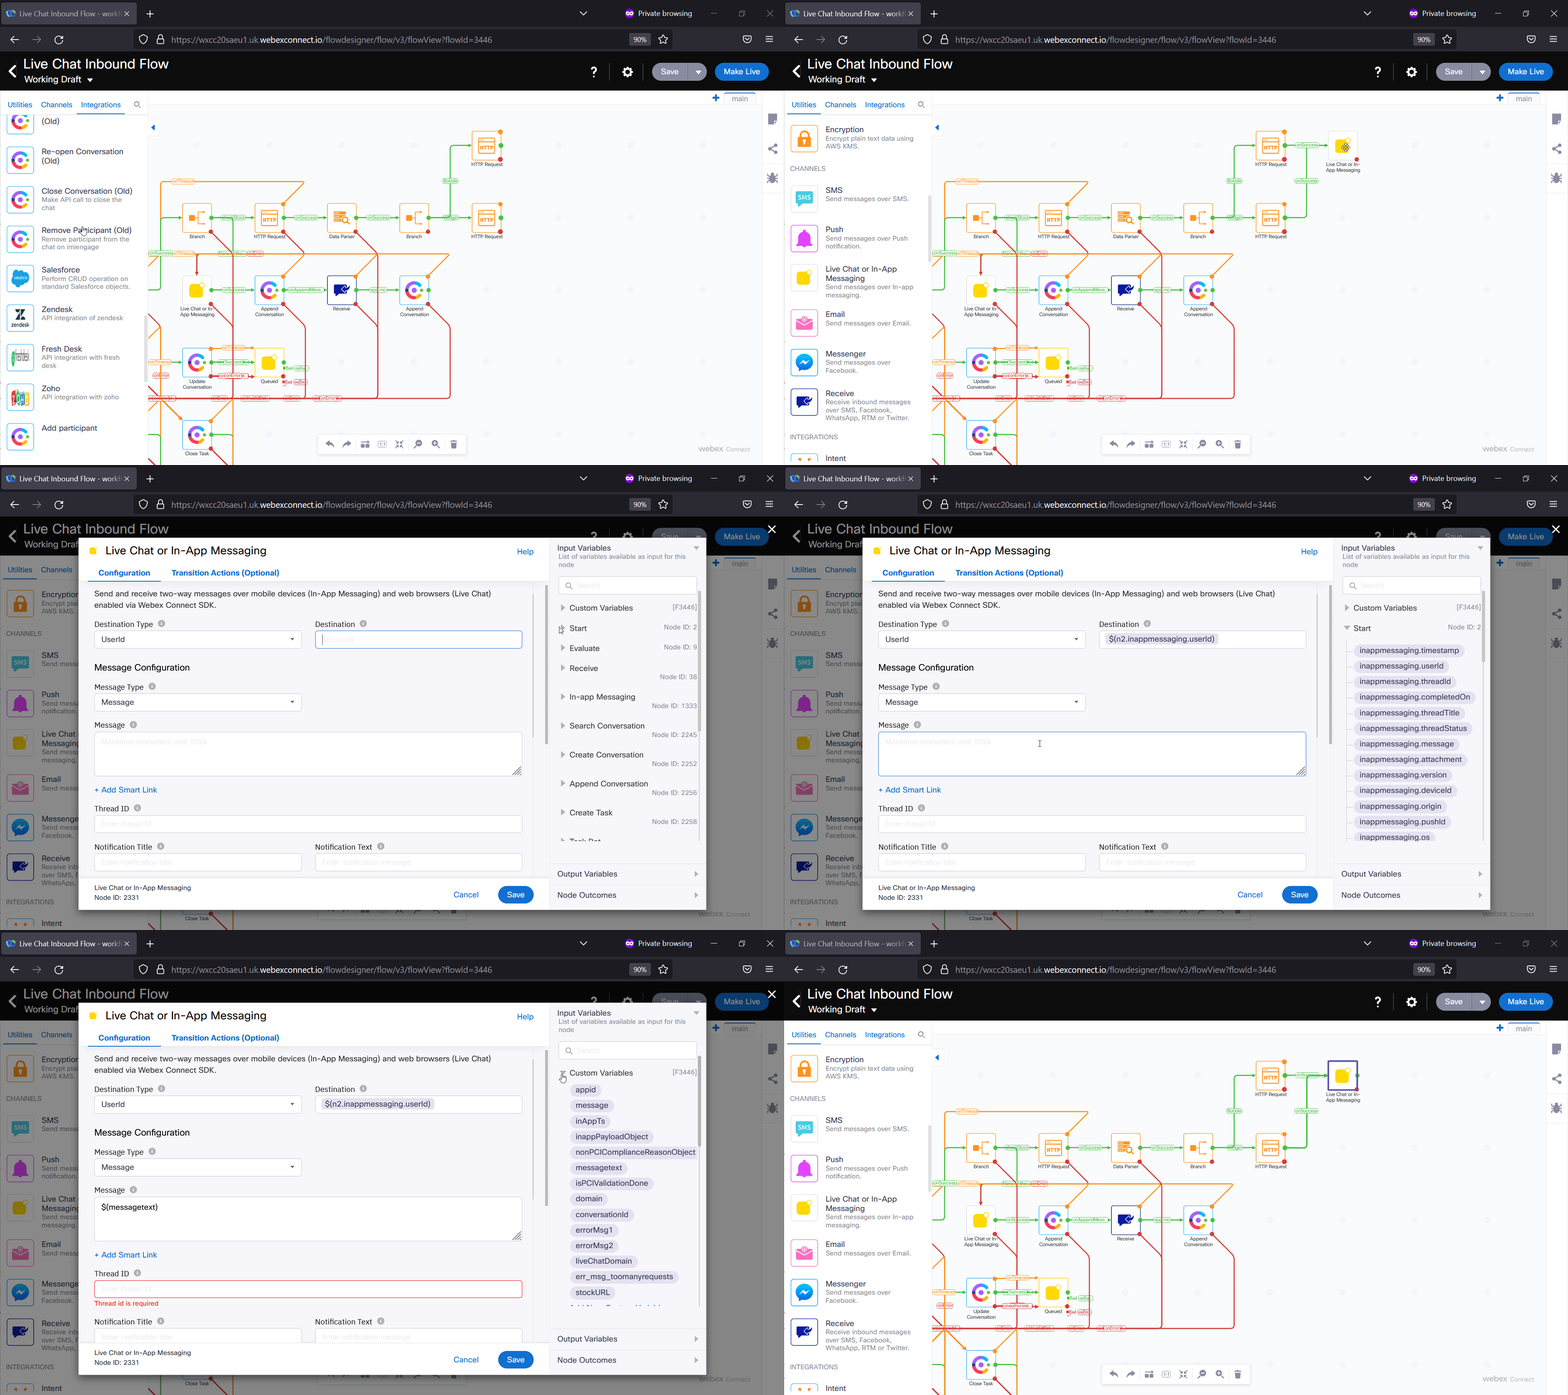
Drag a new Live Chat or In-App Messaging node and link it with both HTTP Request nodes
- Open the Live Chat or In-App Messaging node and set the following parameters:
Destination type: UserId
Destination: Start > inapppessaging.userId $(n2.inappmessaging.userId)
Message Type: Message
Message: Custom Variables > messagetext
Thread ID: Start > inappmessaging.threadId $(n2.inappmessaging.threadId)
- Open the Live Chat or In-App Messaging node and set the following parameters:
-
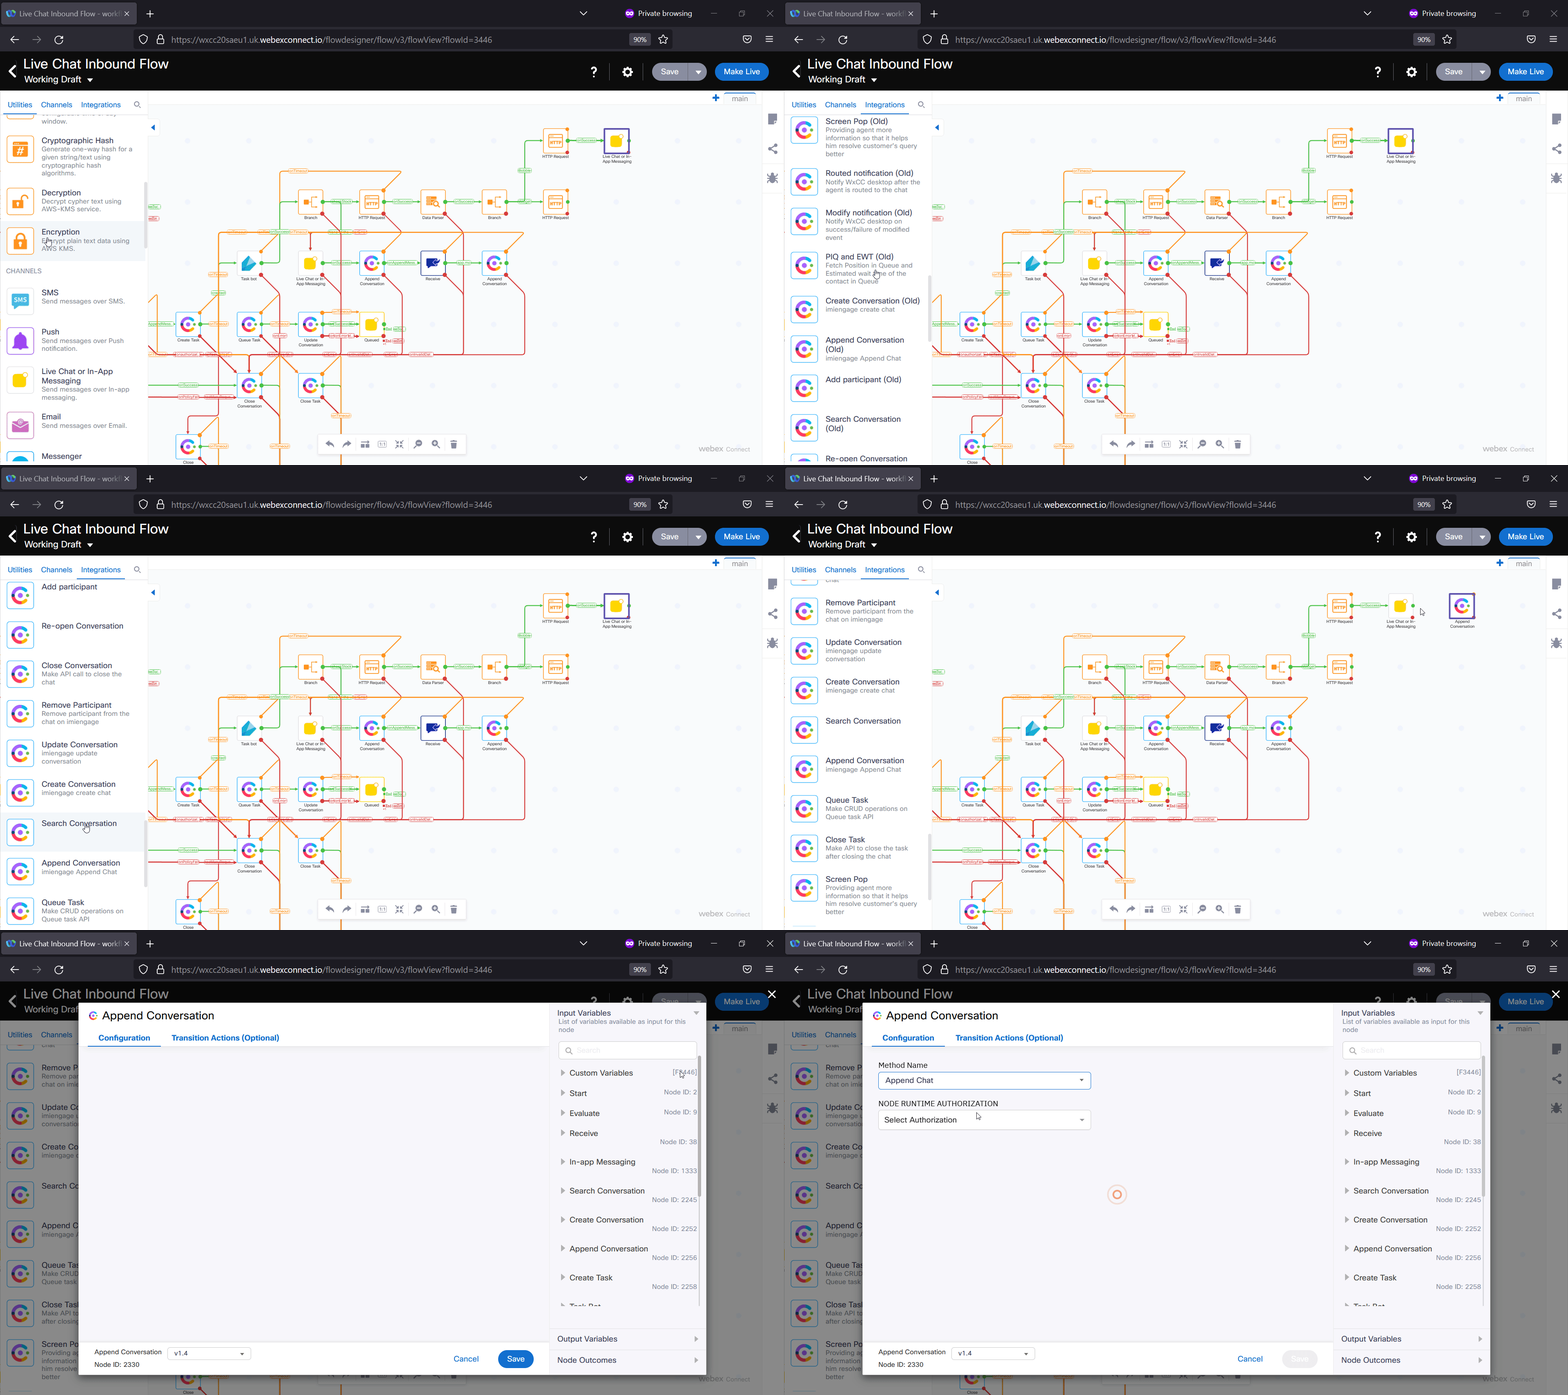
Drag a new Append Conversation and link it with the Live Chat or In-App Messaging node
-
Open the Append Conversation node and set the following parameters:
Method Name: Append Chat
Node Runtime Authorization: Pick default
Channel: Livechat
Conversation ID: Custom Variables > conversationId
Message Type: Text With Attachments
Direction: Outbound
Text: messagetext $(messagetext)
Timestamp: Start > inappmessaging.timestamp
Attachments: null
-
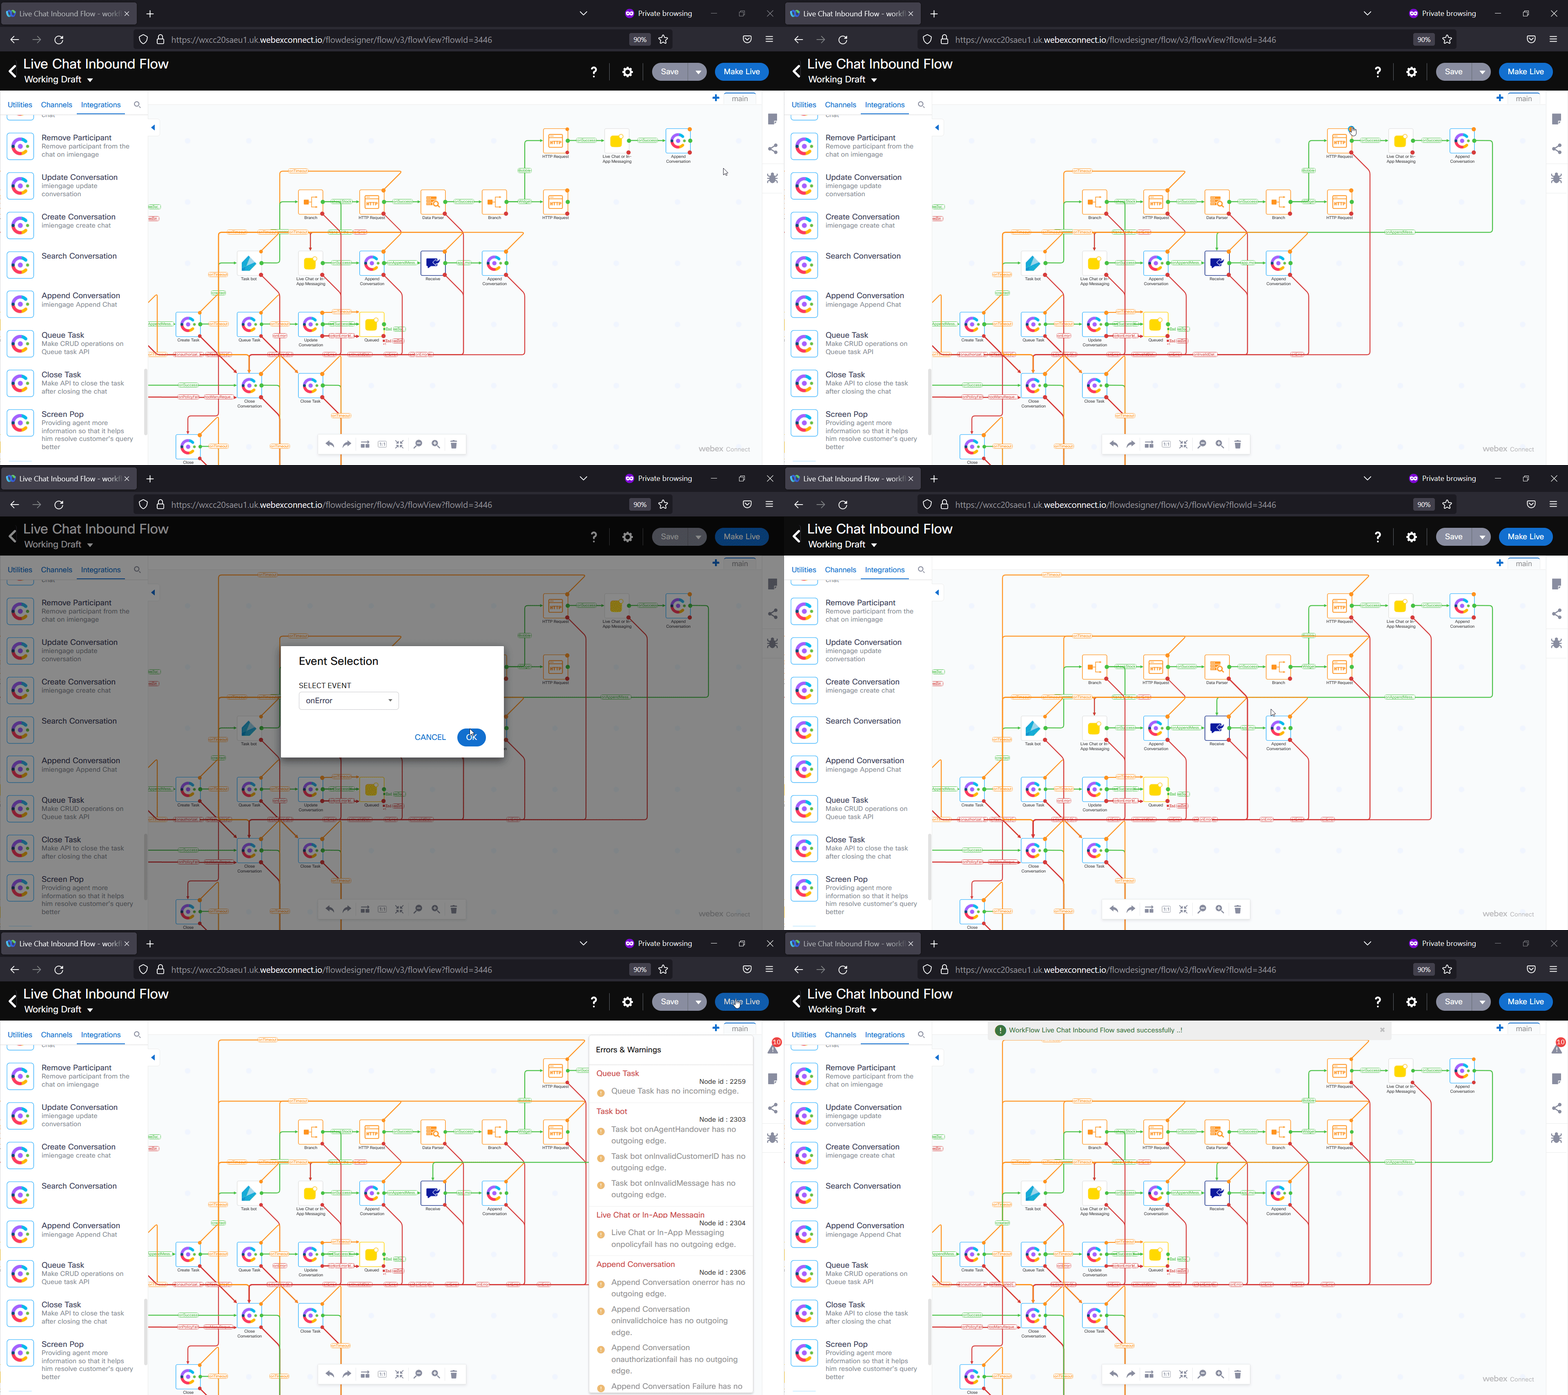
Connect the Green node edge to the Receive node
-
Connect all remaining Red and Orange node edges to the Close Conversation node
-
Click Save in the upper right corner and make it live
-
Confirm the proper application is selected and Click Make Live again.
- Navigate to your website (The one defined as Channel Asset in Webex Engage) and test your bot from