Lab 4.1: Webex Connect Task Bot Setup
Table of Contents
Introduction
Lab Objective
In this lab we will be creating a task bot using the bot builder in Webex Connect. We will be creating Intents and Entities that might be coming in the requests from end-customers. Based on this information, our task bot will be able to automatically provice an answer of handoff to a real agen.
Pre-requisites
- You have received the access credentials with a full admin access
- Lab 2 should be completed successfully and chat routing to agent is working
Quick Links
Control Hub: https://admin.webex.com
Portal: https://portal.wxcc-us1.cisco.com/portal
Agent Desktop: https://desktop.wxcc-us1.cisco.com
Connect: https://cl2podX.imiconnect.io/ (where X is your POD number)
AI Terminology
-
Utterances: Anything a user says to the bot
-
Intents: Task or action that the user wants to perform
-
Entities: Metadata that specifies the user’s intent
-
Responses: Message sent from the bot to converse to the user
-
Fallback: The state when a bot is unable to understand the utterance
-
Handover: Bot stops processing messages and transfers to an agent
-
NLU (Natural Language Understanding): engines used to assess the intent from the consumer inputs and respond with an accurate response
Use Case
- Check if an item is in stock
- Entities:
- Stock Item (Custom list): Widget, Bobble
- Color (Custom List): Green, Red, Yellow, Blue, Purple, Silver, Orange
- Intent:
- Check Stock
- Utterances:
- Do you have green bobbles?
- Do you have red widgets?
- Entities:
Lab Section
NOTE: Please read carefully the lab guide and follow the instructions. It might be possible that some GIFs are not accurate.
Step 1. Create Task bot and Entities
-
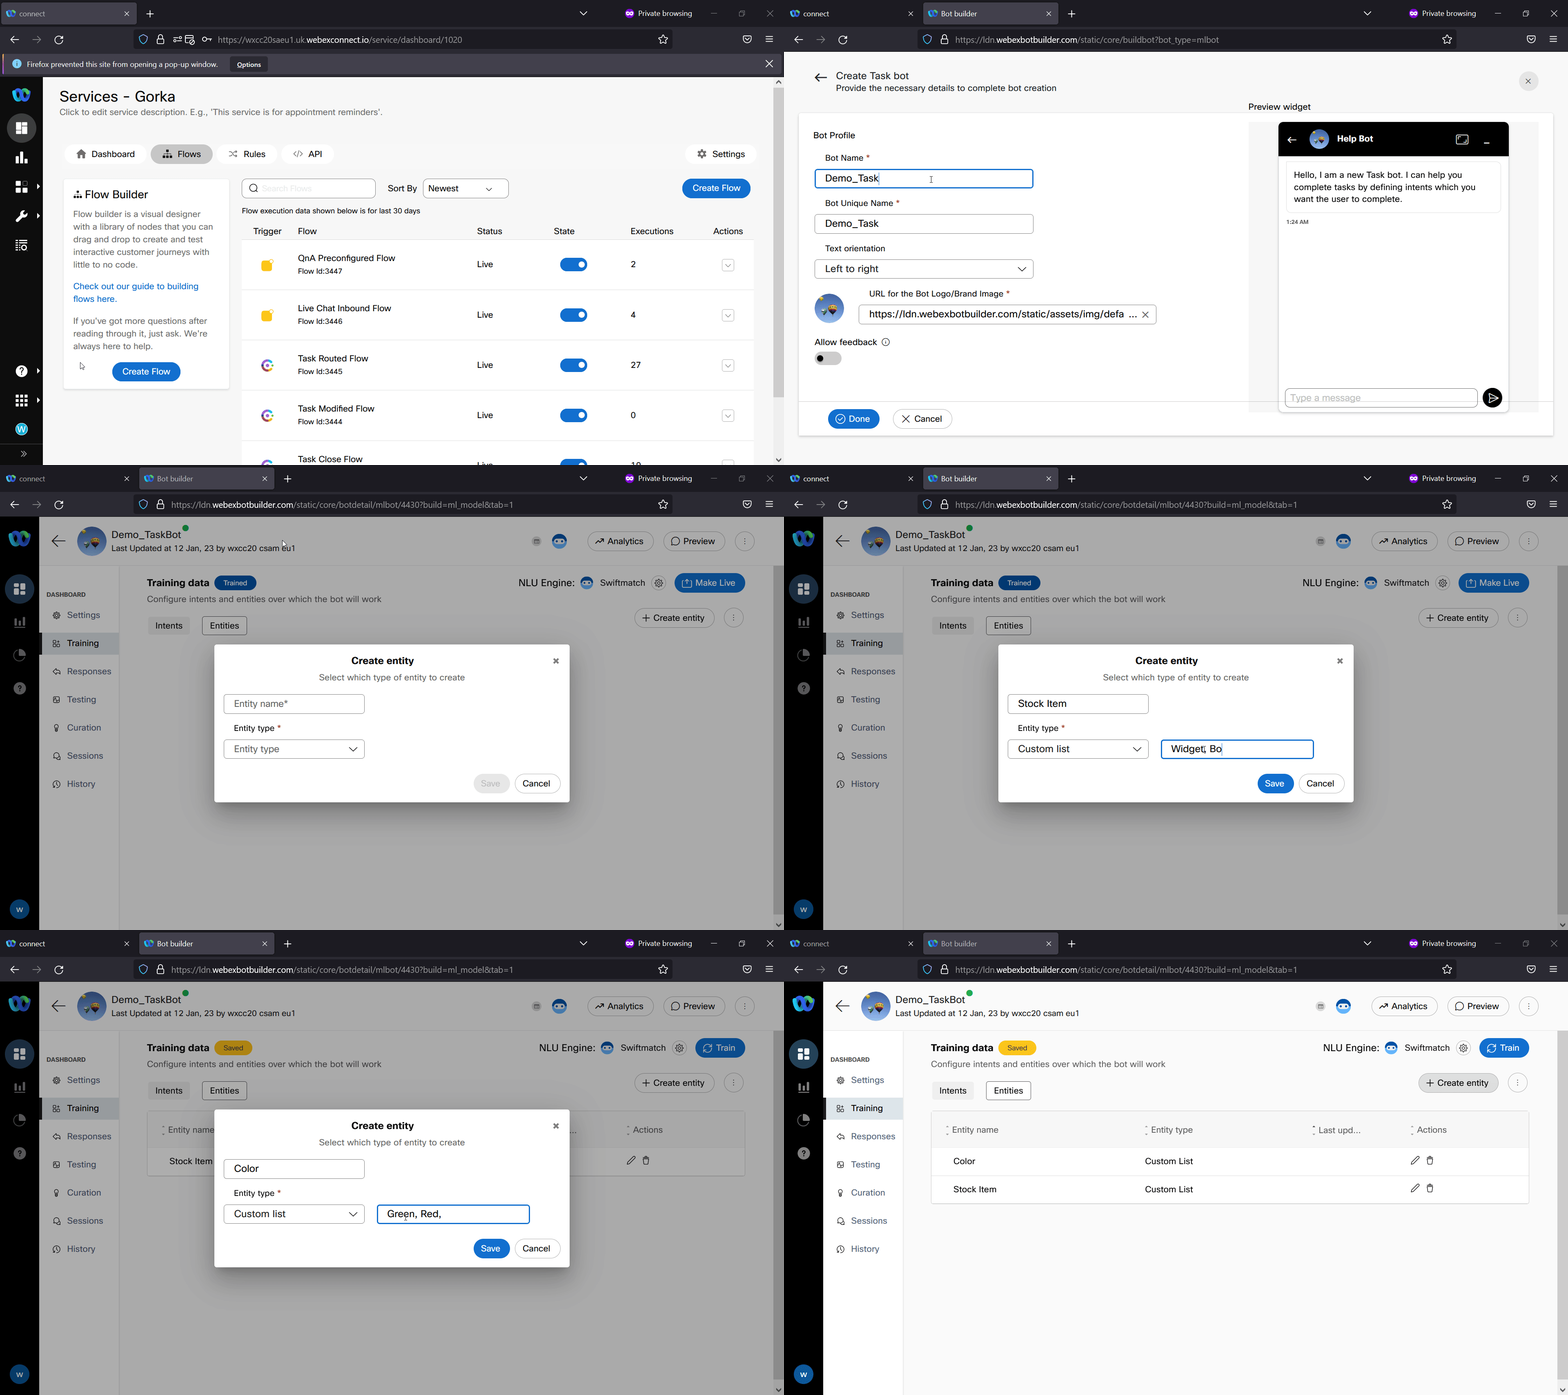
Navigate to the Webex Connect portal (https://cl2podXX.imiconnect.io)
-
Click App tray -> Bot Builder
-
Select the Task bots option at the top of the screen
-
Click the new Task Bot button, give the bot a name and click done
-
Click Training -> Entities -> Create Entity
-
For Each Entity, give it a name and select the data type (Custom List if you decide to copy the proposed Use Case)
- Don’t use spaces in the name of the entities (for example: StockItem)
- Populate the custom list with values using commas.
- You can also add new values if you click on the edit button
- Add any Synonyms that are necessary
Step 2. Create Intents
-
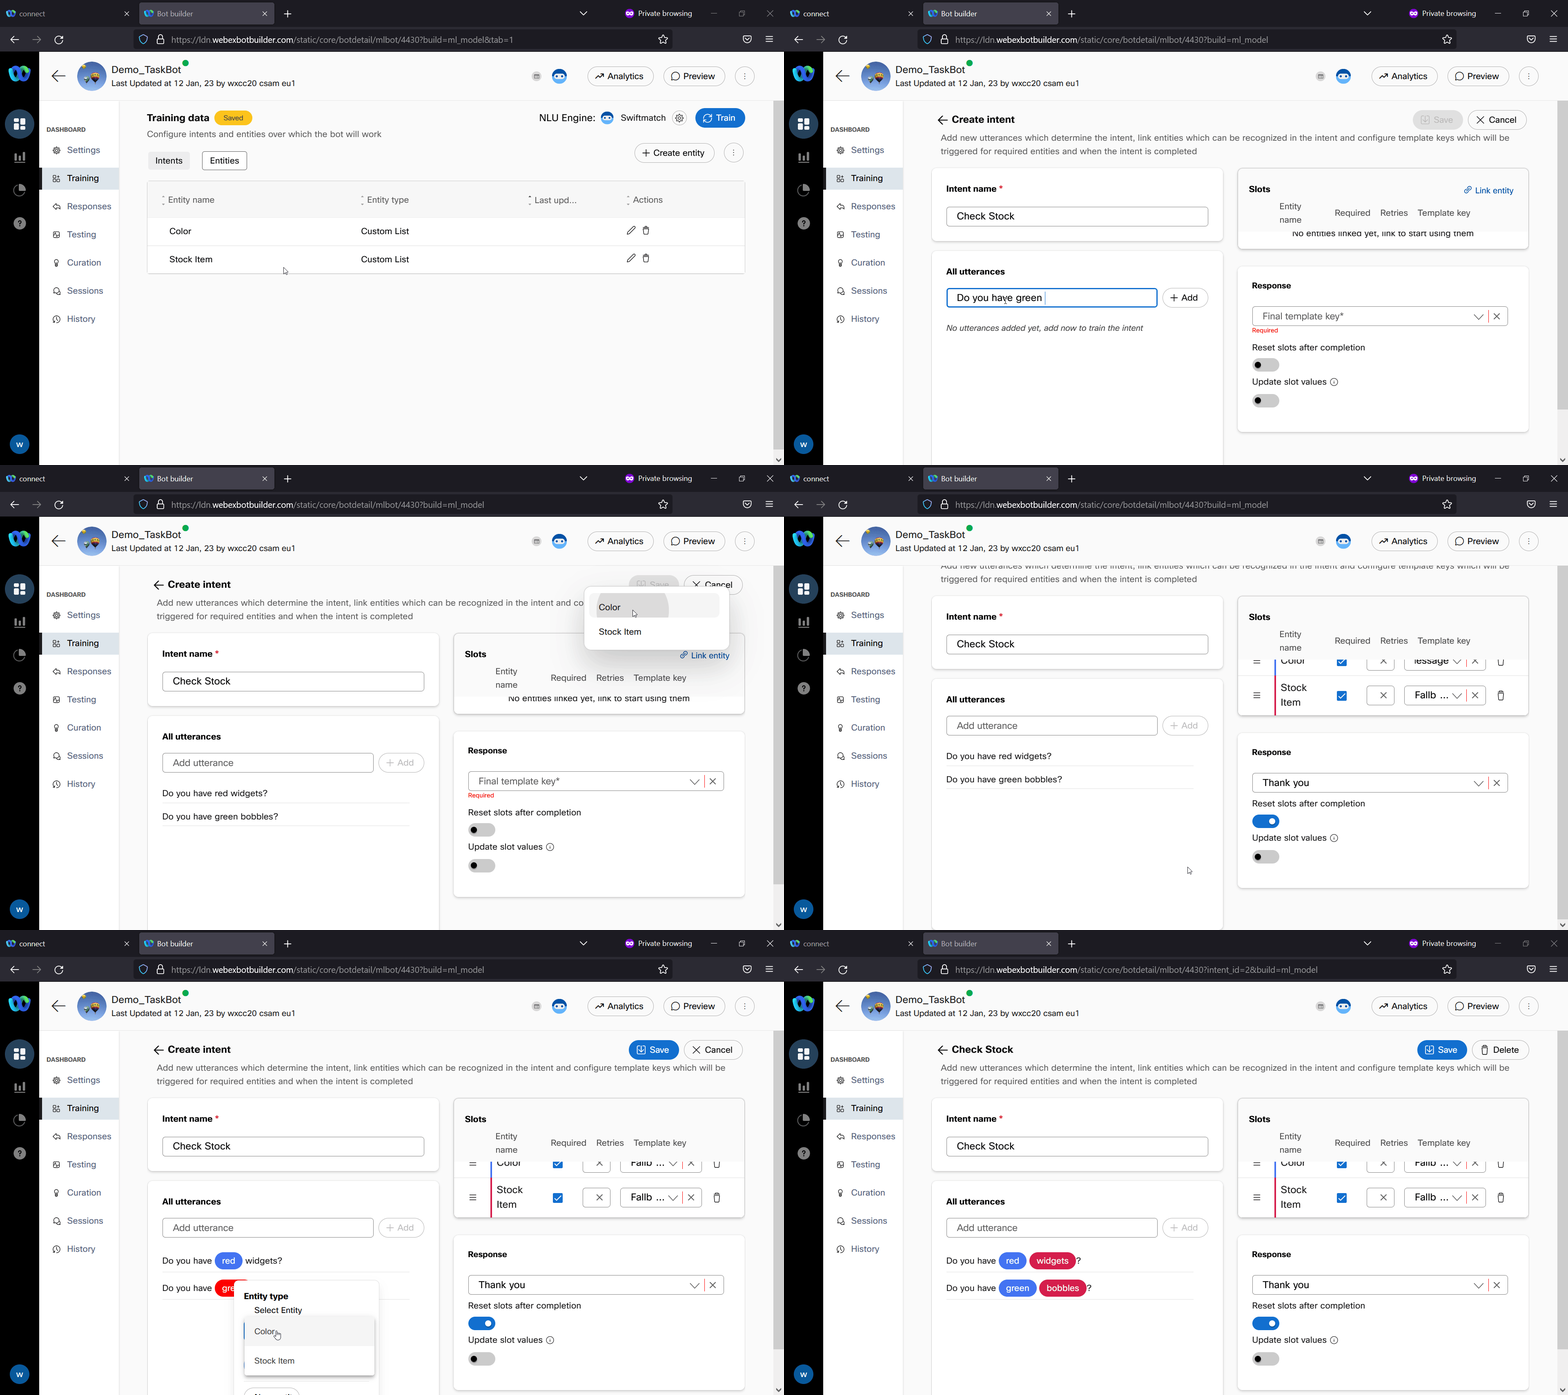
Click Training -> Intents -> Create Intent
-
Name your intent (Example: Check Stock)
-
Add utterances (you can copy the ones mentioned in the Use Case)
- In the slots section, click on Link Entity and select the entities that you will use for the intent
Click the Required checkbox if they are required
Select or create a new Template Key that will be used to prompt when there is missing information (Example: Fallback)
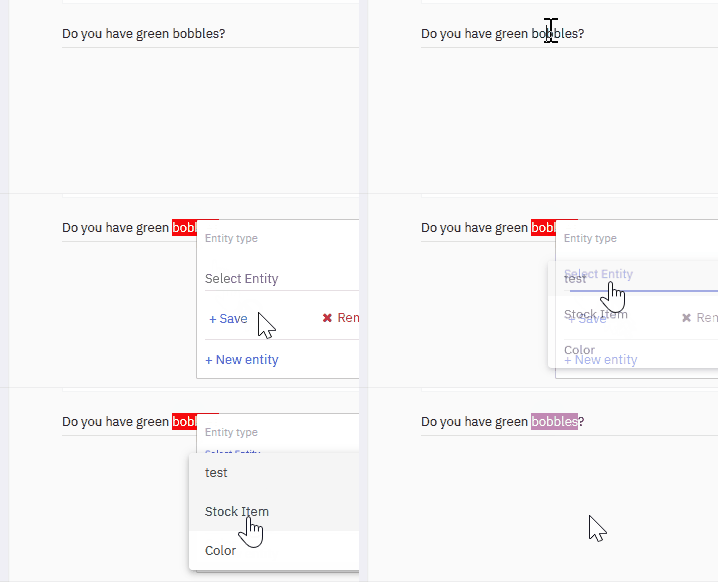
- Click on words which represent Entities
- In the Response Section Click on final template key
Select or create a Template key which will be used to respond to the intent once required slots are filled. (Example: Lookup Item)
Toggle reset slots after completion to True
- Save the configuration and click on Train
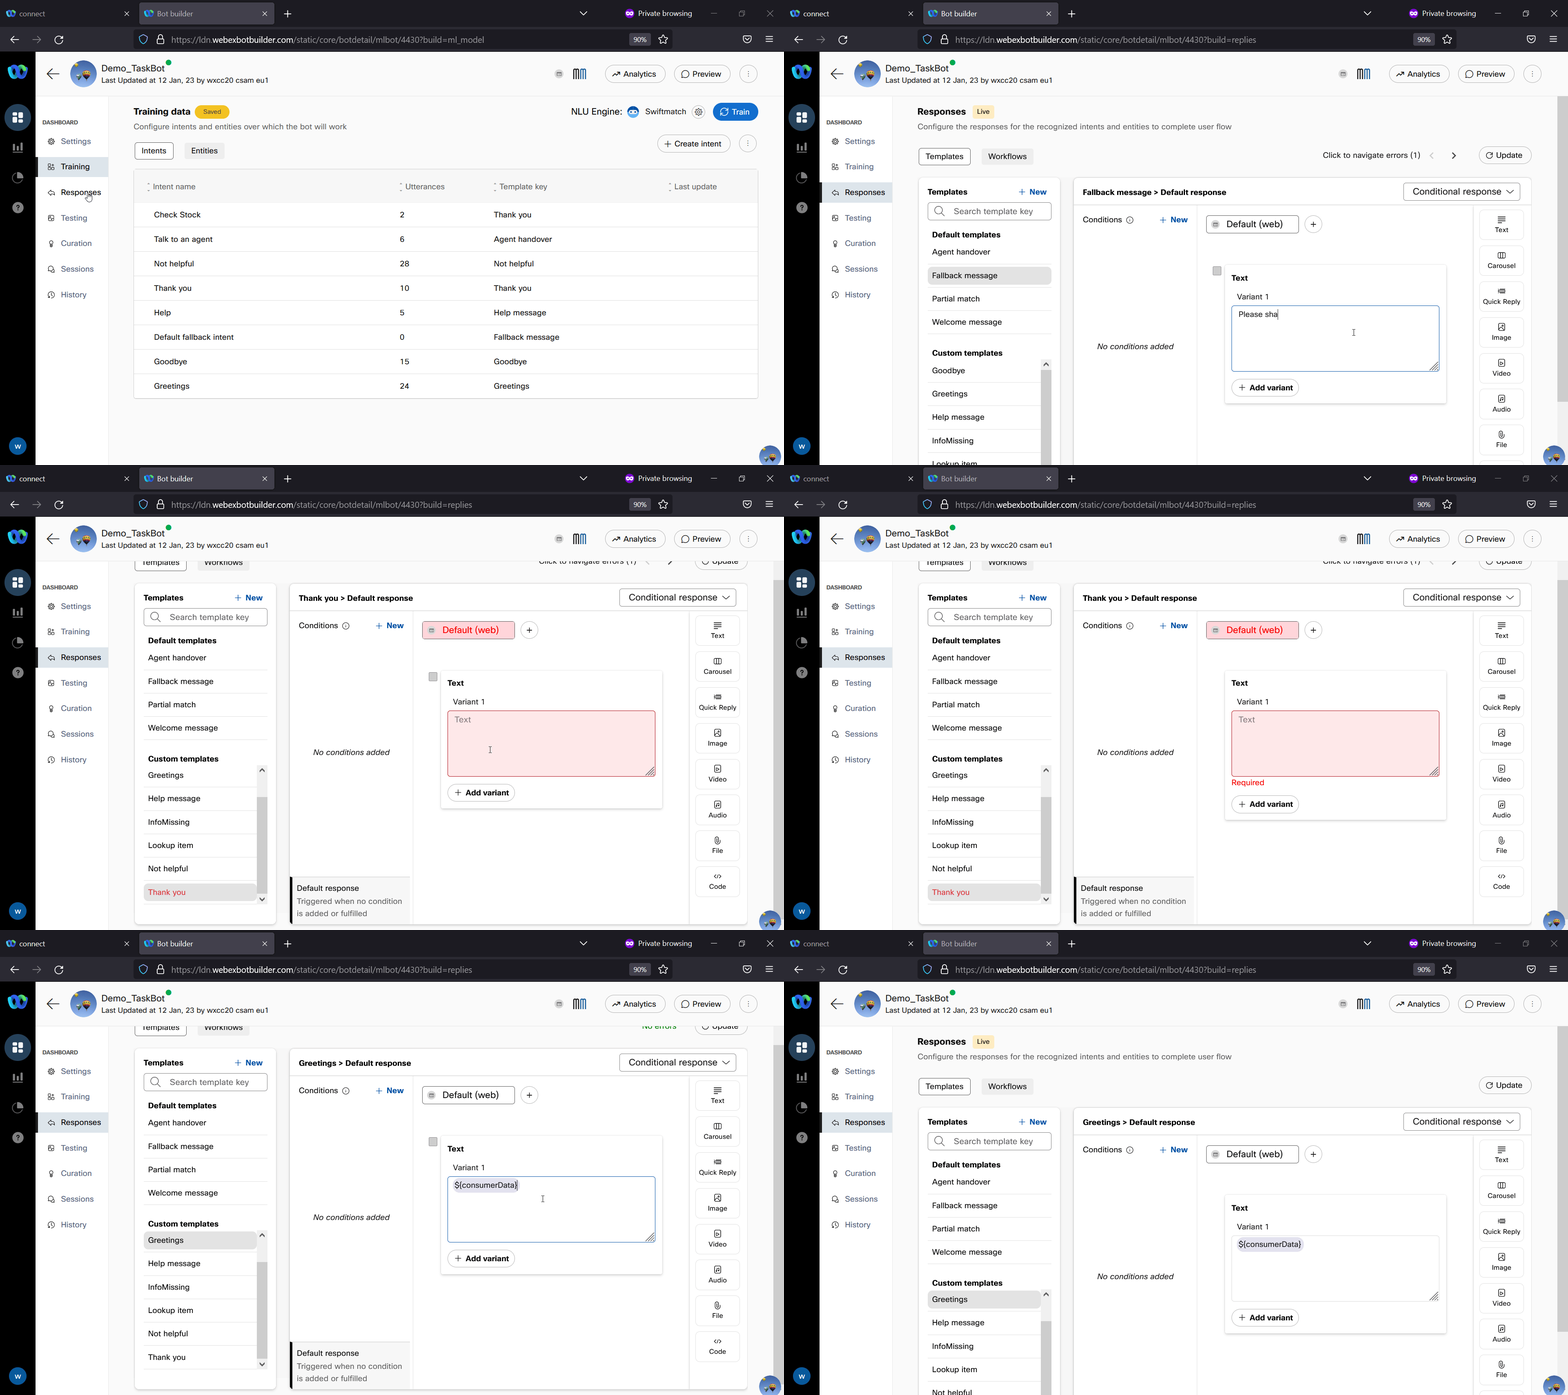
Step 3. Create Responses
-
Go to Responses
- Locate the templates that you selected when some Entity information is missing
- Add some responses that will ask the customer to enter the correct information (Example: Which Color?)
- Locate the template which you created to respond to your intent once required slots are filled
- Populate the response with the Entities and Intents that you will be using as variables. (Example: ${entity.Color} ${entity.Stock Item} ${intent})
- Locate the Greetings template
- Update the response to include ${consumerData}
- Click Update and Make Live
Step 4. Testing Bot
-
Switch back to Training section
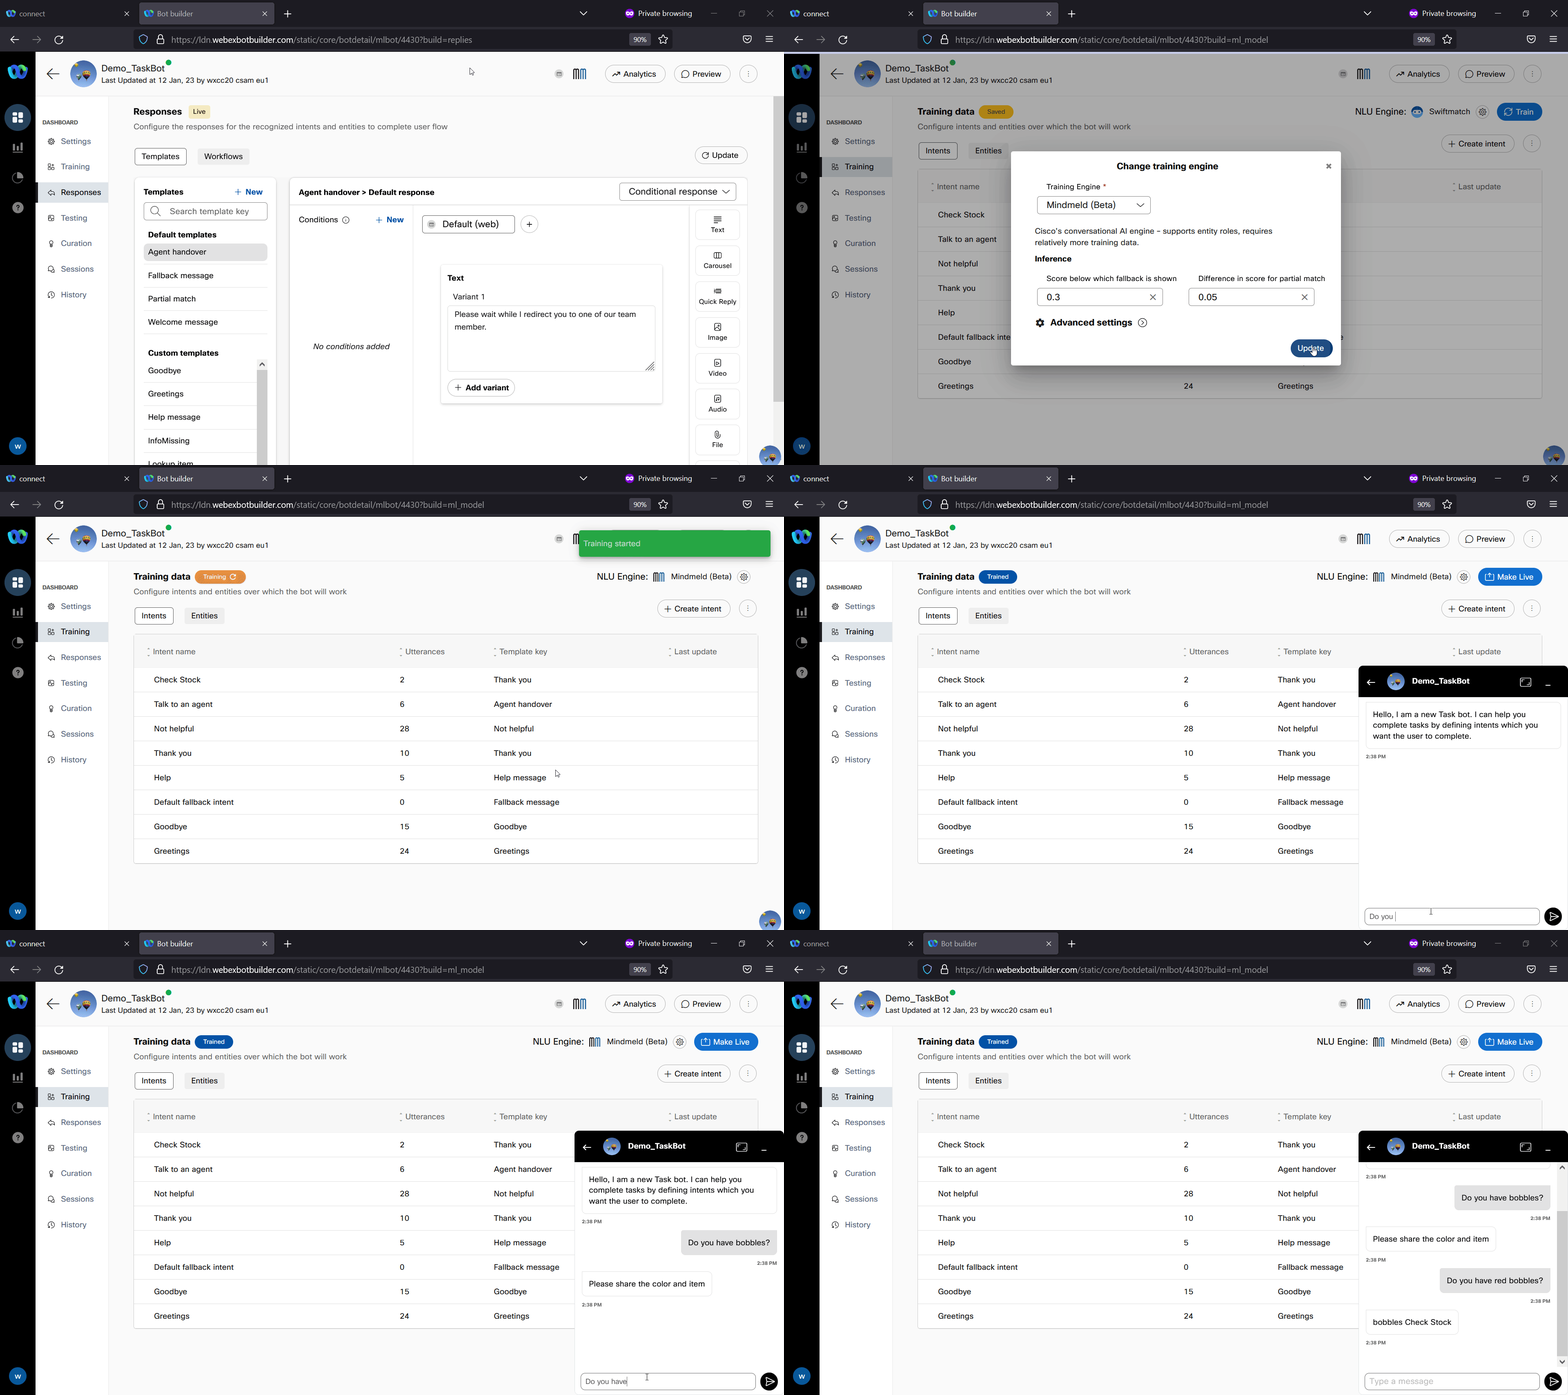
- Select Mindmeld as NLU Engine
- This is only needed if you have configured Custom List values separated by commad
- If you defined the values as different entries or you have set synonimes, you can use Swiftmatch
- Click Preview and test your bot by using training phrases.
